
Related Manuals for Homebase FRANKLIN ll


Summary of Contents for Homebase FRANKLIN ll
- Page 1 FRANKLIN ll CHARCOAL BBQ INSTRUCTION MANUAL IMPORTANT: Please read these instructions before using the product and retain for future use. HHGL Limited, MK9 1BA V1_2024 HHGL (ROI) Limited, D02 X576...
-
Page 2: General Information
GENERAL INFORMATION Safety and Care Advice IMPORTANT - Please read these instructions fully before starting assembly Warning: Whilst every effort has been made in the manufacture of your BBQ to remove any sharp edges, care should be taken in handling to avoid any accidental injury. ... -
Page 3: Care And Maintenance
Small quantities of charcoal may be added on top of the charcoal layer prior to cooking to extend cooking time. To help prevent food sticking, apply a thin coating of cooking oil on the grill prior to cooking. ... - Page 4 Do not use the barbecue in a confined and/or habitable space e.g. houses, tent, caravans, motor homes, boats. Danger of carbon monoxide poisoning fatality. Carbon Monoxide Hazard...
-
Page 5: Components - Parts
Please check have all the components and fittings listed. If you find any missing or damaged parts, please contact our customer services team on 0333 003 7084 between 09:00 & 18:00, or use the contact form on our website www.homebase.co.uk PART NO. - Page 6 PART NO. DESCRIPTION DIAGRAM Threaded mount Charcoal tray lift handle Left cart assembly Leg caps Bottom shelf Right cart assembly Wheels Axle Circular cooking grill Charcoal door Crank handle washer Ash pan handle...
- Page 7 PART NO. DESCRIPTION DIAGRAM Ash pan Lower hinges Front bracket Back bracket Upper hinges Side shelf Bottle opener Charcoal door handle Crank lock Air vents Hooks...
- Page 8 Please check have all the components and fittings listed. If you find any missing or damaged parts, please contact our customer services team on 0333 003 7084 between 09:00 & 18:00, or use the contact form on our website www.homebase.co.uk. PART NO.
- Page 9 ASSEMBLY INSTRUCTIONS Remove any transit protection material. STEP 1 Fix the firebowl front panel (6) and firebowl back panel (7) with firebowl right side panel (8) using M6*15mm bolts (A). Align the holes and fix the bolts tightly using a screwdriver. STEP 2 Fix the firebowl front panel (6) and firebowl back panel (7) with the firebowl left side panel (5) using M6*15mm bolts (A).
- Page 10 STEP 3 Fix the air vents (33) on the firebowl side panel using M6*15mm bolts (A) and M6 nuts (E). STEP 4 Fix the side handle (4) on the firebowl left panel (5) using M6*15 bolts (A).
- Page 11 STEP 5 A:Fix the charcoal tray assembly (11) and threaded mount (12) on the firebowl front panel (6) using M6*15mm bolt (A). B:Fix the charcoal tray assembly (11) on the firebowl front panel (6) using M6*15mm bolt (A). STEP 6 Put the axle of charcoal tray (11) into the “U”...
- Page 12 STEP 7 Fix the crank lock (32), crank handle washer (22) and crank handle (31) on the charcoal door using M6 nuts (E). Fix the charcoal door (21) on the firebowl front panel (6). STEP 8 Fix the Charcoal tray lift handle (13) into the firebowl front panel (6) using (R) pin (G).
- Page 13 STEP 9 Fix the lower hinges (25) to the firebowl back panel (7) using M6*35mm bolts (B). STEP 10 Fix the legs of left cart assembly (14) with leg caps (15) using M6*30mm bolts (C).
- Page 14 STEP 11 Fix the bottom shelf (16) on the left cart assembly (14) and right cart assembly (17) using M6*15mm bolts (A). STEP 12 Insert the axle (19) to the legs of right cart assembly (17). Then apply the wheels (18) to the axle end.
- Page 15 STEP 13 Fix the firebowl on the left cart assembly (14) and right cart assembly (17) using M6*15 bolts (A). STEP 14 Fix the front bracket (26) and back bracket (27) using M6*15 bolts (A).
- Page 16 STEP 15 Fix the hooks (34) on the side shelf (29) using M6*15mm bolts (A). STEP 16 Fix the side shelf (29) on the front bracket (26) and back bracket (27) using M6*15 bolts (H).
- Page 17 STEP 17 Fix the lid handle (2) on the lid (1) using M6*30mm bolts (C). STEP 18 Fix the temperature gauge (3) on the lid (1).
- Page 18 STEP 19 Fix the air vents (33) on the lid (1) using M6*15mm bolts (A) and M6 nuts (E). STEP 20 Fix the upper hinges (28) on the lid (1) using M6*35mm bolts (B).
- Page 19 STEP 21 Fix the upper hinges (28) and the lower hinges (25) using lid pins (I)and R pins (G). STEP 22 Fix the warming rack (9) on the lid (1) using M6*30mm bolts (C).
- Page 20 STEP 23 Place the cooking grills (10) and circular cooking grill (20) on the firebowl. STEP 24 Fix the ash pan handle (23) on the ash pan (24) using M6*15mm bolts (A). Slide the ash pan under the firebowl.
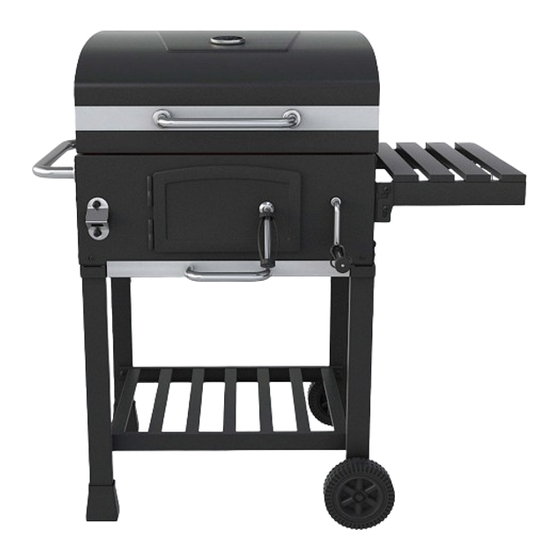
- Page 21 STEP 25 Fix the bottle opener (30) on the firebowl front panel (6) using M6*15mm bolts (A). STEP 26 Assembly is complete. Your BBQ is now ready to use.
Need help?
Do you have a question about the FRANKLIN ll and is the answer not in the manual?
Questions and answers