Advertisement
Quick Links
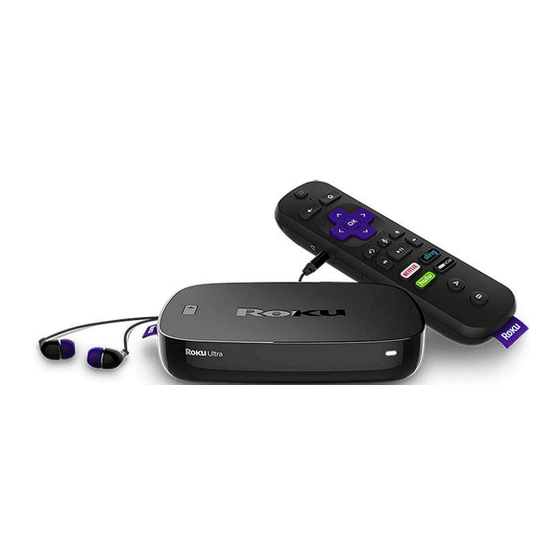
How to set up your Roku® Ultra
Going through Guided Setup
1. Choose a language
The first screen you see will allow you to choose a language. All text
o
and dialog within the Roku application will be displayed in the
selected language.
Scroll up and down the list and press the OK button
o
remote to choose a language.
2. Connect your Roku Ultra to the internet
Choose your wireless network from the list of available networks and
o
enter your password. This is most often the same network you use to
connect your computer or smartphone to the internet. If you do not
see your network, select Scan again to see all networks. For more
assistance, see
If you want to see your password as you type, choose Show password.
o
This can help prevent entering the wrong password. Remember,
passwords are case-sensitive – use the shift button
screen keyboard to enter a capital letter.
Once you have entered your password and selected Connect, your
o
Roku Ultra will automatically connect to the internet. Alternatively,
you can get more help if you are
network.
3. Wait for your Roku Ultra to download the latest software
Once connected to the internet, your Roku Ultra will download the
o
latest version of Roku OS software and then reboot.
4. Set the display type
Select Auto detect display type and your Roku Ultra will analyze the
o
HDMI connection to determine the supported video resolutions. To
Note: It is the responsibility of the channel publisher to
translate their channel and some channels may not support
your chosen language.
help finding your wireless network and
unable to connect to your wireless
on your Roku
password.
on the on-
Advertisement

Related Manuals for Roku Ultra 4660R


Summary of Contents for Roku Ultra 4660R
- Page 1 Once connected to the internet, your Roku Ultra will download the latest version of Roku OS software and then reboot. 4. Set the display type Select Auto detect display type and your Roku Ultra will analyze the HDMI connection to determine the supported video resolutions. To...
- Page 2 Ultra, it must be linked to a Roku account. Your Roku account keeps track of which Roku devices you own and allows you to add free and purchase channels from the Roku Channel Store. Note: There is NEVER a charge to create a Roku account.
- Page 3 7. You are done! Once you have completed all of the activation steps, your Roku Ultra will be ready to use. Tips: You can personalize your Roku Ultra by changing your theme or screensaver. You can use the Roku Channel Store to add new streaming channels, games, themes, screensavers, and other apps.
Need help?
Do you have a question about the Ultra 4660R and is the answer not in the manual?
Questions and answers