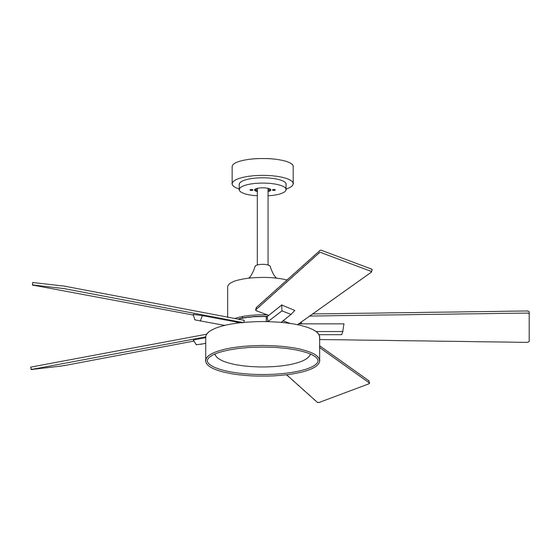
Summary of Contents for Autelo F3698
- Page 1 INSTALLATION GUIDANCE AUTELO 52 INCH CEILING FAN MODEL:F3698 UESTION LEASE CONTACT US F EEL We will be there for you 7/24 hours of customer service. E AIL :autelo_service@outlook.com...
-
Page 2: Table Of Contents
TABLE OF CONTENTS Safety Information--------------------------------1 Warranty------------------------------------------2 Tools Required------------------------------------2 Fan Parts Included--------------------------------3 Hardware Included---------------------------------3 Exploded View-------------------------------------4 Installation Pre-Check----------------------------5 Installation Of Hanging Bracket-------------------6 Installation Of Downrod & Hanger Ball-------------6 Hanging Of Ceiling Fan----------------------------7 Wiring Of Ceiling Fan-----------------------------7 Placement Of Receiver-----------------------------8 Installation Of Canopy----------------------------8 Installation Of Blades &... -
Page 3: Safety Information
SAFETY INFORMATION READ ALL SAFETY INFORMATION AND INSTALLATION INSTRUCTIONS BEFORE YOU BEGIN INSTALLING THE FAN AND SANE INSTRUCTIONS. 1.To reduce the risk of electric shock. ensure the electricity has been turned off at the WARNING: To avoid possible electrical circuit breaker or fuse box before you begin. shock. -
Page 4: Warranty
WARRANTY The supplier warrants the fan motor to be free from defects in workmanship and material present at the time of shipment from the factory for a time after the date of purchase by the original purchaser. The supplier also warrants that all, other fan parts, excluding any glass or acrylic blades, be free from defects in workmanship and material at the time. -
Page 5: Fan Parts Included
FAN PARTS INCLUDED 1.Hanging Bracket(*1) 2.Canopy(*1) 3.Motor(*1) 4.Blade Arm(*5) 5.Canopy Cover(*1) 6.Horn Cover(*1) 7.Metal Lampshade(*1) 8.Receiver + Remote Control(*1) 9.Blade Screw+Washer(*15) 10.Downrod (5"*1 10"*1) 11.Fan Blade(*5) l.Please check and compare LIGHT LED- LED+ all parts with the package 1h 4h contents parts are present. -
Page 6: Exploded View
EXPLODED VIEW Hanging Bracket Receiver Hanger Ball Downrod Canopy Canopy Cover Horn Cover R Pin Cross Pin Hanging Head Motor Blade Screws Fan Blade Blade Arm Metal Plate Mounting Screws Metal Lampshade Lampshade Remote Control... -
Page 7: Installation Pre-Check
INSTALLATION PRE-CHECK Pre-Check: The distance from the fan blade to the ground shall not be less than 7.5 ft(2.3 m) and at least 3.2 ft (1 m) away from the wall. 3.2ft(1m) 7.5 ft(2.3 m) Security Procedure: Turn OFF the electrical Do this first power at the main fuse or circuit breaker. -
Page 8: Installation Of Hanging Bracket
Concrete Ceiling For Concrete Ceiling: Drilling a pilot hole in the base material with a hammer drill and a correctly sized carbide drill bit for the Expansion Screw anchor and clean out the hole of all debris. Knock the expansion screw into the hole and then tighten it with a Ceiling Cover wrench. -
Page 9: Hanging Of Ceiling Fan
HANGING OF CEILING FAN 1.Turn the hanger ball so that the groove is clamped Hanging Bracket on the lug on the hanging bracket to stabilize the Downrod ceiling fan(Fig1- 2). Lug on hanging bracket Grooved Fig 1 Fig 2 WIRING OF CEILING FAN Input:110-120V Receiver to Supply Wire Black Wire... -
Page 10: Placement Of Receiver
PLACEMENT OF RECEIVER Hanging Bracket Receiver Downrod Fig 2 Fig 1 1.After connecting all wires, place the receiver in between of the hanging bracket and hanger ball(Fig1- 2). INSTALLATION OF CANOPY Hanging Bracket Mounting Screw Mounting Screw Canopy Cover Canopy Fig 1 Fig 2 Fig 3... - Page 11 2.Install the fan blades onto the motor in turn and tighten them with blade screws(Fig 2). Motor Blade Arm Mounting Screws Fig 2 Fig 3 4.Connect the wires from metal plate and the wires on LED source(Fig 5). Fig 4 Wires from metal plate LED Lampshade Wires from LED source...
- Page 12 5.Place the lampshade and finish installation(Fig 6-7). LED Light Panel LED Lampshade Fig 6 Fig 7...
-
Page 13: Details Of Remote Control
DETAILS OF REMOTE CONTROL Battery Signal Indicator Fan OFF Speeds Control(1-6 speeds) Forward / Reverse Warm white Nature white Cool white Led light dimming down(-) LIGHT LED- LED+ Light OFF & dimming up(+) Timing Control (1/4/8 hrs) Sound OFF The remote control uses 2*AAA battery. -
Page 14: Reversible Function Of Fan
REVERSIBLE FUNCTION OF FAN LIGHT LED- LED+ -12-... -
Page 15: Fan Balance
FAN BALANCE If the ceiling fan has the wobble problem, you can please try the ways below. -13-... -
Page 16: Troubleshooting
TROUBLESHOOTING Please read all installation instructions carefully. WARNING Before servicing or cleaning your fan, switch power off at the service panel and lock the service disconnecting means to prevent power from being switched on accidentally. Fan not reponding to remote control ·Check that all wire connections are secure and made as instructed.


Need help?
Do you have a question about the F3698 and is the answer not in the manual?
Questions and answers