Advertisement
Table of Contents
INSTALLATION GUIDANCE
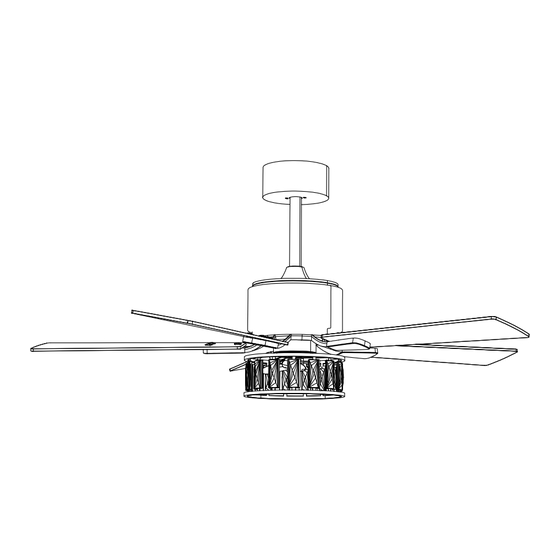
AUTELO 52 INCH CEILING FAN
MODEL:9327
ANY QUESTION PLEASE CONTACT US FREELY
✉
Email
We will be there for you 7/24 hours of
customer service.
EMAIL :autelo_service@outlook.com
Page:
Pre-Installation
Installation Pre-Checked
Installation Of Hanging Bracket
Installation Of Downrod & Hanging Ball
Hanging Of Ceiling Fan
Wiring Of Ceiling Fan
Installation Of Blades & Light Kit
Details Of Remote Control
Balance Of Ceiling Fan
Function Of Reversible Direction
Troubleshooting
1. To avoid possible electrical shock, before installing or servicing
your fan, disconnect the power by turning off the circuit breakers to
the outlet box and associated wall switch location.
2. All wiring must be in accordance with national and local
electrical codes ANSI/NFPA 70. If you are unfamiliar with wiring, use
a qualified electrician.
3. To reduce the risk of fire, electrical shock, or personal injury,
mount the fan directly from the building structure and/or an outlet
box marked acceptable for fan support of 35 lbs (77 kg) and use the
mounting screws provided with the outlet box.
4. The ceiling fan must be mounted at least 90 inches meters of
clearance from the floor.
5. Do not operate the reverse switch when the fan is still in motion
mode. Wait till its stops completely before switching to reverse
mode.
6. To reduce the risk of personal injury, do not bend the blade
brackets when installing the blade brackets, balancing the blades, or
cleaning the fan. Do not insert foreign objects in between rotating
fan blades.
7. When all electrical connections are done, store all wires neatly.
8. Make sure all screws and connections are tightly screwed and
secured.
9. The supply wires live and neutral must be connected to a double
pole switch having a contact of at least 3mm in all poles.
CATALOGUE:
...............1-2
...............3
...............4
...............4-5
...............6
...............7
...............8-9
...............10
...............11
...............12
...............13
WARNING
Advertisement
Table of Contents

Related Manuals for Autelo 9327

Summary of Contents for Autelo 9327
- Page 1 CATALOGUE: INSTALLATION GUIDANCE Page: Pre-Installation ……………1-2 AUTELO 52 INCH CEILING FAN Installation Pre-Checked ……………3 Installation Of Hanging Bracket ……………4 MODEL:9327 Installation Of Downrod & Hanging Ball ……………4-5 Hanging Of Ceiling Fan ……………6 Wiring Of Ceiling Fan ……………7 Installation Of Blades & Light Kit ……………8-9...
-
Page 2: Pre-Installation
PRE-INSTALLATION PRE-INSTALLATION (CONTINUED) HARDWARE INCLUDED: SPECIFICATION: Quantity Description Single Maximum Installation Expansion Size Weight Voltage Amps wattage RPM inclination height Screws Wooden Screw maximum 52inch 9.71kg 110-120v 0.3700 90inches ≤15° Plastic Wire Connector Balance Parts TOOLS REQUIRED FOR INSTALLATION Package Blade Screw Blade Washer 17/14spanner... - Page 3 INSTALLATION OF HANGING BRACKET INSTALLATION PRE-CHECK PRE-CHECK: 1. For Wooden Ceiling: Drilling a You probably bought this fan with a location in mind. pilot hole in your ceiling with Wood screws Let’s check below to make sure it is a good fit the power drills first, then secure the plate with wood screws.
- Page 4 INSTALLATIO OF DOWNROD & HANGING BALL HANGING OF CEILING FAN 3.Lock the upper downrod pin and the "R" pin lock, and tighten the screws on both sides to fix them ( Figure 3) 1. Turn the lifting head so that the groove is clamped on the lug on the hanger to stabilize the ceiling fan Downrod...
- Page 5 WIRING OF CEILING FAN INSTALLATION OF BLADES & LIGHT KIT Input:110V 1.The input live wire is 1.Take out the fan blade connected to the black live screws and washers of the Neutral wire, the neutral wire is accessory package, open the Ground Line N Live Line L...
- Page 6 DETAILS OF REMOTE CONTROL INSTALLATION OF BLADES & LIGHT KIT Speed Control(Low/Medium/High) 3.The blue line is connected to the blue line, and the white Light ON/OFF line is connected to the white line( Figure 3) 4.Take out the screws for locking the ceiling lamp frame, and Fan Off align the holes on the ceiling lamp frame with those on the Timing Control(1/2/4/8H)
- Page 7 BALANCE OF CEILING FAN FUNCTION OF REVERSIBLE DIRECTION ● If the ceiling fan has the wobble problem, you can please try the ways below. 1.Clip the clip in the middle of the fan blade. Turn on the fan. If the oscillation still exists, replace the clip with another blade until the Switch It Manually...
-
Page 8: Troubleshooting
TROUBLESHOOTING FAN DOESN’T WORK • Make sure power switch is on. • Check the circuit breaker to ensure the power is turned on. • Make sure the blades spin freely. • Turn off power from the circuit breaker, then loosen the canopy and check all the connections according to the wiring diagram.
Need help?
Do you have a question about the 9327 and is the answer not in the manual?
Questions and answers