Advertisement
Quick Links
Advertisement

Subscribe to Our Youtube Channel
Related Manuals for StarBlock CARGOBLOCK


Summary of Contents for StarBlock CARGOBLOCK
- Page 1 Installation Manual The anti-theft for light commercial vehicles’ rear and side doors...
- Page 2 Ford T ransit...
- Page 3 Instructions. B – GENERAL GUIDELINES CargoBlock installation has been tested on vehicles following Assembly instructions which are analyzed in this guide. Product warranty registration is required on the website:...
- Page 4 No holes and no changes are made on the doors. The device is installed on the lock studs. CargoBlock is equipped with StarBlock® lock with proprietary technology and non duplicable profile key. Patent n° 202016000071343. D - MAINTENANCE...
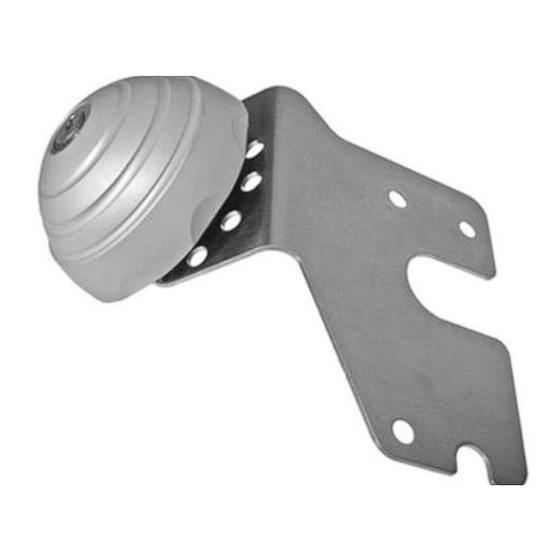
- Page 5 E – BOX CONTENTS Rear door plate, right side; Rear door fixing plate, left side; Side door fixing plate; Side sliding door plate; Accessory: stud M6X25; Six studs M6X20; Scratch-resistant adhesive felt;...
- Page 6 F – INSTALLATION GUIDE 1 – Rear door, right side - Unscrew and remove the screw securing the lock (img 1); - Screw in the M6X25 stud to prevent the lock from coming loose during installation, then unscrew the two screws (img 2);...
- Page 7 3 – Side sliding door plate -Unscrew and remove the screw that fixes the lock and screw in the M6X25 stud to prevent the lock from coming loose during installation, then unscrew the other two screws (img. 6); -Position the side sliding door plate at the holes and tighten the two screws (do not tighten the screws completely for final adjustment of...
- Page 8 ST AUTOMOTIVE SRL Ss 96 Strada Vicinale Lamarossa snc - 70026 Modugno (BA) T. +39 080 21 43503 - F. +39 080 9692317 info@starblock.it...
Need help?
Do you have a question about the CARGOBLOCK and is the answer not in the manual?
Questions and answers