
Subscribe to Our Youtube Channel
Related Manuals for PICARRO A0211

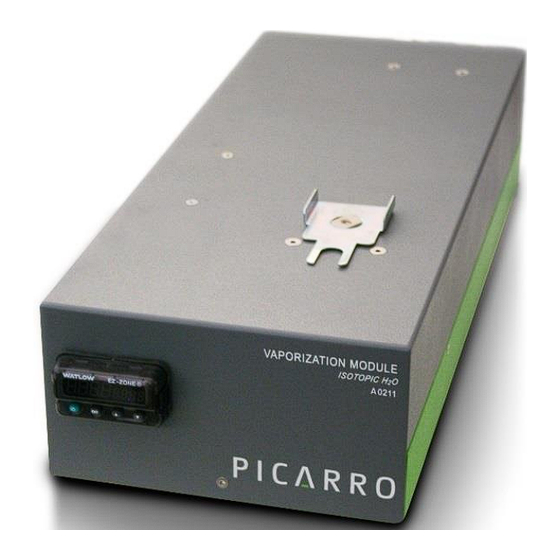
Summary of Contents for PICARRO A0211
- Page 1 A0211 High-Precision Vaporizer User Manual Picarro Inc. 3105 Patrick Henry Drive Santa Clara, CA 95054, USA Tel: 408.962.3944 • Fax 408.962.3200 www.picarro.com Document Number 40-0044 Revision B...
-
Page 2: Notices
DISCLAIMER AND RESERVATION OF RIGHTS Picarro has prepared this manual solely for the information and use by its customers as a guide for the selection, installation, operation, and maintenance of the products described. -
Page 3: Contact Information
Contact Information General Technical Support: Email: mailto:support@picarro.com Phone: +1 408 962 3991 European Technical Support: Email: support@picarro.com Phone: +31 85 888 1650 Customer Service: Email: orders@picarro.com Phone: +1 408 962 3992 A0211 User Manual P/N 40-0044 Rev. B... -
Page 4: Table Of Contents
Table of Contents ......................4 List of Figures ....................... 6 List of Tables ......................... 7 Introduction ......................8 Intended Use ....................8 A0211 Specifications ..................9 Acronyms ..................... 11 Text Conventions ..................11 Safety ........................12 Warning Symbols ..................12 General Safety ..................... - Page 5 Troubleshooting ....................32 Vaporizer Controller Panel Does Not Illuminate ........... 32 Incorrect Water Concentration Pulse Shape During Injection ...... 32 Transportation and Storage ................33 Shutdown and Preparation ................33 Packing ......................34 A0211 User Manual P/N 40-0044 Rev. B...
-
Page 6: List Of Figures
Figure 6: Vacuum Pump Voltage Selection ..............17 Figure 7: Dry Gas Connection Diagram ................ 20 Figure 8: Dry Gas Connection Diagram – A0211 with A0214 MCM ......22 Figure 9: Temperature Controller .................. 24 Figure 10: Change Septum Button Status Modes ............28 Figure 11: Injection Port Septum Cover Removal ............ -
Page 7: List Of Tables
List of Tables List of Tables Table 1: A0211 Vaporizer Specifications ................. 9 Table 2: Vacuum Pump Specifications ................10 Table 3: Acronyms, Formulas, Units, and Symbols ............11 Table 4: Warning/Information Icons................12 Table 5: Shipping Box Contents ..................14 A0211 User Manual P/N 40-0044 Rev. -
Page 8: Introduction
Introduction 1. Introduction This manual provides details on the installation and operation of the Picarro A0211 High Precision Vaporizer when used in conjunction with Picarro L2130-i or L2140-i instruments. The Picarro A0211 High-Precision Vaporizer in combination with the A0325 Autosampler is designed for high precision and delivers performance equaling or exceeding Isotope Ratio Mass Spectrometers (IRMS). -
Page 9: A0211 Specifications
AC Input Voltage Setting Transfer Line A0214 Insulator Figure 2: A0211 Vaporizer Rear Panel with/without A0214 MCM Attached Figure 3: Vacuum Pump for Vaporizer – Side Views A0211 Specifications Table 1: A0211 Vaporizer Specifications Parameter Specification 10 to 40 °C (ambient) Temperature Range –10 to 50 °C (storage) -
Page 10: Table 2: Vacuum Pump Specifications
Introduction Parameter Specification 1/8” A0211 connections Swagelok Fittings 1/4” Analyzer inlet connection 3/8” Vacuum connections Operational Gas Flow < 100 sccm N2 or Zero Air (< 100 ppm H Standby Gas Flow < 50 sccm N2 or Zero Air (< 100 ppm H Width: 6.3”... -
Page 11: Acronyms
Bold Italic text identifies section reference links. • Bold text is for actions to take (such as clicking on a UI button), caution and warning statements, and text you should type or select in screens. A0211 User Manual P/N 40-0044 Rev. B... -
Page 12: Safety
WARNING indicates an imminent danger to the user. WARNING CAUTION alerts user to high temperature hazard. CAUTION CAUTION alerts user to electrical hazard. CAUTION REMINDER is a helpful hint to procedures listed in the text. REMINDER P/N 40-0044 Rev. B A0211 User Manual... -
Page 13: General Safety
CE label. This CE label is located on the rear of the instrument. Using this Vaporizer in a manner not specified by Picarro may result in damage to the vaporizer and render it unsafe to operate. -
Page 14: Unpacking
Unpacking 3. Unpacking Inspect the Shipping Box Picarro products are inspected and tested before leaving the factory. The shipping boxes provide proven safety from most dropping, crushing or spiking events. Picarro shipping containers consist of: • A Vaporizer box •... -
Page 15: Hardware Setup
Hardware Setup 4. Hardware Setup When the A0211 Vaporizer and the analyzer is being integrated to an external system, the safety of that system is the responsibility of the assembler of that system. CAUTION Using this vaporizer in a manner not specified by Picarro may result in damage to the vaporizer and render it unsafe to operate. -
Page 16: Figure 4: Aligning And Attaching Vaporizer Outlet To Analyzer Input
If the voltage of the vaporizer is not set properly to your power source voltage, the fuse will blow as soon as you turn on the vaporizer. CAUTION Figure 4: Aligning and Attaching Vaporizer Outlet to Analyzer Input P/N 40-0044 Rev. B A0211 User Manual... -
Page 17: Vacuum Pump Setup
Figure 6: Vacuum Pump Voltage Selection Attach the vacuum line between the vaporizer 3/8” vacuum port and its external vacuum pump. Hand tighten the nut, then make an additional 1/4 turn with an 11/16” wrench. A0211 User Manual P/N 40-0044 Rev. B... - Page 18 10. If necessary, attach a tube to the external vacuum pump exhaust port and route the other end of the tube to a safe place for venting the mixture of sample gases. P/N 40-0044 Rev. B A0211 User Manual...
-
Page 19: Dry Gas Setup
For North American customers, Picarro strongly recommends purchasing the #A0923 “Zero air dry-gas kit” or #A0921 “N2 dry-gas kit” from Picarro, as these kits come with all recommended hardware, a cylinder pressure regulator with an appropriate delivery pressure range, and a set of tools and instructions on how to assemble the kit. -
Page 20: Figure 7: Dry Gas Connection Diagram
4. SS-400-R-2 Swagelok 1/8" (adapter fitting) to 1/4" (tube fitting) Reducing Union 5. 5033K31 McMaster-carr 1/4" OD Teflon (PTFE) tubing 6. SS-T2-S-028-20 Swagelok 1/8" OD stainless steel tubing Figure 7: Dry Gas Connection Diagram P/N 40-0044 Rev. B A0211 User Manual... - Page 21 Dry Gas Setup Dry Gas Setup – A0211 Vaporizer with A0214 Micro Combustion Module (MCM) Figure 8 below illustrates how to connect dry gas to the water analyzer for setups that include the MCM. Please follow the instructions for setup in the L2140-I and L2130-I Isotopic Installation and Operation Manual, P/N 40035.
-
Page 22: Dry Gas Setup - Other Configurations
7. MCM power connection from included power adapter 8. MCM USB communication from Analyzer Figure 8: Dry Gas Connection Diagram – A0211 with A0214 MCM Dry Gas Setup – Other Configurations For all other configurations (e.g., Dual Mode, Manual Injections, Standards... -
Page 23: Vaporizer Operation
After a power outage, the vaporizer will automatically start up and attempt to return to its 110 °C (nominal) temperature set point. If short power outages will be a routine operating environment, Picarro recommends using power conditioning or an uninterruptable power supply (UPS) to help prevent damaging the operating system, and to avoid software corruption problems. -
Page 24: Vaporizer Control
Coordinator Software section in the analyzer manual. Choose and launch an appropriate coordinator mode from the choices in the drop down menu. The coordinator window will pop up. P/N 40-0044 Rev. B A0211 User Manual... - Page 25 • Manual Inject: Used for semi-automated measurement of liquid water samples with high precision. Requires A0211 High Precision Vaporizer and A0322 Syringe Guide. User manually injects samples after prompt. The vaporizer control and the analysis of liquid samples are automated.
-
Page 26: Coordinators Using The Micro Combustion Module (Mcm)
O-17 mode. In this mode the coordinate will output O and O-excess. To learn about all the other coordinator modes supported by the Picarro water analyzer (in different setups), see Coordinator Modes section in the L2140-I and L2130-i Isotopic Water Analyzer and Peripherals Installation and Operation Manual, P/N 40035. -
Page 27: Maintenance
Search pane. Salt Liner (C0354) Picarro recommends including a salt liner beneath the injection port septum if you are running water samples with significant salt content (brackish-saline). The salt liner captures dissolved solids as the water sample vaporizes to prevent the build- up of solids on the inside surfaces of the vaporizer. -
Page 28: Figure 10: Change Septum Button Status Modes
Figure 10: Change Septum Button Status Modes Remove the protective metal cover from the injection port. There is a piece of insulation foam attached to the cover plate. Ensure that it stays attached to the plate. See Figure 11. P/N 40-0044 Rev. B A0211 User Manual... -
Page 29: Figure 11: Injection Port Septum Cover Removal
The bottom of the cap is very hot. Avoid direct contact to prevent burn injury. WARNING Unscrew port by hand. A wrench may be used if it is too tight. Figure 12: Port Cap Removal Exposing Septum (Blue) A0211 User Manual P/N 40-0044 Rev. B... -
Page 30: Figure 13: Septum And Salt Liner Removal (If Used)
When using the coordinator Change Septum button in the middle of a run, try to do so before the first injection of a new sample. If performed on subsequent injections, the sample should be flagged, as ambient air memory effects may CAUTION bias one or more injections. P/N 40-0044 Rev. B A0211 User Manual... -
Page 31: Main Electrical Fuse Replacement
Cleaning Clean the outside of the vaporizer with a clean dry cloth. Only certified service technicians should access or clean the inside of the vaporizer. A0211 User Manual P/N 40-0044 Rev. B... -
Page 32: Troubleshooting
This section lists problems that may occur during installation and operation of the vaporizer, and the corresponding step-by-step procedures provide resolution in most cases. If, these solutions do not solve the problem, contact Picarro Technical Support. Vaporizer Controller Panel Does Not Illuminate Pressing the back panel ON switch does not start the vaporizer. -
Page 33: Transportation And Storage
Transportation and Storage 9. Transportation and Storage If the A0211 vaporizer will be transported or stored, use the following procedure to prepare and repack it into the original packaging. When shipping or relocating the vaporizer, it is important to protect it from mechanical shocks. -
Page 34: Packing
If shipping the pump, do the same for it. Pack the vaporizer and pump in their original shipping containers ensuring that all the foam pieces are in place to protect the equipment during shipping. P/N 40-0044 Rev. B A0211 User Manual...
Need help?
Do you have a question about the A0211 and is the answer not in the manual?
Questions and answers