Advertisement
Available languages
Available languages
1697911COM
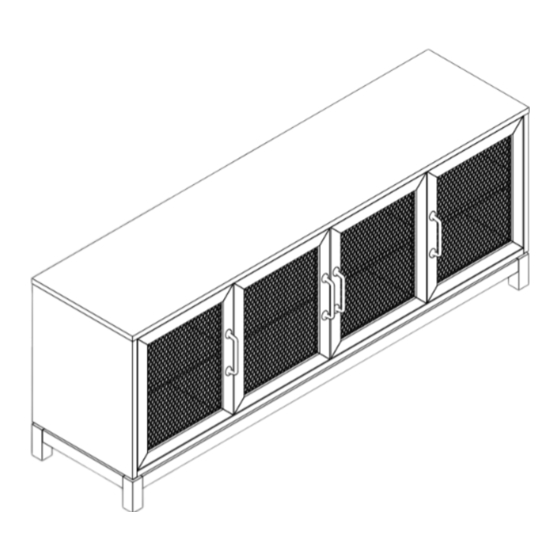
65" TV Stand -Shadow Oak
Date of Purchase ___ / ___ / ___
Lot Number:
THIS INSTRUCTION BOOKLET CONTAINS IMPORTANT SAFETY INFORMATION. PLEASE READ AND KEEP FOR FUTURE REFERENCE.
Do Not Return This Product!
Contact our customer service team for help first.
Call: 1-800-489-3351 (toll free)
Visit: www.ameriwoodhome.com
WARNING
- Unit can tip over causing severe injury or death.
- Anchor unit to stud in wall (if instructed to).
- Do Not allow children to climb on unit.
- Put heavy items on lower shelves or drawers.
B341697911COM00GO
Easy
Assembly Difficulty Meter
Follow Ameriwood Home
You
Tube
Tough
Advertisement
Table of Contents

Subscribe to Our Youtube Channel
Related Manuals for mr.Kate Tess 1697911COM


Summary of Contents for mr.Kate Tess 1697911COM
- Page 1 1697911COM 65" TV Stand -Shadow Oak B341697911COM00GO Date of Purchase ___ / ___ / ___ Lot Number: THIS INSTRUCTION BOOKLET CONTAINS IMPORTANT SAFETY INFORMATION. PLEASE READ AND KEEP FOR FUTURE REFERENCE. Do Not Return This Product! Contact our customer service team for help first. Call: 1-800-489-3351 (toll free) Visit: www.ameriwoodhome.com Easy...
-
Page 2: Helpful Hints
Contact Us! Do NOT return this product! Contact our friendly customer service team first for help. Call us! 1-800-489-3351 Visit ameriwoodhome.com Helpful Hints PEOPLE NEEDED FOR ASSEMBLY: 1-2 ESTIMATED ASSEMBLY TIME: 1 HOUR - Open your item in the area you plan to keep it to avoid excessive heavy lifting. - Identify, sort and count the parts before attempting assembly. -
Page 3: Before You Start
Before You Start Read through each step carefully and follow the proper order Separate and count all your parts and hardware Give yourself enough room for the assembly process Have the following tools: #2 Phillips Head Screwdriver and Hammer Caution: If using a power drill or power screwdriver for screwing, please be aware to slow down and stop when screw is tight. - Page 4 Before You Start Please Note: You may need to lightly tap the wood dowels with a hammer into the holes during your assembly process. Wood Dowel Insertion: Insert wood dowel completely into the hole. Not Actual Size Wood dowel will extend out approximately 3/8".
-
Page 5: Board Identification
Board Identification Not Actual Size Top Panel Left Panel Right Panel Left Partition T1697911010GO T1697911020GO T1697911030GO T1697911040GO QTY: 1 PC QTY: 1 PC QTY: 1 PC QTY: 1 PC Right Partition Bottom Panel Bottom Frame Large Adj Shelf T1697911050GO T1697911060GO T1697911070GO T1697911080GO QTY: 1 PC... - Page 6 Board Identification Not Actual Size ameriwoodhome.com Tube...
-
Page 7: Part List
Hardware Bag Reference Number: 21697911COM0GO Part List Actual Size For any replacement hardware, order part # 21697911COM0GO (x12) (x16) TGO2002 TGO2900 Wood Dowel Cam Bolt Ø8x30 mm (x4) (x8) (x10) (x4) TGO1329 TGO2904 TGO1607 TGO1307 Bolt Wood Dowel Bolt Screw Ø7x50 mm Ø6x20 mm M4x25mm... - Page 8 Hardware Bag Reference Number: 21697911COM0GO Part List Not Actual Size (x4) (x4) (x12) (x4) TGO4311 TGO4319 TGO2102 TGO5519 Hinge Hinge Handle Cam Lock (x1) (x12) (x1) (x4) TGO6514 TGO6520 TGO2813 TGO7001 Bumper Card Hex Key Door Stopper Shelf Support WARNING ADVERTENCIA AVERTISSEMENT (x8)
- Page 9 STEP Dowels extend out 3/8". For more details, please see (x4) page 4 (x4) Insert four Wood Dowels (2) into the bottom of the Left Partition (D) and the Right Partition (E). Attach the Bottom Panel (F) to the Left Partition (D) and Right Partition (E) using four Screws (7) as illustrated.
- Page 10 STEP (x4) Attach two Cam Bolts (1) into the Left Panel (B) and two Cam Bolts (1) into the Right Panel (C) as illustrated. Do NOT over-tighten. ameriwoodhome.com Tube...
- Page 11 STEP Dowels extend out 3/8". For (x4) more details, please see page 4 (x4) Insert four Wood Dowels (2) into the Bottom Panel (F). Attach the Left Panel (B) and the Right Panel (C) to the Bottom Panel (F) with four Cam Locks (13) as illustrated.
- Page 12 STEP Dowels extend out 3/8". For more details, please see page 4 (x10) (x4) Insert four Wood Dowels (3) into the Bottom Panel (F). Attach the Bottom Frame (G) to the Bottom Panel (F) with 10 Screws (5) as illustrated. Finished edge Raw Edge ameriwoodhome.com...
- Page 13 STEP (x4) (x1) Attach four Legs (K) to the Bottom Frame (G) with four Bolts (6) as illustrated. Attach two Middle Legs (L) to the Bottom Frame (G) as illustrated. Do NOT over-tighten. ameriwoodhome.com Tube...
- Page 14 STEP (x2) (x8) (x1) Attach eight Cam Bolts (1) into the Top Panel (A) as illustrated. Do NOT over-tighten. Attach Door Stopper (15) to the Top panel (A) using two Screws (8) as illustrated. ameriwoodhome.com Tube...
- Page 15 STEP Dowels extend out 3/8". For more details, please see (x8) (x8) page 4 (x8) Insert eight Wood Dowels (2) into boards (B), (D), (E) and (C) as illustrated. Attach the Top Panel (A) to boards (B), (D), (E) and (C) with eight Cam Locks (13) and eight Cam Covers (19) as illustrated.
- Page 16 STEP 8 Warning facing outward. (x32) With the assistance of a second person, carefully turn the unit over so that the back is accessible. Attach the Back Panel (I) to boards (A),(B),(C),(D),(E) and (F) as shown.Verify that the unit is square before connecting with 32 Screws (10).
- Page 17 STEP (x12) Insert 12 Shelf Supports (16) into the TV Stand at the desired shelf heights. Put the Large Adj Shelf (H) and two Small Adj Shelves (J) onto the Shelf Supports (16) as illustrated. ameriwoodhome.com Tube...
- Page 18 STEP (x4) (x2) (x4) (x8) Attach two Hinges (11) to the Door (M) with four Screws (9) x2 as illustrated. Attach the Handle (14) to the Door (M) with two Bolts (4) x 2 as illustrated. ameriwoodhome.com Tube...
- Page 19 STEP (x4) (x16) Attach the Door (M) to the Left Panel (B), and the Right Panel (C) with 16 Screws (9) as illustrated. Attach four Bumper Cards (18) to the Door (M) as illustrated. ameriwoodhome.com Tube...
- Page 20 STEP (x2) (x4) (x8) (x4) Attach two Hinges (12) to the Door (M) with four Screws (9) x2 as illustrated. Attach the Handle (14) to the Door (M) with two Bolts (4) x 2 as illustrated. ameriwoodhome.com...
- Page 21 STEP (x16) Attach Door (M) to the Left Partition (D) and the Right Partition (E) with 16 Screws (9) as illustrated. ameriwoodhome.com Tube...
- Page 22 STEP To adjust the vertical height. Loosen the four screws "A" on both hinges. Two of them are usually in slotted holes which allows you to adjust up of down by a few mm and then tighten back Para ajustar la altura vertical Afloje los cuatro tornillos "A"...
-
Page 23: Warning Label
STEP WARNING ADVERTENCIA AVERTISSEMENT (x1) Apply Warning Label (20) to the center of Top Panel (A) as shown, ensuring that the TV covers the label. Please note that the label is permanent. Once affixed to your item, it will not come off and will damage the surface if removal is attempted. -
Page 24: Maximum Loads
Maximum Loads This unit has been designed to support the maximum loads shown. Exceeding these load limits could cause sagging, instability, product collapse, and/or serious injury. WARNING ADVERTENCIA AVERTISSEMENT Certificate of Conformity 1. This certificate applies to the Dorel Home Furnishings, Inc. product identified by this instruction manual. 2. - Page 25 Register your product to receive the following: * New trend details - sneak peek on what's new * Surveys - have a voice within our community * Exclusive deals and discount codes * Quick and easy replacement part service To register your product, visit ameriwoodhome.com Visit your local retailer's website, rate your purchased product and leave us some feedback! We would like to extend a big "Thank You"...
- Page 26 Español Cubierta Delantera Este libro de instrucciones contiene información IMPORTANTE de seguridad. Por favor lea y manténgalo para referencia en el futuro. No Regrese este producto! Comuniquese con nuestro amistoso equipo de servicio al cliente para obtener ayuda. Llamenos al: 1-800-489-3351 (Gratis) Lunes - Viernes 9am - 5pm CST Visitar: www.ameriwoodhome.com PRECAUCION Este mueble puede volcarse y causar graves heridas y/o muerte.
- Page 27 Español Identificación de los Paneles (Página 5-6) Lista de Piezas (Página 7-8) Este no es el tamaño real Tamaño real Este no es el tamaño real Perno De Leva (11) Bisagra PANEL SUPERIOR Taco De Madera (12) Bisagra PANEL IZQUIERDO Taco De Madera (13) Bloqueo De Leva...
- Page 28 Español Página 16 Con la ayuda de una segunda persona, gire con cuidado la unidad para que se pueda acceder a la parte trasera. Conecte el panel posterior (I) a las tablas (A), (B), (C), (D), (E) y (F) como se muestra. Verifique que la unidad esté...
- Page 29 Español Página 24 CARGA MAXIMA Esta unidad ha sido diseñada para soportar la carga máxima anotada. El exceder estos límites puede causar inestabilidad, colapsarse y/o causar serias lesiones. ADVERTENCIA: aplique la etiqueta de advertencia de TV a su unidad para que siempre tenga los límites de peso y tamaño de TV del modelo.
- Page 30 Français Couverture Avant CE LIVRET D'INSTRUCTION CONTIENT DES INFORMATIONS IMPORTANTES SUR LA SÉCURITÉ. VEUILLEZ LIRE ET GARDER POUR UNE RÉFÉRENCE FUTURE Ne retournez pas ce produit! Contactez notre équipe de service à la clientèle amicale d'abord pour obtenir de l'aide. Appelez-nous: (sans frais) du Lundi au Vendredi de 9h à...
- Page 31 Français Liste des pièces (Page 7-8) Identification des matériaux Taille réelle Pas de taille réelle (Page 5-6) Pas de taille réelle (A) PANNEAU DU HAUT (11) Charnière Boulon à came (B) PANNEAU GAUCHE (12) Charnière Cheville en bois (C) PANNEAU DROIT (13) Verrouillage à...
- Page 32 Français Page 16 Avec l'aide d'une deuxième personne, retournez délicatement l'appareil afin que le dos soit accessible. Fixez le panneau arrière (I) aux cartes (A), (B), (C), (D), (E) et (F) comme indiqué. Vérifiez que l'unité est carrée avant de la connecter avec 32 vis (10). AVERTISSEMENT Veuillez vous assurer que les dos sont solidement fixés.
- Page 33 Français Page 24 CHARGES MAXIMALES Ce meuble a été conçu pour supporter les charges maximales indiquées. En excédant ces limites de charge, le meuble pourrait devenir instable, s'effondrer, et/ou causer des blessures graves. AVERTISSEMENT: Appliquez l'étiquette d'avertissement du téléviseur sur votre appareil afin d'avoir toujours les limites de poids et de taille du téléviseur du modèle.
Need help?
Do you have a question about the Tess 1697911COM and is the answer not in the manual?
Questions and answers