Table of Contents
Advertisement
Quick Links
Advertisement
Table of Contents

Subscribe to Our Youtube Channel
Related Manuals for OCI OCIE30-BQRL


Summary of Contents for OCI OCIE30-BQRL
- Page 1 This Owner's Manual is provided and hosted by Appliance Factory Parts. OCI OCIE30-BQRL Owner's Manual Shop genuine replacement parts for OCI OCIE30-BQRL Find Your OCI Grill Parts - Select From 22 Models -------- Manual continues below --------...
- Page 2 PROFESSIONAL GRILL USE AND CARE MANUAL MODELS: OCIE26BQ OCIE30BQR OCIE30BQSR OCIE36BQR OCIE36BQAR OCIE48BQR OCIE48BQAR...
- Page 3 A MESSAGE TO OUR CUSTOMERS Thank you for selecting the Outdoor Concepts Professional Grill. We have worked hand in hand with top designers to create a product that meets exacting standards and will provide years of pleasurable, outdoor grilling. Because the grill has features not found on any other, we recommend that you read this entire booklet before your first use.
-
Page 4: Table Of Contents
TABLE OF CONTENTS SAFETY PRACTICES / PRECAUTIONS..........2-4 GRILL MODELS....................5 CLEARANCES/BTU RATING/L.P. TANK REQUIREMENTS......6 L.P. GAS HOOK-UP..................7 NAT GAS HOOK-UP..................8 LEAK TESTING....................9 LIGHTING INSTRUCTIONS...............10 SEAR BURNER MATCH LIGHTING............11 ADJUSTMENTS & EFFICIENCY..............12 LOW END ADJUSTMENT................13 USING YOUR GRILL..................14 USING THE SMOKER BURNER..............15 USING THE ROTISSERIE BURNER............16 REPLACING IGNITION BATTERY/MANUAL ROTISSERIE LIGHTING..17 BUILT IN CONSTRUCTION DETAILS............18... -
Page 5: Safety Practices / Precautions
SAFETY PRECAUTIONS AND PRACTICES Read this Care and Use Manual carefully and completely before using FOR YOUR SAFETY your grill to reduce the risk of fire, burn hazard or other injury. Begin If you smell gas: by ensuring proper assembly. 1. - Page 6 SAFETY PRECAUTIONS AND PRACTICES Always inspect the gas hose(s) before each use. If the hose shows evidence of excessive abrasion or wear, or the hose is cut, it must be replaced prior to operating the appliance. Any replacement must be that specified by the manufacturer. The pressure regulator and hose assembly supplied with the unit must be used.
- Page 7 SAFETY PRACTICES & PRECAUTIONS IMPORTANT SAFETY NOTICE: Certain Liquid Propane dealers may fill liquid propane cylinders for use in the grill beyond cylinder filling capacity. This “Overfilling” may create a dangerous condition. “Overfilled” tanks can build up excess pressure. As a safety device, the tanks pressure relief valve will vent propane gas vapor to relieve this excess pressure.
-
Page 8: Grill Models
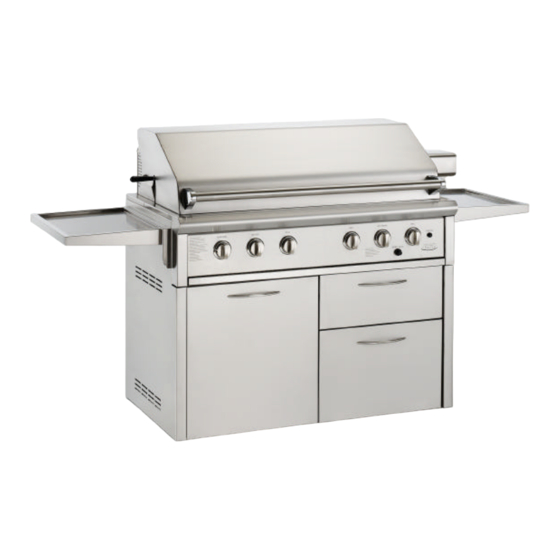
GRILL MODELS OCIE48BQR/OCIE48BQAR OCIE36BQR/OCIE36BQAR OCIE30BQR/OCIE30BQSR OCIE26BQ... -
Page 9: Clearances/Btu Rating/Lp Tank Requirements
Before any gas connections can be made, the cart must be assembled and the grill head mounted correctly to the cart. Never connect an unregulated gas line to the appliance. Total gas consumption (per hour) of the OCI Grill with all burners on “HI”: 26” Grill ..32,000 BTU 30” Grill ..56,000 BTU 36”... -
Page 10: Gas Hook-Up
L.P. GAS HOOK UP L.P. Gas Hook Up (Type 1 or QCC-1 regulator): Grill orificed for use with L.P. gas come equipped with an L.P. hose/regulator assembly for connec- tion to a standard 20 lb. L.P. cylinder (Type 1). The L.P. tank is not included. -
Page 11: Nat Gas Hook-Up
NATURAL GAS HOOK UP CONNECTION: 1/2” NPT male with 3/8” flare adapter and SS corrugated gas line. OPERATING PRESSURE: 4.0” W.C. SUPPLY PRESSURE: 5” TO 4” W.C. if in excess of 4” W.C. a step down regulator is required. Check with your local gas utility company or with local codes for instructions on installing gas supply lines. -
Page 12: Leak Testing
LEAK TESTING GENERAL Although all gas connections on the grill are leak test- ed at the factory prior to shipment, a complete gas tightness check must be performed at the installation site due to possible mishandling in shipment, or excessive pressure unknowingly being applied to the unit. -
Page 13: Lighting Instructions
LIGHTING INSTRUCTIONS WARNING: IMPORTANT! Before lighting . . . Inspect the gas supply piping or hose prior to turning the gas “ON”. If there is evidence of cuts, wear, or abrasion, it must be replaced prior to use. Do not use the grill if the odor of gas is present while the knobs are in the OFF position. -
Page 14: Sear Burner Match Lighting
SEAR BURNER MATCH LIGHTING INSTRUCTIONS TO MATCH LIGHT THE SEAR BURNER: If you are unable to light Sear Burner using the 9 volt ignition source you can utilize the match holder to match light the sear burner. Fit the match between the wire loops on end of match holder and light the match. Position the lit match down between the cooking grill rack approximately 1/4”... -
Page 15: Adjustments & Efficiency
ADJUSTMENTS & EFFICIENCY BURNER AIR ADJUSTMENT: FIG.01 Each grill burner is tested and adjusted at the facto- ry prior to shipment; however, variations in the local gas supply may make it necessary to adjust the burners. The flames of the burners should be visually checked and com- pared with Figure 01. -
Page 16: Low End Adjustment
LOW END ADJUSTMENT NOTE: THIS ADJUSTMENT SHOULD BE DONE WHEN CONVERTING TO NATUR- AL GAS AS WELL AS UPON FIRST USE. LOW SETTING ADJUSTMENTS: The valves on the Professional Grill features an adjustable low setting. Due to fluctuations in gas pres- sure, heating value or gas conversion, you may feel it necessary to increase or decrease gas flow in the low position. -
Page 17: Using Your Grill
USING YOUR GRILL Each main burner is rated between 17,000 and 28,000 BTU depending on the grill model. The grill burn- ers encompass the entire cooking area. Above the burners are stainless steel radiants. The igniter button is located in the upper right portion of the valve panel. NOTE: A hot grill sears the food, sealing in the juices. -
Page 18: Using The Smoker Burner
These removable stainless steel heat shields direct the heat upwards to the cooking surface and not outward across the grill. The result is our OCI Elite Series... -
Page 19: Using The Rotisserie Burner
USING THE ROTISSERIE BURNER Your Grill is capable of performing back burner rotis cooking. The location of the rear burner allows the placement of a rotis basting pan (not included) beneath the food to collect juices and drippings for basting and gravy. -
Page 20: Replacing Ignition Battery/Manual Rotisserie Lighting
MANUAL ROTIS LIGHTING/REPLACING IGNITION BATTERY MANUAL LIGHTING: To manually light the rotisserie, place a butane lighter or long handled match near the tip of the thermo- couple. Turn the control knob to “HI”. Hold the safety valve button in for about 4 to 5 seconds or until the burner remains lit. -
Page 21: Built In Construction Details
Do not build the grill under overhead unprotected com- bustible construction. If the grill is to be placed into a com- bustible enclosure, an OCI insulated jacket is necessary and is available from your dealer. Use only Outdoor Concepts Inc. insu- lated jacket which has specifically been designed and tested for this purpose. -
Page 22: Built In Clearance Details
BUILT IN CLEARANCE DETAILS Model Shown: OCIE26BQ Models Shown: OCIE30BQR/BQSR OCIE36BQR/BQAR OCIE48BQR/BQAR Location: When determining a suitable location take into account concerns such as exposure to wind, proximity to traffic paths and keeping any gas or electrical supply lines as short as possible. Locate the grill only in a well ventilated area. -
Page 23: Care & Maintenance
CARE AND MAINTENANCE GRILL RACK The easiest way to clean the grill is immediately after cooking is completed and after turning off the flame. Wear a barbeque mitt to protect your hand from the heat and steam. Dip a brass bristle barbeque brush in tap water mixed with a small amount of vinegar and scrub the hot grill. -
Page 24: Troubleshooting
TROUBLESHOOTING WHAT TO DO PROBLEM Remove the grill rack and the radiant tray. With a mirror, watch the igniter Grill won’t light when the ignit- tip. You should see a spark jump from the tip of the igniter when the button er button is pressed. -
Page 25: Grilling Hints & Grill Recipes
GRILLING HINTS & COOKING CHART The doneness of meat, whether rare, medium, or well done, is affected to a large degree by the thickness of the cut. Expert chefs say it is impossible to have a rare doneness with a thin cut of meat. The cooking time is affected by the kind of meat, the size and shape of the cut, the temperature of the meat when cooking begins, and the degree of doneness desired. - Page 26 GRILL COOKING CHART FOOD WEIGHT OR FLAME APPROXIMATE SPECIAL INSTRUCTIONS THICKNESS SIZE TIME AND TIPS MEATS Beef Hamburgers 1/2 to 3/4 inch Medium 10 to 18 minutes Grill, turning once when juices rise to the surface. Do not leave High 8 to 15 minutes hamburgers unattended since a flare-up could occur quickly.
- Page 27 GRILL COOKING CHART FOOD WEIGHT OR FLAME APPROXIMATE SPECIAL INSTRUCTIONS THICKNESS SIZE TIME AND TIPS MEATS Pork Ham Steaks Remove excess fat from edge. (precooked) 1/2 inch High 4 to 8 minutes Slash remaining fat at 2-inch intervals. Grill, turning once. Hot Dogs Medium 5 to 10 minutes...
- Page 28 GRILL RECIPE SUGGESTIONS BBQ SALMON 2 Large salmon steaks 2 Tbs. oil Salt & pepper 2 Oz. Thin bacon slices 2 Tbs. butter 1 Tbs. lemon juice Spring of parsley Lemon wedges Preheat the BBQ. Brush the steaks with oil and season with salt and pepper. Place on BBQ grill and cook for 10 minutes, turning steaks over halfway cooking time.
- Page 29 GRILL RECIPE SUGGESTIONS BARBECUED POTATOES & CHEESE 1 /2 3 /4 Cups shredded cheddar cheese 1 Can (10 oz.) condensed cream of mushroom soup 1 /3 Cup milk 2 Tbs. barbecue sauce 1 /4 Tsp. oregano 1 /4 Tsp. salt 1 /8 Tsp.
-
Page 30: Rotis Recipes
ROTIS RECIPE SUGGESTIONS SPARE RIBS Marinade: 1 C. soy sauce C. vinegar C. honey C. dry sherry 2 Tsp. chopped garlic 2 Tsp. sugar 1 C. water1 Chicken bouillon cube 1 Can beer for basting sauce Marinade ribs for 3 hours. Use marinade for basting by adding beer to it. Place pan under the ribs and baste fre- quently. -
Page 31: 26" Bq Parts Breakdown
26” BQ PARTS BREAKDOWN-GRILL BODY ASSEMBLY ITEM DESCRIPTION PART # GREASE PAN HANDLE 143673 GREASE PAN 143674 FRONT HEATSHIELD, 26” 143495 BODY WELD ASSEMBLY, 26” 126120 IGNITER ASSEMBLY, 26” 126156 BURNER PERCH 143388 10-24 X 1/2” SS TYPE 23 PH.SCREW 115001-26 BACK PANEL, 26”... - Page 32 26” BQ GAS SYSTEM/GRATES ITEM DESCRIPTION PART # BQ MAIN BURNER VALVE 113006 MANIFOLD 118011 3/8-27 BRASS ORIFICE, #48 (NAT.) 113001-48 3/8-27 BRASS ORIFICE, #56 (LP) 113008 3/8 M. FL. X 1/2 FNPT BR. ADAPTER 118033 U-BURNER 112006-02 LP REGULATOR 113007 NAT.
- Page 33 26” BQ LID ASSEMBLY/VALVE PANEL/ROTIS SYSTEM ITEM DESCRIPTION PART # 3/8 ALUM. SPACER 115020-03 5/16” SS ACORN NUT 115019-04 3/8 X 3/8 SS SHOULDER BOLT 115089-04 LID HANDLE, 26” 126096-02 LID WELD ASSEMBLY, 26” 126188 1/4-20 X 1/2” SS HEX BOLT 115003-05 LID HANDLE END CAP 118026...
-
Page 34: L 30", 36" & 48" Bq Parts Breakdown
30, 36 AND 48” BQ GRILL BODY PARTS BREAKDOWN ITEM DESCRIPTION PART # GREASE PAN 36” 143567-03 GREASE PAN 48” 143567-05 GREASE PAN 30” 143567-04 GREASE PAN HANDLE, 36” 143566-03 GREASE PAN HANDLE, 48” 143566-05 GREASE PAN HANDLE, 30” 143566-04 GREASE PAN ALIGNMENT ANGLE 143593 BOTTOM PANEL 36”... - Page 35 30, 36 AND 48” BQ GRILL BODY PARTS BREAKDOWN ITEM DESCRIPTION PART # SS ROLLER 115041 SAFETY VALVE BRACKET 143571 VALVE PANEL 36” BQR 143555-04-PA VALVE PANEL 36” BQAR 143555-07-PA 13XX VALVE PANEL 48”BQR 143555-06-PA 13XXX VALVE PANEL 48” BQAR 143555-08-PA 13XXXX VALVE PANEL 30”...
- Page 36 30, 36 AND 48” BQ GAS SYSTEM/GRATES ITEM DESCRIPTION PART # 1/4-20 X 3/4 SS HEX HD BOLT 115003-15 1/8” FNPT X 3/8 CC BRASS UNION 113016-02 1/8”FNPT X 1/4 M. FLARE UNION 113038 SAFETY VALVE, 1/8 NPT 118240 1/8” MNPT X 3/8 CC BRASS UNION 113017-02 1/8”...
- Page 37 30, 36 AND 48” BQ GAS SYSTEM/GRATES ITEM DESCRIPTION PART # LP REGULATOR, 30-36 113007 LP REGULATOR, 48 113007-02 NATURAL REGULATOR, 30-36 113013 NATURAL REGULATOR, 48 113013-02 10-24 X 1/2” TYPE 23 SS SCREW 115001-26 RADIANT TUBE KEEPER 126086 RADIANT TUBE 126085 RADIANT, TUBE, 36-48 126084...
- Page 38 30, 36 AND 48” BQ LID ASSEMBLY/ROTIS SYSTEM ITEM DESCRIPTION PART # 3/8” ALUM. SPACER 115020-03 5/16” SS ACORN NUT 115019-04 3/8 X 1” SS SHOULDER BOLT 115089-01 LID HANDLE, 36 143597-02 LID HANDLE, 48 143597-04 LID HANDLE, 30 143597-03 LID WELD ASSY, 36 143658 LID WELD ASSY, 48...
-
Page 39: Warranty
Outdoor Concepts to be defective. Replacement will be F.O.B. OCI, and OCI will not be liable for any transportation costs, labor costs, or export duties. This warranty shall not apply, nor can we assume responsibility for damage that might result from failure to follow manufacturer’s instructions or local codes, where the appliance has been tampered with or altered... - Page 40 As product improvement is an ongoing process, we reserve the right to change specifications or design without notice. Litho in USA 6/2007 Westminster, California 92683 Part No. 110174 rev. D 1 (714) 903-1885 Fax (714) 903-5805...
Need help?
Do you have a question about the OCIE30-BQRL and is the answer not in the manual?
Questions and answers