Advertisement
Available languages
Available languages
Quick Links
Soap Dispenser Installation Instructions
Tools Required: Pliers
Install The Base Figure #1
1. Pass base assembly (A) and rubber gasket (B) through sink hole opening
from the top of the sink.
2. Secure the base assembly to the sink from the under side using metal
washer (C) and nut (D).
Use With Included Bottle Figure #2
1. Screw bottle (E) in to base assembly (A) from the underside of the sink.
2. Fill the attached bottle by pouring soap through the base assembly into
the attached bottle.
3. Push 7 in. tubing into the bottom of the head assembly (F).
4. Insert head assembly into base assembly (A).
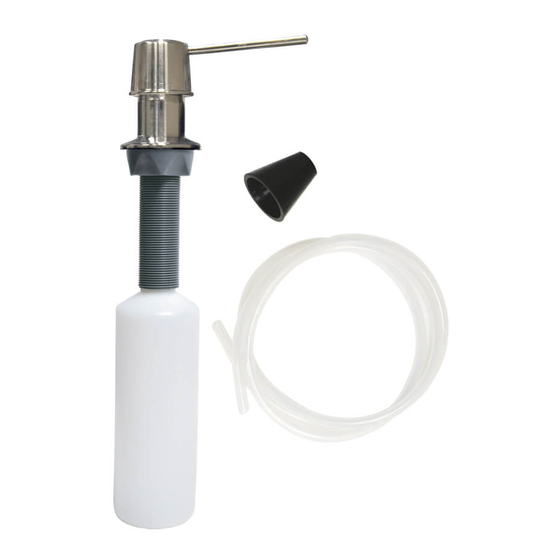
Use With 4 Foot Hose Figure #3
1. Attach one end of the 4 ft. hose (G) to the head assembly (F).
2. From the top of the sink, run the 4 ft. hose through the base assembly (A).
3. From under the sink, slide the stopper (H) onto the 4 ft. hose, leaving
about 12 in. hanging out.
4. Unscrew the cap from an existing bottle of soap (J).
5. Push the loose end of the 4 ft. hose into the bottle of soap and secure
by pushing the stopper into the bottle opening.
6. If desired, cut the hose to appropriate length and reinstall into the bottle of soap.
HELPFUL HINT - Please Read!
You Must Prime The Pump Prior To Intial Use
Start by depressing the soap dispenser 5 times. Wait a few seconds and
depress again 5 times. Repeat this process until soap comes out of the
dispenser (depending on length of the hose, you may need to repeat the
"pump and wait" process up to 20 times).
Note: You only need to prime the pump during the initial installation.
Please call 800-523-5135 or visit Danco.com for additional support.
©2016 Danco, Inc.
Irving, TX 75062
10037, 10038, 10039
F
A
B
C
D
Figure #1
10039
F
A
E
Figure #2
F
A
G
H
J
Figure #3
Advertisement

Related Manuals for Danco 10039

Summary of Contents for Danco 10039
- Page 1 (depending on length of the hose, you may need to repeat the “pump and wait” process up to 20 times). Note: You only need to prime the pump during the initial installation. Please call 800-523-5135 or visit Danco.com for additional support. ©2016 Danco, Inc. Irving, TX 75062...
- Page 2 (Dependiendo de lo largo de la mangera puede ser necesario el "bombear y esperar" proceso hasta 20 veces). Atención: Usted necesita solamente preparar la bomba durante la instalación inicial. Llame al 800-523-5135 o visite danco.com para mas ayuda. ©2016 Danco, Inc. Irving, TX 75062...
Need help?
Do you have a question about the 10039 and is the answer not in the manual?
Questions and answers