Advertisement
Available languages
Available languages
Advertisement
Table of Contents

Related Manuals for minimondo EVOLUTION PRO


Summary of Contents for minimondo EVOLUTION PRO
- Page 1 INSTRUCTIONS MANUAL MANUAL DE INSTRUCCIONES Ref. 562...
- Page 2 INSTRUCTIONS INSTRUCTIONS EVOLUTION PRO IMPORTANT: READ CAREFULLY AND KEEP FOR FUTURE REFERENCE...
- Page 3 INSTRUCTIONS INDEX 5. Maintenance and cleaning.......18 1. Product Overview..6 5.1 Daily maintenance 2. Safety Warning.....8 5.2 Washing instruction 5.3 Remove and assemble the fabric cover 3. Usage......10 6. The main technical parameters......20 3.1 Install position of the child seat in vehicle 3.2 Adjust the headrest 3.3 Checking the shoulder strap height 3.4 Usage of buckle...
-
Page 4: Product Overview
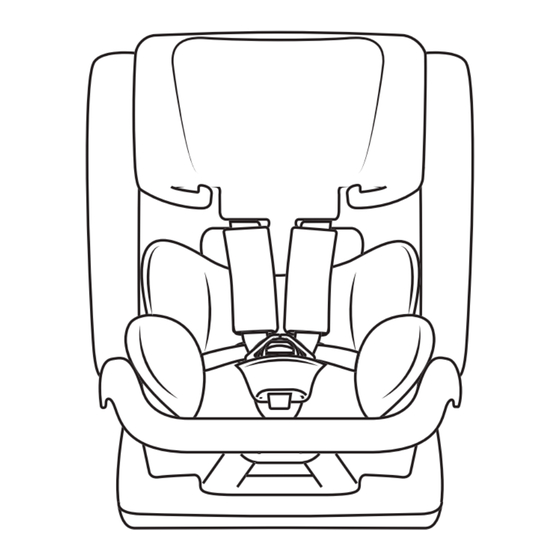
INSTRUCTIONS 1. Product Overview Headrest Belt guide hook Belt clip Shoulder strap Chest pad Comfortable cushion Buckle Crotch pad Adjuster button Body Angle adjuster Harness adjuster strap Harness connector Belt slot... - Page 5 INSTRUCTIONS “ Universal Belted ” NOTICE This is Universal Belted Enhanced Child Restraint System. It is approved according to UN Regula- tionNo. 129, for use primarily in “Universal seating positions” as indicated by vehicle manufacturers inthe vehicle user’s manual. If in doubt, consult either the Enhanced Child Restraint System manufacturer or the retailer. “...
-
Page 6: Safety Warning
INSTRUCTIONS 2. Safety Warning 1. This product can be rearward-facing used by 5-point safety system for children with a height of 40-105cm (Weight 0-18kg, about 0-4 years old), using adult three-point belt to fix the child restraint system. This product can also be forward-facing for children with a height of 100- 150cm (Weight 15-36kg, about 4-12 years old), using adult three-point belt to fix the child restraint system. - Page 7 INSTRUCTIONS 12. The device should be replaced when it has been subjust to violent stresses in an accident. 13. It’s dangerous to make any alterations or additions to the device without the approval of the Type Approval Authority, also dangerous not to follow closely the installaton instructions provided by the manufacturer.
- Page 8 INSTRUCTIONS 3. Usage 3.1 Install position of the child seat in vehicle Proper installation Improper installation Only suitable if the approved vehicles are fitted with 3 point safety-belt, approved to UN/ECE Regulation No.16 or other equivalent standards. Not to use rearward-facing in seating positions where an active frontal airbag is installed.
- Page 9 INSTRUCTIONS 3.2 Adjust the headrest As shown in the picture, you can adjust the headrest up and down by pulling onthe headrest adjustment tab, and adjust the headrest to a position suitable for the child’s head. Only suitable if the approved vehicles are fitted with 3 point safety-belt, approved to UN/ECE Regulation No.16 or other equivalent standards.
- Page 10 INSTRUCTIONS 3.4 Usage of buckle ■ Get the left and the right pieces of buckle together. ■ Insert the two pieces into the slot of the buckle .At the same time, hearing “click” means the buckle gets stuck, pull the pieces of the buckle and check whether the buckle is locked correctly.
- Page 11 INSTRUCTIONS ■ Tighten the shoulder strap. Pull the shoulder strap upward to remove the slack from the lap sections of the harness then pull the front stretch belt until the harness adjuster strap is fully tightened. * The shoulder strap should be adjusted as tightly as possible without causing discomfort to your child.
- Page 12 INSTRUCTIONS 3.7 Remove the Cheat pad and Cheat strap ■ Loosen the cloth cover inside the seat and adjust the headrest to the highest position (see page 5, 3.2 of the manual). Pull out the shoulder cover and shoulder strap from the headrest hole as shown in Figure 1.
- Page 13 INSTRUCTIONS 4. Installation 4.1 40-105 cm installation ■ Installed rearward-facing (Height:40-105CM Weight 0-18kg) * DO NOT use the device in seating positions where an active frontal airbag installed. ■ Method: Pull out the Body Angle Adjuster under the seat, adjust to the most inclined gear, and hear a sound of “click”. 11 11 Body Angle Adjuster ■...
- Page 14 INSTRUCTIONS Shoulder belt Lap belt ■ As shown in the figure, firstly, snap the vehicle shoulder belt into the child restraint system’s belt guide hook and belt clip on the same side, and then pass the vehicle lap strap through the guide hook over the side of the child restraint base.
- Page 15 INSTRUCTIONS ■ Put your child into child seat. * Check the height of shoulder belts on the correctposition and fasten the buckle * Check that the harness has not been twisted. * Check that the cover is not impeding the movement or fit of the harness in anyway.
- Page 16 INSTRUCTIONS 4. 2 100-150 cm installation Shoulder belt Lap belt ■ Put the child seat forward facing on the car seat and make sure that the front of the child seat is firmly pressed against the car seat backrest. ■ Place the child on the restraint system and adjust the height of the headres.
-
Page 17: Maintenance And Cleaning
INSTRUCTIONS 5. Maintenance and cleaning 5.1 Daily maintenance ■ In daily use, check periodically the child seat. The child seat should be replaced after an accident. ■ Please keep this child seat in dry and ventilated place to avoid damp moldy. ■... - Page 18 INSTRUCTIONS 6.The main technical parameters ■ Distance from front to back of the seat: 510mm ■ Distance form left to right of the seat: 440mm ■ Height of the seat: 580mm ■ Weight of the seat: 5.9±0.5kg...
- Page 19 INSTRUCCIONES INSTRUCCIONES EVOLUTION PRO IMPORTANTE: LEE DETENIDAMENTE Y GUARDE PARA FUTURAS CONSULTAS...
- Page 20 INSTRUCCIONES ÍNDICE 5. Mantenimiento y limpieza........33 1. Descripción del producto......23 5.1 Mantenimiento diario 5.2 Instrucciones de lavado 2. Advertencia de Seguridad......25 5.3 Retirar y montar la cubierta de tela....36 6. Principales parámetros técnicos......37 3. Utilización...........27 3.1 Posición de instalación del asiento infantil en el vehículo 3.2 Ajuste de reposacabezas 3.3 Comprobar la altura de la correa del hombro...
- Page 21 INSTRUCCIONES 1. Product Overview Reposacabezas Gancho guía del cinturón Clip para cinturón Almohadilla pectoral Correa para el hombro Reductor de recién nacido Hebilla Almohadilla de entrepierna Botón de ajuste Palanca de reclinado Correa de ajuste del arnés Conector del arnés Ranura del cinturón...
- Page 22 INSTRUCCIONES AVISO “ Cinturón Universal ” Se trata de un sistema de retención infantil universal mejorado con cinturón de Seguridad de Automovil de 3 puntos. Está homologado según el Reglamento nº 129 de la ONU, para su uso principalmente en “posiciones de asiento universales”, según lo indicado por los fabricantes de vehículos en el manual del usuario del vehículo.
- Page 23 INSTRUCCIONES 2. Safety Warning 1. Este producto puede orientarse hacia atrás mediante un sistema de seguridad de 5 puntos para niños con una altura de 40-105 cm (peso de 0-18 kg, aproximadamente de 0-4 años), utilizando un cinturón de tres puntos para adultos para fijar el sistema de retención infantil.
- Page 24 INSTRUCCIONES 10. Las correas cel cinturón no deben estar retorcidas. 11. Se hará hincapié en que toda correa ventral se lleve baja, de modo que la pelvis quede firmemente enganchada. 13. Es peligroso hacer cualquier alteración o adición al dispositivo sin la aprobación de la Autoridad de Aprobación de Tipo, también es peligroso no seguir de cerca las instrucciones de instalación proporcionadas por el fabricante.
- Page 25 INSTRUCCIONES 3. Uso 3.1 Posición de instalación del asiento infantil en el vehículo Instalación correcta Instalación incorrecta Sólo es adecuado si los vehículos homologados están equipados con cinturón de seguridad de 3 puntos, homologado según el Reglamento nº 16 de la CEPE/ONU u otras normas equivalentes.
- Page 26 INSTRUCCIONES 3.2 Ajustar el reposacabezas Como se muestra en la imagen, puede ajustar el reposacabezas hacia arriba y hacia abajo tirando de la lengüeta de ajuste del reposacabezas, y ajustar el reposacabezas a la posición adecuada para la cabeza del niño. una posición adecuada para la cabeza del niño.
- Page 27 INSTRUCCIONES 3.4 Uso de la hebilla ■ Junta las piezas izquierda y derecha de la hebilla. ■ Introduzca las dos piezas en la ranura de la hebilla. Al mismo tiempo, si oye un “clic”, la hebilla se atasca; tire de las piezas de la hebilla y compruebe si la hebilla está correctamente bloqueada.
- Page 28 INSTRUCCIONES ■ Apriete la correa del hombro. Tire de la correa del hombro hacia arriba para eliminar la holgura de las secciones de regazo del arnés y, a continuación, tire del cinturón elástico delantero hasta que la correa de ajuste del arnés esté...
- Page 29 INSTRUCCIONES 3.7 Quitar la almohadilla y la almohadilla de la correa ■ Afloje la funda de tela del interior del asiento y ajuste el repo- sacabezas a la posición más alta (consulte la página 5, 3.2 del manual). Saque la funda y la correa del hombro del orificio del reposacabezas como se muestra en la figura 1.
- Page 30 INSTRUCCIONES 4. Instalación 4.1 Instalación 40-105 cm ■ Instalado mirando hacia atrás (Altura:40-105CM Peso 0-18kg) * NO utilice el dispositivo en asientos en los que haya instalado un airbag frontal activo. ■ Método: Extraiga la palanca de reclinado situado debajo del asiento, ajústelo a la marcha más inclinada y oiga un sonido de “clic”.
- Page 31 INSTRUCCIONES Cinturón de hombro Lap belt ■ Como se muestra en la figura, en primer lugar, encaje el cinturón de hombro del vehículo en el gancho guía del cinturón del sistema de retención infantil y en el clip del cinturón del mismo lado, y a continuación pase la correa ventral del vehículo a través del gancho guía por el lado de la base del sistema...
- Page 32 INSTRUCCIONES ■ Coloque a su hijo en el asiento infantil. * Compruebe la altura de los cinturones de hombro en la posición correcta y abroche la hebilla * Compruebe que el arnés no esté retorcido. * Compruebe que la funda no impide de ningún modo el movimiento o el ajuste del arnés.
- Page 33 INSTRUCCIONES 4.2 Instalación 100-150 cm Cinturón ventral Cinturón de hombro ■ Coloque el asiento infantil orientado hacia delante en el asiento del automóvil y asegúrese de que la parte delantera del asiento infantil esté firmemente presionada contra el respaldo del asiento del automóvil. ■...
-
Page 34: Mantenimiento Y Limpieza
INSTRUCCIONES 5. Mantenimiento y limpieza 5.1 Mantenimiento diario ■ En el uso diario, compruebe periódicamente el asiento infantil. El asiento infantil debe sustituirse después de un accidente. ■ Mantenga el asiento infantil en un lugar seco y ventilado para evitar que se llene de moho. - Page 35 INSTRUCCIONES 5.3 Desmontar y montar el tejido ■ En primer lugar, retire la almohadilla de la entrepierna y la hebilla del asiento infantil y, a continuación, retire las correas de los hombros y el cojín. ■ Retire la funda de tela del asiento infantil . * Para instalar la funda de tela, siga las instrucciones anteriores en orden inverso.
- Page 36 Importado por/Imported by: Zoalfer SA A38093373 Juan de Avila,50-52 38009 Santa Cruz de Tenerife info@zoalfer.es www.minimondo.es...
Need help?
Do you have a question about the EVOLUTION PRO and is the answer not in the manual?
Questions and answers