Advertisement
Quick Links
NOTE
We highly recommend watching
the quick help & set up guide video
first before assembling. Simply
place a smart phone camera over
the QR code for a quick link to the
video.
To watch assembly video :
www.frankolsenfurniture.co.uk
Download the Frank Olsen Smart app from :
Google Play store or Apple store
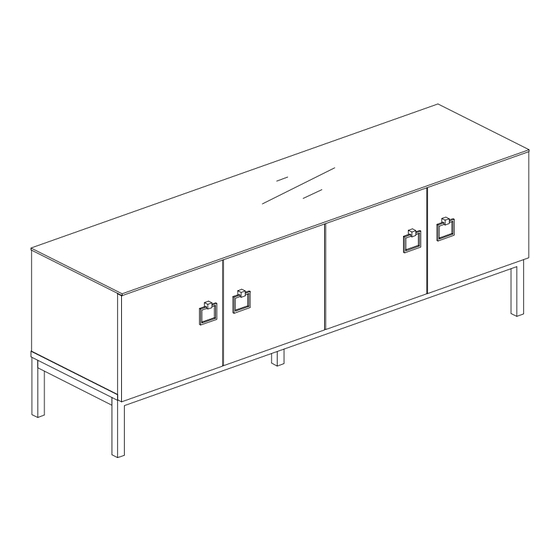
LYRA TV CABINET
Assembly Instructions
01
Advertisement

Subscribe to Our Youtube Channel
Related Manuals for Frank Olsen LYRA TV CABINET


Summary of Contents for Frank Olsen LYRA TV CABINET
- Page 1 Simply place a smart phone camera over the QR code for a quick link to the video. To watch assembly video : www.frankolsenfurniture.co.uk Download the Frank Olsen Smart app from : Google Play store or Apple store...
- Page 2 HARDWARE 105 110 M3*12 M3.5*14 M6*15 M4*25 1.3m 12*5 Pre-fitted Tools Required-Not Supplied PARTS Please make sure all parts are present before beginning assembly.
- Page 3 GUIDE Assembly Instructions Ensure dowel is aligned with hole before pushing panel into groove Disassembly Instructions Unlock the cam fixing (top and bottom) of panel 11 Use Disassemble rod ‘M’ and gently slide in to the small triangle as shown below marked ‘KEY’ We highly recommend watching the quick help video before disassembling.
- Page 4 Please note: On panel 1, you’ll notice pre-drilled holes for the optional installation of a Frank Olsen Intelligent Eye. This addition enables seamless operation of up to six pieces of AV equipment, even with the cabinet doors closed.To purchase an Intelligent Eye,...
- Page 5 * Locate Dowel position first as a guide First * Locate Dowel position first as a guide...
- Page 6 Locate dowel first as a guide, and press panel 2 down into place. After bottom panel is fitted, tighten the cam. Do not fully tighten to allow for final adjustments.
- Page 7 Do not fully tighten to allow for final adjustments. To fix the legs to panel 2 evenly, install leg bolts in diagonally opposite corners. Ensure the bar of the legs is lined up with the edges of panel 2 before completely tightening.
- Page 8 180° When the legs have been attached, turn the unit over to the upright position. IMPORTANT We recommend that two people do this. PLEASE FOLLOW THE STEPS TO ENSURE NO DAMAGE. Screw in clip 'I’- ensure surface is DUST FREE...
- Page 9 CAUTION, When peeling off LED adhesive strip, take extra care to peel ONLY the protective strip, not the adhesive strip. 1.Do not remove LED strip backing yet, unravel LED strip from reel. 2. Place LED strip in position in the clip and lay the LED strip in place. 3.
- Page 10 Please choose shelf height position before attaching the door. Finished edge IMPORTANT To avoid any damage to the doors whilst fitting the hinges, please fit the hinges with the doors on soft surface such as a carpet or a place a blanket on harder floors.
- Page 11 Hinge type J Hinge type N PUSH Hinge type J When attaching doors, please do so with care to ensure no damage to paintwork. Please use QR code to view a short video on how to attach the hinges.
- Page 12 To get the doors aligned perfectly, the hinges can be adjusted in three places. A Hinge Plate Down Right B Door Alignment Left C Hinge ARM Back Forward Please use QR code to view a short video on how to adjust the hinges and align the door.
-
Page 13: Cleaning Advice
Please note, you may have difficulty Once doors are aligned, use aligning the doors if the floor is uneven. extra screws to strengthen Please ensure the cabinet is as level as the hinge, these holes are possible. not pre-drilled CLEANING ADVICE: To avoid scratching the painted and glass surfaces, clean only with a non abrasive cleaner. - Page 14 Wall Fixing Installation Instructions: Textile strap Step 1 Place your product in the final position. Mark the wall with a pencil where corresponding hole will be drilled into wall. Check for hidden gas and water pipes and / or electrical wiring. Drill holes and fit an appropriate wall plug (not supplied) for your wall type.
- Page 15 Disassembly Instructions Gently insert Disassembly rod ‘M’ in to the triangle shown in the diagram as ‘KEY’ . Once all the way in, the panels will come apart. Due to the click system, the panels may need a gently ‘nudge or tap ’ to release them. Insert rod ‘M’...
- Page 16 Finish - Remove all visible stickers when assembly is fully completed. CLEANING ADVICE: To avoid scratching the surfaces, clean only with a non abrasive cleaner. NOTES ON SETTING UP WIFI The LEDS lights only work on 2.4 GHz, they will not work on 5.0 GHz Most homes are 2.4 GHz or operate a dual function.
- Page 17 Pairing mode Re-setting pairing mode Re-setting AP mode AP mode Setting up Frank Olsen app & Help in setting up Intelligent Eye SMART speaker control Simply hold the camera on a smartphone over the QR code above to go to...
Need help?
Do you have a question about the LYRA TV CABINET and is the answer not in the manual?
Questions and answers