OJ Electronics Microline OCD4-1999 Manual
6 event clock thermostat
Hide thumbs
Also See for Microline OCD4-1999:
- Instructions manual (8 pages) ,
- User manual (17 pages) ,
- Instructions (4 pages)
Advertisement
Available languages
Available languages
6 Event Clock Thermostat
An "all-in-one" clock thermostat for electric
underfloor heating control where optimum
comfort temperature and minimum energy
consumption are required.
• The thinnest clock thermostat on the
market, only 20 mm, making it easy for the
installer.
• Easy animated menu navigation and
programming in 8 different languages. The
programming is now child's play, ensuring
the fastest and easiest set-up.
• Set and forget! Adaptive control
ensuring comfort temperature at the
required time.
• Compatible with existing floor sensors,
making it the best thermostat for
renovation purposes.
T H E R M O S T A T S F O R C O M F O R T H E A T I N G
PRODUCT PROGRAMME
TYPE
PRODUCT
OCD4-1999
All in one - Clock thermostat with built-in room sensor
and floor limit sensor.
The ideal service thermostat.
OCC4-1991
Clock thermostat incl. floor sensor 3m.
OCC4-1999
Clock thermostat with built-in room sensor.
Thermostat control
Electronic thermostat for control of temperature by means
of a sensor placed either externally in the floor or built into
the thermostat. OCD4 can also operate in regulator mode
(option). This is useful for renovation purposes where it is
not possible to use a floor sensor.
Easy read-out of energy consumption
Total switch-on time in percent and calculated cost can be
read out for the last 2 days, 30 days or 365 days. Overall
energy consumption can thus be monitored.
Built-in clock - calendar with power backup
Comes with built-in 4- or 6-event program for automatic
comfort and setback temperature. The clock and calendar
have built-in battery backup, so the user never has to care
about setting the clock after power interruption.
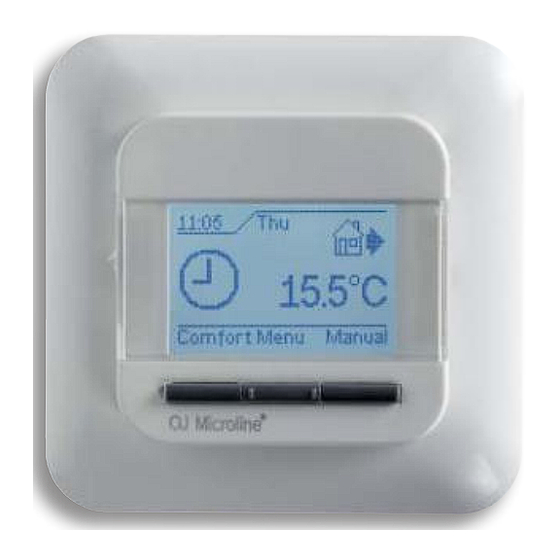
Graphical display
Unique user interface with new animated graphical menus
and button based navigation for easy programming and
readout of data.
© 2012 OJ Electronics A/S
FH 3 : 1.4.1 : 10.12
®
OJ Microline
OCD4-1999
Intelligent Control
Maximum comfort with
low energy consumption
Save up to 36% CO
2
Advertisement
Table of Contents

Related Manuals for OJ Electronics Microline OCD4-1999


Summary of Contents for OJ Electronics Microline OCD4-1999
- Page 1 Graphical display Unique user interface with new animated graphical menus and button based navigation for easy programming and readout of data. © 2012 OJ Electronics A/S...
- Page 2 Manual mode The scheduled event program can be cancelled, e.g. during holidays, and the temperature set for frost protection purposes instead, e.g. to 5 °C. The new setpoint will remain active until manual mode is cancelled. © 2012 OJ Electronics A/S...
- Page 3 Term. 5-6: External floor sensor Der Bodenfühler ist mit einem Kleinspannungs- cable must not be used. The switching peaks of Sicherheitskreis (SELV) ausgestattet, womit eine such current supply lines may create interfer- Anbringung möglichst nahe an der Fußbode- © 2012 OJ Electronics A/S...
- Page 4 TER. Stäng av strömmen innan du utför några kommer värmesystemet att stängas av. Givaren Fühler lässt sich mit der Widerstandstabelle installations- eller underhållsarbeten på denna kan kontrolleras med hjälp av motståndstabel- (Abb. 5) abgleichen. styrenhet och dess tillhörande komponenter. len (fig. 5). © 2012 OJ Electronics A/S...
- Page 5 La première fois que le thermostat est alimenté, chée avant toutes interventions d’installation ou positionner le bouton à glissière sur la position d’entretien de cet appareil et ses composants. « I ». La langue, l’heure et la date doivent être Cet appareil de contrôle et ses composants réglées en utilisant les boutons : © 2012 OJ Electronics A/S...
- Page 6 Relé de salida ......... Contacto de bels van de vloerverwarming leveren, mogen activación - SPST - NO niet worden gebruikt. De schakelpieken van © 2012 OJ Electronics A/S...
- Page 7 Aby uniknąć ryzyka zetknięcia się luźnych można sprawdzać, posługując się tabelą opor- ności (rys. 5). overeenkomstig de voor de afvalverwerking przewodów stałej instalacji z listwą zaciskową geldende nationale voorschriften te verwijderen. czujnika temperatury podłogi, muszą one być © 2012 OJ Electronics A/S...
- Page 8 Термостат рассчитан на монтаж впотай в OCC4-1999 Termostat s hodinami se zabu- Při prvním připojení termostatu, posuňte стенной коробке. Можно приобрести кре- dovaným pokojovým čidlem posuvný spínač do polohy „I“ (zapnuto) Pomocí пежное основание для наружного монтажа. © 2012 OJ Electronics A/S...
- Page 9 1. Переместите кнопку питания вниз в по- Плавкий предохранитель ......16 А у монтажній трубі з діелектричного матеріа- ложение выключения «0». Встроенный выключатель .. 2-полюсный, 16 A лу, закладеної в підлогу (мал. 3). Кінець цієї © 2012 OJ Electronics A/S...
- Page 10 Тел.: +45 73 12 13 14 · Факс: +45 73 12 13 13 Якщо датчик від’єднується або трапляється oj@oj.dk · www.oj.dk Temp.(˚C) Value (ohm) його коротке замикання, система обігріву 64000 38000 23300 14800 9700 The trademark is registered and belongs to OJ Electronics A/S · © 2012 OJ Electronics A/S...
- Page 11 Temperature scale ..........3 Language .............. 3 Factory reset ............4 Exit Factory reset Information ............4 Back..............4 Exit ................ 4 Information Error messages ............4 Factory settings ............4 Preset schedule ............ 4 Back Exit © 2014 OJ Electronics A/S...
-
Page 12: Event Settings
• Time and date Auto mode • Child lock Select Auto if you want the temperature to be controlled automa- • Display settings tically via the 4-event schedule. • 4-event schedule • Energy monitor © 2014 OJ Electronics A/S... -
Page 13: Engineer Settings
• Heating active: Backlighting comes on when heat is called for by The value must be in watt (W). Press OK. the thermostat. Leave the menu by pressing Exit. Select the desired backlighting setting and confirm with OK. © 2014 OJ Electronics A/S... -
Page 14: Factory Settings
E0: Internal failure. The thermostat is defective. Replace thermostat. E1: Internal sensor defective or short-circuited. E2: External sensor defective or short-circuited. E5: Internal overheating. Inspect the installation. The trademark is registered and belongs to OJ Electronics A/S · © 2014 OJ Electronics A/S... - Page 15 Språk ............. 8 Fabriksåterställning ........8 Avsluta Fabriksåterst. Information ............ 8 Tillbaka ............8 Avsluta ............8 Information Felmeddelanden ..........8 Fabriksinställningar ......... 8 Förinställd plan ..........8 Tillbaka Avsluta © 2014 OJ Electronics A/S © 2014 OJ Electronics A/S...
- Page 16 I menyn för användarinställningar kan du Använd. inställ. ändra följande parametrar: Autoläge • Tid och datum Välj Auto om du vill att temperaturen ska styras automatiskt • Barnspärr enligt planen med fyra händelser. • Visningsinställningar © 2014 OJ Electronics A/S...
- Page 17 • Värmedrift: Belysningen tänds när termostaten kopplar in värmen. Last: Tryck på OK och ange den anslutna värmelasten. Välj den önskade bakgrundsbelysningsfunktionen och bekräfta Värdet måste anges i watt (W). Tryck på OK. med OK. Lämna menyn genom att trycka på Avsluta. © 2014 OJ Electronics A/S...
- Page 18 E0: Internt fel. Termostaten är defekt. Byt termostaten. E1: Den interna givaren är defekt eller kortsluten. E2: Den yttre givaren är defekt eller kortsluten. E5: Intern överhettning. Kontrollera installationen. Varumärket er registrerat och tillhör OJ Electronics A/S · © 2014 OJ Electronics A/S...
- Page 19 Takaisin Kieli Näytön valaistus ......... 11 Kieli .............. 12 Tehdasnollaus ..........12 Lopeta Tehdasnollaus Tiedot ............12 Takaisin ............12 Lopeta ............12 Tiedot Virheviestit ............. 12 Tehdasasetukset..........12 Esiasetettu aikataulu ........12 Takaisin Lopeta © 2014 OJ Electronics A/S...
- Page 20 Käyttäjän asetukset -valikossa voit muuttaa Käyttäjän asetukset Termostaatissa on kolme erilaista lämpötilasäätöä: seuraavia kohtia: • Aika ja pvm Automaattitila • Lapsilukko Valitse Auto, jos haluat, että lämpötilaa säädellään automaatti- • Näyttöasetukset sesti 4-vaiheaikataululla. • 4-vaiheaikataulu • Energiavalvonta © 2014 OJ Electronics A/S...
- Page 21 • Päällä: Taustavalaistus on jatkuvasti päällä. Hinta/yksikkö: Paina OK ja aseta sähkön nykyinen hinta. • Lämmitys otettu käyttöön: Taustavalaistus otetaan käyttöön, kun Hinta on ilmoitettava kilowattituntia kohden. termostaatti alkaa lämmittää. Paina OK. Valitse haluamasi taustavalaistusasetus ja vahvista painamalla OK. © 2014 OJ Electronics A/S...
- Page 22 E5: Sisäinen ylikuumeneminen. Tarkista asennus. OJ ELECTRONICS A/S Stenager 13B · DK-6400 Sønderborg Tel: +45 73 12 13 14 · Fax: +45 73 12 13 13 oj@ojelectronics.com · www.ojelectronics.com OJ on OJ Electronics A/S:n rekisteröity tavaramerkki· © 2014 OJ Electronics A/S...
Need help?
Do you have a question about the Microline OCD4-1999 and is the answer not in the manual?
Questions and answers