Table of Contents
Advertisement
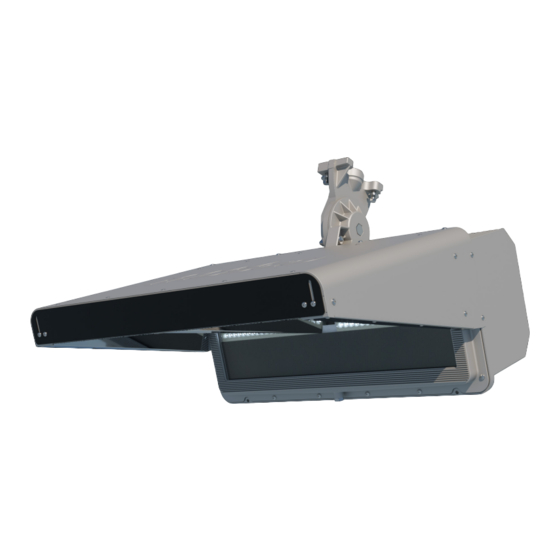
Diode Light Source—LED
Installation Instructions: Light-Structure System™
Fast, trouble-free installation with
5 Easy Pieces
approach to system design
™
Poletop Luminaire Assembly
5
Wire Harness
4
Electrical Components Enclosure
3
Galvanized Steel Pole
2
Precast Concrete Base
1
©2015, 2023 Musco Sports Lighting, LLC · LED ECE 9, ECE 11 · M-1917-en04-10
5
4
3
2
1
L
Advertisement
Table of Contents

Related Manuals for Musco Sports Lighting Light-Structure System TLC-LED-350

Summary of Contents for Musco Sports Lighting Light-Structure System TLC-LED-350
- Page 1 Fast, trouble-free installation with 5 Easy Pieces approach to system design ™ Poletop Luminaire Assembly Wire Harness Electrical Components Enclosure Galvanized Steel Pole Precast Concrete Base ©2015, 2023 Musco Sports Lighting, LLC · LED ECE 9, ECE 11 · M-1917-en04-10...
-
Page 2: Table Of Contents
Auxiliary Bracket ..................D Platform, Climbing Steps, and Safety Cable ........E Climbing Steps and Safety Cable............F External Lightning Grounding ..............J Baseplate Pole .....................K ©2015, 2023 Musco Sports Lighting, LLC · LED ECE 9, ECE 11 · M-1917-en04-10 www.musco.com · lighting@musco.com... -
Page 3: Before You Begin Safety Information
2. Represents geometric area only. Your structures have been designed using Effective Projected Area (EPA). Install luminaires outside arm’s reach of unauthorized personnel. ©2015, 2023 Musco Sports Lighting, LLC · LED ECE 9, ECE 11 · M-1917-en04-10 www.musco.com · lighting@musco.com... -
Page 4: About These Instructions
The contact Musco symbol appears in special situations where you may need to contact Musco for further The recycle symbol identifies recyclable materials. information. ©2015, 2023 Musco Sports Lighting, LLC · LED ECE 9, ECE 11 · M-1917-en04-10 www.musco.com · lighting@musco.com... -
Page 5: Standard Tools/Supplies Checklist
❏ Stamped Foundation and Pole Design ❏ Control System Summary If you do not have all of these documents, contact your local Musco representative. ©2015, 2023 Musco Sports Lighting, LLC · LED ECE 9, ECE 11 · M-1917-en04-10 www.musco.com · lighting@musco.com... -
Page 6: Electrical System Requirements
• Provide and install trenching, supply wiring, and conduit. • Complete all steps from Connecting to Supply Wiring section. • Test complete lighting system. ©2015, 2023 Musco Sports Lighting, LLC · LED ECE 9, ECE 11 · M-1917-en04-10 www.musco.com · lighting@musco.com... -
Page 7: Components Matching And Labeling
Galvanized steel pole section(s) Poletop luminaire assembly Wire harness Electrical components enclosure [MKT-2991-6] MKT-2991-6 Light Structure LED-1200 with handle Components Matching and Labeling 10 March 2023 ©2015, 2023 Musco Sports Lighting, LLC · LED ECE 9, ECE 11 · M-1917-en04-10 www.musco.com · lighting@musco.com... -
Page 8: Documents We Provide
Some poles on a project may require a stamped Foundation and Pole Design. This stamped drawing provides construction details of the alternative design. This document supersedes all other foundation information. ©2015, 2023 Musco Sports Lighting, LLC · LED ECE 9, ECE 11 · M-1917-en04-10 www.musco.com · lighting@musco.com... -
Page 9: Unloading Instructions
Save wooden shipping blocks to use during pole assembly. Please recycle. Luminaires, wire harnesses, and other components are shipped in recyclable cardboard packaging. ©2015, 2023 Musco Sports Lighting, LLC · LED ECE 9, ECE 11 · M-1917-en04-10 www.musco.com · lighting@musco.com... -
Page 10: Precast Concrete Base
Field Aiming Diagram. Note: Use only project-specific foundation designs as detailed on Musco Foundation and Pole Assembly Drawing or stamped Foundation and Pole Design. ©2015, 2023 Musco Sports Lighting, LLC · LED ECE 9, ECE 11 · M-1917-en04-10 www.musco.com · lighting@musco.com... - Page 11 Backfill with concrete per Musco Foundation and Pole Assembly Drawing or stamped Foundation and Pole Design. Wedges (3) ©2015, 2023 Musco Sports Lighting, LLC · LED ECE 9, ECE 11 · M-1917-en04-10 www.musco.com · lighting@musco.com...
- Page 12 Foundation and Pole Design requires concrete to finished grade. Insulated equipment grounding conductor Supply wiring Compacted fill unless backfill to grade with To contactor concrete Concrete ©2015, 2023 Musco Sports Lighting, LLC · LED ECE 9, ECE 11 · M-1917-en04-10 www.musco.com · lighting@musco.com...
-
Page 13: Galvanized Steel Pole And Poletop Luminaire Assembly Overview
Ensure minimum overlap per Musco Foundation and Pole Assembly Pole ID Drawing. Repeat for all sections. Come-along 1½ ton Weldmark ©2015, 2023 Musco Sports Lighting, LLC · LED ECE 9, ECE 11 · M-1917-en04-10 www.musco.com · lighting@musco.com... - Page 14 Proceed to Electrical Components Enclosure section. See Installation Instructions: Platform, Climbing Steps, and Safety Cable, if your project includes these items. Welded crossarm configuration (reference) ©2015, 2023 Musco Sports Lighting, LLC · LED ECE 9, ECE 11 · M-1917-en04-10 www.musco.com · lighting@musco.com...
-
Page 15: Bolt-On Crossarms
Route wire harness for crossarms 4–7 to handhole below crossarm position 5. Position crossarm as shown below. Ensure crossarm wire harness is not pinched between mating plates. ©2015, 2023 Musco Sports Lighting, LLC · LED ECE 9, ECE 11 · M-1917-en04-10 www.musco.com · lighting@musco.com... - Page 16 Using supplied breaker bar, 11/16 in socket, extension, and wrench, tighten each nut until orange extrusion appears from at least three bumps. ©2015, 2023 Musco Sports Lighting, LLC · LED ECE 9, ECE 11 · M-1917-en04-10 www.musco.com · lighting@musco.com...
- Page 17 60 in (1524 mm). Always install longer bars to (34 N•m) upper three crossarms. 9 16 See Installation Instructions: Platform, Climbing Steps, and Safety Cable, if your project includes these items. ©2015, 2023 Musco Sports Lighting, LLC · LED ECE 9, ECE 11 · M-1917-en04-10 www.musco.com · lighting@musco.com...
-
Page 18: Electrical Components Enclosure
Electrical components enclosure may weigh up to 65 lb (30 kg). Lift carefully with two people to avoid injury. Wire access hole Wire access hole with captive screws ©2015, 2023 Musco Sports Lighting, LLC · LED ECE 9, ECE 11 · M-1917-en04-10 www.musco.com · lighting@musco.com MKT-283... - Page 19 (green/yellow) Caution Risk of injury or property damage Enclosure harness Pole may move without warning. Properly support pole before attaching luminaires. ©2015, 2023 Musco Sports Lighting, LLC · LED ECE 9, ECE 11 · M-1917-en04-10 www.musco.com · lighting@musco.com...
- Page 20 Circuit A Circuit A Circuit B [MKT-4187-4_A] Connecting Controllers Termination Termination Plug Plug Controller Controller Communication Module Circuit B Circuit A Circuit A ©2015, 2023 Musco Sports Lighting, LLC · LED ECE 9, ECE 11 · M-1917-en04-10 [MKT-4187-3_A] www.musco.com · lighting@musco.com...
- Page 21 +30 Vdc Emergency application using AC power monitoring monitoring via RS-485 RS-485 termination Emergency Emergency board power power normal power source ©2015, 2023 Musco Sports Lighting, LLC · LED ECE 9, ECE 11 · M-1917-en04-10 www.musco.com · lighting@musco.com...
- Page 22 Install the coaxial cable on the wireless radio located in the electrical components enclosure. Wireless radio [MKT-4594-1] ©2015, 2023 Musco Sports Lighting, LLC · LED ECE 9, ECE 11 · M-1917-en04-10 www.musco.com · lighting@musco.com...
-
Page 23: Wire Harness Overview
Replace handhole covers and polecap. protective sleeve Quick connectors (match luminaire ID’s) Electrical components enclosure Handhole ⁄ in MKT-3018-1_E ©2015, 2023 Musco Sports Lighting, LLC · LED ECE 9, ECE 11 · M-1917-en04-10 TLC-LED-1150, www.musco.com · lighting@musco.com 16 August 201... -
Page 24: Luminaire Attachment
Luminaire light source is not replaceable; when light source reaches end of life entire luminaire must be replaced. Contact your local Musco representative for [MKT-5071-1] maintenance or replacement. [MKT-5070-1] Recta ©2015, 2023 Musco Sports Lighting, LLC · LED ECE 9, ECE 11 · M-1917-en04-10 www.musco.com · lighting@musco.com... -
Page 25: Assembly Procedure
Pole may move without warning. Properly support pole before attaching luminaires. Some luminaires may attach to auxiliary brackets, refer to Installation Instructions: Auxiliary Bracket. Pivot Insert ©2015, 2023 Musco Sports Lighting, LLC · LED ECE 9, ECE 11 · M-1917-en04-10 www.musco.com · lighting@musco.com... - Page 26 Lift carefully with two people. Do not use visor to lift. Use handle if provided. Temporary protective cover Insert Base of knuckle Mounting plate ©2015, 2023 Musco Sports Lighting, LLC · LED ECE 9, ECE 11 · M-1917-en04-10 www.musco.com · lighting@musco.com...
- Page 27 Note: Attaching auxiliary brackets before setting pole may interfere with slings. Attaching auxiliary brackets after pole is set may be preferable depending on height of auxiliary bracket. ©2015, 2023 Musco Sports Lighting, LLC · LED ECE 9, ECE 11 · M-1917-en04-10 www.musco.com · lighting@musco.com Knuck...
-
Page 28: Pole Setting And Alignment
Rotator bar can swing with force as pole is lifted. Do not install until you are ready to lower pole onto base (step 8). ©2015, 2023 Musco Sports Lighting, LLC · LED ECE 9, ECE 11 · M-1917-en04-10 www.musco.com · lighting@musco.com... - Page 29 All slings must be rated for complete pole weight. Cradle point must be above pole assembly center of gravity. Refer to Musco Foundation and Pole Assembly Drawing. ©2015, 2023 Musco Sports Lighting, LLC · LED ECE 9, ECE 11 · M-1917-en04-10 www.musco.com · lighting@musco.com...
- Page 30 (step 9). Pole should rotate with reasonable force applied to bar, but not freely. Warning Pinching hazard Keep hands clear when setting pole on concrete base. ©2015, 2023 Musco Sports Lighting, LLC · LED ECE 9, ECE 11 · M-1917-en04-10 www.musco.com · lighting@musco.com...
- Page 31 <1.5 mrad x 1 rad. Using alignment beam in a manner other than as described here may result in hazardous exposure. Do not modify, dismantle, or attempt to repair. ©2015, 2023 Musco Sports Lighting, LLC · LED ECE 9, ECE 11 · M-1917-en04-10 www.musco.com · lighting@musco.com...
- Page 32 Concrete base If pole has climbing steps and safety cable, see Steel bar Installation Instructions: Climbing Steps and Safety Cable for cable tensioning instructions. ©2015, 2023 Musco Sports Lighting, LLC · LED ECE 9, ECE 11 · M-1917-en04-10 www.musco.com · lighting@musco.com...
-
Page 33: Overview
Enclosure Enclosure stack 1 stack 2 Tighten lugs using 3/16 in hex key. Bonding 35 in•lb jumper (3.9 N•m) Steel pole ©2015, 2023 Musco Sports Lighting, LLC · LED ECE 9, ECE 11 · M-1917-en04-10 www.musco.com · lighting@musco.com LED-Connect... - Page 34 14 – 2/0 AWG (2.5 – 50 mm 120 in•lb (13.6 N•m) *Stranded cable, single conductor, copper only **Stranded cable, single conductor, copper or aluminum LED-Undergrou ©2015, 2023 Musco Sports Lighting, LLC · LED ECE 9, ECE 11 · M-1917-en04-10 www.musco.com · lighting@musco.com...
- Page 35 A, B, C, or neutral, if present, and terminal green wire to ground bar. (if present) Emergency lighting Normal lighting enclosure stack 1 enclosure stack 1 Steel pole ©2015, 2023 Musco Sports Lighting, LLC · LED ECE 9, ECE 11 · M-1917-en04-10 www.musco.com · lighting@musco.com...
- Page 36 Musco Light-Structure System™ product referenced or shown may be protected by one or w ww .m us c o . c o m more of the patents listed here: www.musco.com/patents/lss_m-1917.pdf. ©2015, 2023 Musco Sports Lighting, LLC · LED ECE 9, ECE 11 · M-1917-en04-10...
Need help?
Do you have a question about the Light-Structure System TLC-LED-350 and is the answer not in the manual?
Questions and answers