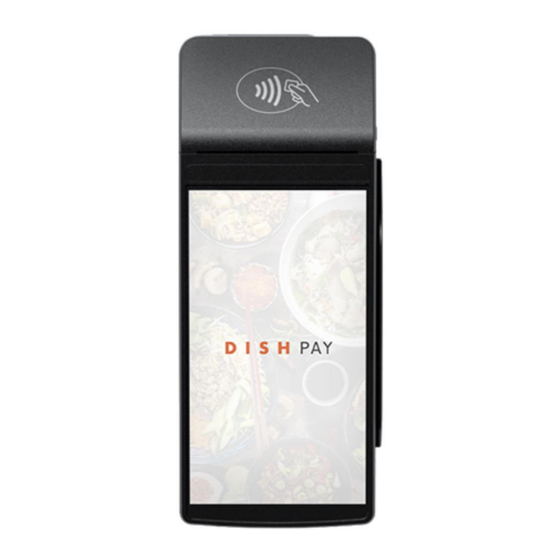
Summary of Contents for Metro DataVac DISH PAY S1F2
- Page 1 PAYMENT TERMINAL S1F2 SELF-INSTALLATION USER MANUAL VERSION: EU - 001 DATE: 2024 – 02 – 01 DISH DIGITAL SOLUTIONS GMBH...
- Page 2 S1F2 – SELF-INSTALLATION USER MANUAL (Version: 2024-02-01-EU-001) COPYRIGHT © DISH DIGITAL SOLUTIONS GMBH 2024. ALL RIGHTS RESERVED. No part of this document may be reproduced or transmitted in any form or by any means without prior written consent of DISH Digital Solutions GmbH (hereinafter referred to as “DISH”). TRADEMARKS AND PERMISSIONS are the registered trademarks of DISH Digital Solutions GmbH.
-
Page 3: Table Of Contents
S1F2 – SELF-INSTALLATION USER MANUAL (Version: 2024-02-01-EU-001) TABLE OF CONTENTS GET STARTED ................................ 5 Step 1: Inspect the terminal ............................6 1.1 Verify the box containing the terminal ............................6 1.2 Check the serial number ..................................6 1.3 Verify the content of your box ................................7 Step 2: Insert the receipt paper roll .......................... - Page 4 S1F2 – SELF-INSTALLATION USER MANUAL (Version: 2024-02-01-EU-001) S1F2 Mobile Payment Terminal An all-in-one Android device with printing power Note: This user manual only applies to customers who have purchased DISH Pay as a standalone product and do not use it with DISH POS or DISH POS Lite. Copyright ©...
-
Page 5: Get Started
S1F2 – SELF-INSTALLATION USER MANUAL (Version: 2024-02-01-EU-001) GET STARTED These are the steps to get your new S1F2 Payment Terminal up and running. Inspect the terminal. Insert the receipt paper roll. Turn on the terminal by connecting it to a power source. During •... -
Page 6: Step 1: Inspect The Terminal
S1F2 – SELF-INSTALLATION USER MANUAL (Version: 2024-02-01-EU-001) S T E P 1 : IN S P E C T TH E T ER M IN A L Since payment terminals process sensitive card data, it is crucial to verify that the terminal you received is the correct one and has not been tampered with. -
Page 7: Verify The Content Of Your Box
S1F2 – SELF-INSTALLATION USER MANUAL (Version: 2024-02-01-EU-001) 1.3 VERIFY THE CONTENT OF YOUR BOX Your S1F2 set consists of the following components: S1F2 Payment Terminal • Power supply • SIM card • Receipt paper roll 57 x 40 mm (Length x Width) •... -
Page 8: Step 2: Insert The Receipt Paper Roll
S1F2 – SELF-INSTALLATION USER MANUAL (Version: 2024-02-01-EU-001) S T E P 2 : IN S E R T TH E R E CE IP T P AP E R R OL L Pull up the latch of the paper compartment and swing the cover downwards. Insert the paper roll by placing it into the terminal and ensure that the paper sticks out slightly. -
Page 9: Step 3: Install The Terminal
S1F2 – SELF-INSTALLATION USER MANUAL (Version: 2024-02-01-EU-001) S T E P 3 : I N S T A L L T H E T E R M IN A L If you turn on the payment terminal for the first time or after it was off for a long time, it may make a maintenance call to synchronize the configuration and update the software. -
Page 10: Payment Terminal Menu
S1F2 – SELF-INSTALLATION USER MANUAL (Version: 2024-02-01-EU-001) 3.2 PAYMENT TERMINAL MENU Check out your payment terminal menu, which includes options related to payments, and a configuration menu with relevant settings. Menu/Button Description Passcode Device info: view information about the Payment •... -
Page 11: Connect To Your Network
S1F2 – SELF-INSTALLATION USER MANUAL (Version: 2024-02-01-EU-001) 3.3 CONNECT TO YOUR NETWORK Connect your device to your local network via Wi-Fi with the following instruction: After selecting your language on the Welcome screen, select the arrow button: • On the Setup Wi-Fi screen, select the + sign. •... -
Page 12: Step 4: Optional Actions
S1F2 – SELF-INSTALLATION USER MANUAL (Version: 2024-02-01-EU-001) S T E P 4 : O P TI O N AL A C TI O N S 4.1 VIEW, PRINT, AND RESET TOTALS Your S1F2 Payment Terminal can generate a Totals report, providing an overview of the total amounts for sales, refunds, gratuities (tips), and cancellations processed by the terminal since the last report reset. -
Page 13: Dashboard
S1F2 – SELF-INSTALLATION USER MANUAL (Version: 2024-02-01-EU-001) 4.3 DASHBOARD Accepting transactions is a crucial aspect of your business, and monitoring your card turnover is equally important. Stay informed by connecting to your Dashboard, where you can track transactions, payouts, and other account- related information. -
Page 14: Device Info
S1F2 – SELF-INSTALLATION USER MANUAL (Version: 2024-02-01-EU-001) 4.4 DEVICE INFO To view information about the terminal: Select Settings and then Device info. • A screen similar to the one shown here appears, with: Model and serial number of the terminal. •... -
Page 15: Step 5: Turn Off The Terminal
S1F2 – SELF-INSTALLATION USER MANUAL (Version: 2024-02-01-EU-001) S T E P 5 : T UR N O F F T H E T E R M IN A L To turn off the terminal: Press and hold the power button until a dialog box appears. You can find the power button on the left side of the terminal.


Need help?
Do you have a question about the DISH PAY S1F2 and is the answer not in the manual?
Questions and answers