Table of Contents
Advertisement
Quick Links
Advertisement
Chapters
Table of Contents

Related Manuals for Xiaomi Redmi 12 5G


Summary of Contents for Xiaomi Redmi 12 5G
- Page 1 Redmi 12 5G User Guide...
-
Page 3: Table Of Contents
About the User Guide............3 Getting Started Parts & Functions.............. 6 eSIM..................7 SIM Card................10 SD Card................11 Charging Battery.............. 14 Redmi 12 5G Power On/Off..............15 User Guide Contents Making Initial Settings............ 15 Using a Google Account........... 18 Unlocking Screen...............22 Basic Operations Basic Operation..............24... - Page 4 Handset Settings Handset Settings.............. 70 About Phone (Handset Information) Settings....71 Data Usage Settings............71 Lock Screen Settings............72 Display and Brightness Settings........73 Sound & Vibration Settings..........74 Fingerprints, Face Data, and Screen Lock Settings..74 Battery & Performance Settings........76 Additional Settings............77 Other Settings..............
-
Page 5: About The User Guide
Introduction About the User Guide In the User Guide, most operation descriptions are based on handset at time of purchase. Unless noted otherwise, descriptions are for Home Screen. Some operation descriptions may be simplified. Before Using This Product Read "Quick Start" and "Safety Precautions"... -
Page 7: Getting Started
Getting Started Parts & Functions.............. 6 eSIM..................7 SIM Card................10 SD Card................11 Charging Battery.............. 14 Power On/Off..............15 Making Initial Settings............ 15 Using a Google Account........... 18 Unlocking Screen...............22... -
Page 8: Parts & Functions
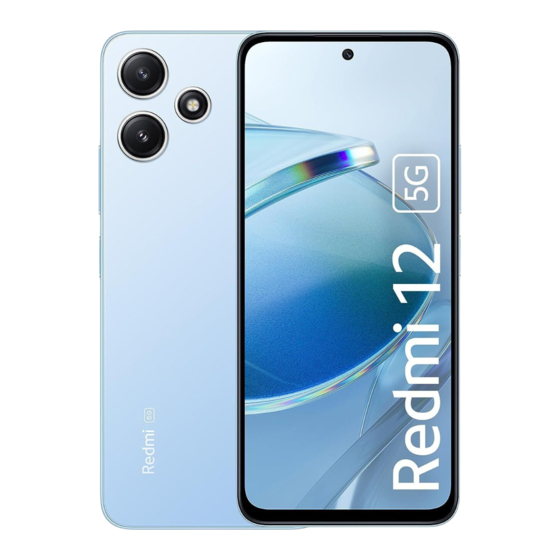
Parts & Functions Handset (Back/Side) Handset (Front) Part Description Part Description Infrared Not functional on this model. Earpiece/ Hear the other party's voice, sound of etc. Sensor here. Speaker Flash/Light Use as a light when taking photos, etc. Front Use to shoot photos or videos of yourself. Rear Camera Capture photos and videos. -
Page 9: Esim
eSIM Set up an eSIM eSIM is a type of SIM that is embedded in a device. If your device supports an eSIM, you only need to set up a service plan that you purchased with eSIM and start using it. You don't need SIM Card. - Page 10 Enable or disable eSIM Close In Home Screen, (Settings) Mobile networks Your service plan with eSIM is downloaded. ・ Tap Settings to make eSIM settings. Continue by following onscreen instructions. Manage eSIM Disable Disable You can set enabling or disabling eSIM. ・To enable eSIM, Tap eSIM.
- Page 11 Erase your service plan with eSIM Delete In Home Screen, (Settings) Mobile networks Your service plan with eSIM is erased. Restart your service plan with eSIM after erasing it Manage eSIM Your service plan with eSIM is not terminated by erasing it.
-
Page 12: Sim Card
SIM Card Pull out SD Card/SIM Card Tray straight SIM Card is an IC card containing phone number and other customer information. Handling SIM Card For SIM Card handling, see following items. Place SIM Card in SD Card/SIM Card Tray IC chip For SIM Card handling, see below Website. -
Page 13: Sd Card
SD Card Removing SIM Card Handset supports SD Cards up to 1TB. Some SD Cards may not Always power off handset beforehand. operate properly. When using a new SD card for the first time, always format it on handset. Insert SIM Removal Pin (complimentary sample) into Tray Removal Hole straight SD Card Cautions Data... - Page 14 Formatting SD Card Place SD Card in SD Card/SIM Card Tray In Home Screen, (Settings) ・Place gently, noting orientation of SD Card (notch/IC (gold) chip facing down). ・Make sure SD Card is in SD Card/SIM Card Tray securely. Insert SD Card/SIM Card Tray in SIM Card Slot straight About phone SD Card is inserted.
- Page 15 Unmounting SD Card Format SD card In Home Screen, (Settings) Done About phone All data on SD Card is erased. Formatting SD Card Cautions Storage Observe the following when formatting SD Card. ・Formatting erases all data on SD Card. Carefully check any SD Card that was used on another device before formatting.
-
Page 16: Charging Battery
Charging Battery Removing SD Card Always power off handset beforehand. Charging Cautions Never connect USB Type-C plug while handset or peripheral Insert SIM Removal Pin (complimentary sample) into Tray equipment is wet. Removal Hole straight Charging with AC Charger AC Charger is optional. Be sure to use an AC Charger specified by SoftBank. -
Page 17: Power On/Off
Power On/Off Making Initial Settings When powering on the first time, an initial settings wizard Powering On appears for optionally making Wi-Fi, Google™ account, and other settings. Follow onscreen instructions to set items. Initial settings described here are based on handset with SIM Card installed. - Page 18 Follow onscreen instructions to set Wi-Fi Check the terms of use and privacy policy, then I've read and agree to the User Agreement and Privacy Policy. Don't copy ・ Tap Next to copy data from another mobile with Google account settings. Follow onscreen instructions. ・...
- Page 19 Follow onscreen instructions to set unlocking using screen I agree lock, fingerprint, or face unlock Set/check Google Services Continue ・To finish initial settings later and receive a reminder, Tap Leave & get reminder Accept Follow onscreen instructions to set Google Assistant™ Only screen lock Fingerprint Face unlock...
-
Page 20: Using A Google Account
Using a Google Account Skip Use a Google account and get more convenience with Google ・ After Tapping Add a card , follow onscreen instructions to services. A Google account is required to use some services or fully use some applications. save card information. - Page 21 Add account Enter first name Enter last name Next Google Set date of birth and gender Next Window for logging in to a Google account opens. Select Gmail address Next Create account ・ To create a Gmail address, Create your own Gmail address Enter username (mail address) Next...
- Page 22 Yes, I'm in Accept ・ Not to add a phone number, Tap Skip Account is created. ・To add a phone number only for security protection, Tap More options . Continue by following onscreen instructions. ・If confirmation appears, follow onscreen instructions. Next Check the privacy policy and terms of usage, then I agree...
- Page 23 Logging In with a Google Account Google In Home Screen, (Settings) Window for logging in to a Google account opens. Enter username (mail address or phone number) Next Additional settings Enter password Next Accounts & sync Follow onscreen instructions Add account You are signed in to your Google Account.
-
Page 24: Unlocking Screen
Unlocking Screen Unlocking Screen Screen Lock While screen is locked, press Power Key After a period of inactivity, Display turns off to save battery power (Screen lock active). Screen lock prevents accidental Touchscreen operation. Lock Screen appears. Swipe/Flick lock screen up ・Press Power Key while Display is on to lock screen manually. - Page 25 Basic Operations Basic Operation..............24 Using Touchscreen............24 Silent Mode............... 25 Airplane Mode..............26 Text Entry.................26 Updating Software............27...
-
Page 26: Basic Operation
Basic Operation Using Touchscreen Handset uses a touchscreen-type Display. Operate with your Selecting Options and Navigating fingers on Display. Screens Tap items, icons, onscreen keys, etc. to open assigned items. Contact Display lightly and briefly. ・ To return to the previous screen, Tap Touch &... -
Page 27: Silent Mode
Silent Mode Pinch/Spread Mute ringtones and other handset sounds to avoid disturbing Contact Display lightly, then close/widen fingers. others around you. Silent Mode Cautions Camera shutter, video start/stop tones, Alarm, video/ music, etc. sound even in Silent mode. Using Silent Mode Press Volume Key Volume adjustment bar appears. -
Page 28: Airplane Mode
Airplane Mode Text Entry Disable all functions that emit signals. Handset remains Keyboards powered on. Enter text with onscreen QWERTY keyboard by Tapping each Using Airplane Mode character individually, or by using Glide typing feature and sliding finger from character to character (on by default). Touch &... -
Page 29: Updating Software
Signal becoming weak or Battery becoming low during an update may cause an update failure. An update failure may disable handset. If Using Other Functions Other functions cannot be operated during a software update. Updating Software In Home Screen, (Settings) About phone Xiaomi HyperOS... - Page 30 Check for update Follow onscreen instructions Software update starts.
-
Page 31: Handset Interface
Handset Interface Handset Screens............... 30 Status Bar................. 31 Using Notifications Window..........32 Using Control Center............32... -
Page 32: Handset Screens
Handset Screens Navigation Bar Tap icons on Navigation Bar (Display bottom). Tap or Touch & Home Screen Layout Hold icons to operate. Also use gesture action. For details, see "Home Screen." Item Description Item Description (Back) Return to previous screen. Swipe/Flick left side of Status Bar down Tap for Home Screen. -
Page 33: Status Bar
Status Bar Main Status Indicators Status Bar appears at the top of Display. Notification Status Indicators appearing in Status Bar include the Indicators for new mail, etc. and Status Indicators for handset following. appear here. Indicator Description Status Bar Layout Bluetooth ®... -
Page 34: Using Notifications Window
Using Notifications Window Using Control Center Swipe/Flick left side of Status Bar down to open Notifications Swipe/Flick the right end of Status Bar down for Control Window. Open notifications and check handset status. Center. Tap icons in Control Center to enable/disable functions. - Page 35 Control Center Layout Toggle Wi-Fi on/off Operate music playback Toggle Airplane mode on/off Toggle Bluetooth on/off ® Toggle battery saver on/off Capture screenshot Activate cast Record screen Toggle wallet on/off Activate scanner Toggle Mobile Data on/off Adjust screen brightness Adjust media volume Enter/exit Silent mode Turn flashlight on/off Toggle dark mode/light mode...
-
Page 37: Phone
Phone Placing/Answering Calls........... 36 Optional Services..............38 Phone Number..............44 Using Contacts..............44... -
Page 38: Placing/Answering Calls
Placing/Answering Calls Placing Calls How to dial directly to make a call and answer a call, as well as options when a call is arriving/during a call are described. In Home Screen, (Phone) Phone Function Emergency Location Report Making emergency calls (110, 119 or 118) automatically reports handset location to corresponding agency (police, etc.). - Page 39 Answering Calls Call Swipe/Flick up when call is arriving Handset dials number. Call begins when other party answers. Call begins. To end call, To end call, Call ends. Call ends. Calling the Emergency Number When the Phone's Screen is Locked Arriving Call Operations In lock screen, Swipe/Flick up EMERGENCY...
-
Page 40: Optional Services
Optional Services In-Call Screen Layout/In-Call Operations Use useful optional services for calling. While in a call, Tap an icon to use these functions. Optional Services The following optional services are available. Service Description Call Divert calls to a preset number when out Forwarding of service area or unable to answer. - Page 41 Using Call Forwarding Voice Mail / Call Forwarding Call Forwarding ON In Home Screen, (Phone) Ring Time Select ring time Settings Calling accounts Telephone Number of Forwarding Destination Enter phone number to forward to Register Call service settings Call service settings open. Confirm Voice Mail / Call Forwarding Call Forwarding is activated.
- Page 42 Using Voicemail Voice Mail / Call Forwarding Voice Mail ON In Home Screen, (Phone) Ring Time Select ring time Settings Calling accounts Confirm Call service settings Voicemail is activated. ・ appears in Status Bar for new message. Dial "1416" then Call service settings open.
- Page 43 Using Call Waiting for "Call Waiting" ( Requires separate subscription. In Home Screen, (Phone) Call Waiting is set. ・When call arrives during another call, tone sounds. Swipe/ Flick up to begin call. Settings Calling accounts Call service settings Call service settings open.
- Page 44 Using Group Calling Using Caller ID Notification Requires separate subscription. In Home Screen, (Phone) During a call, More Add call Settings Calling accounts Enter number Call Advanced settings Caller ID When call connects, Merge Caller ID Network default Hide number Show Group Calling starts.
- Page 45 Using Call Barring Outgoing Call Barring Incoming Call Barring Select Restrict incoming and outgoing calls and SMS to specific outgoing/incoming condition to bar numbers. ・When attempting to place call and SMS while calling is restricted, a message appears. Message may take time to appear in some areas.
-
Page 46: Phone Number
Phone Number Using Contacts Save phone numbers, mail addresses, etc. to Contacts. Checking Your Phone Number Contacts Cautions Information saved in Contacts may be lost or changed if In Home Screen, (Settings) About phone Battery is left uncharged. Accident or malfunction may also cause loss or change to information. - Page 47 Set each item ・ Tap More fields to add a residential address, notes, etc. Save Contact is added. Saving Contacts from Call Window Save a number entered in call window directly to Contacts. In Home Screen, (Phone) Tap dialpad to enter number to save Create new contact Set each...
-
Page 49: Messaging
Messaging Sending Messages............. 48 Using Gmail............... 49... -
Page 50: Sending Messages
Sending Messages Tap destination Sending New Messages In Home Screen, (+Message) Message window opens. ・To send to a phone number/email address not saved in contacts, enter phone number/email address in Enter name and phone number field and create message. Tap message entry field Message Enter message Message is sent. -
Page 51: Using Gmail
Using Gmail Enter recipient/subject/mail text Gmail is Google's webmail service. Use this service to exchange email. Creating/Sending Mail In Home Screen, (Google) (Gmail) Message is sent. Operations when Composing Mail Adding Cc/Bcc In mail composition window, in To field Enter recipient Mail list opens. -
Page 53: Internet
Internet Using Chrome..............52... -
Page 54: Using Chrome
Using Chrome Enter search words or URL Use Chrome simply by entering words to search and URLs. TLS (Transport Layer Security) is a protocol for encrypting sent/received data. While in a screen connected by TLS, data is encrypted to safely send/receive private information, credit card numbers, corporate secrets, etc., and provide protection against online threats (eavesdropping, falsification, impersonation, etc.). - Page 55 Adding Bookmarks Show Web page to add Current Web page is added to Bookmarks. Bookmark Operations Editing Bookmarks In Chrome, Bookmarks Touch & Hold target bookmark Edit items Deleting Bookmarks In Chrome, Bookmarks Touch & Hold target bookmark...
-
Page 57: Camera
Camera Capturing Still Images/Videos......... 56 Viewing Captured Still Images/Videos (Gallery).... 58... -
Page 58: Capturing Still Images/Videos
Capturing Still Images/Videos Aim Camera at subject File Format for Still Images/Videos File Format for Still Images File format for still images is JPEG. File Format for Videos File format for videos is MPEG-4. ・ Tap Display Swipe/Flick Display up/down to adjust Camera Cautions brightness. - Page 59 Capturing Videos In Home Screen, (Camera) Video recording starts. ・Depending on setting, press Volume Key to start/stop video recording. To stop recording, Photo Viewfinder appears. ・If confirmation appears, follow onscreen instructions. Video Video recording stops and video is saved. Video Viewfinder appears. ・Alternatively, Drag shooting mode to left/right for Video Viewfinder.
-
Page 60: Viewing Captured Still Images/Videos (Gallery)
Viewing Captured Still Images/ Videos (Gallery) Tap still image/video Showing Still Images/Videos Show captured or downloaded still images and videos. Supported file formats are as follows. Type File Format JPEG, HEIF, GIF, PNG, BMP, WBMP, WEBP, Still image DNG, CR2, HEIC, ICO, JPE, JPG, RAW MPEG, MPG, MP4, M4V, 3GP, 3GPP, 3G2, Still image/video window opens. -
Page 61: Application Basics
Application Basics Applications...............60 Adding/Deleting Application..........61... -
Page 62: Applications
Applications Setting Applications with Permitted Usage for Each Function Setting Required Permissions for In Home Screen, (Settings) Apps Applications Permissions Permissions Tap function application Allow Don't allow Set the operation of applications when activating for the first time. ・Displayed items may vary depending on function. The type and content of a confirmation differ with the ・If confirmation appears, follow onscreen instructions. -
Page 63: Adding/Deleting Application
Adding/Deleting Application Install Download a variety of applications (free/paid) from Google Play. Change the setting of downloaded applications to enable manual or automatic updates. Log in to your Google account beforehand. Installing Applications Many different kinds of applications can be installed on handset from Google Play (provided by Google LLC). - Page 64 Requesting Refunds Purchasing Paid Applications Refund is possible within a limited time. By requesting a refund, the application is deleted and the charge is In Home Screen, (Play Store) cancelled. A refund request is valid only once per one application. In Google Play, Tap account icon on the top right of screen Manage apps &...
- Page 65 Updating Applications Setting Automatic Updates for Individual Applications In Google Play, Tap account icon on the top right of In Home Screen, (Play Store) screen Manage apps & device Manage application Enable auto update ・Automatic updates are unavailable for some applications. Google Play appears.
-
Page 67: Wi-Fi Bluetooth
Wi-Fi Bluetooth Connecting by Wi-Fi............66 Using Bluetooth Function..........67 ®... -
Page 68: Connecting By Wi-Fi
Connecting by Wi-Fi Tap Wi-Fi network Handset supports Wi-Fi (wireless LAN). Access the Internet via a household Wi-Fi connection environment. Selecting and Connecting to a Wi-Fi Network In Home Screen, (Settings) Enter password Connect Wi-Fi Handset is connected. ・The password, for a household wireless LAN router, is sometimes found on a sticker on the router (WEP, WPA, KEY, etc.). -
Page 69: Using Bluetooth ® Function
Using Bluetooth Function ® Bluetooth Connect to a Bluetooth -capable wireless phone, etc. for calls ® or to a hands-free device such as a headset. Hints Cannot use Bluetooth ® Is handset in Airplane mode? If in Airplane mode, Bluetooth function is disabled. - Page 71 Handset Settings Handset Settings.............. 70 About Phone (Handset Information) Settings....71 Data Usage Settings............71 Lock Screen Settings............72 Display and Brightness Settings........73 Sound & Vibration Settings..........74 Fingerprints, Face Data, and Screen Lock Settings..74 Battery & Performance Settings........76 Additional Settings............77 Other Settings..............
-
Page 72: Handset Settings
Handset Settings Xiaomi Create and manage your Xiaomi Account. Account The User Guide describes main setting options. Google Make settings for Google services. Additional Set date and time, language and input, settings accessibility, etc. Handset Settings Make privacy settings such as a Privacy permission manager and password display. -
Page 73: About Phone (Handset Information) Settings
Settings In Home Screen, (Settings) Settable items are the following. Item Description Check whether updates are required via Xiaomi the network, and update as required. HyperOS "Updating Software" for details. Device name Check handset name. Check used space/total space in SD Card Storage and internal storage. -
Page 74: Lock Screen Settings
Lock Screen Settings Setting Recommended Wallpaper to Lock Screen Make settings for Lock screen. Set whether recommended wallpaper is shown in lock screen using Wallpaper Carousel (Glance). Lock Screen Settings Settable items are the following. In Home Screen, (Settings) Item Description Set delay until Display turns off after Sleep... -
Page 75: Display And Brightness Settings
Display and Brightness Settings Turn on Make settings for Display such as brightness, text size, etc. Display and Brightness Settings Settable items are the following. Item Description Light mode/ Set Light mode or Dark mode. Dark mode Dark mode Make settings for Dark mode. options Setting is complete. -
Page 76: Sound & Vibration Settings
Sound & Vibration Settings Fingerprints, Face Data, and Screen Lock Settings Make ringtone, operation tones, and other sound settings. Set password and security functions such as screen lock, PIN, etc. Sound & Vibration Settings Fingerprints, Face Data, and Screen Settable items are the following. Lock Settings Item Description... - Page 77 Enabling SIM PIN Changing SIM PIN When PIN is enabled, PIN entry window appears to permit First enable SIM PIN to change PIN. handset use each time handset is powered on with SIM Card/ eSIM installed. In Home Screen, (Settings) Fingerprints, face data, and screen lock Privacy...
-
Page 78: Battery & Performance Settings
Battery & Performance Settings Setting Whether to Reduce Power Consumption Check Battery usage and make settings to save battery power. for 5G Connection under Certain Conditions In Home Screen, (Settings) Battery Battery & Performance Settings Additional features 5G battery saver ・... -
Page 79: Additional Settings
Additional Settings Limiting All but Basic Functions (Phone, SMS, Selected Applications) to Save Battery Set date and time, language and input, accessibility, etc. In Home Screen, (Settings) Battery Additional Settings Current mode Ultra battery saver ・Activating ultra battery saver switches handset to a dark Settable items are the following. -
Page 80: Other Settings
Other Settings More Connectivity Options Make settings for VPN, Airplane mode, data usage, etc. Security Status Settable items are the following. Check whether location will be shown if handset is lost, Item Description whether to scan handset for security issues, etc. Portable Use handset as Wi-Fi router to access hotspot... - Page 81 Notifications & Status Bar Home Screen Make settings for application notifications, Status Bar, etc. Make settings for Home Screen and system navigation. Settable items are the following. Settable items are the following. Item Description Item Description Set whether to show notifications in lock Home screen Change Home Screen mode.
- Page 82 Safety & Emergency Privacy Protection Make settings for safety and emergency information. Settable Make permission settings. Settable items are the following. items are the following. Item Description Item Description Location Allow use of location per application. Open Personal Use functions for sharing your emergency Contacts Allow use of contacts per application.
- Page 83 Digital Wellbeing & Parental Controls Privacy Manage time that handset is used and set parental limitations Make privacy settings such as a permission manager and on use. Settable items are the following. password display. Settable items are the following. Item Description Item Description...
- Page 84 Location Make settings for location information. Settable items are the following. Item Description Use location Set whether to use location information. Show all the applications that requested See all location information. App location Allow use of location per application. permissions Share location Set handset operation when sharing info with...
- Page 85 Global Services Global Roaming..............84 Making Calls while Abroad..........86...
- Page 86 Global Roaming Tap provider Handset is Global roaming Service eligible. Use the same handset number outside Japan. Handset connects to an appropriate cellular provider automatically by default. Setting a Cellular Provider In Home Screen, (Settings) Mobile networks Cellular provider is set. Tap SIM to set Mobile networks Automatically select network...
- Page 87 Changing Data Roaming Setting Always For exceptions only Turn on In Home Screen, (Settings) Mobile networks Data roaming is enabled. ・ After selecting For exceptions only , next Tap Data roaming exceptions , and select application for using data roaming ( Data roaming International roaming...
- Page 88 Making Calls while Abroad Enter country code then other party number (omit first 0) See SoftBank Website to learn about roaming areas/services, etc. https://www.softbank.jp/en/mobile/service/global/ International Calls to Japan and Other Countries from Abroad In Home Screen, (Phone) ・Do not omit first "0" from phone numbers when dialing Italy (39).
- Page 89 Calls to Landline Phones/Cell Phones in Country of Stay Call Place calls the same way you would within Japan. ・Do not enter country code or omit first "0" from phone numbers. In Home Screen, (Phone) Handset dials number. Call begins when other party answers.
- Page 91 Warranty/Specifications/ Customer Service Warranty & After-Sales Service........90 Specifications..............90 Material List..............91 Customer Service.............. 92...
-
Page 92: Warranty & After-Sales Service
Display turned off. Charging time varies depending on environment of usage. Charging time is based Disassembly/modification of handset is prohibited under on the test performed in Xiaomi labo under environment the Radio Law. Note that handset cannot be accepted for with room temperature at 25℃. -
Page 93: Material List
Material List SIM Removal Pin (Complimentary Sample) Handset Part Material/Surface Treatment SIM Removal Stainless steel/- Part Material/Surface Treatment Infrared Acrylic/- Sensor Soft Case (Complimentary Sample) SIM Card/SD Card Tray Stainless steel/- (metal part) Part Material/Surface Treatment SIM Card/SD Soft Case Thermoplastic PU/grained processing Card Tray PC plastic (10% GF)/coated... -
Page 94: Customer Service
Customer Service If you encounter any difficulties or are unsure of anything, contact customer service. SoftBank Customer Support ・From a SoftBank handset, dial toll free at 157 ・From a landline/IP phone, dial toll free at 0800-919-0157 ・Business hours: Call 10:00am - 7:00pm / Chat 9:00am - 8:00pm Smartphone Technical Support Center ・From a SoftBank handset, dial toll free at 151... - Page 95 Safety Precautions Safety Precautions............94 Important Product Information........103 Bluetooth /Wi-Fi (WLAN)..........104 ® Waterproof/Dustproof........... 105 Intellectual Property Rights..........108 Declaration..............109 RF Exposure Information of This Product....109...
-
Page 96: Safety Precautions
Safety Precautions Handset, SIM Card, SIM Removal Pin (Complimentary Sample), Soft Case (Complimentary Sample) (Common) Read safety precautions before using handset. Observe precautions to avoid injury to self or others, or damage to property. Safety Precautions These labels indicate the degree of risk from improper use. Do not use, store, leave in a high temperature Make sure you thoroughly understand their meanings before or heat accumulating place (e.g. - Page 97 Do not subject handset to excessive force or Use optional accessories specified by SoftBank. break it. Especially when carrying it in your Using unspecified accessories or those with unclear pocket, do not hit it or press it between other manufacturer, distributor, or specifications may cause fire, objects.
- Page 98 Take the following actions, exercising caution, in case of abnormal smell, noise, smoke, heat Do not drop, stomp, throw, or otherwise generation, discoloring or deformation while subject to strong force, impact, or vibration. using, charging, or storing. May cause fire, burns, injury, electric shock, etc. -Disconnect the power plug from an outlet -Power off handset Continued use may cause fire, burns, injury, electric shock,...
- Page 99 Handset Do not use damaged handsets or related accessories. May cause fire, burns, injury, etc. Do not throw handset into a fire or apply heat. May cause fire, burns, injury, etc. Do not place handset on unstable/uneven surfaces. Be extra careful while the vibrator is set.
- Page 100 For use in hospitals, follow the medical facility's instructions. Do not light up or flash the Flash/Light with the light-emitting part close to other people's Power off handset in a place where its use is prohibited. eyes. Keep away from infants. Handset radio waves may affect electronic devices or other electronic medical equipment.
- Page 101 If Display, Rear Panel, or Camera lens breaks, be careful with broken parts and exposed When using the motion sensor, ensure the handset parts. safety of the surroundings and hold handset firmly, not swinging around more than Touching the broken or exposed part may cause burns, necessary.
- Page 102 AC Charger (Optional) Before using handset in a car, check with the car manufacturer or dealer for information about the effects of radio waves. Handset radio waves may affect the vehicle's electronic Do not use AC Charger (optional) if the cord is equipment in some car models.
- Page 103 Do not touch the cord, charging terminals, or Stop using handset immediately if Charging power plug of AC Charger (optional), with wet Terminals are deformed or bent. hands. Or, do not use AC Charger even with the deformation fixed. May cause fire, burns, electric shock, etc. Charging Terminals may short-circuit causing fire, burns, injury, electric shock, etc.
- Page 104 SIM Removal Pin (Complimentary Handset Use & Electronic Medical Sample) Equipment Tip of SIM Removal Pin (complimentary sample) Persons with an implanted pacemaker or is pointed. Do not use pointed at yourself or defibrillator should keep handset at least 15 others.
-
Page 105: Important Product Information
Important Product Information Charging ・Use AC Charger (optional) to charge handset. Using other Handset, AC Charger (Optional), SIM charging equipment may cause Internal Battery leakage, Removal Pin (Complimentary Sample), overheating, or fire. SoftBank Corp. is not responsible for Soft Case (Complimentary Sample) damages whatsoever from accidents or problems arising (Common) from use of other charging equipment. -
Page 106: Bluetooth ® /Wi-Fi (Wlan)
Bluetooth /Wi-Fi (WLAN) ® Volume Connection/operation may not be possible with some ・Do not listen for a prolonged period at high volume; may Bluetooth /Wi-Fi (wireless LAN) devices. ® hurt ears. Handset Bluetooth /Wi-Fi (wireless LAN) communication is ® secured in conformity with Bluetooth /Wi-Fi (wireless LAN) ®... -
Page 107: Waterproof/Dustproof
Waterproof/Dustproof Cautions for General Use Handset has waterproof equivalent to IPX3 (JIS C 0920) and The frequency band used by handset Bluetooth /Wi-Fi ® dustproof equivalent to IP5X with SD Card/SIM Card Tray (wireless LAN) functions is also used for operation by firmly closed. - Page 108 ・Close SD Card/SIM Card Tray firmly. Just a small particle ・Do not sink handset into boiling hot water or do not splash (hair etc.) between contact surfaces can cause water with boiling hot water to handset. Also, do not use handset intrusion or dust penetration.
- Page 109 Draining Charging Continued use of wet handset presents a risk of getting AC Charger (optional) is not waterproof/dustproof. Check the clothes/bag wet or make it harder to hear sound. Drain as following before and after charging. follows. ・Never charge if handset is wet. May cause fire, burns, injury, electric shock, etc.
-
Page 110: Intellectual Property Rights
Intellectual Property Rights Trademarks The company names and product names appearing in this Copyrights and Portrait Rights manual are trademarks or registered trademarks of their respective holders. Copyrighted contents you recorded or obtained from Websites ・"SOFTBANK", SOFTBANK's equivalent in Japanese and the pages using this product by downloading or other means, such SOFTBANK logo are trademarks or registered trademarks of as documents, images, music data, software, are prohibited... -
Page 111: Declaration
RF Exposure Information of This Product Declaration "A401XM" here refers to this mobile phone "Redmi 12 5G". ・Xiaomi has a policy of ongoing development. Thus, Xiaomi Specific Absorption Rate (SAR) reserves the right to make changes or improvements to any... - Page 112 Simplified Declaration of Conformity for 【A401XM】 FCC ID 2AFZZRA4BR in the FCC ID Search webpage: https:// Hereby, Xiaomi Communications Co., Ltd. declares that the www.fcc.gov/oet/ea/fccid. radio equipment type 【A401XM】 is in compliance with Additional information on SAR can be found on the FCC Directive 2014/53/EU.
- Page 113 About Phone (Handset Information) Settings....71 About the User Guide............3 Adding/Deleting Application..........61 Additional Settings............77 Airplane Mode..............26 Applications...............60 Redmi 12 5G User Guide Index B Basic Operation..............24 Battery & Performance Settings........76 Bluetooth /Wi-Fi (WLAN)..........104 ®...
- Page 114 M W Making Calls while Abroad..........86 Warranty & After-Sales Service........90 Making Initial Settings............ 15 Waterproof/Dustproof........... 105 Material List..............91 O Optional Services..............38 Other Settings..............78 P Parts & Functions.............. 6 Phone Number..............44 Placing/Answering Calls........... 36 Power On/Off..............15 R...
- Page 116 Redmi 12 5G User Guide June 2024, First Edition SoftBank Corp. Visit SoftBank Shop for assistance Model : Redmi 12 5G Importer : Xiaomi Technology Japan Co., Ltd. Manufacturer : Xiaomi Communications Co., Ltd.
Need help?
Do you have a question about the Redmi 12 5G and is the answer not in the manual?
Questions and answers