
Related Manuals for Paragon HydraChem 180


Summary of Contents for Paragon HydraChem 180
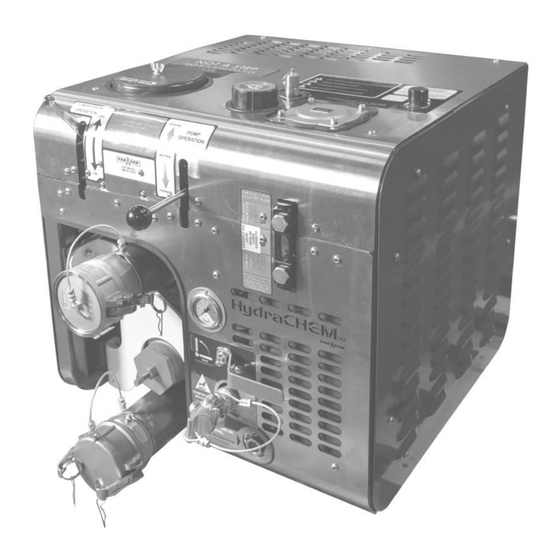
- Page 1 Installation Operation Manual Models: HydraCHEM 180 PRGMAN-06 Version: A January 25, 2024...
-
Page 2: Introduction
Congratulations on your new Paragon purchase... -
Page 3: Table Of Contents
Table of Contents Section Page Introduction ..............1 Safety Notice ..............3 Warning Labels… ............4 Initial Installation .............. 5 Pre-Installation Checklist ......... 5 Power Take-Off & Hydraulic Pump ......6 Mounting ..............6 Hydraulic Hoses & Fittings........7 Orientation .............. -
Page 4: Safety Notice
Safety Notice This manual is designed to be read to its entirety prior to installation or operation of this product. Do NOT install or operate prior to reading this manual completely - injury or property damage can occur. Use adequate protection and safety equipment while preforming the steps indicated in this manual. - Page 5 Safety Notice 1. Do not operate before reading the enclosed instruction manuals. 2. Use adequate protection, warning and safety equipment necessary to protect against hazards involved in installation and operation of this equipment N O T I C E • Safety instruction tags and labels were attached to your unit prior to shipment. DO NOT remove, obscure, or cover in any manner •...
-
Page 6: Initial Installation
It is the installer’s responsibility to ensure that the HydraCHEM is mounted in a location providing proper clearance from any heat source(s). Paragon recommends 12” from any exhaust opening, 6” from any other heat source(s). Verify no signs of damage to any equipment prior to installation Verify correct Power Take-Off matches paperwork. -
Page 7: Power Take-Off & Hydraulic Pump
Initial Installation Power Take Off & Hydraulic Pump • Mount Power Take-Off, and brace hydraulic pump per manufacturers instructions. • Mount hydraulic pump to Power Take-Off unit using the fasteners supplied by manufacturer. • See PTO owner’s manual for additional items. Mounting the HydraCHEM Note: Position in a location where all panels can be removed for service. -
Page 8: Hydraulic Hoses & Fittings
Initial Installation (continued) Hydraulic Hoses & Fittings 1. DO NOT use thread tape or pipe dope on hydraulic NPT connections; this will contaminate the hydraulic system. Use a hydraulic sealant for all NPT connections (Loctite number 545 or similar). 2. High Pressure and Suction hoses are customer supplied, and will need to be measured to fit according to system drawings and installation locations 3. -
Page 9: Pre-Initial Start Up Checklist
Initial Start Up Pre-Initial Start Up Check the P40 oil level after installation and before bleeding the hydraulic system. (Fig. 6) Ensure the air lever is in the “Vent” position. FULL Ensure the compressor operation lever is in the “Off” position. Ensure all grommets are in place. -
Page 10: Initial Start Up
Initial Start Up (continued) Bleeding the Hydraulic System 1. Ensure all cover panels are installed and the hydraulic hoses are connected. 2. Remove red hydraulic fill cap. (See Fig. 7) 3. Use Shell Tellus S2 V 32 (or equivalent ISO 32) non-foaming hydraulic oil. 4. - Page 11 Initial Start Up (continued) (Fig. 7) Pneumatic Relief Valve P40 Oil Fill Cap P40 Air Filter Cover Hydraulic Hydraulic Oil Filter Cap Fill Cap Universal Pneumatic Connector Plug Hydraulic Oil Sight Glass P40 Oil Sight Glass...
-
Page 12: Setting The Chemical Pump Relief Valve
Initial Start Up (continued) Setting the Chemical Pump Relief Valve Product Pump Factory Relief Valve Setting G150 100 PSI If the above pressures are incorrect for your application, follow the directions below to alter the delivery Relief Valve pressure CAUTION: DO NOT adjust the pressure rating or tamper with the chemical pump while it is in operation. -
Page 13: Operation
Operation Before operation: • Ensure all controls are in “NEUTRAL” and/or “OFF” positions. • Air Control Valve is in “VENT” position. • Ensure the truck is running. 1. Engage the PTO according to the manufacturer’s directions. 2. Set the engine speed for the desired application. 3. -
Page 14: Maintenance Schedule
Maintenance Schedule After use, cleaning and lubrication are required to prevent pump components from seizing. See product pump manual for proper clean out procedures. It is recommended that all product pumps are cleaned at a tank wash station after each use. If equipped with a gear pump: To lubricate the product pump, remove both inlet and outlet dust covers, spray an aerosol lubricant into the pump inlet while in operation, and watch for vapors on the outlet side of the pump. -
Page 15: Service Items
Service Items (Fig. 11) P40 Oil Fill Cap 6 month maintenance kit: Part # 621-032 Part # 522-008 Includes: • P40 Air Filter Element Pneumatic Relief Valve P40 Oil • P40 Oil (1 qt.) Part # 409-003 • Hydraulic Filter Element P40 Air Filter Element Part # 575-001 Hydraulic... -
Page 16: Warranty Information
Warranty Subject to the terms and conditions hereinafter set forth in General Terms of Sale, Paragon Tank Truck Equipment LLC (the Seller) warrants products and parts of its manufacturer, when shipped and its work (including installation and start-up) when performed, will be of good quality and will be free from defects in material and workmanship. This warranty applies only to Seller’s equipment, under use and service of products, for a period as stated in the table below.
Need help?
Do you have a question about the HydraChem 180 and is the answer not in the manual?
Questions and answers
Hey hey I got you all covered I got one of the cover so y'all equipment I'll give it back to you if you bring my wife to me