Asus NUC 14 Pro User Manual

Asus NUC 14 Pro User Manual

Mini pc / kit

Advertisement

ASUS NUC 14 Pro Mini PC / Kit
NUC14RVH/NUC14RVK
User Guide
June 24
ASUS NUC 14 Pro Mini PC NUC14RV
User Guide – June 2024
1

Advertisement

Table of Contents
loading
Need help?

Need help?

Do you have a question about the NUC 14 Pro and is the answer not in the manual?

Questions and answers

Rémi
March 10, 2025

Hello, It's been the second NUC14+ I received, and I can' t open it like the first

1 comments:
Mr. Anderson
March 10, 2025

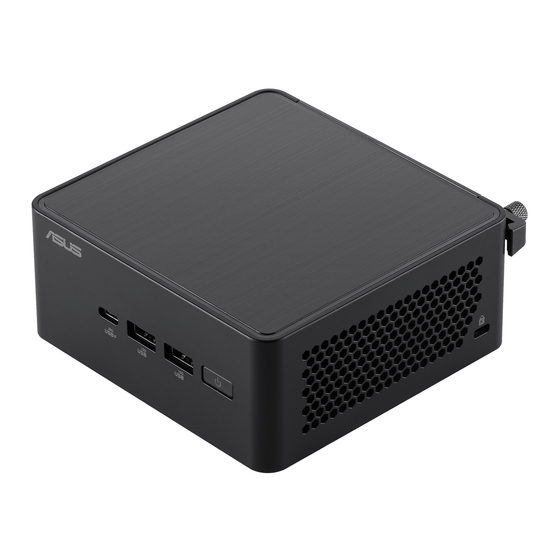
To open the ASUS NUC 14 Pro, use a flathead screwdriver to twist the chassis lock a quarter turn to unlock it. Then slide the latch toward the nearest rubber foot and lift the lid up.

This answer is automatically generated

Summary of Contents for Asus NUC 14 Pro

  • Page 1 ASUS NUC 14 Pro Mini PC / Kit NUC14RVH/NUC14RVK User Guide June 24 ASUS NUC 14 Pro Mini PC NUC14RV User Guide – June 2024...
  • Page 2 Warranty Statement, up to the listed contract price of each product. ASUS will only be responsible for or indemnify you for loss, damages or claims based in contract, tort or infringement under this Warranty Statement. This limit also applies to ASUS’ suppliers and its reseller.
  • Page 3: Table Of Contents

    Use the VESA Bracket (Optional) ................15 Connect Power ....................18 Set Up Microsoft® Windows 11 ................. 19 Install the Latest Device Drivers and Software ............... 20 Operating System Recovery ..................21 10.0 ASUS NUC 14 Pro Mini PC NUC14RV User Guide – June 2024...
  • Page 4 Revision History Date Revision Description June 2024 Initial release. ASUS NUC 14 Pro Mini PC NUC14RV User Guide – June 2024...
  • Page 5: Introduction

    Introduction This User Guide provides basic step-by-step installation instructions for these products: ASUS NUC 14 Pro Mini PC / ASUS NUC 14 Pro Kit • Before You Begin CAUTIONS The steps in this guide assume you’re familiar with computer terminology and with the safety practices and regulatory compliance required for using and modifying computer equipment.
  • Page 6: Installation Precautions

    Installation Precautions When you install and test the ASUS NUC, observe all warnings and cautions in the installation instructions. To avoid injury, be careful of: Sharp pins on connectors • Sharp pins on circuit boards • Rough edges and sharp corners on the chassis •...
  • Page 7: Open The Chassis

    Using a flat head screwdriver twist the chassis lock a quarter turn to unlock the chassis. Then slide the latch toward the nearest rubber foot, and lift lid up. ASUS NUC 14 Pro Mini PC NUC14RV User Guide – June 2024...
  • Page 8: Upgrade System Memory

    Upgrade System Memory The ASUS NUC 14 Pro Mini PC NUC14RVH and NUC14RVK has two 262-pin DDR5 SO-DIMM sockets. To upgrade memory, be sure to select memory modules that meet these requirements: 1.1V low voltage memory • 4800/5200/5600 MHz SO-DIMMs •...
  • Page 9: Install Additional Memory

    6. Reinstall and reconnect any parts you removed or disconnected to reach the memory sockets. 7. Replace the computer’s cover and reconnect the power cord. ASUS NUC 14 Pro Mini PC NUC14RV User Guide – June 2024...
  • Page 10: Changing The M.2 Ssd

    42mm connector supporting NVMe SSD • one internal SATA bay supporting 2.5in SATA SSD/HDD • Find known compatible and validated storage devices in the ASUS Product Qualified Vendor List: ASUS NUC 14 Pro Qualified Vendor List • ASUS NUC 14 Pro Mini PC NUC14RV...
  • Page 11: Install Additional M.2

    3. Align the space at the bottom of the new M.2 SSD to the key on the connector. 4. Insert the bottom edge of the M.2 SSD into the connector (A). 5. Secure the card to the toolless standoff with the plastic plunger (B). ASUS NUC 14 Pro Mini PC NUC14RV User Guide – June 2024...
  • Page 12 Install 2.5in drive (RVH only) To install an M.2 SSD: 1. Insert the 2.5in drive into the bottom bracket. 2. Secure the 2.5in drive with the include M3 threaded Screws. ASUS NUC 14 Pro Mini PC NUC14RV User Guide – June 2024...
  • Page 13: Close The Chassis

    Close the Chassis After all components have been installed, close the ASUS NUC chassis. ASUS recommends this be done by hand by aligning the chassis bottom cover at roughly a 30 degree angle and then slowly closing until the slide latch clicks closed.
  • Page 14: Locking The Chassis

    Locking the chassis To lock the chassis for security, use the flat head screw driver again to turn the chassis lock a quarter turn into the locked position. ASUS NUC 14 Pro Mini PC NUC14RV User Guide – June 2024...
  • Page 15: Use The Vesa Bracket (Optional)

    Follow these instructions to attach and use the VESA mount bracket: 1. Using the four small black screws that were included in the box, attach the VESA bracket to the back of the monitor or TV. ASUS NUC 14 Pro Mini PC NUC14RV User Guide – June 2024...
  • Page 16 2. Attach the two slightly larger black screws to the bottom chassis cover of the ASUS NUC. ASUS NUC 14 Pro Mini PC NUC14RV User Guide – June 2024...
  • Page 17 3. Slide the ASUS NUC onto the VESA mount bracket. ASUS NUC 14 Pro Mini PC NUC14RV User Guide – June 2024...
  • Page 18: Connect Power

    Connect Power Each ASUS NUC model includes a region-specific AC power cord. Please check the box to make sure the power cord included is compatible with your intended usage. ASUS NUC 14 Pro Mini PC NUC14RV User Guide – June 2024...
  • Page 19: Set Up Microsoft® Windows 11

    Set Up Microsoft® Windows 11 Microsoft Windows 11 is already installed on the ASUS NUC. The first time you start the computer, you are guided through the Windows 11 setup steps, including: Selecting your region and language. • Accepting the Microsoft Windows license terms.
  • Page 20: Install The Latest Device Drivers And Software

    Here are the options for keeping device drivers current: Allow the MyASUS Application to detect out-of- date drivers. • Manually download drivers, BIOS, and software from ASUS Download Center: • ASUS NUC 14 Pro Download Center • • Select your model from the drop-down menu.
  • Page 21: Operating System Recovery

    Operating System Recovery 10.0 There’s a Windows recovery partition on the ASUS NUC. You can use this partition to Refresh, Reset, or Restore Windows. Here is what each of these actions do: Refresh If your PC isn't performing as well as it once did, and you don't know why, you can refresh your PC.
  • Page 22 If Windows doesn’t start The recovery process should automatically start. If Recovery doesn’t automatically start, attempt to restore system BIOS to defaults and try again. 1. Follow the recovery steps. ASUS NUC 14 Pro Mini PC NUC14RV User Guide – June 2024...

This manual is also suitable for:

Nuc14rvhNuc14rvk

Table of Contents

Save PDF