Table of Contents
Advertisement
Quick Links
Advertisement
Table of Contents

Related Manuals for AMPURE POSICHARGE DVS100


Summary of Contents for AMPURE POSICHARGE DVS100
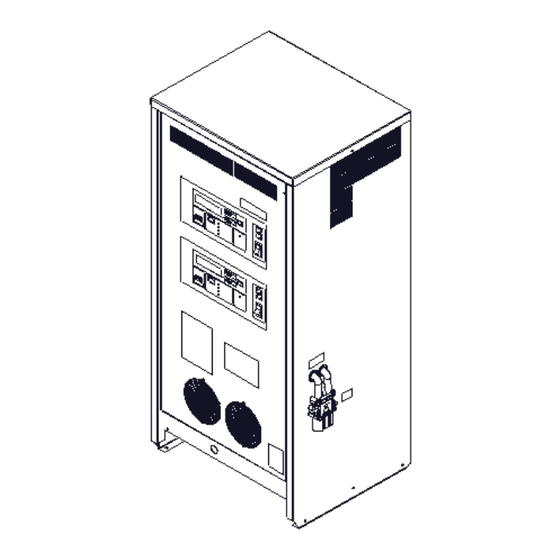
- Page 1 DVS100/DVS150 CAN Board Installation Guide...
- Page 2 Installation Guide © Ampure 2024. All rights reserved. PosiCharge™ systems is a product line of Ampure and the Ampure logo are trademarks of Ampure. Corporate names, trademarks, registered trademarks, service marks, symbols, and logos stated herein are property of their respective companies.
-
Page 3: Table Of Contents
Figure 17 P101 Cable Connected from the J101 Connector ..............17 Figure 18 Disconnected BMID Connector J13(P13) ................18 Figure 19 X1 Cable Connected to Channel B of TB1 ................18 Figure 20 Cut BMID Wires Screwed into One Wire Nut ................ 19 Ampure 3 of 20 5911436 A01... -
Page 4: Safety Precautions: Read Before Using
DANGER Indicates information about safety practices which, if not followed, may result in death or serious injury. NOTE Indicates helpful information for installation or usage but does not contain personnel or equipment safety-related information. 5911436 A01 4 of 20 Ampure... -
Page 5: Document Purpose
— or if it detects BMID communication protocols — then it will charge according to BMID communication protocols. 3.5. Equipment Equipment Description Quantity Part Number Notes DVS100 / DVS150 CAN package 5911438 Ampure 5 of 20 5911436 A01... -
Page 6: Dvs100/Dvs150 Charger Decal, Manufacturer Nameplate, And Caution Label
(Figure 2). Place the supplied caution label (31407) (Figure 3) on either side of the manufacturer nameplate. Ensure that the caution label does not impede the airflow. (Figure 2). Figure 1 DVS100/DVS150 Charger Decal 5911436 A01 6 of 20 Ampure... - Page 7 DVS CAN Board Installation Guide DVS100/150 Charger Decal Manufacturer Name Plate Label Caution Labels Figure 2 DVS100/DVS150 Charger Decal, Manufacturer Nameplate, and Caution Label Placements Ampure 7 of 20 5911436 A01...
- Page 8 DVS CAN Board Installation Guide Figure 3 Caution Label 5911436 A01 8 of 20 Ampure...
-
Page 9: Dvs100/Dvs150 Can Board Installation Process
The battery terminals are always electrically live, and the output circuit is live whenever the battery is connected or being charged. • The input power circuitry and internal circuits are live whenever input power is on. • An incorrectly installed or improperly grounded charger is a hazard. Ampure 9 of 20 5911436 A01... - Page 10 Pin 1 Pin 1 J101 Connector X1 Connector Figure 4 CAN Board Mounted to the mounting Bracket and the X1 and P101 Cables Connected to the X1 and J101 Connectors, Respectively, on the CAN Board 5911436 A01 10 of 20 Ampure...
- Page 11 The baud rate can be set with the dual in-line package (DIP) switches on the CAN board (Figures 6 and 7) by using the below DIP switch table. Baud Rate DIP 1 125 kbps 250 kbps Ampure 11 of 20 5911436 A01...
- Page 12 DVS CAN Board Installation Guide CAN Board Assembly NOTE: DIP Switches are accessible Figure 6 CAN Board Assembly Mounting for Channel A Figure 7 DIP Switches 5911436 A01 12 of 20 Ampure...
- Page 13 J2 connector on the DVS100/DVS150 control board (Figure 9). Figure 9 P101 Cable Connected from the J101 Connector on the CAN Board to the J2 Connector on the Channel A of DVS100/DVS150 Control Board Ampure 13 of 20 5911436 A01...
- Page 14 White wire to the Data terminal • Black wire to the Dir terminal NOTE Twisting wires (Figure 11) is recommended for longer distances. Keeping them close together, however, is more important than twisting them. 5911436 A01 14 of 20 Ampure...
- Page 15 13. Place the DVS100/DVS150 CAN board assembly on the Channel B of DVS100/DVS150 control board assembly over the loosened nuts and slide the CAN board toward the control board as shown in Figure 13, and tighten the two nuts. Ampure 15 of 20 5911436 A01...
- Page 16 (Figures 14 and 15) by using the below DIP switch table. Baud Rate DIP 1 125 kbps 250 kbps CAN Board Assembly NOTE: DIP Switches are accessible Figure 14 CAN Board Assembly Mounting for Channel B Figure 15 DIP Switches 5911436 A01 16 of 20 Ampure...
- Page 17 J2 connector on the DVS100/DVS150 control board (Figure 17). Figure 17 P101 Cable Connected from the J101 Connector on the CAN Board to the J2 Connector on the Channel B of DVS100/DVS150 Control Board Ampure 17 of 20 5911436 A01...
- Page 18 White wire to the Data terminal • Black wire to the Dir terminal NOTE Twisting wires (Figure 19) is recommended for longer distances. Keeping them close together, however, is more important than twisting them. 5911436 A01 18 of 20 Ampure...
- Page 19 (Figure 20), bend them back, and secure them to the harness with a provided cable tie. Figure 20 Cut BMID Wires Screwed into One Wire Nut 21. Power back on the DVS100/DVS150 charger after installation. Ampure 19 of 20 5911436 A01...
- Page 20 Ampure 1333 S. Mayflower Ave., Ste 100 Monrovia, CA 91016...
Need help?
Do you have a question about the POSICHARGE DVS100 and is the answer not in the manual?
Questions and answers