Table of Contents
Advertisement
Quick Links
Advertisement
Table of Contents

Related Manuals for senelux FW2


Summary of Contents for senelux FW2
- Page 1 INSTRUCTION MANUAL 10 Inch Wall-mounted Oscillating Fan Model: FW2 ENGLISH...
-
Page 2: Table Of Contents
TABLE OF CONTENTS (i). Points For Attention (ii). Package Content (iii). Specifications (iv). Product Details (v). How To Install (vi). How To Clean (vii). Trouble Shooting (viii). Attention (ix). Warranty (x). Information... -
Page 3: Points For Attention
1. POINTS FOR ATTENTION Before using the product, it is essential to carefully read and follow the instructions provided in this user manual. Additionally, it is recommended to keep the manual in a safe place for future reference. Warning Avoid electrical shock and fire: Ensure that water, other liquids, and flammable cleaning agents do not enter the product. -
Page 4: Package Content
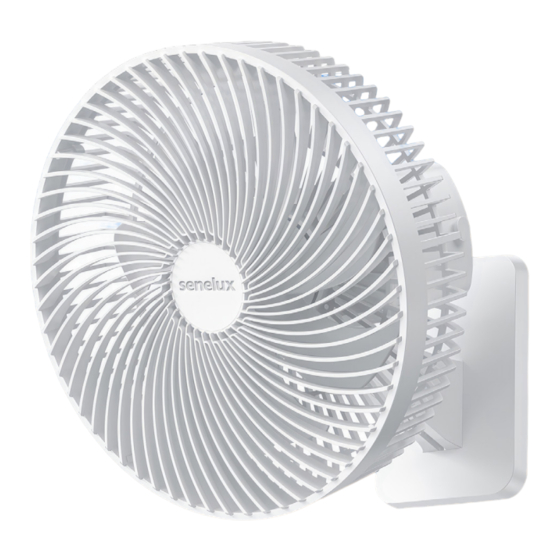
2. PACKAGE CONTENT 1 x Fan (2.24lb/1020g) 1 x Wall Bracket 2 x Nails 1 x Adapter (1.8m/5.9feet) 1 x Remote Control l x Instruction Manual 1 x Base 1 x Holder 3. SPECIFICATIONS Product Name 10 Inch Wall-mounted Oscillating Fan Main Material ABS Plastic Input... -
Page 5: (Iv). Product Details
4. PRODUCT DETAILS Type-C Port Adapter Remote Control Holder Screw Wall Bracket Locking Knob Oscillating Button Oscillating Indicator Switch Button Speed Indicator Base Timer Timer Indicator REMOTE CONTROL BUTTONS On/Off button: Cycle in Low-Mid-High-Super-Off Oscillating On/Off Timer button (0.5 hours – 1.5 hours – 4 hours – 8 hours) -
Page 6: How To Install
5. HOW TO INSTALL Attach the holder's Thread the Type-C plug Position the cord within screw to the fan's nut, through the opening the designated slot. ensuring the holder's in the fan base as Ensure that you leave bump aligns with the illustrated, then connect at least 10 centimetres nut's groove. -
Page 7: (Vi). How To Clean
6. HOW TO CLEAN Unplug the power cord prior to cleaning. Remove the four screws on the fan’s back cover using a screwdriver (not provided). Rotate the front cover counter clockwise to remove it. Wipe the fan blades with a dry cloth. Avoid using water or a damp cloth since the fan blades are not water-resistant. -
Page 8: (Vii). Trouble Shooting
7. TROUBLE SHOOTING MULFUNCTION POSSIBLE REASON SUGGESTED SOLUTION No power Check the power supply Not working/ No Power cord, plug, or Ensure the plug power socket damage or and socket are well not connected connected Check if the voltage of power supply is too high/ too low 8. - Page 9 Do not pull the power cord to lift or move the appliance. The appliance should not be immersed in water when cleaning. While in operation, the device should be placed out of reach of children. This appliance is for indoor use only. Disassembling the appliance will void the warranty.
-
Page 10: (Ix). Warranty
9. WARRANTY All Senelux products are covered from the original purchase date by a standard 2-year warranty. To register your warranty, please visit www.senelux.co.uk. If, in the unlikely event that your product has any manufacturing defect, please get in touch with our customer service team at support@senelux.co.uk. - Page 11 Senelux Ltd Unit 5-6 105 Boundary Street Liverpool L5 9YJ United Kingdom Email – info@senelux.co.uk Website – www.senelux.co.uk Be sure to tag us in your photos on social media using #seneluxathome to be featured @Senelux @senelux.official Thank you very much for using our products.
Need help?
Do you have a question about the FW2 and is the answer not in the manual?
Questions and answers