Frigidaire FAH106S1T - 10000 BTU Through-the-Wall Air Conditioner Use And Care Manual
Thru-the-wall electronic control air conditioner
Hide thumbs
Also See for FAH106S1T - 10000 BTU Through-the-Wall Air Conditioner:
- Use and care manual (11 pages) ,
- Installation instructions manual (12 pages)
Table of Contents
Advertisement
USE & CARE MANUAL
Contents
2
3
3
Packaging
3
4
4
5-10
10
10
11
READ AND SAVE THESE INSTRUCTIONS
THRU-THE-WALL
ELECTRONIC CONTROL
AIR CONDITIONER
NOTE: This USE & CARE MANUAL
provides specific operating instructions
for your model. Use the room air
conditioner only as instructed in this USE
& CARE MANUAL instructions are not
meant to cover every possible condition
and situation that may occur. Common
sense and caution must be practiced when
installing, operating, and maintaining any
appliance.
P/N 66129901149
Advertisement
Table of Contents

Related Manuals for Frigidaire FAH106S1T - 10000 BTU Through-the-Wall Air Conditioner


Summary of Contents for Frigidaire FAH106S1T - 10000 BTU Through-the-Wall Air Conditioner
-
Page 1: Table Of Contents
USE & CARE MANUAL Contents NOTE: This USE & CARE MANUAL provides specific operating instructions for your model. Use the room air Warranty conditioner only as instructed in this USE Product Registration & CARE MANUAL instructions are not meant to cover every possible condition Packaging and situation that may occur. -
Page 2: Warranty
D i a g n o s t i c c o s t s a n d a n y r e m o v a l , R e p a i r o r r e p l a c e a n y p a r t s i n t h e S e a l e d... -
Page 3: Product Registration
Record Your Model and Serial Numbers Product Registration Record in the space provided below the model and serial numbers. On all models, the serial plate is located on the outside of the cabinet. Model No. Serial No. Register Your Product The self-addressed PRODUCT REGISTRATION CARD should be filled in completely, signed and returned to the Frigidaire Company. -
Page 4: Important Safety Instructions
To reduce the risk of fire, electrical shock, or injury to persons when using your air P l e a s e r e f e r t o t h e s e c t i o n conditioner, follow basic precautions, including the following: “Operation of Current Device”... -
Page 5: Air Conditioner Features
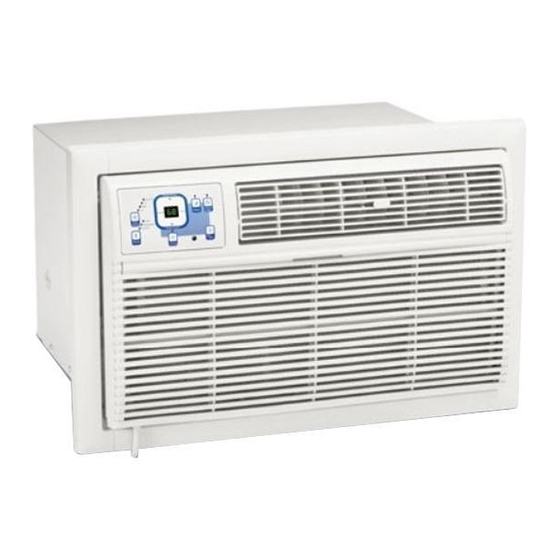
Before you begin, thoroughly familiarize yourself with the control panel and remote as shown below and all its functions. Then follow the symbol for the functions you desire. The unit can be controlled by the touch pad alone or with the remote. - Page 6 Note: The fan speed will begin in HI, then adjust to MED and LO as the room temperature conditions indictates. For example in cooling, if the room doesn't get too warm it will stay at LO. If the room temperature rises quickly, such as a door being opened, it will automatically go to HI speed.
-
Page 7: To Operate On Fan Only
Note 2: For Delay Start, the unit must be in the OFF position. To adjust timer setting, tap or hold the UP arrow ( ) or DOWN arrow (v) to change the delay time by .5 hour increments up to 10 hours, then by 1 hour increments up to 24 hours. - Page 8 To activate the remote sensing feature, point the remote control towards the unit and press the remote sensing start button. The LIGHT on the unit control will pulse to indicate it received the signal. The LIGHT on the remote control will pulse each time it sends a signal.
- Page 9 When in the “Heat” Mode,the fan will run continuously while heat is needed. The temperature will automatically be maintained anywhere between 55°F (13°C) and 80°F (27°C). When the room set temperature is satisfied, the fan will cycle off and on to circulate and sample the room air.
-
Page 10: Care And Cleaning
(continued) 4-Way Air Directional Louvers The 4-Way air directional louvers allow you to direct air flow up or down, left or right throughout the room as needed. To adjust the air directional louvers side- to- side, use the center handle as you move it side-to-side. -
Page 11: Avoid Service Checklist
Outdoor temperature below 60°F (16°C). To defrost the coil, set selector to FAN ONLY Mode. room is too warm - ice forming Air filter may be dirty. Clean filter. Refer to Care and Cleaning section. To defrost, set selector to on cooling coil behind FAN ONLY Mode.
Need help?
Do you have a question about the FAH106S1T - 10000 BTU Through-the-Wall Air Conditioner and is the answer not in the manual?
Questions and answers