Advertisement
- 1 INTRODUCTION
- 2 PACKAGE CONTENTS
- 3 DEVICE LAYOUT
- 4 ADJUST YOUR AZERON CYRO
- 5 INSTALLING SOFTWARE
-
6
HOW TO USE AZERON SOFTWARE
- 6.1 INTERFACE OVERVIEW
-
6.2
KEYBIND SETUP
- 6.2.1 Keyboard mode
- 6.2.2 Xinput button
- 6.2.3 Mouse mode
- 6.2.4 Joystick button
- 6.2.5 Joystick D-pad mode
- 6.2.6 Toggle analog stick mode
- 6.2.7 Mouse wheel
- 6.2.8 Media keys
- 6.2.9 Profile switch
- 6.2.10 DPI Button
- 6.2.11 Input sequence
- 6.2.12 Layering
- 6.2.13 Macro
- 6.2.14 No action mode
- 6.2.15 Button labels
- 6.2.16 Advanced settings – Release behavior
- 6.3 CALIBRATING THUMBSTICK
- 6.4 RESTRICTOR RING
- 6.5 THUMBSTICK SETUP
- 6.6 PROFILES
- 6.7 SYSTEM TRAY ICON
- 6.8 MOUSE SENSOR SETTINGS
- 7 SETTINGS
- 8 TROUBLESHOOTING
- 9 TIPS AND TRICKS
- 10 Documents / Resources
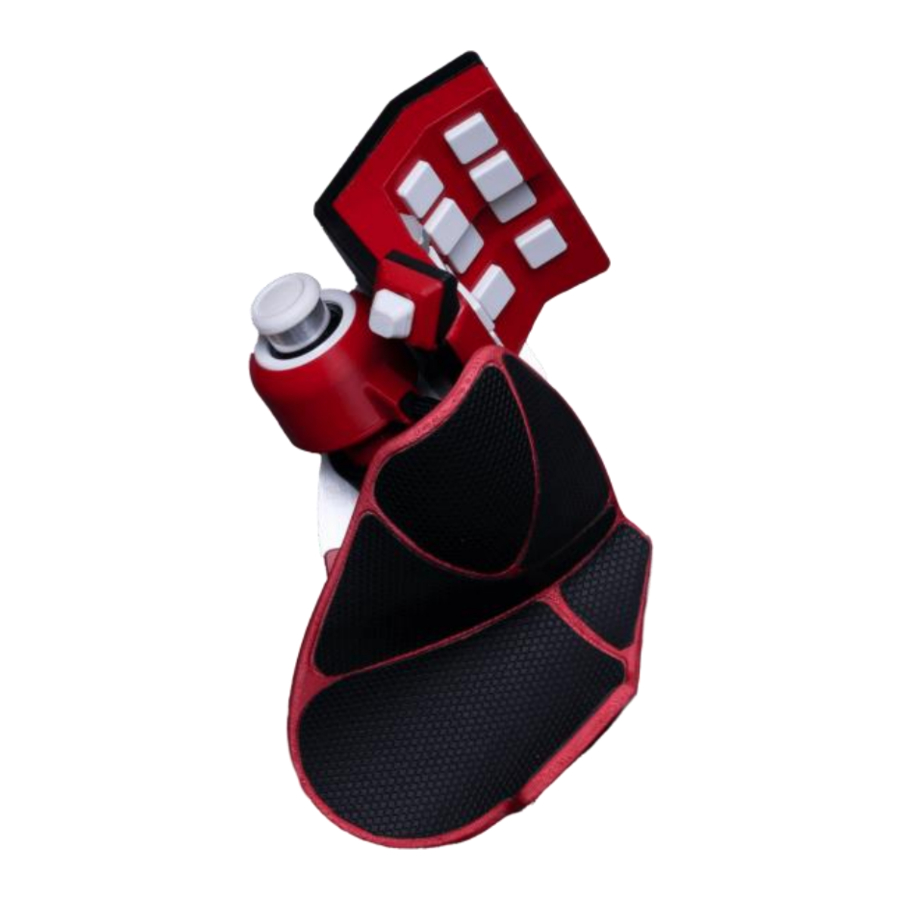
INTRODUCTION
The Cyro is a one handed device - a simple Plug-and-Play controller that sets up easily with our software. It can function as a joystick or as a keyboard or a mouse or everything together in hybrid mode.
The Azeron Cyro device comes with 22 programmable buttons, an analog thumbstick and a mouse sensor for complete control and maneuverability over your game with only one hand.
Its ergonomic wrist pad, adjustable button distance and adjustable thumb module delivers a perfect fit for your arm and minimized fatigue over extended gameplay.
The main advantage of the Azeron Cyro is the ability to move in game character with one finger – the thumb (either in 360° mode or in WASD mode, depending what your game supports). All other fingers now can freely press other 22 buttons while you are moving at the same time. On top of that also at the same time you can control the mouse cursor with the same hand.
PACKAGE CONTENTS

- Azeron Cyro
- Screwdriver for adjustments
- 2 thumbstick replacement caps
- Metal restrictor ring
- Silicon USB cable (2m / 6ft 7in)
- Quick guide
- Elastic hand strap
DEVICE LAYOUT

ADJUST YOUR AZERON CYRO

By using the included Hex screwdriver, it is possible to adjust button and thumb module positions for your hand.
You can swap included thumbstick caps and put on or off the restrictor ring, just by pulling the cap off with a little force:

Or if you have chosen the Elite thumbstick, you can swap the magnetic caps easily and adjust the thumbstick tension with the included tool.

INSTALLING SOFTWARE
First you need to check if your computer recognizes Azeron device. Plug in USB cable in PC. Go to Start – Control Panel – Devices and Printers, and see if under Devices shows up Azeron Keypad.

If it doesn't, and the LED lights are not turning on, make sure the USB cable is connected to the keypad properly.
We are constantly working on new features and improvements, so make sure to go to our website (https://www.azeron.eu/downloads/) and download the latest Azeron software.

When shipping out the device to you, it has already pre-installed latest firmware. So by default you don't need to install that.
Go to the directory where you downloaded the software, then double click on Azeron-setup-vX.XX.X to install the software.
Sometimes Windows may prevent installation, because it is a new software it doesn't recognize:

Just click on the "More info" and then on "Run anyway".
After that, the software will start to install. When it's done, there will be a shortcut icon on Desktop and in the Start menu.
In case the software installation stops midway and doesn't progress, make sure to pause your antivirus and try to install again.
After the installation is done, plug in the USB cable of the device in PC and then launch the Azeron software.
If you are not sure if your PC has the USB3.0 motherboard drivers installed, then we would suggest to use USB 2.0 port to avoid unpredictable behavior of the keypad recognition.
Also if you are using USB hub, the keypad may flicker and have power loss. So make sure to use USB hub that can provide enough power or plug in the keypad directly in PC motherboard.
When opening Azeron software, there are 4 options what could show up:
- When opening software, it may show this screen:

It means that the device requires firmware update. Click on "Update" at the bottom right corner.
After firmware installation the device will restart. Wait until software connects with your device.
When the firmware update is complete the software will ask you to calibrate the thumbstick. Follow the directions on screen to complete the calibration.


- The second possible option when software opens up will look like this:

That means that everything is ready, the software and PC recognize the device and everything is up to date. You are ready to configure your Cyro to your liking and start gaming. - Another option when opening software, it may be empty and asking to plug-in your device:

It means, that the software cannot find the Azeron device. First of all, make sure you have plugged in the USB cable fully in the Cyro. Make sure you are using a USB cable that can send data (not only charging), otherwise the Cyro can act unpredictably (for example, buttons are working, but the mouse sensor does not).
Another possible solution is to close the software, unplug USB cable, wait until Windows no longer see the device, then plug in back the USB cable (make sure you are plugging in the USB directly in PC and not via USB hub! So that it has enough power), open the software again.
If the PC still doesn't recognize your keypad, it could be that firmware installation have gone wrong, please check TROUBLESHOOTING section on how to fix that. Or alternatively you can contact Azeron support via email info@azeron.eu or have a chat in Azeron Discord and together we will get it back up and running. - Another option is when software is asking to choose the device you want to setup, if you have plugged in multiple Azeron devices. Choose Azeron Cyro, if you wish to configure your Cyro device or unplug the other devices and leave only the Cyro.

It is possible to configure only one device at a time. The devices, that you are not currently configuring, are running on a profile that is in the onboard memory.


HOW TO USE AZERON SOFTWARE
INTERFACE OVERVIEW
There are 2 profile types available - on-board and software profiles.

On-board profiles are saved in the device memory (so you can use the keypad on other PC or consoles and it will work with the saved settings). If you are using only on-board profiles, then Azeron software doesn't need to be opened while gaming, it is used just to setup buttons. If you are using software profiles, then the Azeron software needs to run in the background while playing the game.
 Note!
Note!
Macros, Layering and Input sequence features will not work in the on-board memory
To create a new profile, click on  . The software will create a new profile by making a copy of currently selected profile.
To send a software profile to on-board memory, you need to click on the profile you wish to send and then click on  and choose on which on-board profile slot you want to send it.
KEYBIND SETUP
When pressing button on the device, the corresponding button will light up in the Azeron software and execute the keybind.
To setup buttons, with your mouse click on the button you wish to setup, then on the popup window choose between several modes.

At the top you can name the button by writing custom label, for example, "Jump".
It is possible to setup several modes on one button at the same time – single click, long press and double press. If you choose all three modes, then the corresponding symbols will appear on top of the button:

Single click keybind will execute immediately on button press. Long press keybind will execute only after the delay that you specify while holding down the button. Double press keybind will execute after the button is pressed 2 times.
If you are using Single click and Double press modes on the same button, then there may be a small lag for Single click keybind. The shorter the Double press delay is specified, the shorter will be the lag on Single click keybind. If you specify very short delay, then there is a chance that Double press will be executed unintentionally, when you actually expect to have Single click keybind executed.
Keyboard mode
For keyboard mode you can setup a keyboard button to be used on Azeron Cyro. It is also possible to setup button combinations on one key press (for example, Shift + Ctrl + Alt + E).
Only buttons not possible to setup currently are Right side modification buttons, they will always default to the Left side Shift, Ctrl or Alt. Also there is no simple way to setup special buttons, for example F13 F14 or numpad etc. These will be included in the future software updates.

Xinput button
Xinput allows the Azeron Cyro button to act as an Xbox controller button or trigger.

Under Xinput button it is possible to setup:
- Home
- Start
- X, Y, A, B
- Right Bumper, Left Bumper
- Push Right analog stick
- Push Left analog stick
- Back
- D-pad right, left, down and up
- Right trigger
- Left trigger
Mouse mode

Under mouse mode the Azeron keypad button can act as a mouse buttons:
- Left click
- Middle click
- Right click
- Back
- Forward
Joystick button
In joystick button mode the device will act as a generic controller button (direct input of generic gaming controllers). If you are using Azeron device on consoles through XIM device (or similar adapter), then you need to setup all buttons as joystick buttons.

Joystick D-pad mode
In Joystick D-Pad mode the button can be setup as any function of the DPad (Up, Right, Down Left, Left, and also diagonally, for example Right Up or Left Down). This also will act as direct input of generic gaming controllers.

Toggle analog stick mode
On the device there is only one thumbstick, but you can setup a button to switch between two thumbstick settings.

- If thumbstick is setup as an analog stick, then it will switch between Left and Right analog stick of the controller.
- If thumbstick is setup as a keyboard (WASD for example), then you can setup also what keyboard buttons will be on the second thumbstick (for example QWES).
After setting "Toggle analog stick" on the button, make sure to go in the thumbstick settings, turn on the 2nd thumbstick and change the keybinds on it as you wish:


If you enable mode Toggle only on hold, then the second thumbstick settings will work only while the button on the keypad is held down.
Mouse wheel
Any of the buttons can function as a mouse wheel (either horizontal or vertical). For example, adjust the slider up, to setup vertical scroll up. The higher the number the faster it will scroll up.

Media keys
Choose Media keys if you want to control your music, videos or PC volume with the Cyro.

You can setup:
- Pause
- Fast forward
- Mute
- Volume Up
- Volume Down
- Rewind
- Next
- Previous
- Stop
- Play / Pause
Profile switch
You can setup any of the Cyro buttons to act as a profile switch. While holding the profile switch, you can scroll the mouse wheel to switch between profiles in the on-board memory (or favorite profiles in the software). We suggest to setup the profile switch under long press, so that the same button can be used for other keybinds on single press.

DPI Button
Any of the buttons can be used to change the DPI setting up or down. It will switch between the Stages that are setup in the sensor settings (see MOUSE SENSOR SETTINGS to learn more about the sensor settings)

Input sequence
This mode is not available in On-board memory profile!
It is possible to setup several keybinds on one button which are changing in sequence.
In Sequential mode the keybinds will go through 1st to last and then again from 1st to last.
In Ping pong mode the keybinds will go from 1st to last and then from last to 1st.

Example 1: if there are skills/stances in the game that toggle, for example Healing stance on 8 and fighting stance on 9. Then you can put both keybinds (8 and 9) on one button with this Input sequence.
Example 2: if there are several weapon types, for example Rifle on 4 and Sniper on 5, then you can use one button to switch between both weapons.
Layering
This mode is not available in On-board memory profile!
Any of the buttons can be programmed as a shift button to switch between several button layers on the fly thus increasing the number of functions that can be programmed into the other buttons by several times.

For example, in the picture above, we are editing button #12 as a switch button and we will set it up to switch to another software profile, which is called "ED2". Now when pressing button #12 on the Cyro, the software will switch to profile named "ED2" and will use the keybinds that are stored there.
If we want that by pressing again button #12 we switch back to the previous profile, then we need to choose ON at the option "Set ED2 button #12 to switch back to current profile".
If we want to access the 2nd layer buttons only while we hold the button #12, then the setting "Toggle on hold" must be ON.
If we choose ON at the option "Switch held binds on layer change" then the held keys from the current profile binds will be released and the new profile binds for the pressed keys will automatically be pressed on profile change. For example, if on Profile 1 we hold button A, it spams AAAAAA, then we press profile switch button without releasing A, then it will start to spam BBBBBB from the Profile 2. As soon as we release the profile switch button, it will continue to spam AAAAAAA.
How to setup layering step by step:
- Create 2 profiles in software section (layering will not work in onboard memory). We will name them Profile 1 and Profile 2:
![]()
- Activate Profile 1, select on the button you wish to use as layer shift. PickSingle Press and choose Layering from the dropdown menu

- Then under Layering Select Profile 2, which will act as our 2nd layer for buttons.

- Turn ON the option "Set profile button #1 to switch back to current profile" to be able to switch back to Profile 1 with the same button.
- Setup one set of keybinds in Profile 1 and another set of keybinds in Profile 2.


Macro
This mode is not available in On-board memory profile!
It is possible to setup macros on device buttons. When choosing Macro mode for the button, it is possible to program several sequential keyboard keypresses, mouse buttons and delays in the sequence you wish. You can also choose how long is the keypress and delays in milliseconds (avoid using too small values for delays and keypresses, otherwise it may not register). It is also possible to turn on a repeat for the macro while the button is held down (the repeat will not be available if you have setup a long press or double press on the same button). The blue arrow next to the button shows if the button is held down or raised up, or both.

At the bottom of the window are Copy and Paste buttons, to be able to copy current Macro and paste it on another keypad button.
Macro function is available only in software profiles! Currently it is not possible to save Macro in on-board memory due to the memory limitations.
You can also change the default macro duration in the settings:

No action mode
Right click on the button to delete any keybind on it and make it "empty" and do nothing.
Or press "Unbind All" at the top to remove all keybinds and labels in current profile.

Button labels
You can setup custom names for each button for easier overview of your keybinds. Similar to this (white color is keybinds, darker color is custom button names):

To setup custom name - click on the button and then write the name in field "Custom name":

In the software Settings under Appearance you can choose to:
- Hide custom labels, to show only keybinds
- Show both labels and keybinds


Advanced settings – Release behavior
By opening the advanced section, it is possible to specify how the button will be released after it is pressed down. It has 2 modes – on second press and time out.

On second press – if this is activated then the keybind will be pressed down and held until you press the button for 2nd time.
Time out – the button will be held down for a specified amount of time and then released.
CALIBRATING THUMBSTICK
If you will be using your keypad for the first time or just recently reinstalled software or firmware, then you need to calibrate the thumbstick. Here is steps on how to do it:
- Plugin the USB cable of device to your PC. Open the Azeron software. Go to Settings. Make sure the restrictor ring is removed from the thumbstick! (If you are using software version 1.5 and up, then you can leave the restrictor ring on the thumbstick). Press on button "Calibrate" and carefully follow the instructions on screen.


By pressing on Adjust it manually you can also adjust the global thumbstick settings as you wish manully, if you need that all your profiles have equal thumbstick settings.
RESTRICTOR RING
If you are using software version 1.5 and up, then you don't need to follow these instructions.
The restrictor ring will fit on the shortest thumbstick cap!

In case you wish to use the included restrictor ring, then please follow this video guide or these steps below:
- Make sure the restrictor ring is removed from the thumbstick.
- Calibrate the thumbstick in the Azeron software (how to)
- Remove the thumbstick cap
- Put on the restrictor ring, make sure the concave part is positioned downwards.
- Put back on the thumbstick cap
- In the Azeron software go in the thumbstick settings:


- Take the upper deadzone and lower it to ~120 (or around 60% in newer software versions). Make sure the thumbstick makes perfect circle at the edge when moved around. If not, then lower the deadzone even more.


If you wish to setup restrictor ring for all your profiles simultaneously, then instead of adjusting the thumbstick setting for each individual profile you need to go to Settings -> Analog Calibration -> Calibrate and choose "Adjust it manually". If you setup it this way, then make sure to remove any upper deadzone setting in the individual profile, so that they don't stack up on each other.

THUMBSTICK SETUP
Thumbstick has several modes – it can act as analog stick or emulate keyboard buttons or mouse wheel.

Xbox360 joystick will work the same as an Xbox controller analog stick. It has 360° movement and analog capabilities like if you move the thumbstick a little, then a character in video game will walk slowly, but if you move it to the outer edge, then character will start running.
This mode will work with any game that support Xbox controller and in the same time can work together with mouse and keyboard binds. You can see the list of games that support such simultaneous input here:
https://www.pcgamingwiki.com/wiki/List_of_games_that_support_simultaneous_in put
If a game doesn't support simultaneous input or is supported only partially, then the game user interface may flicker between Xbox controller and keyboard&mouse interface when trying to use mouse together with controller. In that case you can setup analog stick with keyboard keybinds, such as WASD to have better gaming experience.
Analog joystick mode will work as generic joystick analog stick with a direct input. It will work in games that are compatible with any controller, not only Xbox controller, but the same as with Xbox360 analog stick mode, the game has to support simultaneous input to be able to use the mouse at the same time.

In Keyboard mode analog stick will work in 8 directions with keybinds provided for 4 directions, such as WASD or similar. If you move the thumbstick in diagonal between W and D, then it will work as W+D at the same time (if it does not, you need to calibrate the thumbstick).
It is possible to setup 2 separate keybinds on thumbstick and switch between them on the fly (see more information at "Toggle analog stick mode")

In analog mouse wheel mode, the thumbstick will work as vertical and horizontal mouse wheel. If you move the thumbstick forward and back, it will act as a vertical mouse wheel. If you move the thumbstick left or right, then it will act as a horizontal mouse wheel. It also reacts on how far the thumbstick has been moved by scrolling faster or slower.
It is possible to change the forward direction for thumbstick with angle slider up to 180° in each direction.

Fastest way to find the correct angle for you – close your eyes, move the thumbstick forward and then check where it is positioned.

If it the thumbstick goes slightly to the side, adjust it accordingly with the angle in opposite direction.

Lower deadzone is an area in the center of the thumbstick that won't recognize input if the stick is moved within it. The higher the value, the bigger the circle is in the center where thumbstick movement won't register.

If a lower deadzone is set to 0 or very low value, then the thumbstick may be too sensitive to every micro movement (even your cat sneezing) and it may have a flickering motion in Azeron software and a character in video game may move around even if you are not touching the thumbstick. In that case you need to set the lower deadzone value higher until it stops moving by itself (for example something between 2%-13% is a good value or 10 – 65 values in older software versions). Please note, that if you have completed the calibration on your thumbstick (CALIBRATING THUMBSTICK) then here the settings you change for the thumbstick will add up to the settings that were applied via calibration tool.
Upper deadzone
determines how far is the outer diameter of the thumbstick travel zone. The higher the value the smaller the outer circle. So the higher the value, the less movement you will need with your thumb for your video game character to start moving with maximum speed. For example, if you are playing a fast paced FPS game and need extremely fast direction changes, you can increase the upper deadzone value very high. Then even the tiniest movement with your thumb will already register the direction change. Using this technic together with restrictor ring is the best, because then also the thumbstick physically doesn't need large movements to hit the edges, less travel.

If you are not sure what deadzone settings you should use, just go through the Calibrate Deadzones wizard, and the software will choose the best settings for your thumbstick. See CALIBRATING THUMBSTICK.
Sensitivity setting controls how sensitive thumbstick feels. The lower the value the more sensitive is the thumbstick. Default value is 3. If you are experiencing thumbstick vibration when you move it around, you can increase the value to reduce such effect. If the max value doesn't help, then most likely thumbstick potentiometers are worn out and needs replacement.
In analog mouse wheel mode, the thumbstick will work as vertical and horizontal mouse wheel. If you move the thumbstick forward and back, it will act as a vertical mouse wheel. If you move the thumbstick left or right, then it will act as a horizontal mouse wheel. It also reacts on how far the thumbstick has been moved by scrolling faster or slower.
PROFILES
To switch between the two on-board memory profiles, you need to setup one of the buttons as Profile switch (by default it is the closest pinky button) and then while holding it, move the scroll wheel.

Which LED lights lit up according to the currently active profile.

To work with software profiles, you need to turn them on by pressing ON button near "Profiles:".
Note! When using software profiles, the Azeron software must be running in the background while playing the game.
If you are using Software profiles, it is possible to choose 2 profiles as favorite and then switch between them with Profile switch similar as onboard memory profiles. Or you can activate any selected profile with Activate button at the top of the keybinds. You can also double click to switch between active profiles.

The list of profiles can be reordered by drag & dropping with your mouse.

Any software profile can also be sent to On-board memory, by pressing Copy To and choose in which profile to copy the keybinds or choose to create a new profile in the on-board memory.
At the bottom of the profile list is button + Add Profile, which will create a new profile by copying currently selected profile.

Profile import / export
To export them all at once, go to software Settings, find "Import/Export" section and choose Export profiles or Import profiles. The profiles in Onboard memory will not be exported, only software profiles.
To export only one profile, right click on the profile name and choose "Copy to Clipboard". It will save a string of text in your clipboard. You can paste this string in the chat to share with other people or save in Notepad for later use. You can import the single profile by copying its text string and clicking on  at the bottom of the profile list.
Automatic profile switching
You can setup Azeron software so that it switches profiles automatically when you open a specific software or game. To do that, right click on the profile name, choose "Link Settings" and then you have 2 options. First option, "Link Exe" will ask you to show the location of.exe file on your computer for the software or game. Second option "Link Process" will open a list of processes installed on your PC and you can choose a game or software from that list.

In the Settings you can turn on an option that, when launching Azeron software, it checks what software/games are already opened.

SYSTEM TRAY ICON
It is possible to minimize the Azeron software to Windows system tray (at the bottom near the clock) by enabling option "Close button minimizes software to the tray".
![]()
Then in the system tray you can right click on Azeron icon to get several options:
Minimize to tray – will close the Azeron software window
Switch Profile – you can swap between 2 favorite profiles in your profile list
Hardware mode – switch the keypad to on-board memory profiles
Software mode – switch the keypad to software profile mode
Visit Azeron – open Azeron.eu download site
Exit – close the Azeron software completely

You can double click on the Azeron icon in the system tray to open the software window.
MOUSE SENSOR SETTINGS
At the top of each profile there is a button for Cyro mouse sensor settings:

It is possible to adjust DPI and sensor angle, or even turn off the sensor completely.

SETTINGS
At the left side of the software you can select Settings button to access all the software and keypad settings:

APPEARANCE
Under Theme section you can choose the color theme for whole software.
Under Button mapper you can change size of the buttons and keybind font size.

Hide custom labels will hide the labels for each button you have created, only keybinds will be visible.
Show keybinds with custom labels (visible only if Hide custom labels is OFF) will allow to switch between 2 modes – having visible only button labels or visible labels together with keybinds.
If you wish to hide button numbering (in the button corner there is number, for example #18), enable Hide button numbering.

Show key binds together with custom button labels (visible only if Hide custom button labels is OFF) will allow to switch between 2 modes – having visible only button labels or visible labels together with keybinds.
Auto Scaling – if turned ON, it checks your applications current window size and scales the interface automatically

Lighting OFF will completely turn off the Profile LEDs on the side of the keypad. LED brightness slider adjusts the Profile LEDs. The higher the value, the brighter the LEDs will glow.
UPDATE SETTINGS
Version information. Here you can see what software and firmware you are using. And check out what have been changed in Release Notes.
Update settings. By turning On the "Auto update enabled" it will offer to install the newest software version as soon as it is released. If you are ok to use beta version of the newest release and test new features before they are "polished", you can turn On the "Beta Version Opt in" option. To reinstall the keypad firmware, press "Re-install latest firmware".

ANALOG CALIBRATION
Analog joystick hardware calibration. Here you can reset the offset and deadzones to zero values or Calibrate the thumbstick to optimal settings. When calibrating, carefully follow the instructions on screen. See more information at CALIBRATING THUMBSTICK

If you wish to manually adjust your own offset and deadzone values for all profiles at the same time, click on Calibrate and then on Adjust it manually.

WINDOWS SETTING
If you enable Start with Windows, then whenever you turn on your PC, the Azeron software will open automatically at the startup.
It is possible to minimize the Azeron software to Windows system tray (at the bottom near the clock) by enabling option Close button minimizes software to the tray. You can read more information in SYSTEM TRAY ICON.

If Check monitored games on start-up is enabled, then when launching
Azeron software, it will check what software/games are already opened. See more info in AUTOMATIC PROFILE SWITCHING.
IMPORT / EXPORT
At the Import/Export option it is possible to Export and Import all your profiles. You can back up all of your profiles in. JSON file, to prevent any accidental deletion when reinstalling software or Windows, updating firmware, etc. You can also export/import individual profiles – see how to here: PROFILE IMPORT/EXPORT.

Note! Profiles that are in on-board memory will not be exported! Only software profiles.
Under Advanced settings it is possible to adjust global button throttle. In case one or more of the buttons are starting to make double clicks (switch debounce), you can setup button throttle (debounce time) here in milliseconds. That is the time that must pass between keypad will register next keypress on the same button. At first try the Type 1 version, but if it doesn't help, try Type 2, which is more brute force method.

Note! The button throttle currently works on all buttons in the same time, it can't be setup separately for each button.
And the other option at the bottom is for changing the default macro duration for each macro step.
With analog throttle it is possible to control how often inputs are sent from your thumbstick (only in keyboard mode). The higher the number, the more milliseconds are between each input sent.

TROUBLESHOOTING

Export logs button will create a report file that can be sent to customer support to help identify any issues.
Reset Device this option will reset your keypad to factory setting, basically reinstalls firmware, deletes all settings and restarts software.
Reset Software Profiles will delete all profiles in the software.
Reset Settings this option will reset all settings in the software to defaults.
TIPS AND TRICKS
- Cyro comes with a strap for a reason, it must be on while using the mouse to be able to reach all the buttons comfortably and be able to lift and move around the mouse without issues
- To make it easier to get used to the keybind setup – we recommend creating a new character in the game and learn new skills one by one together with your character while leveling or start with games that doesn't have a lot of keybinds
- It is known that using grip tape on the buttons and palmrest feels premium:) Button grip tapes.
- It is possible to change thumbstick caps to Elite xbox magnetic caps
- Our Discord community is the best place where to solve problems, search keybinds, get ideas and find likeminded people
- To get access to more advanced macros and other options– it is possible to setup Azeron keypad as generic joystick and then use 3rd party software JoyToKey to setup more advanced macros on each button.
- Azeron devices are compatible with 3rd party softwares, such as reWASD and JoyToKey.

Do not keep the Azeron device near heat sources or in hot places!
Contact us for more information: info@azeron.eu
Discord community and support: https://discord.gg/9tw9pju
Webpage: azeron.eu
Documents / Resources
References
![www.azeron.eu]() Azeron – Azeron Software Download
Azeron – Azeron Software DownloadAzeron Keypad
![youtu.be]() Azeron Cyborg - Restrictor Ring Guide (UPDATED) - YouTube
Azeron Cyborg - Restrictor Ring Guide (UPDATED) - YouTube![www.pcgamingwiki.com]() List of games that support simultaneous input - PCGamingWiki PCGW - bugs, fixes, crashes, mods, guides and improvements for every PC game
List of games that support simultaneous input - PCGamingWiki PCGW - bugs, fixes, crashes, mods, guides and improvements for every PC game![store.azeron.eu]() Button Grip tapes
Button Grip tapesAzeron Keypad
![azeron.eu]() Azeron Keypad - Joystick Keyboard Gaming!
Azeron Keypad - Joystick Keyboard Gaming!
Download manual
Here you can download full pdf version of manual, it may contain additional safety instructions, warranty information, FCC rules, etc.
Advertisement


Need help?
Do you have a question about the Cyro and is the answer not in the manual?
Questions and answers