Table of Contents
Advertisement
Quick Links
BUILT-IN OUTDOOR GRILLS
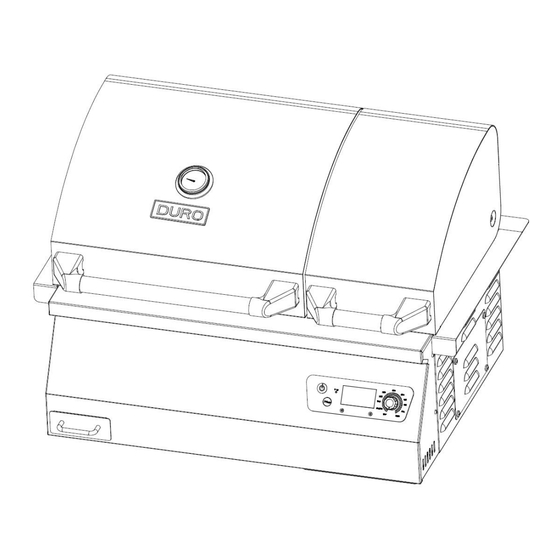
MODEL: 740-3009BI
Electric Stainless Steel Pellet Grill
Installation and User Care Guide
IMPORTANT:
Save for electrical inspector's use.
Installer: Leave installation instructions with the homeowner.
Homeowner: Keep installation instructions for future reference.
For questions about operation, parts, accessories, and services, please call: (888) 909-8818
®
Advertisement
Table of Contents

Related Manuals for Duro 740-3009BI


Summary of Contents for Duro 740-3009BI
- Page 1 ® BUILT-IN OUTDOOR GRILLS MODEL: 740-3009BI Electric Stainless Steel Pellet Grill Installation and User Care Guide ...
-
Page 2: Table Of Contents
Should you encounter any problems CALL US FIRST. Do not return product to the store. WE CAN HELP. nxrcs@duro-global.com For assistance, contact customer service at or at 1-888-909-8818; Monday-Friday 9AM-5PM Pacific Standard time ... -
Page 3: Outdoor Grill Safety
OUTDOOR GRILL SAFETY Your safety and the safety of others are very important. We have provided many important safety messages in this manual and on your appliance. Please always read and obey all safety messages. This is the safety alert symbol. This symbol alerts you to potential hazards that can kill or hurt you and others. -
Page 4: Important Safety Warnings
IMPORTANT SAFETY WARNINGS READ ALL SAFETY WARNINGS AND INSTRUCTIONS CAREFULLY BEFORE ASSEMBLING AND OPERATING YOUR GRILL Do not use it in any enclosed area. For convenience and safety,assemble the grill by at least two people. Be careful w hen assembling and operating your grill to avoid scrapes or cuts from sharp edges. Do not use gasoline, kerosene or alcohol for lighting wood pellets. Use of any of these or similar products could cause an explosion possibly leading to severe bodily injury. Do not used lighter fluid on already lit wood pellets. When adding wood pellets, pay extreme attention. ... - Page 5 WARNING For Safe Use of Your Grill and to Avoid Serious Injury. Keep Children and Pet away from Grill. Supervision is necessary and do not leave grill unattended when in use. Keep grill area clear and free from materials that burn. ...
-
Page 6: Clearance On Grill Installation
CLEARANCE ON GRILL INSTALLATION WARNING: The structure and surrounding objects MUST maintain the specified minimum clearance to the Grill. If Built-in structures constructed of wood or other combustible materials, it may require clearance to combustible materials. The grill may be supported by either the three support brackets, or the four leveling feet. Please note that there must be at least 3/8”... -
Page 7: Installation Requirements
INSTALLATION REQUIREMENTS Tools and Parts Gather the required tools and parts before Location Requirement starting installation. Read and follow the instructions provided with any tools listed here. Tools Needed ■ Tape measure ■ Small, flat‐blade screwdriver ■ Phillips screwdriver ... -
Page 8: Product Dimension
Built-In Outdoor Grill Enclosure Fire Hazard Do not install grill on or near combustible materials without an insulated jacket. Doing so can result in death or fire. ... -
Page 9: Cabinet Cutout Dimension
CABINET CUTOUT DIMENSIONS The illustration below includes cutout dimensions and minimum spacing requirements. The illustration is for reference. The design of your cabinet layout can be personalized, but the dimensions for the cutouts and minimum spacing must be followed. Center or support surfaces must be level. -
Page 10: Grill Installation Instruction
GRILL INSTALLATION INSTRUCTIONS Unpack Grill 8. Using 5pcs 1/4* 12mm screws (these 5 pcs screws will be packed together with manual) to lock the back trim to the back side of firebox as pic. below Unpack Grill Remove all packaging materials and remove grill from the shipping base. -
Page 11: Operation Instructions
OPERATION INSTRUCTIONS Only Dia 6 mm Pellets can be used. LIGHTING INSTRUCTIONS 1. Read instructions before lighting. the pellet firepot. 2. Open lid during lighting. 8. When the pellets start to drop to the firepot, 3. Make sure power switch is disconnected. turn the control knob to "... - Page 12 IF GRILL FAILS TO IGNITE: 1. Turn the control knob to the "OFF" position and turn the power switch off. 2. Wear the protective gloves and make sure all the components are cool to touch. Open lid, remove the cooking grates, grease drip tray and flame tamer. 3.
- Page 13 CONTROLLER OPERATION Functional Description Starting–up Power switch button including indicator controlled by light touch. When the power is off, indicator light is black,indicator light is blue when the power on. Fire rod works(the decimal point of LCD temp is flashing) when turning on,then stop after 5 minutes. ...
- Page 14 Shutdown Cycle: Feeding motor and fire rod turn off. Fan will continues to run for 10 minutes. After finished cooking, turn the temperature control knob to OFF position, to prevent flame flare-up, The function of this setting will leave the draft fan running for 10 minutes to burn redundant pellets in firepot.
- Page 15 HOW TO USE THE MEAT PROBES When meat probes not connected, display screen will shows ”no P”. Plug the meat probes into the pellet control panel as shown, you can get the temperature of probe 1 and probe 2 once you insert the foods, and the temperature will shows on the display screen later.
-
Page 16: Operating Tips
OPERATING TIPS 1. Just like other barbecues, the actual temperature of this grill or the cooking times will be affected by external temperature, humidity, wind conditions, quality of pellets and so on. 2. It is better to shelter your grill from the wind, this will aid in temperature output,heat retention and heat recovery time when opening the lid. -
Page 17: Tips For Outdoor Grilling
TIPS FOR OUTDOOR GRILLING Before Grilling ■ Thaw food items before grilling. ■ Preheat grill on high for 10 minute.The lid must be closed during preheating. Preheating provides the high heat needed to brown and seal the juices. ■ Shorten the preheat time when grilling high-fat cuts of meat or poultry, such as chicken thighs. This will help to reduce flare-ups. -
Page 18: Outdoor Grill Care
OUTDOOR GRILL CARE Maintain and Cleaning IMPORTANT: Before cleaning, make sure all controls are off and the grill is cool. Always follow label instructions on cleaning products. For routine cleaning, wash with soap and water using a soft cloth or sponge. Rinse with clean water and dry at once with a soft, lint-free cloth to avoid spots and streaks. - Page 19 INTERIOR Discoloration of stainless steel on these parts is to be expected, due to intense heat from the burner. Always rub in the direction of the grain. Cleaning should always be followed by rinsing with clean, warm water. Cleaning Method: ■...
-
Page 20: Troubleshooting
TROUBLESHOOTING CAUTION: Make sure the grill is completely cool and unplugged before you do any inspection, cleaning, maintenance or service work. Problem Potential Cause Solution Make sure the power cord is plugged in. Verif y Power there is power at the electrical outlet. Remove the control, check the fuse on back . -
Page 23: Wiring Diagram
D IAG R AM W IR ING Controller RTD Sensor "P" Set White Black SMOKE Prime HIGH Power Cord FUSE (on back of controller) 4A 125V 4 amp 125V 5 x 20 MM Fast Blow Fuse MOLEX Connector Hot Rod Burner Blower Fan Auger Motor... -
Page 24: Limited Warranty
LIMITED WARRANTY DURO warrants to the original consumer-purchaser only that this product (Model #740-3009-BI) shall be free from defects in workmanship and materials after correct assembly and under normal and reasonable home use for the periods indicated below beginning on the date of purchase. The manufacturer reserves the right to require photographic evidence of damage, or that defective parts be returned, postage and or freight pre-paid by the consumer, for review and examination. - Page 25 You may also have other rights which vary from state to state. If you wish to obtain performance of any obligation under this limited warranty, you should write to: DURO CORPORATION 17018 Evergreen place, City of Industry,...
- Page 26 ...
Need help?
Do you have a question about the 740-3009BI and is the answer not in the manual?
Questions and answers