Table of Contents
Advertisement
Quick Links
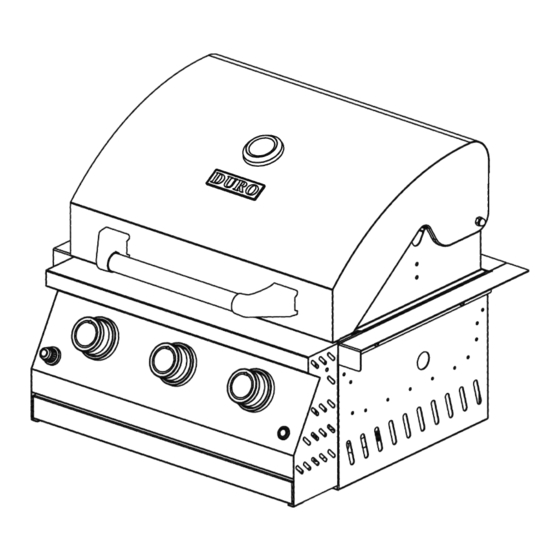
BUILT-IN OUTDOOR GRILLS
MODEL: 740-3024-BI LED
Liquid Propane / Natural Gas Stainless Steel Grill
Installation and User Care Guide
IMPORTANT:
Save for electrical inspector's use.
Installer: Leave installation instructions with the homeowner.
Homeowner: Keep installation instructions for future reference.
For questions about operation, parts, accessories, and services, please call: (888) 909-8818
1
心
Advertisement
Table of Contents

Subscribe to Our Youtube Channel
Related Manuals for Duro 740-3024-BI


Summary of Contents for Duro 740-3024-BI
- Page 1 BUILT-IN OUTDOOR GRILLS MODEL: 740-3024-BI LED Liquid Propane / Natural Gas Stainless Steel Grill Installation and User Care Guide 心 IMPORTANT: Save for electrical inspector’s use. Installer: Leave installation instructions with the homeowner. Homeowner: Keep installation instructions for future reference.
-
Page 2: Table Of Contents
TABLE OF CONTENTS OUT DOORGRILLUSE............17 OUTDOOR GRILL SAFETY..........UsingYourOutdoorGrill............17 INSTALLATION REQUIREMENTS........UsingYourRotisserieBurner..........19 Tools and Parts .............. RotisserieCookingTips............19 Location Requirements........... TIPSFOROUTDOORGRILLING..........20 Product Dimensions............CookingMethods..............20 Built-In Outdoor Grill Enclosure........GrillingChart...............21 Cabinet Cutout Dimensions..........OUTDOORGRILLCARE............23 Light Instructions.............. ReplacingtheIgniterBattery..........23 Gas Supply Requirements............ 10 GeneralCleaning...............23 GasConnectionRequirements.......... -
Page 3: Outdoor Grill Safety
OUTDOOR GRILL SAFETY Your safety and the safety of others are very important. We have provided many important safety messages in this manual and on your appliance. Always read and obey all safety messages This is the safety alert symbol. This symbol alerts you to potential hazards that can kill or hurt you and others. - Page 4 IMPORTANT SAFETY INSTRUCTIONS To reduce the risk of fire, electrical shock, For LP Unit: WARNING: ■ LP gas grill models are designed for use with a standard 20 lb. Liquid injury to persons, or damage when using the outdoor cooking Propane Gas tank.
-
Page 5: Installation Requirements
INSTALLATION REQUIREMENTS Tools and Parts Location Requirements Gather the required tools and parts before starting installation. Read and follow the instructions provided with any tools listed WARNING here. Tools Needed Tape measure Pipe wrench ■ ■ Scissors or cutting pliers Small, flat-blade screwdriver ■... -
Page 6: Product Dimensions
Built-In Outdoor Grill Enclosure Fire Hazard WARNING Do not install grill on or near combustible materials without an insulated jacket. Doing so can result in death or fire. This built-in outdoor grill is only for installation in a built-in enclosure constructed only of noncombustible materials. Non- combustible materials could be brick, firewall or steel. -
Page 7: Cabinet Cutout Dimensions
Cabinet Cutout Dimensions The illustration below includes cutout dimensions and minimum spacing requirements. The illustration is for reference. The design of your cabinet layout can be personalized, but the dimensions for the cutouts and minimum spacing must be followed. Center or support surfaces must be level. Built-in Outdoor Grill Enclosure Ventilation Requirements(see picture 1)... -
Page 8: Light Instructions
Light Instructions Knob should be in the OFF position Picture 1 main burner LED knob ON/OFF switch Picture 2 1. Light Operation Instructions (see picture 1) Make sure light’s power switch on the control panel is in the “OFF” position 2. - Page 9 Install 20 lb LP Gas Fuel Tank Tray (see picture 3) (Pictures of gas tank is for illustration purpose only.) The tank tray should be secured to a fixed location that can be easily accessed and will allow the gas pressure regulator/ hose assembly to connect to the 20 lb LP gas fuel tank without kinking or putting strain on the gas pressure regulator/ hose assembly.
- Page 10 LP Gas Connection Gas Pressure Regulator The gas pressure regulator supplied with this grill must be used. Install the 20 lb LP Gas Fuel Tank Replacement gas pressure regulator/ hose assembly specific to your model, This grill is equipped for use with a 20 lb LP gas fuel tank (fuel is available from your outdoor grill dealer.
-
Page 11: Installationinstructions
Grill INSTALLATION INSTRUCTIONS Unpack Grill Install Grill NOTE: The grill drops into the enclosure and is supported by its side WARNING flanges. Do not use a bottom support. Excessive Weight Hazard 1. Place grill into outdoor enclosure, leave enough room in the back to Use two or more people to move and install grill. -
Page 12: Leakagetesting
Gas Leakage Testing After install the gas supply system, and the Gill is well fixed to the enclosure: 1, Before lighting the grill, test all connections by brushing on an approved non-corrosive leak-detection solution. Bubbles will show a leak. 2. If a leak is found, turn the tank valve off and do not use the grill. -
Page 13: Gas Conversions
NG GAS CONVERSIONS Natural gas adapter, hose and regulator are not included in this grill. Instruction and pictures are for illustration only in case needed. STEP THREE: Change Grill Main Burner Valve Orifices IMPORTANT: The Natural gas Conversion Kit supplied with this grill must be Remove the grates and flame tamers. - Page 14 STEP FIVE: Connecting the NG hose The supply line shall be equipped with an approved IMPORTANT: shutoff valve. This valve should be located in the same area as the grill and should be in a location that allows ease of opening and closing. Do not block access to the shutoff valve.
-
Page 15: Checkandadjusttheburners
Warning: The outdoor cooking gas appliance and its individual shutoff valve must be disconnected from the gas supply piping system during any STEP SIX: Leakage Checking and adjusting pressure testing of that system at test pressures in excess of 0.5 psi 1. - Page 16 Light Instructions Control Knob Picture 1 Light Operation Instructions (see picture 1) Make sure light’s power switch on the control panel is in the “OFF” position.
-
Page 17: Out Doorgrilluse
OUTDOOR GRILL USE The grill you have purchased may have some or all of the features listed. The locations and appearances of the features shown here may not match those of your model. Control Panel A. electric ignition control knob B. - Page 18 Prepare the Gas Supply Manually Lighting the Main Grill Open the hood completely. Do not light burners with the hood Do not lean over the grill. closed. Remove the manual lighting extension (see following Make sure control knobs are turned to OFF. The drip tray illustration) and attach a match to the split ring.
-
Page 19: Tipsforoutdoorgrilling
Shorten the preheat time when grilling high-fat cuts of meat ■ ROTISSERIE CHART or poultry, such as chicken thighs. This will help reduce Use a portable meat thermometer to check internal doneness of flare-ups. the food. Lightly oil the grill grates or the food when cooking low-fat ■... -
Page 20: Grillingchart
Grilling Chart Knobs have High, Medium and Low settings for flame When 2 temperatures are listed, for example: Medium to ■ ■ adjustment. Medium-Low, start with the first and adjust based on cooking progress. Heat settings indicated are approximate. ■ Cooking times may vary from chart times depending on the ■... - Page 21 FOOD COOKING METHOD/ INTERNAL TEMP. TIME SPECIAL INSTRUCTIONS BURNER SETTING (total minutes) Fish and Seafood Fillets, Steaks, Chunks DIRECT 4-6 per Grill, turning once. Brush grill Halibut, Salmon, Medium ½” (1.3 cm) with oil to keep fish from Swordfish, 8 oz (0.25 kg) thickness of fish sticking.
-
Page 22: Outdoorgrillcare
OUTDOOR GRILL CARE Replacing the Igniter Battery GRILL GRATES If igniters stop sparking, the battery should be replaced. IMPORTANT: To avoid damage to grill grates, do not use a steel Unscrew igniter button cap counterclockwise to remove. or fiber scraper. Immediately after you are finished cooking, loosen food soil with a brass bristle brush. - Page 23 BURNERS ROTISSIERE BURNER Cleaning Method: Cleaning Method: Clean the exterior of the burner with a wire brush. Light the rotisserie burner. See the “Using Your Rotisserie ■ Burner” section. Clear any clogged burner ports with a straightened paper ■ Close the grill hood. clip.
- Page 25 Parts Parts Parts (description) Parts (Description) Number Number Main Valve Setting Temperature Gauge Regulator Main lid with Logo Led Know Wire Fire box side panel,Left Fire box back panel Bezel LED Knob Fire box side panel,Right Electric ignition Main lid handle base Left Grill Cover Main lid handle tube Main lid handle base Ritght...
-
Page 26: Troubleshooting
Excessive flare-ups TROUBLESHOOTING ■ Is there excessive fat in the food being grilled? Keep flame on low or turn one burner off. Grill will not light Keep the hood up when grilling to avoid excessive flare-ups. Move food to the warming rack until flames subside. ■... -
Page 27: Replacementparts
LIMITED WARRANTY DURO warrants to the original consumer-purchaser only that this product (Model #740-3024-BILED) shall be free from defects in workmanship and materials after correct assembly and under normal and reasonable home use for the periods indicated below beginning on the date of purchase. The manufacturer reserves the right to require photographic evidence of damage, or that defective parts be returned, postage and or freight pre-paid by the consumer, for review and examination. - Page 28 You may also have other rights which vary from state to state. If you wish to obtain performance of any obligation under this limited warranty, you should write to: DURO CORPORATION 17018 Evergreen place, ,...
Need help?
Do you have a question about the 740-3024-BI and is the answer not in the manual?
Questions and answers
The grill is not as hot as I expected. Can you send the regulator specifications?
The Duro 740-3024-BI grill includes one regulator, listed as part number 22 in the parts list. Specific details about the regulator's specifications (such as pressure rating or type) are not provided in the available information.
This answer is automatically generated
I neglected the model 740-3024-BI Led
@Mr. Anderson There we’re two regulators on for natural gas and one for propane. Where are the specifications available?
When do you use the back infrared element