Table of Contents
Advertisement
Quick Links
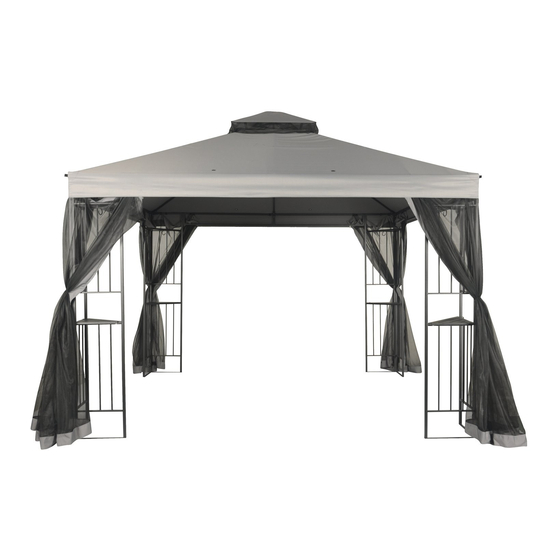
USER GUIDE
10FT X 10FT EASY ASSEMBLY GAZEBO
VSN#MS10-301-004-01
CAUTION
For outdoor
use only!
For product assistance &
THIS GUIDE CONTAINS
missing or replacement parts:
IMPORTANT SAFETY
WE CAN HELP
INFORMATION.
Email: Walmart@aeoutdoor.com
1-877-980-6928
PLEASE READ AND KEEP
FOR FUTURE REFERENCE.
Monday-Friday 7:30 am to 4:30 pm PST
Walmart.com
Find more at
1
Advertisement
Table of Contents

Related Manuals for Mainstays MS10-301-004-01


Summary of Contents for Mainstays MS10-301-004-01
- Page 1 USER GUIDE 10FT X 10FT EASY ASSEMBLY GAZEBO VSN#MS10-301-004-01 CAUTION For outdoor use only! For product assistance & THIS GUIDE CONTAINS missing or replacement parts: IMPORTANT SAFETY WE CAN HELP INFORMATION. Email: Walmart@aeoutdoor.com 1-877-980-6928 PLEASE READ AND KEEP FOR FUTURE REFERENCE.
-
Page 2: Table Of Contents
Contents & Information ASSEMBLY ......... 7-11 CONTENTS & INFORMATION ..2 PRE-ASSEMBLY ......2 CLEANING & CARE ....... 12 Cleaning ........12 OVERVIEW ........Storage ........12 SAFETY PRECAUTIONS ....CARE AND MAINTENANCE ..12 MODEL DESCRIPTION ....5 WARRANTY ........13 Setup ........ -
Page 3: Overview
Overview Safety Precautions CAUTION Select ideal location • Set out all parts on a clear and level surface prior to assembly. Ideally, the Gazebo should be set up in its location to avoid moving it after assembly. Use location • During the process of assembling, especially when lifting heavy or large parts, pay attention to safety. - Page 4 Safety Precautions WARNING Instruction Manual • Save this Manual for future reference. • Your Gazebo requires assembly prior to use. It is Important that you read the entire manual BEFORE you set up the Gazebo. WARNING Safety Warning • When using your gazebo, basic safety precautions should always be followed to reduce the risk of personal injury and damage to equipment.
-
Page 5: Model Description
Model Description SETUP TOOLS NEEDED Clamp PARTS Part Description Part Description Side panel Clamp Side panel Shelf Crossbeam Hook M Peg Corner connector Canopy Middle connector Mosquito net Rope... -
Page 6: Parts Diagram
PARTS DIAGRAM... -
Page 7: Assembly
Assembly SELECT SIDE REQUIRED • lnsert the plug Side panel (B) into the plug hole on side (A) Side panel x 4 Panel (A). Then use the clamps to attach the panels.Repeat these steps for all 4 panels. • Push down sping button. •... - Page 8 Assembly 2. CONNECT REQUIRED • Ensure that the hole in Crossbeam (C) is faced inwards (C) Crossbeam x 4 towards the center of the Gazebo. (I) Clamp x 8 3. Attach the self REQUIRED • Put the Hook (K) on the panels in between of each corner. (J) Shelf x 4 •...
- Page 9 Assembly 4. CONNECT REQUIRED • Connect the ribs to the hubs.Push down spring button. (D) Rib x 4 (H) Hub x 1 5. CONNECT REQUIRED • Connect the ribs to the hubs. (E) Rib x 4 • Push down spring button. (G) Middle connector...
- Page 10 Assembly 6. ATTACH REQUIRED • Attach the Mosquito net. (O) Mosquito net 7. ATTACH REQUIRED • Attach the Canopy. (N) Canopy x 1...
- Page 11 Assembly 8. FIX REQUIRED • Making certain that the pavilion is square, spread the cover (L) Peg x 16 out over the top of the Gazebo. Pull it tight and bring it down over the top portion of the side panels at each corner. Secure gazebo to the ground with pegs (L).
-
Page 12: Cleaning & Care
Cleaning & Care CLEANING 1. Using soap and water, wipe down base, rinse with clean water and dry with a soft absorbent cloth towel. 2. Do not use any bleach or solvents to clean this product. This will void the warranty. STORAGE 1.
Need help?
Do you have a question about the MS10-301-004-01 and is the answer not in the manual?
Questions and answers