
Related Manuals for Fronius Symo GEN24 12.0 SC


Summary of Contents for Fronius Symo GEN24 12.0 SC
- Page 1 Operating Instructions Fronius Symo GEN24 12.0 SC / 12.0 Plus SC Operating Instructions 42,0426,0492,EN 004-11062024...
-
Page 3: Table Of Contents
Noise emission values EMC measures Backup power Data security Copyright Protective earthing (PE) General information Fronius Symo GEN24 SC / Fronius Symo GEN24 Plus SC Device concept Function overview Fronius UP Scope of supply Intended use Thermal concept Fronius Solar.web... - Page 4 Connection area Connection area divider Ground electrode terminal DC disconnector Data communication area Button functions and LED status indicator Internal schematic connection diagram of the IOs Backup power variant - PV Point (OP) General Explanatory note - PV Point/PV Point Comfort PV Point (OP) Backup power variant - Full Backup General...
- Page 5 Maximum alternating current fuse protection Connecting the inverter to the public grid (AC side) Safety Connecting the inverter to the public grid (AC side) Connecting solar module strings to the inverter General comments regarding PV modules Safety Module array - general information Module array configuration Connecting the solar module strings to the inverter Connecting the battery to the inverter...
- Page 6 Event Log Information License Manager Support Communication Network Modbus Remote control Fronius Solar API Internet Services Safety and grid requirements Country setup Requesting inverter codes in Solar.SOS Export limitation Dynamic power regulation with several inverters I/O power management Connection diagram - 4 relay...
- Page 7 Circuit diagrams Fronius Symo GEN24 and BYD Battery-Box Premium HV Circuit Diagram Fronius Symo GEN24 with two BYD Battery-Box Premium HV connected in parallel Circuit Diagram Fronius Symo GEN24 with three BYD Battery-Box Premium HV connected in parallel Circuit Diagram...
-
Page 8: Safety Rules
Safety rules Explanation of WARNING! safety notices Indicates a potentially hazardous situation. ▶ Death or serious injury may result if appropriate precautions are not taken. CAUTION! Indicates a situation where damage could occur. ▶ If not avoided, minor injury and/or damage to property may result. NOTE! Indicates a risk of flawed results and possible damage to the equipment. -
Page 9: Environmental Conditions
All safety and danger notices on the device: Must be kept in a legible state Must not be damaged Must not be removed Must not be covered, pasted or painted over Only operate the device when all protection devices are fully functional. If the protection devices are not fully functional, there is a risk of: Serious or fatal injury to the operator or third parties Damage to the device and other material assets belonging to the operating... -
Page 10: Emc Measures
Where an automatic backup power supply is installed, a notice (https://www.fronius.com/en/search-page, item number: 42,0409,0275) must be fitted on the electrical distributor. Maintenance and installation work in the home network requires both disconnec- tion on the utility side and deactivation of the replacement power mode by open- ing the integrated DC disconnector on the inverter. -
Page 11: Data Security
Devices with electric motors (e.g. lifting platform, circular saws, planing bench) Devices with large transmission ratio and flywheel mass Devices with compressors (e.g. compressed air compressors, air conditioning systems) IMPORTANT! Very high starting currents can cause short-term distortion or a drop in output voltage. -
Page 13: General Information
General information... -
Page 15: Fronius Symo Gen24 Sc / Fronius Symo Gen24 Plus Sc
Backup power variant - PV Point (OP) Available as an op- Battery connection* tion** Backup power variant - Full Available as an op- Backup tion** For suitable batteries, see chapter Suitable batteries. The functions are optionally available via Fronius UP (see chapter Fronius UP). -
Page 16: Fronius Up
Fronius UP With Fronius UP*, the inverter can be expanded by the authorised specialist to Function overview). include optionally available functions (see chapter The availability of Fronius UP varies from country to country. For more in- formation on Fronius UP and availability, see Installation guide: Fronius GEN24 &... -
Page 17: Thermal Concept
The Fronius GEN24 inverter is a grid-connected inverter with a backup power function – it is not a stand-alone inverter. The following restrictions must there- fore be observed in backup power mode: Backup power mode may be in operation for at max. 2000 hours... -
Page 18: Local Communication
Fronius recommends testing the Internet connection on site according to the minimum requirements. Local commu- The inverter can be found via the Multicast DNS protocol (mDNS). It is recom- nication mended to search for the inverter by the assigned host name. -
Page 19: The Various Operating Modes
Primary meter records the system's load curve and provides measurement data for energy profiling in Fronius Solar.web. The primary meter also controls the dynamic feed-in control. Secondary meter records the load curve of individual loads (e.g. washing machine, lamps, TV, heat pump, etc.) in the consumption branch and provides... -
Page 20: Operating Mode - Inverter With Battery
Operating mode In order to be able to obtain the highest rate of self-consumption with your PV – Inverter with system, a battery can be used to store excess energy. The battery is coupled to battery the inverter on the direct current side. Multiple current conversion is therefore not required, and the efficiency is increased. -
Page 21: Operating Mode - Inverter With Battery And Backup Power Function
Ohmpilot Operating mode IMPORTANT! – Inverter with In the fully equipped hybrid PV system with a Fronius Ohmpilot, the Ohmpilot battery, Ohmpi- cannot be operated in the event of a power failure for regulatory reasons. It is lot and backup therefore sensible to install the Ohmpilot outside of the backup power branch. -
Page 22: Operating Mode - Inverter With Battery And Additional Inverter
0 0 1 Operating mode In the hybrid photovoltaic system, batteries must only be connected to one in- – Inverter with verter with battery support. Batteries cannot be split between multiple inverters battery and ad- with battery support. However, depending on the battery manufacturer, several ditional inverter batteries can be combined on one inverter. -
Page 23: Energy Flow Direction Of The Inverter
0 0 1 Energy flow dir- In the case of hybrid inverters, there are four different energy flow directions: ection of the in- verter PV module – inverter – load/grid PV module – inverter – battery* Battery – inverter – load/grid* Grid –... - Page 24 Operating state Description Min. state of charge (SOC) Battery has reached the minimum SOC set or achieved specified by the manufacturer. The battery cannot be discharged any further. Energy saving mode The system has been put into energy saving mode. (standby) Energy saving mode is automatically ended as soon as sufficient excess energy is available again.
-
Page 25: Energy Saving Mode
Both the inverter and the battery automatically switch to energy sav- ing mode under certain conditions. The inverter switches to energy saving mode if the battery is flat and no PV power is available. Only the inverter's communication with the Fronius Smart Meter and Fronius Solar.web is maintained. Switch-off con-... -
Page 26: Indication Of Energy Saving Mode
Indication of en- During energy saving mode: ergy saving Button functions and Operating LED for the inverter lights up orange (see mode LED status indicator on page 36). The user interface of the inverter can be reached. All the available data is saved and transmitted to Solar.web. The real-time data can be seen on Solar.web. -
Page 27: Suitable Batteries
Fronius explicitly points out that the third-party batteries are not Fronius products. Fronius is not the manufacturer, distributor or retailer of these batter- ies. Fronius accepts no liability and offers no service or guarantees for these bat- teries. Obsolete firmware/software states may lead to incompatibilities between the in- verter and the battery. -
Page 28: Lg Flex
Switch on the battery. Set the DC disconnector to the "On" switch position. Switch on the auto- matic circuit breaker. LG FLEX LG FLEX 12.9 17.2 Number of battery modules Fronius Symo GEN24 SC* Fronius Symo GEN24 Plus SC Battery support optionally available. - Page 29 Switching on the battery Pull off the cover to the right. Pull off the cover of the DC discon- nector to the front. Set the DC discon- nector to the "On" switch position. To refit the battery, follow the steps listed above in reverse order.
-
Page 30: Manual System Start
Manual system start Requirements There is no energy available from the PV modules or from the public grid. If backup power operation or battery operation are not possible (e.g. deep dis- charge protection of the battery), the inverter and battery switch off. Notification of Status codes about the inactive state of the battery are displayed on the user in- system shut-... -
Page 31: Protection Of People And Equipment
▶ Check plug connections are in good condition. ▶ Repair incorrect insulation as appropriate. ▶ Complete connections as per the specifications. IMPORTANT! Fronius will not accept any costs associated with production downtimes, installer... -
Page 32: Safe State
Fronius accepts no liability for damage that can occur despite the presence of the integrated Arc Fault Circuit Interrupter/extinguishing system ( e.g. caused by a parallel arc). -
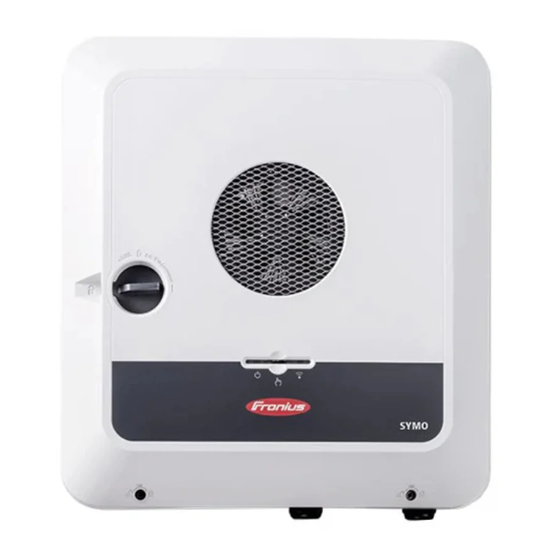
Page 33: Control Elements And Connections
Control elements and connections Connection area 2 x 4-pin DC push-in terminal Push-in WSD (wired shutdown) terminal Push-in terminals in the data communication area (Modbus, digital inputs and outputs) 3-pin push-in terminal for PV Point (OP) 5-pin AC push-in terminal Cable bushing/cable gland AC 6-pin ground electrode terminal Cable bushing/cable gland in the data communication area... -
Page 34: Connection Area Divider
Connection area divider (10) 10x DC cable bushings (11) Optional cable bushing (M16) (12) Optional cable bushing (M16 - M20) (13) Optional cable bushing (M16 - M32) (14) Optional cable bushing (M16 - M25) Connection area The connection area divider separates the high-voltage conductors (DC and AC) divider from the signal lines. -
Page 35: Dc Disconnector
DC disconnector The DC disconnector has 3 switch set- tings: Locked/off (turned to the left) IMPORTANT! In switch settings (1) and (3), a conven- tional padlock can be used to secure the inverter against being switched on/ off. The national guidelines must be complied with in this respect. -
Page 36: Button Functions And Led Status Indicator
LED status shown via the operating status indicator LED. In the event of faults, carry out the individual steps in the Fronius Solar.start app. The optical sensor is actuated WLAN access point by touching with a finger. Quit Service Message 3-6 sec. - Page 37 Sensor functions = WLAN Access Point (AP) is opened. Flashing blue = WLAN Protected Setup (WPS) is activated. Flashing green 3 seconds (max. 6 seconds) = the service message is acknowledged. Flashing white (rapidly) LED status indicator The inverter is operating correctly. Lights up green The inverter is performing the grid checks required by the applicable standards for feed-in mode.
-
Page 38: Internal Schematic Connection Diagram Of The Ios
LED status indicator The inverter is operating correctly, a network fault is in- dicated. Lights up red The network connection is active. Lights up blue The inverter is performing an update. Flashing blue There is a service message. Lights up white Internal schem- On the V+/GND pin, it is possible to feed in a voltage of around 12.5–24 V (+ max. -
Page 39: Backup Power Variant - Pv Point (Op)
Backup power variant - PV Point (OP) -
Page 41: General
General Explanatory note IMPORTANT! - PV Point/PV If several backup power variants are available, please note that only one backup Point Comfort power variant may be installed and configured. The inverter can provide 220 ‑ 240 V at the PV Point/PV Point Comfort. A corres- ponding configuration must be set up during commissioning. - Page 42 Installation Instructions, see Connecting backup power - PV Point (OP) on page...
-
Page 43: Backup Power Variant - Full Backup
Backup power variant - Full Backup... -
Page 45: General
The inverter is operating in backup power mode. from backup The public grid is functioning correctly again. power mode to The Fronius Smart Meter monitors the grid parameters on the public grid feeding energy and passes this information to the inverter. into the grid The stability of the returned public grid is determined by checking the meas- ured values of the Fronius Smart Meter. -
Page 46: Backup Power And Energy Saving Mode
Backup power Under the following conditions, the battery and the inverter are switched to en- and energy sav- ergy saving mode after a waiting time of 8 - 12 minutes and backup power mode ing mode is ended: The battery is discharged to the minimum state of charge and no energy is coming from the PV modules. -
Page 47: Automatic Switch To Backup Power Including Backup Power Circuits And 3-Pin Separation, E.g
Public grid available again. feeding energy The Fronius Smart Meter monitors the grid parameters on the public grid into the grid and passes this information to the inverter. The stability of the returned public grid is determined by checking the meas- ured values of the Fronius Smart Meter. -
Page 48: Automatic Switch To Backup Power All-Pin Separation, E.g. Germany, France, Spain
Transitioning The public grid is monitored by the inverter's internal grid and system pro- from feeding en- tection unit and by the Fronius Smart Meter connected to it. ergy into the grid Failure of the public grid. to backup power... -
Page 49: Transitioning From Backup Power Mode To Feeding Energy Into The Grid
Public grid available again. feeding energy The Fronius Smart Meter monitors the grid parameters on the public grid into the grid and passes this information to the inverter. The stability of the returned public grid is determined by checking the meas- ured values of the Fronius Smart Meter. -
Page 50: Automatic Switch To Backup Power All-Pin Separation, Italy
Italy Functions Measuring and transferring the required parameters for energy management and Solar.web by the Fronius Smart Meter. Monitoring of the voltage and frequency grid parameters by the inverter. Disconnecting from the public grid to enable operation in backup power mode if the grid parameters are outside the country-specific standards. -
Page 51: Transitioning From Backup Power Mode To Feeding Energy Into The Grid
Public grid available again. feeding energy The Fronius Smart Meter monitors the grid parameters on the public grid into the grid and passes this information to the inverter. The stability of the returned public grid is determined by checking the meas- ured values of the Fronius Smart Meter. -
Page 52: Functions
0. This causes the inverter to shut down immedi- ately. This behaviour is ensured via 2 contacts. Communication between the inverter and Fronius Smart Meter is optionally interrupted via a contact. The suspended communication prevents automatic termination of backup power mode when the public grid returns, so that the inverter remains in backup power mode until it is manually switched back. -
Page 53: Transitioning From Backup Power Mode To Feeding Energy Into The Grid
The inverter is again connected to the entire home network and to the public grid. Communication between the inverter and Fronius Smart Meter is re-estab- lished. The inverter can start feeding energy into the grid again after performing the... -
Page 55: Installation
Installation... -
Page 57: General
General Quick-lock sys- A quick-lock system (3) is used to mount the connection area cover and front cover. The system is opened and closed with a half-rotation (180°) of the captive screw (1) into the quick- lock spring (2). The system is independent of torque. NOTE! Danger when using a drill driver. -
Page 58: System Component Compatibility
32 - 11 = 21 → Production year 2021 06 = Calendar week 06 Symbols on the rating plate: CE mark – confirms compliance with applicable EU directives and regulations. UKCA mark – confirms compliance with applicable UK directives and regulations. -
Page 59: Installation Location And Position
Installation location and position Choosing the Please note the following criteria when choosing a location for the inverter: location of the inverter Only install on a solid, non-flam- mable surface. ≥ 200 mm ≥ 275 mm ≥ 150 mm (≥ 7.87 inch) (≥... -
Page 60: Choosing The Location Of Third-Party Batteries
The inverter must not be installed or used at altitudes above 4000 m. Do not install the inverter in: Areas where it may be exposed to ammonia, corrosive gases, acids or salts (e.g. fertiliser storage areas, vent open- ings for livestock stables, chemical plants, tanneries, etc.) During certain operating phases the inverter may produce a slight noise. - Page 61 The inverter is suitable for a horizontal installation position. The inverter is suitable for installation on a sloping surface. Do not install the inverter on a sloping surface with its connec- tion sockets at the top. Do not install the inverter at an angle on a vertical wall or column.
-
Page 62: Install The Mounting Bracket And Hang Up The Inverter
Install the mounting bracket and hang up the in- verter Selecting the fix- Use the corresponding fixing materials depending on the subsurface and observe ing material the screw dimension recommendations for the mounting bracket. The installer is responsible for selecting the correct type of fixing. Properties of the The mounting bracket (illustration) is mounting brack-... -
Page 63: Installing The Mounting Bracket On A Mast Or Beam
Installing the When installing the inverter on a mast mounting brack- or beam, Fronius recommends using et on a mast or the "Pole clamp" (order no. SZ beam 2584.000) mounting kit from Rittal GmbH. The "Pole clamp" kit covers the follow-... -
Page 64: Attaching The Mounting Bracket To Mounting Rails
Attaching the IMPORTANT! mounting brack- The mounting bracket must be affixed et to mounting at a minimum of four points. rails Attaching the in- There are integrated grips on the side verter to the of the inverter which facilitate lifting/ mounting brack- attaching. -
Page 65: Prerequisites For Connecting The Inverter
Prerequisites for connecting the inverter Different cable Fine-stran- Fine-stran- types ded with fer- ded with fer- rule and col- rule without Multi-stran- Fine-stran- Single-core collar Permissible Round copper conductors can be connected to the terminals of the inverter as cables for the described below. -
Page 66: Permissible Cables For The Data Communication Connection
AWG 26 - 18 AWG 26 - 16 sible LAN connections Fronius recommends at least CAT 5 STP (shielded twisted pair) cables and a maximum distance of 100 m (109 yd). Cable diameter For a standard M32 cable gland with a reducer:... -
Page 67: Cable Diameter Of The Dc Cable
For this reason, in accordance with national legislation, Fronius re- commends that a residual current cir- cuit breaker with a tripping current of at least 100 mA suitable for frequency converters be used. - Page 68 Recom- Phase AC out- Maximum mended Inverter fuse rating fuse rating Fronius Symo GEN24 12.0 SC 12000 32 A 32 A...
-
Page 69: Connecting The Inverter To The Public Grid (Ac Side)
Connecting the inverter to the public grid (AC side) Safety WARNING! Danger due to incorrect operation and incorrectly performed work. This can result in serious injury and damage to property. ▶ Read the Installation and Operating Instructions before installing and com- missioning the equipment. - Page 70 Turn off the automatic circuit breaker. Set the DC disconnector to the "Off" switch position. Loosen the 5 screws of the connection area cover by rotating them 180° to the left using a screwdriver (TX20). Remove the connection area cover from the device.
- Page 71 Strip the insulation of the single con- ductors by 12 mm. Select the cable cross section in accordance with the instructions in Permissible cables for the electrical connection on page 65. Lift to open the terminal's operating lever and insert the stripped single conductor into the slot provided as far as it will go.
-
Page 72: Connecting Solar Module Strings To The Inverter
Commissioning as well as maintenance and service work in the power module of the inverter must only be carried out by service personnel trained by Fronius and only within the scope of the respective technical regulations. ▶ Read the Installation and Operating Instructions before installing and com- missioning the equipment. -
Page 73: Module Array - General Information
WARNING! Danger due to damaged and/or contaminated terminals. This can result in serious injury and damage to property. ▶ Before making any connections, check the terminals for damage and con- tamination. ▶ Remove contamination in the de-energized state. ▶ Have defective terminals repaired by an authorised specialist. Module array - 2 independent PV inputs (PV 1 and PV 2) are available. -
Page 74: Connecting The Solar Module Strings To The Inverter
Module array settings: PV 1: ON PV 1 PV 1 PV 2: OFF PV 2 PV 2 PV 1 + PV 2 (connected in parallel): IMPORTANT! The maximum current load of a single terminal is 28 A. PV‑connection strings with a total current of more than 28 A must be split between both PV inputs upstream of the terminals (I SC max... - Page 75 Push the DC cables through the DC bushings by hand. IMPORTANT! Before stripping the insulation, push the cables through the DC bushings to prevent individual wires being bent or broken. PUSH...
- Page 76 Select the cable cross section in ac- cordance with the instructions in Per- missible cables for the electrical con- nection from page 65. Strip the insulation of the individual conductors by 12 mm. Lift to open the terminal's operating lever and insert the stripped single conductor into the slot provided, in each case as far as it will go.
- Page 77 Use a suitable measuring instrument to check the voltage and polarity of the DC cabling. Remove both DC ter- minals from the slots. CAUTION! Danger due to polarity reversal at the terminals. This may result in severe damage to the inverter. ▶...
-
Page 78: Connecting The Battery To The Inverter
Connecting the battery to the inverter Safety WARNING! Danger due to incorrect operation and incorrectly performed work. This can result in serious injury and damage to property. ▶ Commissioning as well as maintenance and service work on the inverter and battery must only be carried out by service personnel trained by the respect- ive inverter or battery manufacturer and only within the scope of the re- spective technical regulations. - Page 79 Manually push the battery cables through the DC bushings. * The battery ground conductor must be connected externally (e.g. switch BAT+ cabinet). When connecting an LG FLEX BAT- battery, the battery ground conductor BAT PE can be connected in the inverter (see Connecting the LG FLEX ground con- ductor on page 82.
- Page 80 Select the cable cross section in ac- cordance with the instructions in Per- missible cables for the electrical con- nection from page 65. Strip the insulation of the individual conductors by 12 mm. Lift to open the terminal's operating lever and insert the stripped single conductor into the slot provided, in each case as far as it will go.
- Page 81 CAUTION! Risk due to overvoltage when using other slots on the terminal. This may result in damage to the bat- tery and/or the PV modules due to dis- charge. ▶ Only use the slots marked BAT for connecting the battery. CAUTION! Danger due to polarity reversal at the terminals.
-
Page 82: Connecting The Lg Flex Ground Conductor
Fasten the screws of the cable guide to the housing using a screwdriver (TX20) and tighten to a torque of 1.3-1.5 Nm. NOTE! Risk due to overtorque at the strain- relief device. This may result in damage to the strain-relief device. ▶... -
Page 83: Connecting Backup Power - Pv Point (Op)
This can result in serious injury and damage to property. ▶ Installing and connecting an option must only be carried out by service per- sonnel trained by Fronius and only within the scope of the respective tech- nical regulations. ▶... - Page 84 Switch off the automatic circuit break- er and DC disconnector. Turn the DC disconnector to the "Off" switch posi- tion. Loosen the 5 screws of the connection area cover by rotating them 180° to the left using a screwdriver (TX20). Remove the connection area cover from the device.
- Page 85 Drill out the optional cable guide with a step drill. Insert the cable gland into the bore and secure to the torque specified by the manufacturer. Guide the mains cable through the cable gland from below. Pull off the OP terminal.
- Page 86 Strip the insulation of the single con- ductors by 12 mm. The cable cross section must be between 1.5 mm and 10 mm . Lift to open the terminal's operating lever and insert the stripped single conductor in- to the slot provided, all the way up to the stop.
-
Page 87: Testing Backup Power Mode
For test mode, a battery charge of min. 30 % is recommended. A description on how to run test mode can be found in the backup power check- list (https://www.fronius.com/en/search-page, item number: 42,0426,0365). -
Page 88: Connecting Backup Power - Full Backup
Connecting backup power - Full Backup Safety WARNING! Danger from incorrect installation, commissioning, operation or incorrect use. This can result in severe personal injury/damage to property. ▶ Only trained and qualified personnel are authorised to install and commis- sion the system, and only within the scope of the technical regulations. ▶... -
Page 89: Automatic Switch To Backup Power 4-Pin Separation, E.g. Germany, France, Spain
The supply for contactor K1 is provided by the public grid and must be con- nected to phase 1 (L1) after the Fronius Smart Meter and fused accordingly. An NC contact for relay K3 interrupts the supply voltage to contactor K1. -
Page 90: Automatic Switch To Backup Power 4-Pin Separation, E.g. Italy
The supply voltage for contactor K1 is provided by the public grid and must be connected to phase 1 (L1) after the Fronius Smart Meter and fused ac- cordingly. To ensure the function of residual current circuit breakers in backup power mode, the connection between the neutral conductor and the ground con- ductor must be established according to the respective Circuit Diagram. - Page 91 The supply voltage for contactors K1 and K2 is provided by the public grid and must be connected to phase 1 (L1) downstream of the Fronius Smart Meter and fused accordingly.
-
Page 92: Testing Backup Power Mode
Testing the protective measure must take place regularly; if this is not regu- lated by law, it must be performed annually. Data transfer between the Fronius Smart Meter and the inverter may be in- terrupted in backup power mode (switch position 2). This is optionally en- sured via a NO contact of the auxiliary contact. -
Page 93: Connecting The Data Communication Cable
"Com- munication” → "Modbus" menu, no Modbus participants are possible. It is not possible to send and receive data at the same time. Example 1: Quantity Quantity Fronius Input Battery Primary Secondary Ohmpilot meter meter Example 2: Quantity... -
Page 94: Routing Data Communication Cables
Routing data IMPORTANT! communication If data communication cables are wired into the inverter, observe the following cables points: Depending on the number and cross section of the wired data communica- tion cables, remove the corresponding blanking plugs from the sealing insert and insert the data communication cables. - Page 95 Guide the data cables first through the cable gland union nut and then through the housing opening. Insert the sealing ring between the union nut and the housing opening. Press the data cables into the seal's cable guide. Then press in the seal un- til it reaches the underside of the cable gland.
-
Page 96: Connecting The Battery Communication Cable
"SHIELD" slot. IMPORTANT! Improperly fitted shielding can cause data communication problems. For the wiring proposal recommended by Fronius, see page 175. Terminating res- It may be possible for the system to function without terminating resistors. istors However, owing to interference, the use of terminating resistors according to the following overview is recommended for trouble-free functioning. - Page 97 OPTION 1 Modbus 1 Modbus 0 Manufacturer manual Manufacturer manual 0 0 1 Modbus 0 / 1 Modbus 0 / 1 (min. CAT 5) (min. CAT 5) OPTION 2 M0 / M1 Manufacturer manual Manufacturer manual 0 0 1 Modbus 0 / 1 Modbus 0 / 1 (min.
-
Page 98: Installing The Wsd (Wired Shutdown)
Installing the IMPORTANT! WSD (wired The push-in WSD terminal in the in- shutdown) verter's connection area is delivered with a bypass ex works as standard. The bypass must be removed when in- stalling a trigger device or a WSD chain. The WSD switch of the first inverter with connected trigger device in the WSD chain must be in position 1 (primary device). -
Page 99: Closing And Commissioning The Inverter
Closing and commissioning the inverter Closing the in- NOTE! verter's connec- tion area/hous- The housing cover is fitted with a lock for safety reasons, which allows the hous- ing cover on the inverter to be pivoted only when the DC disconnector is ing cover, and commissioning switched off. -
Page 100: Installation With The App
/ Technical Support team. Installation with The "Fronius Solar.start" app is required for this installation method. Depending the app on the end device with which the installation will be carried out, download the app for the respective platform. - Page 101 Follow the installation wizard in the individual sections and complete the in- stallation. Add the system components in Fronius Solar.web and start up the PV sys- tem. The network wizard and the product setup can be carried out independently of each other.
-
Page 102: Switching Off Current Supply And Restarting The Inverter
Switching off current supply and restarting the inverter De-energising Turn off the automatic circuit the inverter and breaker. switching it on Turn the DC disconnector to the again "Off" switch position. To start up the inverter again, follow the steps listed above in reverse order. -
Page 103: Settings - User Interface Of The Inverter
Settings - user interface of the in- verter... -
Page 105: User Settings
User settings User login Open the user interface of the inverter in your browser. In the "Login" menu, log in using your user name and password, or go to the "User" menu and click on the "User login" button and then log in with your user name and password. -
Page 106: Device Configuration
Primary meter To ensure smooth operation in conjunction with other energy producers and in Full Backup backup power mode, it is important to install the Fronius Smart Meter at the feed-in point. The inverter and other producers must be connected to the public grid via the Fronius Smart Meter. -
Page 107: Functions Andi/Os
Functions and Backup power I/Os "Off", "PV Point" or "Full Backup" can be selected for backup power mode. ”Full Backup” backup power mode can only be activated once the required I/O assignments have been configured for backup power. In addition, a meter must “Full Backup”... -
Page 108: Demand Response Modes (Drm)
Mode Description Information DRM pin DRM5 Export P ≤ 0% currently not supported DRM 1/5 without disconnec- tion from the grid DRM6 Export P ≤ 50% currently not supported DRM 2/6 DRM7 Export P ≤ 75% & currently not supported DRM 3/7 * ≥... - Page 109 Nevertheless, false alarms can be triggered for the type A residual-current cir- cuit breaker in individual cases and depending on local conditions. For this reas- on, in accordance with national legislation, Fronius recommends that a residual- current circuit breaker with a tripping current of at least 100 mA suitable for fre- quency converters be used.
- Page 110 Parameter Value range Description "Iso Alternative Accurate Isolation monitoring is performed with the Mode" highest accuracy and the measured insula- tion resistance is displayed on the user in- terface of the inverter. Fast Isolation monitoring is performed with lower accuracy, which shortens the dura- tion of the isolation measurement, and the isolation value is not displayed on the user interface of the inverter.
-
Page 111: Energy Management
.This means that energy can be drawn from the home network and fed into the battery via the Fronius inverter (battery support required). You can restrict how much power is consumed by the Fronius inverter by specifying the maximum AC power (AC max.). A maximum power consumption of the AC rated power of the Fronius inverter is possible. -
Page 112: Examples - Time-Dependent Battery Control
Consumption Optimization. Depending on the configuration, the rules may not be satisfied due to other settings. The following values can be selected for the rules of the time-dependent battery control: "Max. charging power" The battery is charged to the maximum level with the value set in the "Power"... - Page 113 Example: Battery system without photovoltaics, including second producer in the house Power into the battery 1500 W Power consumption (AC) of the inverter 1500 W Second producer in home network 2000 W Target value set at feed-in point Infeed into the public grid Consumption in home 500 W 2000 W...
-
Page 114: Allowed Battery Control Rules
Example: Battery system including second producer in the house (with AC max. limitation) PV system available power 1000 W Power into the battery 2000 W Power consumption AC max. limited to 1000 W Power consumption (AC) of the inverter 1000 W Second producer in home network 2000 W Target value set at feed-in point... - Page 115 Specifying the charging range It is possible to define a charging range with a min. and max. charging limit. In this case, it is not possible for the battery to discharge. Limit Min. charging Max. charging Limit discharge power power 500 W power 3800 W charging power Min.
-
Page 116: Pv Power Reduction
IMPORTANT! If there is a Fronius Wattpilot in the photovoltaic system, it is seen as a load. The priority for the load management of the Wattpilot must be configured in the Fronius Solar.Wattpilot app. - Page 117 I/Os controlled by the produced power are always prioritised over a battery and Fronius Ohmpilot. That is to say that an I/O can switch on and result in the bat- tery no longer being charged or the Fronius Ohmpilot no longer being activated.
-
Page 118: System
Update All available updates are made available on the product page and in the "Down- load search" area under www.fronius.com Firmware update Drag the firmware file into the "Drag&Drop file here" field or select it using "Select file". The update will start. -
Page 119: License Manager
Save as PDF Click on the "Save as PDF" button. Individually select information with the "tick" next to the information or tick to "Select all". Enter the file name in the input field and click on the "Save" button. The PDF is created and displayed. License Manager The licence file contains the performance data and the scope of functions of the inverter. -
Page 120: Support
Click the "Enable Support User" button. The support user is enabled. IMPORTANT! The support user only allows Fronius Technical Support to implement settings on "Terminate Support User Ses- the inverter via a secure connection. The button sion" deactivates the access. -
Page 121: Communication
If a firewall is used for outgoing connections, the following protocols, server ad- dresses and ports must be allowed for successful data transfer: Tcp fronius-se-iot.azure-devices.net:8883 Tcp fronius-se-iot-telemetry.azure-devices.net:8883 Tcp fronius-se-iot-telemetry.azure-devices.net:443 Udp sera-gen24.fronius.com:1194 (213.33.117.120:1194) Tcp cure-se.fronius.com:443 Tcp firmware-download.fronius.com:443 Tcp froniusseiot.blob.core.windows.net:443 Tcp provisioning.solarweb.com:443 Upd/Tcp 0.time.fronius.com:123... -
Page 122: Modbus
Click the button. The connection is established automatically. Log in to the user interface of the inverter. Check network details and Fronius Solar.web connection After connecting, the status of the connection should be checked (see "Internet Services" on page 124). - Page 123 SunSpec Model Type Depending on the SunSpec model, there are two different settings. float: SunSpec Inverter Model 111, 112, 113 or 211, 212, 213. int + SF: SunSpec Inverter Model 101, 102, 103 or 201, 202, 203. Meter address The value entered is the identification number (Unit ID) assigned to the meter.Can be found on the user interface of the inverter in the Communic- ation...
-
Page 124: Remote Control
Fronius Solar The Fronius Solar API is an IP-based, open JSON interface. When enabled, IOT devices on the local network can access inverter information without authentica- tion. For security reasons, the interface is deactivated at the factory and must be activated if it is required for a third-party application (e.g. -
Page 125: Safety And Grid Requirements
The "Country Setup" menu area is intended exclusively for installers/service verter codes in technicians from authorised specialist companies. The inverter access code re- Solar.SOS quired for this menu area can be requested in the Fronius Solar.SOS portal. Requesting inverter codes in Solar.SOS: Go to solar-sos.fronius.com... -
Page 126: Export Limitation
With the inverter, any PV power that is not allowed to be fed into the public grid is used to charge the battery instead and/or used by the Fronius Ohmpilot so that it does not go to waste. The export limitation is only active if the power of feeding in is higher than the set power reduction. - Page 127 4,000 7,000 "Total DC power of the Entire System" Input field for the total DC system power in Wp. If there are multiple Fronius inverters, this value is used when the "Maximum Grid Feed-In Power" is specified in %. "Maximum Grid Feed-In Power"...
-
Page 128: Dynamic Power Regulation With Several Inverters
Dynamic power Example 1: Fronius SnapINverter ≤ Fronius Symo GEN24 SC regulation with Only one primary meter is required for the Fronius Symo GEN24 SC inverter. several inverters The power values shown are an example. Inverter configurations with power val- ues other than those shown in the example are possible, taking into account the criteria for this example. - Page 129 In order to be able to record all PV system data in Solar.web in full, only the Fronius Symo GEN24 SC inverter may be created in this PV system. The Fronius SnapINverter data is transmitted from the secondary meter to the Fronius Symo GEN24 SC inverter and thus displayed in Solar.web.
- Page 130 0 0 1 0 0 1 0 0 1 = 12 kW AC nom Settings on the user interface of the Fronius Symo GEN24 SC inverter: Configure the primary meter at the feed-in point in the "Device configura- tion" →...
-
Page 131: Connection Diagram - 4 Relay
Control priorities For setting the control priorities for the ripple control signal receiver, the export limitation and control via Modbus. 1 = highest priority, 3 = lowest priority Connection dia- The ripple control signal receiver and the I/Os terminal of the inverter can be gram - 4 relay connected to one another in accordance with the connection diagram. -
Page 132: I/O Power Management
I/O power man- I/O Power Management agement set- V+/GND tings - 4 relays None None None None None DNO Feedback None not used None None DNO Rules IO control IO control Rule 1 IO control IO control Active Power Power Factor (cos φ) DNO Feedback Rule 2 Active Power... -
Page 133: Connection Diagram - 3 Relay
Connection dia- The ripple control signal receiver and the I/Os terminal of the inverter can be gram - 3 relay connected to one another in accordance with the connection diagram. If the distance between the inverter and the ripple control signal receiver ex- ceeds 10 m, at least a CAT 5 cable is recommended and the shield must be con- nected at one end to the push-in terminal of the data communication area (SHIELD). -
Page 134: I/O Power Management Settings - 3 Relays
I/O power man- I/O Power Management agement set- V+/GND tings - 3 relays None None None None None DNO Feedback None not used None None DNO Rules IO control IO control Rule 1 IO control None Active Power Power Factor (cos φ) DNO Feedback Rule 2 Active Power... -
Page 135: Connection Diagram - 2 Relay
Connection dia- The ripple control signal receiver and the I/Os terminal of the inverter can be gram - 2 relay connected to one another in accordance with the connection diagram. If the distance between the inverter and the ripple control signal receiver ex- ceeds 10 m, at least a CAT 5 cable is recommended and the shield must be con- nected at one end to the push-in terminal of the data communication area (SHIELD). -
Page 136: I/O Power Management Settings - 2 Relays
I/O power man- I/O Power Management agement set- V+/GND tings - 2 relays None None None None None DNO Feedback None not used None None DNO Rules IO control IO control Rule 1 None None Active Power Power Factor (cos φ) DNO Feedback Rule 2 Active Power... -
Page 137: Connection Diagram - 1 Relay
Connection dia- The ripple control signal receiver and the I/Os terminal of the inverter can be gram - 1 relay connected to one another in accordance with the connection diagram. If the distance between the inverter and the ripple control signal receiver ex- ceeds 10 m, at least a CAT 5 cable is recommended and the shield must be con- nected at one end to the push-in terminal of the data communication area (SHIELD). -
Page 138: I/O Power Management Settings - 1 Relay
I/O power man- I/O Power Management agement set- V+/GND tings - 1 relay None None None None None DNO Feedback None not used None None DNO Rules IO control None Rule 1 None None Active Power Power Factor (cos φ) DNO Feedback Rule 2 Active Power... -
Page 139: Autotest (Cei 0-21)
The following Fronius inverters can be connected to a ripple control receiver via a distributor (coupling relay): Symo GEN24 Primo GEN24 Tauro SnapINverter (only devices with Fronius Datamanager 2.0) IMPORTANT! The "4-relay mode" setting (see Connection diagram - 4 relay andI/O power... -
Page 141: Options
Options... -
Page 143: Surge Protective Device (Spd)
"Notific- ations" as well as in Fronius Solar.web. In this case, the inverter must be repaired by an authorised specialist. IMPORTANT! The inverter also switches off if the 2-pin signal cable of the surge protective device is interrupted or damaged. -
Page 144: Energising The Inverter
PC board 4 TX20 screws Ground conductor 2-pin signal cable PV cable PV+ cable User Information De-energising Turn off the automatic circuit breaker. the inverter Set the DC disconnector to the "Off" switch position. Disconnect connections from the solar module strings (+/-). Switch off the battery connected to the inverter. -
Page 145: Installation
Installation CAUTION! Danger due to insufficiently dimensioned ground conductor. Damage to the inverter due to thermal overload can result. ▶ The national standards and guidelines must be observed for dimensioning the ground conductor. Loosen the two screws on the under- side of the housing cover by rotating them 180°... - Page 146 Remove the DC push-in terminals from the slots and disconnect them from the cables (only necessary if the in- stallation already exists). Connect the supplied PV+/PV- cables to the respective connections. IMPORTANT! Note the labelling of the cables when connecting. Connect the supplied cables to the re- spective connections on the PC board.
- Page 147 Insert the PC board into the inverter and secure with the four screws (TX20) supplied at a torque of 1.0 ‑ 1.2 Nm. IMPORTANT! max. Depending on national standards and Ø10mm guidelines, a larger cross section of the ground conductor may be required. 1,5 Nm TX 20 Dimension the cable cross section of...
- Page 148 Strip the insulation on the single con- ductors by 12 mm and secure to the corresponding slot of the terminal on the PC board with a torque of 1.2 - 1.5 IMPORTANT! The cable cross-section must be selec- ted according to the specifications for the respective inverter power category Permissible cables for (see chapter...
- Page 149 Remove the factory installed bypass on the push-in WSD terminal. Connect the signal cable to the push- in WSD terminal on the IN- and IN+ slots, observing the labelling. Check whether the WSD switch is in position 1, adjust if necessary (factory setting: position 1).
-
Page 150: Commissioning The Inverter
Place the cover on the connection area. Tighten the five screws by rotat- ing them 180° to the right in the indic- ated order using a screwdriver (TX20). Clip the housing cover onto the invert- er from above. Press on the lower part of the housing cover and tighten the two screws by rotating them 180°... - Page 151 Set the DC disconnector to the "On" switch position. Switch on the auto- matic circuit breaker.
-
Page 152: Dc Connector Kit Gen24
Commissioning as well as maintenance and service work in the power module of the inverter must only be carried out by service personnel trained by Fronius and only within the scope of the respective technical regulations. ▶ Read the Installation and Operating Instructions before installing and com-... -
Page 153: Scope Of Supply
WARNING! Danger due to grid voltage and DC voltage from solar modules that are exposed to light. This can result in serious injury and damage to property. ▶ Ensure that the AC and DC side of the inverter are de-energised before car- rying out any connection, maintenance or service tasks. -
Page 154: Installation
Disconnect connections from the solar module strings (+/-). Switch off the battery connected to the inverter. Wait for the capacitors of the inverter to discharge (2 minutes). Installation CAUTION! Danger due to insufficiently dimensioned DC cables. Damage to the inverter due to thermal overload can result. ▶... - Page 155 Insert the DC Connector GEN24 into the inverter and secure with the two screws (TX20) supplied at a torque of 1.0 ‑ 1.2 Nm. Manually push the DC cables through the DC bushings. Press the lock on the back of the ter- minal and remove the DC terminals.
- Page 156 Use a slotted screwdriver to push in the lock on the terminal. Insert the stripped single conductor into the slot provided, in each case as far as it will go. Then withdraw the slotted screw- driver from the lock. Connect the solar module strings (+/-). Use a suitable measuring instrument to check the voltage and polarity of the DC cabling.
- Page 157 Insert the DC terminals into the re- spective slot until they engage. Fasten the screws of the strain-relief device to the housing using a screwdriver (TX20) and tighten to a torque of 1.3-1.5 Nm. NOTE! Risk due to overtorque at the strain- relief device.
-
Page 158: Commissioning The Inverter
Commissioning Connect the solar module strings (+/-). the inverter Switch on the battery connected to the inverter. Set the DC disconnector to the "On" switch position. Switch on the auto- matic circuit breaker. -
Page 159: Appendix
Appendix... -
Page 161: Care, Maintenance And Disposal
▶ The connection area must only be opened by an authorised electrician. ▶ The separate power stage set area must only be opened by Fronius-trained service technicians. ▶ Prior to any connection work, disconnect the inverter on the AC side and the DC side. -
Page 162: Disposal
Switch off power to the inverter and wait for the specified time (2 minutes) until the capacitors have discharged and the fan has shut down. Turn the DC disconnector to the "Off" position. Loosen the screws on the underside of the housing cover by rotating them 180°... - Page 163 Packaging materials Collected separately. Check your municipality’s regulations. Reduce the volume of the box.
-
Page 164: Guarantee Provisions
Guarantee provisions Fronius manu- Detailed, country-specific warranty conditions are available at www.fronius.com/ facturer's war- solar/warranty. ranty To obtain the full warranty period for your newly installed Fronius product, please register at www.solarweb.com. -
Page 165: Components For Switching To Backup Power
Backup backup power Fronius Smart Meter 63A-3 43,0001,1473 changeover Fronius Smart Meter 50kA-3 43,0001,1478 Fronius Smart Meter TS 65A-3 43,0001,0044 Fronius Smart Meter TS 5kA-3 43,0001,0046 Fronius Smart Meter WR 43,0001,3591 Grid and system protection unit (fuse protection: 3-pin, 6 A) -
Page 166: Components For Manual Full Backup Backup Power Changeover
Min. short circuit cur- 3 kA (make contacts) rent Test standard IEC 60947-4-1 Examples of contact- ISKRA IKA225-02 ors and relays Components for Current trans- manual Full Device name former Item number Backup backup power Fronius Smart Meter 63A-3 43,0001,1473 changeover... - Page 167 Current trans- Device name former Item number Fronius Smart Meter TS 65A-3 43,0001,0044 Q1 manual changeover switch Number of pins 3-pin or 4-pin (depending on the cabling variant) Rated current depends on house connection Coil voltage 230/400 V Rated frequency...
-
Page 168: Status Codes And Remedy
This can result in serious injury and damage to property. ▶ Installing and connecting a surge protective device (SPD) must only be car- ried out by service personnel trained by Fronius and only within the scope of the respective technical regulations. ▶... -
Page 169: Technical Data
Technical data Fronius Symo DC input data GEN24 12.0 SC / MPP voltage range 295 – 800 V 12.0 Plus SC (at rated power) Max. connected load (P PV max 18,000 Wp Total 14,000 Wp PV 1 9000 Wp PV 2 Max. - Page 170 DC input data Limit value and tripping time of the 300 / 300 mA / ms continuous residual current monitor- ing (on delivery) Adjustable range of continuous resid- 30 – 300 mA ual current monitoring Cyclic repetition of the insulation res- 24 h istance test (on delivery) Adjustable range for the cyclic repeti-...
- Page 171 AC output data PV Point / PV Point Comfort Rated power 3000 W Nominal output current 13 A Nominal grid voltage 1 ~ NPE 220 V / 230 V / 240 V Nominal frequency 53/63 Hz Switching time < 90 s 0 –...
- Page 172 General data Safety class (in accordance with IEC 62103) Protection devices DC isolation measurement Warning / shutdown at R < 100 kOhm Overload performance Operating point shift, power limitation DC disconnector Integrated RCMU Integrated RCMU classification The software class of the safety plat- form(s) is specified as a class B con- trol function (single channel with peri- odic self-test) according to IEC 60730...
-
Page 173: Wlan
WLAN WLAN Frequency range 2412–2462 MHz Channels / power used Channel: 1–11 b,g,n HT20 Channel: 3–9 HT40 <18 dBm Modulation 802.11b: DSSS (1 Mbps DBPSK, 2 Mbps DQPSK, 5.5/11 Mbps CCK) 802.11g: OFDM (6/9 Mbps BPSK, 12/18 Mbps QPSK, 24/36 Mbps 16- QAM, 48/54 Mbps 64-QAM) 802.11n: OFDM (6.5 BPSK, QPSK, 16-QAM, 64-QAM) -
Page 174: Integrated Dc Disconnector
The sum of the rated power per phase must not exceed the rated power of the inverter. Valid for Fronius inverter with battery support. Specified values are standard values; depending on the requirement and PV power, these values must be adjusted accordingly. -
Page 175: Circuit Diagrams
Circuit diagrams... -
Page 177: Fronius Symo Gen24 And Byd Battery-Box Premium Hv
Fronius Symo GEN24 and BYD Battery-Box Premium HV Circuit Diagram... -
Page 178: Fronius Symo Gen24 With Two Byd Battery-Box Premium Hv Connected In Parallel
Fronius Symo GEN24 with two BYD Battery-Box Premium HV connected in parallel Circuit Diagram... -
Page 179: Fronius Symo Gen24 With Three Byd Battery-Box Premium Hv Connected In Parallel
Fronius Symo GEN24 with three BYD Battery-Box Premium HV connected in parallel Circuit Diagram... -
Page 180: Fronius Symo Gen24 And Lg Flex
Fronius Symo GEN24 and LG FLEX Circuit Diagram... -
Page 181: Circuit Diagram - Pv Point (Op)
Circuit Diagram - PV Point (OP) Circuit Diagram... -
Page 182: Circuit Diagram - Pv Point (Op) Australia
Circuit Diagram - PV Point (OP) Australia Circuit Diagram... -
Page 183: Backup Power Terminal - Pv Point (Op) With Battery Only For France
Backup power terminal - PV Point (OP) with bat- tery only for France Circuit Diagram... -
Page 184: Backup Power Terminal - Pv Point (Op) Manual Changeover
Backup power terminal - PV Point (OP) manual changeover Circuit Diagram... -
Page 185: Pv Point Comfort
PV Point Comfort Circuit Diagram... -
Page 186: Automatic Switch To Backup Power 3-Pin Single Frt-Capable Separation - E.g. Austria
Automatic switch to backup power 3-pin single FRT-capable separation - e.g. Austria Circuit Diagram... -
Page 187: Automatic Switch To Backup Power 3-Pin Single Separation- E.g. Australia
Automatic switch to backup power 3-pin single separation- e.g. Australia Circuit Diagram... -
Page 188: Circuit Diagram
Automatic switch to backup power 3-pin double separation with ext. Grid and system protection Circuit Diagram... -
Page 189: Automatic Switch To Backup Power 4-Pin Single Separation - E.g. Germany
Automatic switch to backup power 4-pin single separation - e.g. Germany Circuit Diagram... -
Page 190: Automatic Switch To Backup Power 4-Pin Single Frt-Capable Separation
Automatic switch to backup power 4-pin single FRT-capable separation Circuit Diagram... -
Page 191: Automatic Switch To Backup Power 4-Pin Single Separation - E.g. France
Automatic switch to backup power 4-pin single separation - e.g. France Circuit Diagram... -
Page 192: Automatic Switch To Backup Power 4-Pin Single Separation - E.g. Spain
Automatic switch to backup power 4-pin single separation - e.g. Spain Circuit Diagram... -
Page 193: Circuit Diagram
Automatic switch to backup power 4-pin double separation with ext. grid and system protection - e.g. Italy Circuit Diagram... -
Page 194: Manual Switch To Backup Power 3-Pin Separation, E.g. Austria
Manual switch to backup power 3-pin separation, e.g. Austria Circuit Diagram... -
Page 195: Manual Switch To Backup Power 4-Pin Separation, E.g. Germany
Manual switch to backup power 4-pin separation, e.g. Germany Circuit Diagram... -
Page 196: Surge Protective Device (Spd)
Surge protective device (SPD) Circuit Diagram... -
Page 197: Dimensions Of The Inverter
Dimensions of the inverter... -
Page 199: Fronius Symo Gen24 Sc / Fronius Symo Gen24 Plus Sc
Fronius Symo GEN24 SC / Fronius Symo GEN24 Plus SC Fronius Symo GEN24 SC / Fronius Symo GEN24 Plus SC...
Need help?
Do you have a question about the Symo GEN24 12.0 SC and is the answer not in the manual?
Questions and answers