Table of Contents
Advertisement
Advertisement
Table of Contents

Related Manuals for KARLSON WRCE90RF


Summary of Contents for KARLSON WRCE90RF
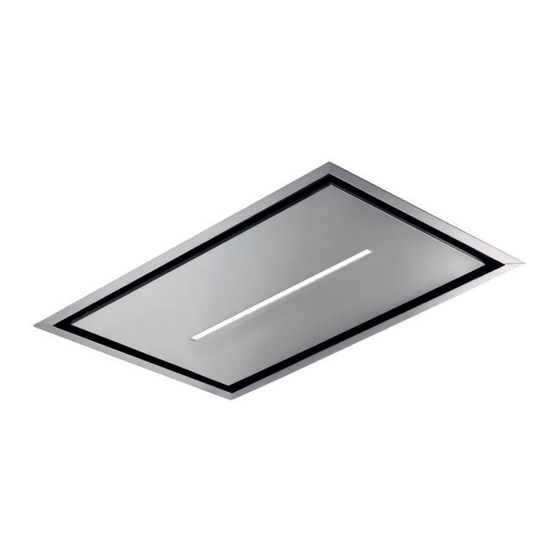
- Page 1 90CM CEILING HOOD WRCE90RF User Manual...
-
Page 2: Table Of Contents
Contents BEFORE USING YOUR APPLIANCE SAFETY ELECTRICAL INSTALLATION TECHNICAL DATA TROUBLESHOOTING GUARANTEE WHAT'S REQUIRED FOR INSTALLATION WHAT'S IN THE BOX INSTALLATION CONNECTIVITY FUNCTIONS & SETTINGS CARE & MAINTENANCE SERVICE & SPARES... -
Page 3: Before Using Your Appliance
Safety BEFORE USING YOUR SAFETY APPLIANCE There is a risk of electric shock These instructions are for your safety. Please read the following instructions and fire if cleaning is not carried carefully before proceeding with the out in accordance with these installation and use of this appliance. - Page 4 Safety GENERAL SAFETY Means for full disconnection The hood may stop working must be incorporated in the fixed during an electrostatic discharge wiring in accordance with the (e.g. lightning). This involves no local wiring installation rules risk of damage. Switch off the for your country.
- Page 5 Safety • Do not install the appliance outdoors in a damp place or in an area which may be prone to water leaks such as under or near a sink unit. In the event of a water leak affecting the appliance, do not use and contact customer services to arrange for inspection.
-
Page 6: Electrical Installation
Safety ELECTRICAL INSTALLATION All installation must be carried out by a To avoid the risks that are always present competent person or qualified electrician. when you use an electrical appliance it is Before connecting the mains supply ensure important that this appliance is installed that the mains voltage corresponds to the correctly and that you read the safety voltage on the rating plate. -
Page 7: Technical Data
Frequency band 434 MHz Information for EU No. 66/2014 and No. 65/2014 A. Information of the cooker hood. Trademark Value Model identification WRCE90RF Annual Energy Consumption (AEC hood) (kWh/year) Energy Efficiency class Fluid Dynamic Efficiency 35.1 Fluid Dynamic Efficiency class Lighting Efficiency (LEhood) (lux/W) 26.3... -
Page 8: Troubleshooting
Safety TROUBLESHOOTING IMPORTANT: If your ceiling hood appears not to be operating properly, before contacting Customer Services, please refer to the checklist below. Problem Possible Cause Solution The appliance is not installed Take down the appliance and check properly on the brackets. it is properly fixed. -
Page 9: Guarantee
This declaration of conformity is issued under the sole responsibility of the manufacturer. Object of the declaration: - Product: 90cm Ceiling Hood - Model: WRCE90RF The object of the declaration described above is in conformity with the relevant Union harmonisation legislation: •... - Page 10 This declaration of conformity is issued under the sole responsibility of the manufacturer. Object of the declaration: - Product: 90cm Ceiling Hood - Model: WRCE90RF The object of the declaration described above is in conformity with the relevant legislation: • Radio Equipment Regulations 2017...
- Page 11 Guarantee RECYCLING & DISPOSAL Waste electrical products (WEEE) should not be disposed of with household waste. Please recycle where facilities exist. Check with your local governmental authority, domestic waste disposal services or the retailer where the product was bought for recycling advice.
-
Page 12: What's Required For Installation
Installation WHAT'S REQUIRED FOR INSTALLATION 10mm WHAT'S IN THE BOX [08] x 1 200 x 90 rectangular ducting (only used for circular ducting installation) [01] x 1 [09] x 1 200 rectangle to [02] x 4 150mm circular 010 8 x 50mm ducting adaptor (only used for circular ducting... -
Page 13: Installation
Installation CHOOSE A TYPE OF INSTALLATION RECIRCULATION OPTION DUCTED OPTION (no extraction to the outside) (extraction to the outside) WRWFILT18... - Page 14 Installation BEFORE YOU INSTALL THE CEILING HOOD Min. 90mm ≥550mm Diagram shows minimum distance between hood & hob ≥650mm max 1500mm Cut out the work surface according to the sizes shown in the drawings. Warning: Caution! Before drilling it is extremely important to check the wall for hidden pipes, electrical cables etc using an appropriate detection device.
- Page 15 Installation ALIGN MOTOR CUT OUT A HOUSING FALSE CEILING The motor housing can be rotated through 2 x 90º increments to cover two sides. You must rotate all frontal frame and fascia set 180º to have the four positions shown in the diagram below: (Please note only one solid ducting pipe OR flexible ducting pipe and CEILING...
- Page 16 Installation PREPARE YOUR CEILING HOOD UNIT FOR INSTALLATION AND CHANGE YOUR DUCTING POSITION IF REQUIRED The motor housing unit is supplied as front position ducting, however this can be changed to side position ducting if required. In order to prepare the hood for installation, please follow steps below: Open the frontal fascia panel.
- Page 17 Installation PREPARE YOUR CEILING HOOD UNIT FOR INSTALLATION AND CHANGE YOUR DUCTING POSITION IF REQUIRED (continued) 4 x screws M4 x 8mm BLANKING DUCTING PLATE ADAPTER Remove ducting adapter [5] by unscrewing 4 x M4 x 8mm screws shown. The following steps are only required if changing position of ducting: Remove blanking plate [6] by unscrewing 4 x M4 x 8mm screws shown.
- Page 18 Installation CEILING HOOD FITTING OPTIONS FIT CEILING HOOD FOR A H170MM CEILING Ensure the motor housing unit is in the correct position for chosen ducting position before securing into the ceiling joists with bolts shown below. CEILING FALSE CEILING [03] [04] [02] x 4 010 8 x 50mm...
- Page 19 Installation CEILING HOOD FITTING OPTIONS FIT CEILING HOOD FOR A H170MM CEILING Ensure the motor housing unit is in the correct position for chosen ducting position before securing into the ceiling joists with bolts shown below. CEILING FALSE CEILING [03] [07] [02] x 4 010 8 x 50mm...
- Page 20 Installation ATTACH DUCTING FRONT POSITION DUCTING (Default position) IMPORTANT: Parts 1 & 3 shown below must be removed prior to fitting the ducting pipe. Solid ducting pipe must be fixed touching the hood's casing before refitting parts 1 & 3. 4 x screws M4 x 8mm DUCTING...
- Page 21 Installation ATTACH DUCTING SIDE POSITION DUCTING IMPORTANT: Parts 1, 2 & 3 shown below must be removed prior to fitting the ducting pipe. Solid ducting pipe must be fixed touching the hood's casing before refitting parts 1, 2 & 3. 4 x screws 4 x screws 4 x screws...
- Page 22 Installation SECURE CEILING HOOD FRAME & METAL FILTERS M6 x 12mm (x4) 10] x 2 [10] OR replace with WRWFILT18 Optional [10] Washable filters 1. Refit the frontal fascia panel with the 4 x M6 x 12mm screws shown and reconnect the LED light connection.
-
Page 23: Connectivity
• The hob and hood have to be set up to link together. To achieve this follow the steps for connectivity appropriate to your branded appliance: Connecting a WRCE90RF Ceiling Hood with a Viceroy Hob Connecting a WRCE90RF Ceiling Hood with a KARLSON Hob... - Page 24 Connectivity CONNECTING A WRCE90RF CEILING HOOD WITH A VICEROY HOB Setting up new linking method Stage B - Configure ceiling hood 1. Make sure that the hood is off. The process for connecting a WRCE90RF ceiling hood to a Viceroy hob happens 2.
- Page 25 Connectivity USING THE CONNECTIVITY FUNCTION Ensure the Connectivity Indicator is lit on the hob control panel. IMPORTANT: The extraction rate of the hood will vary based upon the total power output selected on the hob, as shown in the table below.
- Page 26 Connectivity CONNECTING A WRCE90RF CEILING HOOD WITH A KARLSON HOB Setting up new linking method 3. Scroll down and touch the 'Hood Options' The process for connecting a WRCE90RF - go to 'Hood Connectivity'. ceiling hood to a KARLSON hob happens in 3 stages: 20.00...
- Page 27 Connectivity CONNECTING A WRCE90RF CEILING HOOD WITH A KARLSON HOB Stage B - Configure ceiling hood Stage C - (continued) 1. Make sure that the hood is off. 4. The fan icon will display in hob, now the hood and hob indicate pairing is complete.
- Page 28 Each hob cooking zone has a maximum rated output of 10 comprising 1-9 and Boost (10). KARLSON AUTO MODE TABLE If the hood controls are HOB LEVEL SUMMARY...
-
Page 29: Use
BEFORE YOU START WARNING: Read the instructions before using the appliance. Switch on the appliance at the switched fused connection unit. The appliance is ready for use. FUNCTIONS & SETTINGS Four-button panel To obtain the best results from your ceiling hood it is recommended that you leave it switched on for up to 15 minutes after you have finished cooking. - Page 30 To Set Up For First Use Once the hood is switched off press both increase decrease fan speed icons. All icons will start blinking in white. The hood is now in setting mode. IMPORTANT: Set up must be done with the hood controls, not the remote control.
-
Page 31: Care & Maintenance
Care & Maintenance LOOKING AFTER YOUR APPLIANCE WARNING: Always switch off the electrical supply before carrying out maintenance work on the hood. In the event of a fault, EN Care & maintenance Entretien et maintenance PL Czyszczenie i konserwacja contact customer services. RO Îngrijire și întreținere Care &... -
Page 32: Service & Spares
Service & Spares AFTER SALES & SERVICE SUPPORT For after sales, service enquiries & spares support Please contact: 0333 247 1128 Monday to Friday: 9am-5pm Saturday: 9am-1pm Email enquiries: wrenservice@apelson.co.uk Dedicated spares online at: karlson.co.uk KARLSON WRCE90RF V1 NOV 2022...
Need help?
Do you have a question about the WRCE90RF and is the answer not in the manual?
Questions and answers