Table of Contents
Advertisement
Quick Links
As-Dsp series
Dsp 4.6, dsp 8.12 und
thank you
Congratulation on purchasing a high quality AUDIO SYSTEM product.
Important:
Completely read this operating instruction before installation and use of the device.
Caution:
Pay attention to advices and instructions of the car manufacturer. Check the polarity when
connecting the loudspeakers.
Important:
You will need your purchase receipt as proof of purchase for all warranty repairs and for
insurance purposes. Keep your receipt, owner´s manual and packing materials in a safe location for possible
future use.
Caution:
Use of sound components can impair your ability to hear necessary traffic sounds and may
constitute a hazard while driving your automobile. AUDIO SYSTEM Germany accepts no liability for hearing
loss, bodily injury or property damage as a result of use or misuse of our products.
We recommend installing the equipment by an authorized service center or dealer. A professional fitting and
connection is the requirement for further warranty and perfect sound.
warning:
This speaker-system is able to produce a high level of loudness. Long-term and excessive
exposition can lead to injury of hearing.
warning:
If the as-dsp is improperly set, the connected loudspeakers can be destroyed. We
recommend to have the as-dsp set up by a qualified technician.
Caution:
The as-dsp is intended for use in motor vehicles whose 12 volt negative pole is connected to
ground. Using the as-dsp on other systems can damage your as-dsp. In order to install the as-dsp
and connect it to the power supply of your motor vehicle, please be sure to follow the instructions in the
installation manual.
Manual
Page 1
X-80.4dsp
Advertisement
Table of Contents

Related Manuals for Audio System AS-DSP Series


Summary of Contents for Audio System AS-DSP Series
- Page 1 Use of sound components can impair your ability to hear necessary traffic sounds and may constitute a hazard while driving your automobile. AUDIO SYSTEM Germany accepts no liability for hearing loss, bodily injury or property damage as a result of use or misuse of our products.
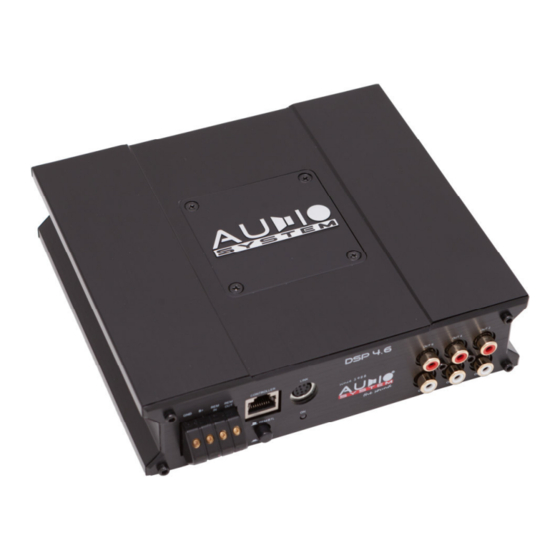
- Page 2 Dsp series owners manual Connectors and control elements 4.6 9 10 11 RCA input 1 and 2 Ground ( Minus pol car battery) RCA input 3 and 4 +12 VOLT ( Plus pol car battery) Gain for input 1 and 2 Remote IN Remote OUT High-level input 1,2,3 and 4...
- Page 3 Dsp series owners manual Connectors and control elements 4.6 Low-level RCA preamplifier input IN 1, IN 2, IN 3 and IN 4. For connection with external signal sources such as a headunit or another source with RCA output. Use an RCA cable to connect the output of your signal source, for example the headunit, with the RCA jacks of the AS-DSP.
- Page 4 24x RCA outputs are possible. To link two as-dsp units an optional link cable called Z-dsp link is available from your authorized audio system partner. Even if two as-dsp units are linked together, the setting has to be made separately for each as-dsp via the...
- Page 5 Dsp series owners manual Connectors and control elements 8.12 12 13 14 15 16 Optical SPDIF output RCA input 1 and 2 Ground ( Minus pol car battery) RCA input 3 and 4 +12 VOLT ( Plus pol car battery) Gain for input 1 and 2 Remote IN High-level input 1,2,3 and 4...
- Page 6 Dsp series owners manual Anschluss- und bedienelemente AS-DSP 8.12 Low-level RCA preamplifier input IN 1, IN 2, IN 3 and IN 4. For connection with external signal sources such as a headunit or another source with RCA output. Use an RCA cable to connect the output of your signal source, for example the headunit, with the RCA jacks of the AS-DSP.
- Page 7 Dsp series owners manual Connectors and control elements 8.12 This micro SD card slot is used to load a setup by computer. When the as-DSP is turned on, it ALWAYS first read the setup from the SD card. This is done regardless of the last setup. With the SD card, a setting stored on the computer can be transferred to the as-DSP without having the computer connected to the as-DSP Attention: This SD card slot is only intended for suitable micro SD cards.
- Page 8 24x RCA outputs are possible. To link two as-dsp units an optional link cable called Z-dsp link is available from your authorized audio system partner. Even if two as-dsp units are linked together, the setting has to be made separately for each as-dsp via the...
- Page 9 Dsp series owners manual Anschluss- und bedienelemente x-80.4 17 18 RCA output 5 and 6 Indicator light RCA output 7 and 8 Minus ( Minus of car power) Gain-Regler input 1 and 2 +12 VOLT ( Plus of car power) Gain-Regler input 3 and 4 Fuse (40 Ampere) RCA input 1 and 2...
- Page 10 Attention: This SD card slot is only for use with suitable micro SD cards. The Micro SD card AS-DSP SD is not included and can be purchased separately. Please contact your audio system dealer. The DSP box can be connected to this RJ50 connector as an option.
- Page 11 Dsp series owners manual Connectors and control elements x-80.4dsp LED: This display informs about the operating status of the x-80.4 dsp. When the x-80.4 is ready for use, the indicator lights green. In case of faults, the indicator lights up red. Ground connection: This connection must be connected to the bodywork of your vehicle.
- Page 12 Dsp series owners manual settings 12.01: Principles of application. The GUI of the application can be adapted to your personal needs and / or preferences. The software can be operated completely with the keyboard as well as the mouse! Many things can be done using short commands. A list of keyboard shortcuts can be found on the last page of this manual.
- Page 13 Dsp series owners manual Creating a new setup 13.01: Click on “File” opens adjacent selection. New Setup file: Allows you to create a new setup. Open Setup file: Opens a saved setup e.g. from a memory stick. Reopen: The DSP-AMP remembers the last 10 stored setups. Here you can recall and use one of these setups.
- Page 14 Dsp series owners manual (The look depends on the selected DSP model) input and output management 14.01: In this window, you can specify the following: Active: Which channel is switched on or off. Alias: Here you can enter your own names for the output channels. Balance /Fade: You can adjust the balance and fader via the software monitor and the optional remote controls.
-
Page 15: Matrix Mixer
Dsp series owners manual Matrix Mixer RCA inputs 15.01: In this constellation, the frequencies were already split up in the factory system. An example. Let's assume In1 is the left tweeter of the OEM music system. In2 is the midrange of the OEM music system. Let's say In1 goes from 2kHz to 20kHz and In2 from 20Hz to 2kHz. -
Page 16: Matrix Mixer Stereo Input
Dsp series owners manual Matrix Mixer Stereo input 16.01: The “Stereo Input Processing” tab is used to enter the AUX and the Digital Input Matrix. The procedure corresponds to the procedure for allocation to the RCA inputs. Matrix Mixer Stereo input 16.02: There are other possibilities in the Stereo Input Matrix. - Page 17 Dsp series owners manual output settings 17.01: When the "Output Processing" tab is clicked, the following image appears. The number of channels displayed depends on which as dSP or dsp-amp you are using. For a better overview, we split the picture into 5 sections and look at all sections individually.
-
Page 18: Gain Input And Output
Dsp series owners manual Section 5 EQ 18.01: EQ Bypass: Disables all EQ settings. Add: Adds another EQ. You can choose up to 15 EQ`s. This can be used to change the order of the EQs. Here you can delete a set EQ. Here the frequency of the EQ can be selected. -
Page 19: The Frequency Response Tab
Dsp series owners manual the frequency response tab 19.01: The Frequency Response tab can display many useful information. Select the speaker (or speakers) whose settings you want to display. To select a channel, simply set a check mark in front of the corresponding channel. In the example on the left the left tweeter, the left TMT and the subwoofer were chosen. - Page 20 Dsp series owners manual how to store a setup to your pc 20.01: To save a setup on the PC, please proceed as described below. To store a new created setup, click the "File" tab. In the drop-down menu that appears, click "Save setup file as". This opens the path you selected during installation.
-
Page 21: How To Store A Setup At The Pc
Dsp series owners manual how to store a setup at the DSP You can store up to 10 presets on the AS-DSP. In order to take advantage of several stored setups you need a remote control. You can then use the remote control to access the various setups. It does not matter whether you choose the wired remote control or the infrared remote control. -
Page 22: Shortcuts
Function shortcut Create a new setup Strg+N Opens an excisting setup file from database Strg+O Storing a setup file Strg+S Connects the DSP with the software Alt+C Opens the preset manager Alt+P Opens the output channel mapping Alt+M Opens bass and treble adjust Alt+B About this software Alt+F1... - Page 23 Dsp series owners manual index Page Theme Chapter Introduction Overview AS-DSP 4.6 pictures Overview description AS DSP 4.6 Overview description AS DSP 4.6 Overview AS-DSP 8.12 Bilder Overview description AS DSP 8.12 Overview description AS DSP 8.12 Overview description AS DSP 8.12 Overview description X-80.4 Overview description X-80.4 Overview description X-80.4...
-
Page 24: Table Of Contents
Dsp series owners manual index Page Theme Chapter Matrix Mixer 50% 15.01 Matrix Mixer Differenzsignal 15.02 Matrix Mixer Summensignal 15.03 De-Delay RCA Eingänge 15.04 16.01 Matrix mixer stereo input 16.02 Functions stereo input 16.03 How to use stereo pairing, choose a channel and the Gain 16.04 How to de-equing the stereo input 17.01...
Need help?
Do you have a question about the AS-DSP Series and is the answer not in the manual?
Questions and answers