Advertisement
Quick Links
JumpStart
™
4-in-1 Activity Bouncer
Saltador de actividad 4 en 1
Owner's Manual
Manual del propietario
•
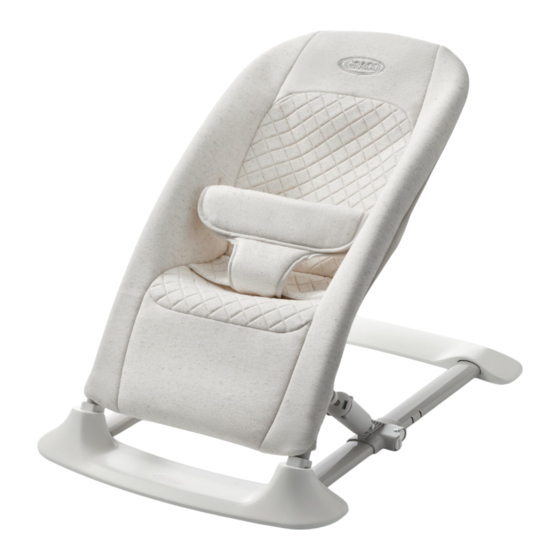
Infant Bouncer
Infant Bouncer
0-4 months
4 months - when baby starts trying to sit up or reaches
(frame position 2)
20 lb (9 kg), whichever comes first
(frame position 1)
Infant Bouncer
4 months - when baby starts trying to sit up or reaches
20 lb (9 kg), whichever comes first
(frame position 1)
www.gracobaby.com
Infant Bouncer
Floor Seat
Baby Jumper
Kid's Chair
©2024 Graco NWL0001535649C 2/24
Advertisement

Related Manuals for Graco JumpStart 4-in-1 Activity Bouncer

Summary of Contents for Graco JumpStart 4-in-1 Activity Bouncer
- Page 1 (frame position 1) Infant Bouncer 4 months - when baby starts trying to sit up or reaches 20 lb (9 kg), whichever comes first (frame position 1) www.gracobaby.com Infant Bouncer Floor Seat Baby Jumper Kid’s Chair ©2024 Graco NWL0001535649C 2/24...
-
Page 2: Features • Características
1 WARNING • ADVERTENCIA Page • Página 2 Features • Características Pages • Páginas Modes of Use • Modos de uso Parts List • Lista de las piezas 3 Assembly • Ensamblaje Page • Página Assemble Frame • Para ensamblar el armazón 7-29 4 Use •... - Page 3 Prevent serious injury or death: Failure to follow these warnings and the assembly instructions could result in serious injury or death. • READ ALL INSTRUCTIONS BEFORE USE OF THE PRODUCT. • PLEASE SAVE OWNER’S MANUAL FOR FUTURE USE. • THIS PRODUCT REQUIRES ADULT ASSEMBLY. Follow assembly instructions carefully.
- Page 4 Modes of Use • Modos de uso 1 Infant Bouncer: Start using: Birth . Stop using: when baby starts trying to sit up or reaches 20 lb (9 kg), whichever comes first • 1 Saltador para bebés Empiece a utilizarlo: Desde el nacimiento .
- Page 5 Parts List • Lista de las piezas Check that you have all the parts for Verifique que tenga todas las this model BEFORE assembling your piezas de este modelo ANTES de product. If any parts are missing, ensamblar su producto. Si falta call Customer Service.
-
Page 6: Assemble Frame
Assemble Frame • Para ensamblar el armazón CLICK! CLICK! ¡CLIC! ¡CLIC! CLICK! ¡CLIC! CLICK! ¡CLIC! Buttons facing out Los botones hacia afuera CHECK that part is attached by pulling on part. VERIFIQUE que la pieza esté sujetada tirando de ella. CLICK! ¡CLIC! CLICK! - Page 7 1 Infant Bouncer 1.25” • 1 Saltador para bebés WARNING FALL HAZARD: Infants have suffered skull fractures falling while in and from bouncers. • Use ONLY on floor. • ALWAYS use restraints and adjust to fit snugly. • NEVER lift or carry baby in bouncer. SUFFOCATION HAZARD: Babies have suffocated when bouncers tipped over on soft surfaces and/or when bouncers have been used as a sleep product.
- Page 8 ADVERTENCIA • Posición 1: NO utilice antes de los 4 meses. Deje de utilizar el producto cuando el bebé comience a tratar de sentarse erguido o pese 20 libras (9 kg), lo que ocurra primero. • Asegúrese de que el armazón esté trabado en la posición de uso correcta.
- Page 9 To Attach Bouncer Seat Pad • Para sujetar la almohadilla del asiento del saltador Tuck harness through seat pad. Acomode las correas del arnés por la almohadilla del asiento. Locate harness inside seat pad, wrap harness straps around back of frame and pull through openings in seat pad.
- Page 10 CLICK! ¡CLIC! To Secure Child • Para asegurar al niño • ALWAYS use harness. Use slide adjuster at waist for tighter adjustment. Repeat on other side. • NEVER leave child unattended. • Use SIEMPRE el arnés. Utilice el ajustador deslizable de la cintura para un ajuste más preciso.
- Page 11 To Open Harness • Para abrir el arnés...
- Page 12 2 Floor Seat 1.25” • 2 Asiento del piso WARNING FALL HAZARD: Infants have suffered skull fractures falling while in and from floor seats. • Use ONLY on the floor. • NEVER use as floor seat on an elevated surface. •...
- Page 13 Remove Seat Pad from Frame (if attached) • Para sacar la almohadilla del asiento del armazón (si está colocada) Tuck harness through seat pad. Acomode las correas del arnés por la almohadilla del asiento.
- Page 14 Frame Position 2 (from Frame Position 1) • Posición 2 del armazón (de la Posición 1 del armazón) PUSH HARD PRESIONE FIRMEMENTE CLICK! ¡CLIC! Frame Position 2 (from folded) • Posición 2 del armazón (si está plegado) CLICK! ¡CLIC!
- Page 15 Seat Position 2 • Posición 2 del asiento...
- Page 16 To Open Flap for Floor Seat Mode (if not open) • Para abrir la solapa para el modo Asiento del piso (si no está abierta)
- Page 17 Turn tray upside down. Voltee la bandeja. BE SURE all 7 rings are hooked ASEGÚRESE DE que los 7 anillos onto the pegs. estén enganchados en las estacas. Test seat assembly by Pruebe el ensamblaje del asiento pushing down hard on seat. empujando el asiento con fuerza hacia abajo.
- Page 18 To Attach Seat to Frame • Para sujetar el asiento al armazón CLICK! ¡CLIC! CHECK that seat is attached by pulling on seat. VERIFIQUE que el asiento esté sujetado de forma segura tirando de él. CLICK! ¡CLIC!
- Page 19 4-C 3 Baby Jumper 1.25” • 3 Brincador para bebés WARNING FALL HAZARD: Babies can FALL from product resulting in head injuries. • NEVER leave child unattended. Always keep child in view while in product. • NEVER use near stairs. •...
- Page 20 Remove Seat Pad from Frame (if attached) • Para sacar la almohadilla del asiento del armazón (si está colocada) Tuck harness through seat pad. Acomode las correas del arnés por la almohadilla del asiento.
- Page 21 To Store Flap for Baby Jumper Mode (if assembled) • Para almacenar la solapa en el modo Brincador para bebés (si está ensamblada)
- Page 22 Turn tray upside down. Voltee la bandeja. BE SURE all 7 rings are hooked ASEGÚRESE DE que los 7 anillos onto the pegs. estén enganchados en las estacas. Test seat assembly by Pruebe el ensamblaje del asiento pushing down hard on seat. empujando el asiento con fuerza hacia abajo.
- Page 23 Frame Position 1 • Posición 1 del armazón CLICK! ¡CLIC! CLICK! ¡CLIC!
- Page 24 Seat Position 1 • Posición 1 del asiento To Attach Seat to Frame • Para sujetar el asiento al armazón CLICK! ¡CLIC! CHECK that seat is attached by pulling on seat. VERIFIQUE que el asiento esté sujetado de forma segura tirando de él.
- Page 25 Adjust seat height so child’s feet do not dangle and front of foot touches ground but not flat footed. Ajuste la altura para que los pies del niño no cuelguen y para que la parte delantera de los pies del niño toquen el piso, sin quedar planos. •...
- Page 26 1.25” 4 Kid’s Chair • 4 Silla para niños WARNING AMPUTATION HAZARD • Chair can fold or collapse if lock not fully engaged. Moving parts can amputate child’s fingers. • Keep fingers away from moving parts. • Completely unfold chair and fully engage locks before allowing child to sit in chair.
- Page 27 To Remove Seat from Frame • Para sacar el asiento del armazón Press bottom of button to release. Presione la parte inferior del asiento para liberarlo.
- Page 28 Frame Position 1 • Posición 1 del asiento CLICK! ¡CLIC! CLICK! ¡CLIC!
- Page 29 Tuck harness through seat pad. Acomode las correas del arnés por la almohadilla del asiento.
-
Page 30: Care And Maintenance
Care and Maintenance • Cuidado y mantenimiento Remove Seat Pads for Cleaning • Para sacar las almohadillas del asiento para la limpieza BE SURE all 7 rings are hooked onto the pegs. Reverse steps to re-assemble. ASEGÚRESE DE que los 7 anillos Invierta los pasos para volver a estén enganchados en las estacas. - Page 31 • FROM TIME TO TIME CHECK YOUR PRODUCT for loose screws, worn parts, torn material or stitching. Replace or repair the parts as needed. Use only Graco replacement parts. • TO CLEAN SEAT PADS, refer to your care tag on your seat pad for washing instructions.
- Page 32 We currently do not accept product registrations from those living outside the United States of America. Para registrar su producto Graco desde dentro de los EE. UU., visítenos en línea en www.gracobaby.com/productregistration o envíe de regreso la tarjeta deregistro provista con su producto.
Need help?
Do you have a question about the JumpStart 4-in-1 Activity Bouncer and is the answer not in the manual?
Questions and answers