Table of Contents
Advertisement
Available languages
Available languages
Quick Links
Item #1008569151
Model #18000009
USE AND CARE GUIDE
WIRELESS BATTERY DOORBELL STROBE KIT
Questions, problems, missing parts? Before returning to the store,
call Defiant Customer Service 8 a.m. - 7 p.m., EST, Monday - Friday, 9a.m. - 6 p.m., EST, Saturday
1-866-308-3976
HOMEDEPOT.COM
Illustrations may vary from actual unit.
THANK YOU
We appreciate the trust and confidence you have placed in Defiant through the purchase
of this wireless battery doorbell strobe kit.
We strive to continually create quality products designed to enhance your home. Visit us online to see our full line of
products available for your home improvement needs. Thank you for choosing Defiant!
Advertisement
Chapters
Table of Contents

Related Manuals for Defiant 18000009


Summary of Contents for Defiant 18000009
- Page 1 USE AND CARE GUIDE WIRELESS BATTERY DOORBELL STROBE KIT Questions, problems, missing parts? Before returning to the store, call Defiant Customer Service 8 a.m. - 7 p.m., EST, Monday - Friday, 9a.m. - 6 p.m., EST, Saturday 1-866-308-3976 HOMEDEPOT.COM Illustrations may vary from actual unit.
-
Page 2: Table Of Contents
This warranty is not extended to other equipment and components that a customer uses in conjunction with this product. Contact the Customer Service Team at 1-866-308-3976 or visit www.HOMEDEPOT.COM. Model #18000009... -
Page 3: Pre-Installation
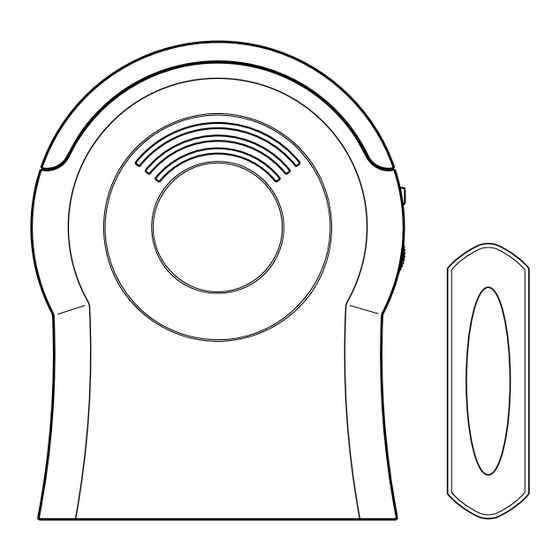
Pre-Installation PLANNING INSTALLATION Before installing the wireless battery doorbell strobe kit, ensure that all parts are present. Compare parts with the Hardware Included and Package Contents sections. If any part is missing or damaged, do not attempt to assemble, install, or operate this wireless doorbell strobe kit. Estimated installation time: 15 minutes SPECIFICATIONS Doorbell... -
Page 4: Package Contents
Pre-Installation (continued) PACKAGE CONTENTS Part Description Quantity Doorbell Push button *Tune/Sync/Reset button. See Selecting a tune or Troubleshooting for additional information. -
Page 5: Installation
Installation Installing the batteries NOTE: In typical use, alkaline batteries will last up to one year. □ Push the battery cover tab toward the battery cover (1) and pull to remove from the doorbell (A). □ Install three alkaline “C” batteries (not included) “C”... -
Page 6: Operation
Installation Mounting the push button Use either screws (BB) or double-sided tape (CC) to mount the push button (B). □ To mount with screws (BB), remove the back of the push button (B) by pushing in the tab on the bottom with a small screwdriver and twisting it. - Page 7 The range of the wireless doorbell can vary with location, temperature, and battery condition. The doorbell (A) can link up to 10 Defiant brand wireless push buttons. All push buttons will play the same selected tune for the "FRONT" push button (B).
-
Page 8: Care And Cleaning
Care and Cleaning □ Use a dry cloth to clean the doorbell and push button. □ Do not use cleaners or polishes. □ Do not use any fluids on the doorbell or push button. Troubleshooting Problem Possible Cause Solution □ □... - Page 9 This device complies with Part 15 of the FCC Rules. Operation is subject to the following two conditions: (1) this device may not cause harmful interference, and (2) this device must accept any interference received, including interference that may cause undesired operation. The user is cautioned that changes or modifications not expressly approved by the party responsible for regulatory compliance could void the user’s authority to operate the equipment.
- Page 10 Questions, problems, missing parts? Before returning to the store, call Defiant Customer Service 8 a.m. - 7 p.m., EST, Monday-Friday, 9 a.m. - 6 p.m., EST, Saturday 1-866-308-3976 HOMEDEPOT.COM Retain this manual for future use. 09-050-22...
- Page 11 Las ilustraciones pueden ser diferentes de la unidad comprada. GRACIAS Agradecemos la confianza que han depositado en Defiant al comprar este juego estroboscópico del timbre inalámbrico. Procuramos crear continuamente productos de calidad diseñados para mejorar su hogar. Visítenos en internet para ver nuestra línea completa de productos disponibles que necesita para el mejoramiento de su hogar.
-
Page 12: Contenido
Esta garantía no se extiende a otros equipos o componentes que el consumidor usa junto con este producto. Póngase en contacto con el personal de servicio al cliente al 1-866-308-3976 o visite el sitio www.HOMEDEPOT.COM. Modelo #18000009... -
Page 13: Antes De La Instalación
Antes de la instalación PLANIFICACIÓN DE LA INSTALACIÓN Antes de instalar el juego estroboscópico del timbre inalámbrico, asegúrese de tener todas las piezas. Compare las piezas con las indicadas en las secciones ferretería incluida y contenidos del paquete. Si alguna pieza falta o está dañada, no trate de ensamblar, instalar u operar este juego estroboscópico del timbre inalámbrico. -
Page 14: Contenido Del Paquete
Antes de la instalación (continuación) CONTENIDO DEL PAQUETE Pieza Descripción Cantidad Timbre Pulsador * Botón Sintonizador / Sincronizador / de Reinico. Consulte Selección de un tono o Análisis de averías para obtener información adicional. -
Page 15: Instalación
Instalación Instalación de las pilas NOTE: Con uso normal, las pilas alcalinas duran hasta un año. □ Empuje la lengüeta de la tapa de la pila hacia esta tapa (1) y hálela para retirarla del timbre (A). □ Instale tres pilas alcalinas tipo “C” (no incluidas) en el timbre. - Page 16 Instalación Montaje del pulsador Use tornillos (BB) o cinta doble faz (CC) para montar el botón pulsador (B). □ Para montar con tornillos (BB), presione la pestaña de la parte inferior del botón pulsador (B) con un destornillador pequeño y retire la parte posterior. Coloque la parte posterior del botón pulsador en la jamba de la puerta y marque los dos orificios para los tornillos.
-
Page 17: Operación
Operación Uso de la luz estroboscópica La luz estroboscópica destella cada vez que el timbre (A) es activado. El número de destellos dependerá del tono seleccionado: □ Din (una nota): 2 destellos -pausa - 2 destellos. □ Din-Don (dos notas): 4 destellos-pausa - 4 destellos. -
Page 18: Cuidado Y Limpieza
El alcance del timbre inalámbrico puede variar con el lugar, la temperatura y la condición de la pila. Este timbre (A) se puede vincular hasta con 10 pulsadores inalámbricos de la marca Defiant. Este botón pulsador reproducirá la misma melodía seleccionada para el botón "FRONTAL" (B). -
Page 19: Análisis De Averías
Análisis de averías Problema Causa Probable Solución □ □ El timbre no suena Las baterías no están Asegúrese de que la batería se instale de acuerdo con ni destella. bien instaladas. el diagrama del interior del pulsador. □ □ Las baterías se acabaron. Compruebe la carga de la batería del pulsador y reem- plácela si es necesario. - Page 20 Este dispositivo cumple con la sección 15 de las normas de la FCC. El funcionamiento está sujeto a las siguientes dos condiciones: (1) este dispositivo no debe causar interferencia perjudicial y (2) debe aceptar cualquier interferencia recibida, incluida la interferencia que pudiese causar un funcionamiento no deseado. Se le advierte al usuario que los cambios o modificaciones a esta unidad que no estén expresamente aprobadas por la parte responsable del cumplimiento regulatorio podrían anular la autorización del usuario para utilizar el equipo.
- Page 21 ¿Tiene preguntas, problemas o piezas faltantes? Antes de la devolución al almacén llame al Servicio al Cliente de Defiant de 8 a.m.-5 p.m., Hora del Central, de lunes a viernes. 1-866-308-3976 HOMEDEPOT.COM Guarde este manual para uso futuro. 09-050-22...
Need help?
Do you have a question about the 18000009 and is the answer not in the manual?
Questions and answers