Table of Contents
Advertisement
Advertisement
Table of Contents

Related Manuals for Cyclades AlterPath BladeManager


Summary of Contents for Cyclades AlterPath BladeManager
- Page 1 AlterPath BladeManager User Manual Product Version 1.3.0 Revision No. 7 This document contains proprietary information of Cyclades and is not to be disclosed or used except in accordance with applicable contracts or agreements. © Cyclades Corporation, 2005...
- Page 2 This manual is published by Cyclades Corporation, which reserves the right to make improvements or changes in the products described in this manual as well as to revise this publication at any time and without notice to any person of such revision or change.
-
Page 3: Table Of Contents
Table of Contents Before You Begin Audience Document Organization Typographical Conventions Naming Conventions Chapter 1: Introduction Connectivity and Capacity Key Features Single Point Security Gateway Centralized Authentication Consolidated Views and Blade Access Simple and Easy Web User Interface One-Click Access to Blades and Switches Centralized Data Logging System Log File Compression and Rotation Prioritized Triggers &... - Page 4 Alarm List Form Viewing the Alarm Detail Form Viewing Alarm or Console Logs Assigning a Ticket to a User 2-12 2-12 2-12 2-13 2-13 2-15 2-15 2-16 2-17 2-21 2-22 2-23 2-23 2-26 2-26 2-27 2-28 2-29 3-10 3-10 AlterPath BladeManager Manual...
- Page 5 Running the First Time Configuration Wizard Resetting Configuration to Factory Settings 4-5 First Time Configuration Wizard: An Example Setting the Authentication Method Hostname Configuration Must Follow RFC Standard AlterPath BladeManager Manual Table of Contents 3-11 3-11 3-13 3-13 3-14 3-14...
- Page 6 Deleting a Device from a Group Deleting a Device Group Alarm Trigger Alarm Trigger Management 4-10 4-10 4-14 4-17 4-17 4-17 4-19 4-24 4-24 4-25 4-26 4-26 4-28 4-29 4-29 4-29 4-29 4-31 4-32 4-37 4-37 4-38 4-38 4-39 4-39 4-39 4-40 AlterPath BladeManager Manual...
- Page 7 Deleting a User from a Group Deleting a User Group Setting the Local Password Setting Up Local Authentication Setting a User’s Security Profile Groups 62 Creating a Group Deleting a Group AlterPath BladeManager Manual Table of Contents 4-40 4-41 4-43 4-43 4-43 4-44...
- Page 8 Changing the Session Timeout Enabling Telnet NIS Configuration Active Directory Configuration Disabling HTTP to Use Only HTTPS 4-65 4-66 4-67 4-68 4-70 4-72 4-73 4-75 4-75 4-76 4-76 4-77 4-78 4-78 5-10 5-11 5-11 5-11 5-12 5-14 5-15 AlterPath BladeManager Manual...
- Page 9 Firmware Upgrading the APBM Firmware Backing Up User Data Managing Log Files Changing the Database Configuration Installing SSL Certificates Appendix A: Hardware Specifications Glossary AlterPath BladeManager Manual Table of Contents 5-16 5-16 5-17 5-18 5-19 5-20...
- Page 10 Table of Contents VIII AlterPath BladeManager Manual...
-
Page 11: Before You Begin
Before You Begin Welcome to the AlterPath BladeManager Manual! This manual is designed to help you install, configure, and operate the BladeManager, as well as to guide you in your daily operations of the product. Note: For convenience, this document refers to the AlterPath BladeManager as simply BladeManager or, as in the case of the command line interface, IPBM. -
Page 12: Typographical Conventions
Addressed to the advanced user, provides configuration procedures using command line interface (CLI). It includes such procedures as backing up log files and user data, and installing SSL certificates. AlterPath BladeManager Manual... -
Page 13: Naming Conventions
BladeManager who has the authority to configure and manage the Bla- deManager. The short name for AlterPath BladeManager. The form is the largest area of the user interface; it contains the user selection or input fields for each selected item in the menu. -
Page 14: Command Line Syntax
Spacing and Separators The list of users in the following example must be separated by semicolons (;); the outlets should be separated by commas (,) to indicate a list or with AlterPath BladeManager Manual... - Page 15 (-) to indicate range; there should not be any spaces between the values. sXX.pmusers: The user access list. For example: jane:1,2;john:3,4. The format of this field is: [<username>:<outlet list>][;<username>:<outlet list>...] Where <outlet list>'s format is: [<outlet number>|<outlet start>-<outlet end>][,<outlet number>|<outlet start>-<outlet end>]... AlterPath BladeManager Manual...
- Page 16 Before You Begin AlterPath BladeManager Manual...
-
Page 17: Chapter 1: Introduction
• Easy-to-use web interface for administrators and regular users. For a summary of all the AlterPath BladeManager features, see “Key Features” on page 1-2 of this chapter. The BladeManager web interface provides two modes based on the type of user: •... -
Page 18: Connectivity And Capacity
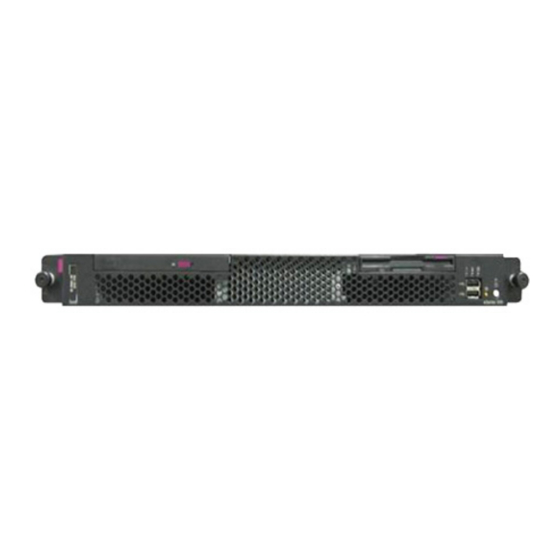
The switches connect as secondary or cascaded devices to the chassis. Front view of the BladeManager: See Chapter 2: BladeManager Installation to view the port connections available from the BladeManager. Key Features The key features of AlterPath BladeManager are: • Single point security gateway • Centralized authentication •... -
Page 19: Single Point Security Gateway
Centralized Authentication Centralized authentication saves the user or administrator from using a password for each blade server, and thereby maintain a secure password. You need only use your password once upon logging onto the BladeManager. To access the blade servers and switch modules, the BladeManager provides the following authentication methods: local database, RADIUS, LDAP, Kerberos, Tacacs+, NIS and active_directory. -
Page 20: One-Click Access To Blades And Switches
Prioritized Triggers & Alarms BladeManager’s event handling feature enables the system to identify possible issues and alert the user. As the BladeManager sends a message to the hard disk for storing and consolidation, it also scans the message for AlterPath BladeManager Manual... -
Page 21: Other Alarm Features
The backup includes data from the compact flash, configuration data from the database, and log data from the console buffer files. This feature also enables users to copy console log files to a server for further analysis and archiving. AlterPath BladeManager Manual... -
Page 22: Exhaustive Reporting
Secure Shell connection to the BladeManager. CLI is one of two user interfaces (the other is the web interface) available to BladeManager users. The CLI is also used for First Time Configuration and system recovery procedures. AlterPath BladeManager Manual... -
Page 23: Deploying The Blademanager
Equipped with its own Ethernet switches, the two networks are physically separated. Any BladeManager user who needs to access a blade server or switch must authenticate and pass through the BladeManager. AlterPath BladeManager Manual... - Page 24 1: Introduction AlterPath BladeManager Manual...
-
Page 25: Chapter 2: Blademanager Installation
Completing an Installation • Connecting the Cables • Updating the Server Configuration • Preparing Console for Initial Configuration Product Installation Checklist Your AlterPath BladeManager is shipped with the following hardware components: • BladeManager • Console cable (null modem) • Power cable •... -
Page 26: Rack Mounting Guidelines
• Ensure that the equipment is mounted or loaded evenly to prevent a potentially hazardous condition. • Do not place any object weighing more than 50 kg (110 lb) on top of rack- mounting devices. C (95 AlterPath BladeManager Manual... - Page 27 Press on tab (2) and tab (3) on the front rail-locking carrier and slide the rail-locking carrier toward the rear of the slide until it snaps into place. AlterPath BladeManager Manual...
- Page 28 Align the pins on the rear rail-locking carrier with the holes on the rear mounting flange. c. Press the tab (2) to secure the rear of the slide rail to the rear mounting flange. Important: Ensure that the pins are fully extended through the mounting flange and slide rail. AlterPath BladeManager Manual...
- Page 29 Press the tab (2) to secure the front of the slide rail to the front mounting flange. d. Repeat steps 1 and 2 for the other slide rail. AlterPath BladeManager Manual...
- Page 30 2: BladeManager Installation a. If you plan to transport the rack cabinet to another location with the server installed, remove one screw and loosen the other screws as indicated. b. Fully extend the rail and re-insert the screw and tighten all screws to secure the rail.
- Page 31 Rack Mounting Guidelines a. Align the server on the slide rails and push the server fully into the rack cabinet. Secure the server to the front mounting flanges with the captive thumbscrews (1). Note: You must leave the shipping brackets (2) attached to the slide rails unless the shipping brackets impede the server from sliding fully in the rack cabinet.
- Page 32 Store the shipping bracket for future use. Note: You just re-install the shipping brackets on the slide rails before you transport the rack cabinet with the server installed. To re-install the shipping brackets, reverse this step. AlterPath BladeManager Manual...
- Page 33 Attach cables to the rear of the BladeManager (such as keyboard, mouse, monitor cables, as needed). b. Route the cables to the left corner of the BladeManager (as viewed from the rear) and use the cable straps to secure the cables to the slide rails. AlterPath BladeManager Manual...
- Page 34 BladeManager installed, you must secure the server to the rack. If necessary, disconnect the cables from the rear of the server; then, slide the server out of the rack 150 mm (6 in.) and insert the M6 screws in each slide rail.
-
Page 35: Major Components Of The Blademanager
• Blue on a component indicates touch points where you can hold the component such as when you remove it from or install it in the server. • Orange on or near a component indicates that you can hot-swap the component (that is, you can remove or install the component while the BladeManager is running). -
Page 36: Installation Safety Guidelines
Do not leave the device where others can handle and damage it. • While the device is still in its static-protective package, touch it to an unpainted metal part of the server for at least two seconds to drain static electricity from the package and from your body. •... -
Page 37: Installation Procedures
Installation Procedures it back into its package; do not place the device on your server or on a metal surface. • Take extra care when handling devices during cold weather as heating reduces indoor humidity and increases static electricity. Installation Procedures This section provides the following procedures: •... - Page 38 To install a DIMM, complete the following procedure: 1. Review the preceding installation guidelines. 2. Switch off the server and peripheral devices, and disconnect the power cord and all external cables. 3. Remove the Cover.
-
Page 39: Installing A Hard Disk Drive
3. Press the release tabs on the bezel and pull the bezel away from the server. 4. Slide the drive into the server until it connects to the backplane. 5. If you have other options to install, do so now. -
Page 40: Installing A Scsi Hard Drive
3. Remove the cover. 4. Press the release tabs on the bezel and pull the bezel away from the server. 5. Slide the drive tray out of the server, and then position the drive on the drive tray. -
Page 41: Installing An Adapter
10. Re-install the bezel and replace the cover. Go to Completing the Installation, this chapter. Installing an Adapter This section describes the types of adapters that your server supports and other information to consider when installing as adapter. • In addition to the instructions in this section, follow the instructions that come with the adapter. - Page 42 The optional Remote Supervisor Adapter II can be installed only in PCI- X slot 2. • You can install an optional RAID controller in your server to control the internal hard disk drives (for example, to allow you to configure the internal hard disk drives into disk arrays.
- Page 43 5. Follow the instructions that come with the adapter to set jumpers or switches, if any. 6. Loosen the captive screw on the rear of the server and remove the riser- card assembly. Place the riser-card assembly on a flat, static-protective surfaced.
- Page 44 This maintains the electronic emissions characteristics of the server and ensures proper cooling of server components. grasp the adapter by its top edge or upper corners, and align it with the PCI-X expansion slot; then, press the adapter firmly into the expansion slot. AlterPath BladeManager Manual...
-
Page 45: Completing The Installation
Attention: Install your server only in a rack cabinet with perforated doors. Do not leave open space above or below an installed server in your rack cabinet. To help prevent damage to server components, always install a filler panel to cover the open space and to help ensure proper air circulation. -
Page 46: Connecting The Cables
4. There is one keyboard connector on the back of the server. Use this connector to connect the server to a keyboard or optional console switch. You can also connect a USB keyboard to the server using one of the USB ports. After installing a USB keyboard, you might need to use the Configuration/Setup Utility program to enable keyboardless operation and prevent the POST error message 301 from displaying during startup. -
Page 47: Updating The Server Configuration
ServeRAID-7e (Adaptec HostRAID) Support CD for more information about reconfiguring the disk arrays. If the server has an optional RAID adapter and you have installed or removed a hard disk drive, see the documentation that comes with the RAID adapter for information about reconfiguring the disk arrays. - Page 48 If this LED is off, it does not mean that there is no electrical power in the BladeManager. The LED might be burned out. To remove all electrical power from the server, you must disconnect the power cord from the electrical unit. AlterPath BladeManager Manual...
- Page 49 The diagram below shows the LEDs on the rear of the BladeManager. Rear LEDs Ethernet 1 transmit/receive activity LED Ethernet 1 speed 1 Gbps LED AlterPath BladeManager Manual Function Press this button to switch the server ON and OFF manually. Press this button to reset the server and run the power on self-test (POST).
-
Page 50: Blademanager Power Features
However, the server can respond to requests from the service processor, such as a remote request to turn on the server. The power-on LED flashes to indicate that the server is connected to AC power but not switched on. -
Page 51: Switching Off The Blademanager
When you switch off the BladeManager and leave it connected to AC power, the BladeManager can respond to requests from the Service processor, such as a remote request to turn on the server. To remove all power from the server, you must disconnect it form the power source. -
Page 52: Pre-Configuration Requirements
- All Console Servers - Gateway - DNS Optional addresses: - NTP - SMTP (only when using the alarms feature). Ensure that you have a NIC card installed in your PC to provide an Ethernet port, and allow network access. AlterPath BladeManager Manual... -
Page 53: Configuring The Com Port Connection And Logging In
Configuring the COM Port Connection and Logging In Note: For a list of internet browsers and Cyclades device firmware versions supported by the BladeManager, refer to Appendix A: Hardware Specifications. Configuring the COM Port Connection and Logging In The console port is used for the initial configuration (also known as First Time Configuration in this document) which is performed using the Command Line Interface (CLI) via serial console connection. - Page 54 2: BladeManager Installation 2-30 AlterPath BladeManager Manual...
-
Page 55: Chapter 3: Blademanager Web Access
Chapter 3 BladeManager Web Access The web interface provides two modes for using the BladeManager based on the type of user: Access (for operation by regular users) and Admin (for configuration by system administrators). This chapter explains the procedures for operating the BladeManager web interface in Access Mode. Addressed specifically to regular users, this chapter is organized as follows: •... -
Page 56: Using The Web Interface As A Regular User
BladeManager administrator. The IP address works for both encrypted (https) and non-encrypted (http) versions. Cyclades recommends that you use the encrypted version. Note: To configure the encrypted version, see “Disabling HTTP to Use Only HTTPS” on page 5-16, Chapter 5: Advanced Configuration. - Page 57 3. Select the Login button. Upon successful login, the Alarms form appears. Note: The first time BladeManager launches your application screens, the process will be slow. Once the screens are cached, subsequent retrieval of screens should be fast. AlterPath BladeManager Manual...
-
Page 58: General Screen Features
Be sure to select the Logout button on the top right hand corner after you finish your session. Sorting a List Form by Column/Field Name Most, if not all, list forms provide sort, search, and filter functions. User view or Buttons panel to manage list data input form AlterPath BladeManager Manual Logout Button... -
Page 59: Search And Filter Functions
If the trigger for the alarm has been configured to send an email, then you should also receive an email notification regarding the alarm. Each alarm or ticket in the list includes a timestamp, a priority level, and a status. AlterPath BladeManager Manual... -
Page 60: Alarm Logs
When you first log in to the BladeManager as a regular user or select Alarms from the menu, the Alarm List form is the first form that you will see. Use this form to view the list of alarms, to connect to a blade, and to view blade logs. AlterPath BladeManager Manual... - Page 61 Alarm Detail (or Ticket Info) form. Table 3-1: Form Fields and Elements Fieldname Ticket Blade AlterPath BladeManager Manual Definition Ticket number assigned to an alarm. The symbol above the ticket number indicates the severity level of the alarm. Select the number to display the Alarm Detail form.
-
Page 62: Viewing The Alarm Detail Form
The Alarm Trigger name. Click on the name to view the Alarm Trigger Detail form. User assigned to the alarm. Status of the alarm. Select this to navigate to the Data Buffer log pertaining to the blade. AlterPath BladeManager Manual... - Page 63 Messages Notes Back Save Reset AlterPath BladeManager Manual Definition Dropdown box that lists all the assigned users for the current alarm. Select a user to assign or re-assign ticket to another individual user. Dropdown box to select the status of the ticket.
-
Page 64: Viewing Alarm Or Console Logs
3. If applicable, select the status from the Status dropdown list box. 4. If applicable, type in your notes or comments in the Notes text entry box. 5. Select Save to complete your entry. 3-10 AlterPath BladeManager Manual... -
Page 65: Blades
The Blades List form allows you to view the blades to which you have authorized access. To view the Blade List form, follow this step: 1. From the Blades form, under the Config column, select the view link adjacent to the blade you wish to view. AlterPath BladeManager Manual 3-11... - Page 66 For each line, select view to open the Blade Detail form of the selected console. Chassis used by the blade. Port number used by the blade. Location of the blade. Operating status (Enabled, Disabled, OnDemand) of the blade. AlterPath BladeManager Manual...
-
Page 67: Connecting To A Blade Console
Write (R/W) access to the blade console panel while the rest can have Read only (R) access. Viewing a Blade or Switch Note: This feature is available only to users of the optional Blade Module. AlterPath BladeManager Manual Definition Button to save the desired blade list and sort order. -
Page 68: Consoles Detail Form
Blade List form. To view a blade or switch, place the mouse cursor over the blade/switch name to display the list of connect options: CLI (command line interface), KVM, VM, On (i.e., to power on the blade server), and Off (i.e., to power off the blade server). - Page 69 Machine Type Machine Name OS Type OS Version Back AlterPath BladeManager Manual Definition Button to display the Console Detail form. Button to view users who are authorized to access the current console. Button to view users who can be notified of an alarm pertaining to the current console.
-
Page 70: Consoles Access Form
Consoles Notify Form The Console Notify form shows the users who are notified when an alarm pertaining to the current console is generated. To view the Console Notify form: 1. From the Console Detail form, click on Notify. 3-16 AlterPath BladeManager Manual... -
Page 71: Consoles Groups Form
USER is the default list which contains all users. Consoles Groups Form The Console Groups form shows the group(s) to which the current blade belongs. To view the Blade Group form: 1. From the Blade Detail form, click on Groups. AlterPath BladeManager Manual 3-17... -
Page 72: Logs
Logs that provide information about notifications and alarms (who handled the alarm, what action was taken, etc.) triggered by a particular blade. This is a log of all transaction data generated on the blade. AlterPath BladeManager Manual... -
Page 73: Viewing The Logs
To view the logs available for a specified blade (to which you have authorized access), perform the following steps: 1. Select Logs from the menu. AlterPath BladeManager Manual Definition Drop down list to select a blade server that will be the basis of the log(s) to be retrieved. -
Page 74: Access Logs
Logs. The Access Logs (default log browser) provide all access information (e.g., who accessed the blade, access date, action taken, etc.) about your target blade server. The name of the blade/port/chassis to which the logs apply to is shown below the tab titles. 3-20 AlterPath BladeManager Manual... -
Page 75: Event Logs
Status Connection Event Logs Use the Event Logs browser to view all events that occurred (within a specified range of time) on your target blade server. AlterPath BladeManager Manual Definition Date in which the event occurred. Time of the event. -
Page 76: Field Name
Note: You can also access the Data Buffer log from the Alarms form. 3-22 Definition Date of the event. Time of the event. Ticket number associated with the event. Trigger Expression Action taken to resolve event. AlterPath BladeManager Manual... -
Page 77: User's Profile
Table 3-8: Users Profile, Details Form - Fields and Elements Field Name Details Access AlterPath BladeManager Manual Definition Tab or button to display the User Detail form. This is also the primary form of User’s Profile. - Page 78 User’s email. This is the same field name used by the system for event notification. User’s department. Location of department. User’s phone number. User’s mobile phone number. User’s pager number. Indicates whether the user is enabled or disabled. AlterPath BladeManager Manual...
-
Page 79: Changing Your Password
The system displays the User Access form: >> Viewing the User Groups Form The User Groups tabbed form displays the groups to which you belong. To view the User Group form: 1. From the User Detail form, click on Groups. AlterPath BladeManager Manual 3-25... - Page 80 Selected groups list box. Button to delete a selected user group (right list box) and return it to the Select groups for the user list box. The list box that shows the group(s) assigned to the current user. AlterPath BladeManager Manual...
-
Page 81: Viewing The Security Form
Table 3-10: User’s Profile, Security Form - Fields and Elements Field Name Security Select security profile AlterPath BladeManager Manual Definition Tab or button to select the current form. List box from which to select a possible list of security profiles assigned to the current user. - Page 82 The list box that shows the Security Profile assigned to the current user. The list box that shows the Security Profile assigned to a user group (that is, the default USER group or any other defined user groups). AlterPath BladeManager Manual...
-
Page 83: Chapter 4: Blademanager Web Administration
Chapter 4 BladeManager Web Administration This chapter presents the procedures for configuring the AlterPath BladeManager through the web interface. Addressed to the BladeManager administrator who must use the web interface in the Admin Mode, the chapter is organized as follows: •... -
Page 84: Operational Modes
Note: For information on how to use the system in Access mode, refer to the previous Chapter 3: BladeManager Web Access . Note: Certain configurational procedures (e.g., System Recovery, Modem Card Configuration) require the use of the CLI by advanced users. These procedures are discussed in Chapter 5: Advanced Configuration. AlterPath BladeManager Manual... -
Page 85: Configuration Process Flow
SEVEN MENU OPTIONS Blades / Chassis Switches Blade / Chassis Switch Detail Detail Group Notify Access Group AlterPath BladeManager Manual Connect to serial console Perform First Time Configuration Reset system Reboot to default successful? factory settings Logon to Blade Manager... -
Page 86: First Time Configuration Wizard
2. Boot your management console. 3. Follow the configuration wizard. You may configure the following manually, or press Return to accept the default value(s). • Enter Root password (and re-type) • Enter Admin password (and re-type) • Select Time Zone AlterPath BladeManager Manual... -
Page 87: Resetting Configuration To Factory Settings
2. Type in: defconf and press <Enter>. 3. Type in: reboot and press <Enter>. Example: BladeManager login: root Password: [root@BladeManager root]# defconf WARNING: this will erase all of your current configuration and restore the AlterPath BladeManager Manual system's factory default configuration. This action is irreversible! -
Page 88: First Time Configuration Wizard: An Example
The First Time Configuration sample session shown below shows the portion of the command line data where the user configuration begins. This is commenced by the heading, Welcome to Cyclades-APBM! Caution: Before the Welcome heading appears, the system will prompt you... - Page 89 Enter the NTP server: Enter the email (SMTP) server: Choose the desirable authentication method (local/radius/tacacs+/ldap/kerberos/nis/active_directory) [local]: Cyclades-APBM V_1.3.0 (Apr/03/2005) - Console (kernel 2.4.25) APBM login: [At this point, First Time Configuration is complete. Close the terminal session and proceed to the web interface.]...
-
Page 90: Setting The Authentication Method
NIS Server. For the NIS Domain Name, the system will accept localdomain or you may leave the field blank. Note: If you use NIS Authentication and the NIS server fails, APBM will not allow you to add the user in the local database since it already exists in the NIS server. -
Page 91: Connecting To The Web Interface
HTTP access by commenting out its configuration in the BladeManager unit by using the command line. Note: To configure the encrypted version, see “Disabling HTTP to Use Only HTTPS” on page 5-16 AlterPath BladeManager Manual - OR -... -
Page 92: Blademanager Web Interface: Admin Mode
For example, before configuring users, it is customary to configure the chassis, the blades and switches first. Once you have configured the blades 4-10 AlterPath BladeManager Manual... - Page 93 Table 4-1: Summary of Web Forms in Admin Mode Menu Option Chassis Blades Alarm Triggers AlterPath BladeManager Manual Forms and their Functions Chassis List - View list of Chassis; add, edit or delete chassis; view logs. Chassis Details - Edit chassis configuration details; set or change admin password;...
- Page 94 Blade > General - Select group members for the selected blade group. User > General - Select group members for the current user group. Security - Select security profile to be applied to the current user. AlterPath BladeManager Manual...
- Page 95 Table 4-1: Summary of Web Forms in Admin Mode Menu Option Security Profile Info Reporting AlterPath BladeManager Manual Forms and their Functions Security Profile List - View list of security profiles; add, edit or delete a security profile. General - Enable or disable the current security profile.
-
Page 96: Logging Into The Blademanager Web Interface
Note: All procedures in this chapter assumes that you are already logged in. Parts of the Web Interface Before proceeding to the web configuration process, familiarize yourself with the graphical user interface. Shown below are the basic features of the 4-14 AlterPath BladeManager Manual... - Page 97 Non-primary forms are shown only as individual forms (i.e., without the menu panel and other GUI elements outside the form). AlterPath BladeManager Manual Access tab allows the Admin user to view and use the WMI as...
-
Page 98: Sorting, Filtering, And Saving A List Form
You can further sort this form by Type, Device, Location, and Status. To filter your list by group, use the Filter by button. The system automatically saves the filtered list. To search for a particular console, use the Search button. 4-16 AlterPath BladeManager Manual... -
Page 99: Using The Form Input Fields
Table 4-2: Summary of Chassis (or Devices) Forms Action Add and configure new chassis. Edit chassis. AlterPath BladeManager Manual _!@%&()[]{}<>?=+-*/,.;:^~ Form(s) Used Chassis List form (Add button) > Select Device Type form > Chassis Details form. Chassis List form (Edit link) > Chassis Details form. - Page 100 4-18 Form(s) Used Chassis List form (Delete button). Chassis List form. Groups tabbed form. Proxies tabbed form. Switch 1 through Switch 4. The Blade Wizard (Save & Create Blades button) is available from all the tabbed forms. AlterPath BladeManager Manual...
-
Page 101: Chassis > Devices List Form
[unlabeled checkbox] Device Type Config Firmware AlterPath BladeManager Manual Definition Checkbox to select the device to be deleted. Device name. Click on the device name to connect to the console server or device. Click on the column title (Device) to change the sort order. - Page 102 Filter by button. From the dropdown box, select the device you wish to search, and then click on Search. Button used to add new devices. Button used to delete the devices. AlterPath BladeManager Manual...
- Page 103 BladeCenter) click the Select button. Proceed to Step 5. 4. If you are editing an existing chassis, from the Device list form, select the chassis you want to edit, and then click on the edit link (Config column, same row). AlterPath BladeManager Manual 4-21...
- Page 104 Dropdown list box to select: Enable - connection between the BladeManager and the device is ALWAYS established. Disable - no connection is established, and all child consoles follow this configuration. OnDemand - connection is established only upon user’s request. AlterPath BladeManager Manual...
- Page 105 Reset Save Save / Create Blades 6. Click on the Save button. AlterPath BladeManager Manual Definition The admin username (superuser) of the device. Button to invoke a dialog box used to define the Admin’s password. This password is used to access the IBM Blade Center port, but NOT to change the password.
-
Page 106: Using A Dhcp Server And Selecting The Correct Ip Mode
Using a DHCP Server and Selecting the Correct IP Mode A DHCP server is build into the BladeManager. You can use your company’s DHCP server or the BladeManager as your DHCP server. If you are not using a DHCP server, then you may use a static IP address. -
Page 107: Selecting The Group(S) To Access A Chassis
4. Repeat steps 2 and 3 if you have another group to add. Note: To delete any entries from the Selected Groups box, highlight the group you wish to delete and then click on Delete. 5. Click on Save to save your configuration. AlterPath BladeManager Manual 4-25... -
Page 108: Proxies
4: BladeManager Web Administration Proxies The BladeManager includes a web proxy server so that connections to the native web interface of any supported device go through the BladeManager. This feature enables the BladeManager to: • Connect users through the BladeManager to remote servers that it controls (e.g., IBM Blade, KVM/net switches, ACS/TS units, and other... - Page 109 Warning: Reverse Proxy does NOT work with Java applets and Active X • Remote access to the IBM Blade devices. AlterPath BladeManager Manual Function A forward proxy acts as a gateway for a client’s browser, sending HTTP requests on the client’s behalf to the Internet.
-
Page 110: Configuring The Proxy
Note: If you select Forward Proxy, then you must set the default gateway of your PC and the chassis (or switches) to the IP addresses of the BladeManager if your PC and the chassis (or switches) are in different networks. 5. Click on Save to complete the procedure. 4-28 AlterPath BladeManager Manual... -
Page 111: Verifying Your Proxy Setting
Unless you have enabled the switch connection from the Switch tabbed form (up to four switches), the system will not allow you to add or configure the switch console. 1. From the menu, go to Devices > Details > Groups> Switch 1. AlterPath BladeManager Manual 4-29... - Page 112 Button to invoke a dialog box used to define the Admin’s password. This password is used to access the IBM Blade Center port, but NOT to change the password. You must enter the SAME password registered in the blade server. AlterPath BladeManager Manual...
-
Page 113: Two Methods Of Blade Configuration
• Through the Blade Wizard • Through the Consoles form AlterPath BladeManager Manual Definition Dropdown list box to select: Enable - connection between the BladeManager and the device is ALWAYS established. Disable - no connection is established, and all child consoles follow this configuration. -
Page 114: Running The Blade Wizard
Allows you to edit any of the configured blades/ switches. This form provides advanced configuration options. Prompts you to review and confirm the configuration. Message to indicate successful completion. AlterPath BladeManager Manual... - Page 115 Note: Use the Back, Next, and Cancel buttons to navigate through the forms. Pressing the Next button saves your current form settings. 2. Connection Method: Select the Connection Protocol and Status, and then click on Next. Note: The default Connection Protocol is Telnet. AlterPath BladeManager Manual 4-33...
- Page 116 Notify tab to proceed to the user notification form. 4. (User) Notify: From the User Notification form, select the user(s) you wish to be notified and then select the Groups tab to display the Groups form. 4-34 AlterPath BladeManager Manual...
- Page 117 Complete the Groups form, as necessary, and then select the Next button to display the Unconfigured Consoles form. 6. Unconfigured Consoles: Select the check box for each unconfigured console that you wish to configure, and then select the Next button to display the Edit Configuration form. AlterPath BladeManager Manual 4-35...
-
Page 118: Edit Configuration
Console Prefix field and then click on the Console Prefix button. The system applies the new prefix to all console names. 8. Confirmation: Check your console settings from the Confirm Edits form (the second tabbed form included). If information is incorrect, select the Back button 4-36 AlterPath BladeManager Manual... -
Page 119: Configuring Blades Manually Through The Menu
Interface), and Power On/Off. (These options are configured from the Security Profile which is associated with the User and Group.) • Add a new server blade/switch by selecting the Add button. • Edit a blade/switch configuration by clicking on edit to invoke the Consoles Detail form. -
Page 120: Connecting To A Device
To delete (or disconnect) a device from the BladeManager, follow the steps below: 1. From the Device List form, select any device you wish to delete by clicking on the checkbox adjacent to the Device name. 2. Select the Delete button. 4-38 AlterPath BladeManager Manual... -
Page 121: Deleting A Device From A Group
Note: Alarm triggers work only with Blades and Switches. An alarm trigger is a text string that you can create to generate any one or combination of the following: • Email notification for users or administrators • Alarm AlterPath BladeManager Manual 4-39... -
Page 122: Alarm Trigger Management
Alarm Trigger detail form (Input fields: Create Alarm and Priority). Alarm Trigger detail form (input field: Notify). Console Detail form (Notify button). Go to: Consoles: Console List > Console Detail. Users List form > Users Detail form AlterPath BladeManager Manual... -
Page 123: Creating An Alarm Trigger
To create an alarm trigger, follows the steps below: 1. From the menu, select Alarm Trigger. The system displays the Alarm Trigger List form. 2. From the Alarm Trigger List form, click on the Add button. AlterPath BladeManager Manual 4-41... - Page 124 Yes or No. Indicates if system needs to send an alarm to the user. Indicates the priority or severity level of the alarm. Enable or disable a trigger. Button to return to the previous page or form. AlterPath BladeManager Manual...
-
Page 125: Deleting An Alarm Trigger
BladeManager and for user access. Select or change the authentication method for console access. AlterPath BladeManager Manual Definition Button to save your trigger entry. Button to reset the form to create a new trigger entry. Form(s) Used Console List (Add button) >... -
Page 126: Consoles List Form
Applies to: Use this connection to: Blade servers Launch a CLI session using and switches. either Telnet or SSH. NOTE: Power control is available through ^ec sequence. Blade servers Launch the remote console only applet session for KVM. AlterPath BladeManager Manual... -
Page 127: Connection Type
(i.e., data status is enabled). >> Viewing the Console List To view the Console List form, perform the following steps: 1. From the menu panel, select Consoles. AlterPath BladeManager Manual Applies to: Use this connection to: Blade servers... -
Page 128: Adding A Serial Console
To add a console, follow the steps below: 1. From the menu, select Consoles. The system displays the Console List form. 2. From the Console List form, click on the Add button. 4-46 AlterPath BladeManager Manual... - Page 129 Blades / Switches The system displays the Select Console Type form: 3. From the Select Console Type form, select the type of console (Blade or Switch) you wish to add. The system displays the Console Details form: AlterPath BladeManager Manual 4-47...
- Page 130 Required. Name of the console (Drop down list.) Console server to which the current console is connected. Port on the console server when the console is connected. If you were configuring a switch console, the port number (e.g., SW_1) corresponds to the switch number (up to four).
-
Page 131: Adding A Switch Console
Use the Console Access form to assign and authorized one or more users to access the current blade console. 1. From the Console Detail form (Consoles: Console List > Console Detail), click on the Access button. AlterPath BladeManager Manual Definition Drop down list. Enable, Disable, OnDemand. Frequency of the automatic log rotation process (Never, Daily, Weekly, Monthly). -
Page 132: Selecting Users To Be Notified
Use the Console Notify form to assign one or more users to whom the system can send all notifications (email or alarm) pertaining to the current console. 1. From the Console Detail form (Consoles: Console List > Console Detail), click on the Notify button. 4-50 AlterPath BladeManager Manual... -
Page 133: Assigning The Console To A Group
To create a new group, you must select Groups from the main menu. To assign a console to a group, follow the steps below: 1. From the Console Detail form (Consoles: Console List > Console Detail), click on the Groups button. AlterPath BladeManager Manual 4-51... -
Page 134: Deleting A Console From A Group
1. From the menu panel, select Consoles. The system displays the Console List form. 2. Under the Config column of the Console List form, click on the Edit link of the Console you wish to remove from a group. 4-52 AlterPath BladeManager Manual... -
Page 135: Deleting A Console Group
To initiate the log rotation perform the following steps: 1. From the Console List form, select the console for the particular console log you wish to rotate. The system displays the Console Detail form. 2. From the Console Detail form, click Logrotate Now. AlterPath BladeManager Manual 4-53... -
Page 136: Setting Log Rotation In Auto Mode
User detail (Access button) > User Access form. User list (username link) > User detail. User detail (Set Password button). User detail (Admin User checkbox). User detail (Groups button) > User Groups form. User list (Delete button). User list. AlterPath BladeManager Manual... -
Page 137: User List Form
User Detail form in the next form section. >> Adding a User To add a new user, perform the following steps: AlterPath BladeManager Manual any user who will use the BladeManager application MUST be entered in the BladeManager database in order to access the application. - Page 138 Click this button to assign or re-assign the current user to one or more user groups. As indicated. Checkbox to indicate if the user is an admin and to authorize user access to the web application in admin mode. AlterPath BladeManager Manual...
- Page 139 Mobile Pager Status Back Save 4. Click on Save to complete the procedure. AlterPath BladeManager Manual Definition Checkbox to enable local authentication for the user. NOTE: Even if you are using another server authentication (e.g., LDAP, RADIUS), it is advisable that you activate the password for local authentication in the event that your authentication server fails.
-
Page 140: Selecting Consoles For A User
In the selection box, the plus (+) sign is used to indicate defined groups. The Console (or +CONSOLE) group is the default console group. 5. Select the Add button. The system transfers the selected group to the Selected Consoles view panel on the right. 4-58 AlterPath BladeManager Manual... -
Page 141: Selecting User Group(S) For A User
3. From the User Detail form, click on Groups. The system displays the User Groups form: 4. From the resulting form, select from the Select Groups for the User view panel the group you wish to assign to the user. AlterPath BladeManager Manual 4-59... -
Page 142: Deleting A User
Click on the Save button to end the procedure. Deleting a User Group You cannot delete a user group from the User Group form. To delete a user group, see the Groups section of this chapter. 4-60 AlterPath BladeManager Manual... -
Page 143: Setting The Local Password
Password, and defining the user name and password. A local password is used if the authentication setting for the BladeManager is Local. The local password is also used as a backup when server-based authentication is being used. In this case, if the authentication server is unavailable due to network problems then the system can use the local password. -
Page 144: Groups
The system does not allow you to edit or delete these groups. You can edit and delete only those groups that you have created. >> Creating a Group To create a new group, follows the steps below: 1. From the menu, select Groups. 4-62 AlterPath BladeManager Manual... - Page 145 The system displays the Group List form: 2. From the Group List form, click on the Add button. The system displays the Adding Group form: 3. From the resulting form, select the group type you wish to create (Device, Console, or User). AlterPath BladeManager Manual 4-63...
-
Page 146: Deleting A Group
>> Assigning a Security Profile to a User Group The User Group includes an additional tab, Security, which allows you to assign one or more Security Profiles to the current user group. To assign a Security Profile: 4-64 AlterPath BladeManager Manual... -
Page 147: Security Profiles
The Default Profile already allows users to log on. You may change it to block connections by default and then allow the valid users. If the chosen rule is Allow, you must select at least one action from the Authorization tab. AlterPath BladeManager Manual 4-65... -
Page 148: Security Profile List
Definition The name of the profile and, if applicable, the source IPs allowed for this profile. A brief description of the profile and, if applicable, the interfaces and the date/time allowed for this profile. AlterPath BladeManager Manual... -
Page 149: Adding Or Editing A Security Profile
1. From the menu select Security Profile. The system displays the Security Profile list form (see previous page). 2. Select the Add button to add, or select an existing profile to edit. AlterPath BladeManager Manual Definition States if the profile is enabled or disabled; if appicable, lists all authorized actions for the current profile. -
Page 150: Security Profiles: Source Ip
(Allow or Deny). 4. Click on Save. >> Security Profiles: Source IP 1. Click on the Source IP tab to configure the conditions for accepting source pages for the current profile. 4-68 AlterPath BladeManager Manual... - Page 151 Source IP (tab) Rule Add Source IP Conditions Netmask AlterPath BladeManager Manual Function Title of the current tabbed form. The configured policy (Allow or Deny) that applies to the entire security profile. The default rule is configured from the General tabbed form.
-
Page 152: Security Profiles: Lan Itf
Button to delete a selected IP address from the adjacent Source IP Conditions list box. List of source IP addresses to be applied to the rule. Button to return to the previous page. Button to save your configuration. AlterPath BladeManager Manual... - Page 153 Field Name LAN ITF (tab) Rule Select LAN ITF Conditions AlterPath BladeManager Manual Function Tab title to select the current form. The configured policy (Allow or Deny) that applies to the current form and the entire security profile. The default rule is configured from the General tabbed form.
-
Page 154: Security Profile: Date/Time
Button to remove any selected LAN ITF conditions from the right list box. List of selected LAN ITF conditions that will be applied by the rule to the policy. Button to return to the previous page. Button to save your configuration. AlterPath BladeManager Manual... -
Page 155: Configuring Authorization
>> Configuring Authorization The Authorization tabbed form allows you to define the authorized actions for the current profile. If the rule chosen for a security profile is Allow, then you AlterPath BladeManager Manual Function Tab title to select the current form. - Page 156 ConsoleReadWrite KVMReadWrite 4-74 Function Allow user access to CLI configuration interface. Allow user access to web configuration interface. Allow user access to console. Allow Read and Write access to console. Allow READ/WRITE access to a KVM/IP interface. AlterPath BladeManager Manual...
-
Page 157: Deleting A Security Profile
BladeManager to a local or a remote destination. This feature allows you to backup and restore (either independently or altogether) the following data types: Data Type System Configuration Configuration Data Data Buffers AlterPath BladeManager Manual Function Allow user to perform power control operations. Allow system access. Allow user access to blades. Definition... -
Page 158: Backup And Restore Scenarios
• Replacing the existing BladeManager - You back up ALL data to an external server. The BladeManager is then replaced with a new unit to which all data is restored. The new unit will have the same configuration as the original unit. -
Page 159: Blademanager Database Transaction Support
Optimistic locking is a mechanism to lock objects in multi-user systems to preserve integrity of changes so that one person’s changes do not accidently get overwritten by another. It offers reduced concurrency, higher performance, and avoids deadlocks. AlterPath BladeManager Manual 4-77... -
Page 160: Changing The Default Configuration
Session Start Session End Date User Login State Console Name 4-78 Definition Date and time when the session started. Date and time when the session ended. Name of session user. Operating status of the login. As indicated. AlterPath BladeManager Manual... - Page 161 User column the particular user you wish to view. When you select a user from the Info/Reporting List screen, the system displays the following detail list: AlterPath BladeManager Manual Definition Reason for any failure of state change.
- Page 162 4: BladeManager Web Administration 4-80 AlterPath BladeManager Manual...
-
Page 163: Chapter 5: Advanced Configuration
This chapter presents some procedures for configuring the BladeManager through the Command Line Interface (CLI). First Time Configuration aside, Cyclades recommends the use of the CLI only for advanced admin users who are proficient with CLI, and would like more control over the configuration features of the BladeManager. -
Page 164: Working From A Cli
<command name> consolelist console <console name> Use this command to: list the available commands get a definition of a command list all consoles allocated to you as defined in the access control list. connect to the console. Alterpath BladeManager Manual... -
Page 165: Copying And Pasting Text Within The Console Applet Window
It is possible to connect to console ports using the BladeManager as a security proxy. Using SSH on your workstation, type in: ssh <user name>:<console name>@<IP address of BladeManager> AlterPath BladeManager Manual Use this command to: display the content of the data buffer file for the specified console. -
Page 166: Sample Command Line Interface
[This field is absent if the user is logged in as an admin. ] AlterPath Manager - connects to a console - prints all lines in a console's logfile - prints lines in a console's logfile that match a pattern Alterpath BladeManager Manual... -
Page 167: Cli Commands
Each command must be preceded by ^Ec. For example, to send a broadcast message, you must press: <Ctrl>Ecb Key(s) \ooo To exit from the CLI, press: <^> <shift>_ (i.e., <Ctrl> <Shift> <underscore>) AlterPath BladeManager Manual Command disconnect send broadcast message down a console force attach read/write... -
Page 168: Set Commands
Press <ENTER> if you wish to change it, or [Q<ENTER>] to quit: Enter Local IP Address []: Current Status: Do you wish to save these parameters? (y/N) n *** Network boot parameters NOT saved DISABLED DISABLED Alterpath BladeManager Manual [local]:... - Page 169 7) Australia 8) Brazil 9) CET 10) CST6CDT 11) Canada 12) Chile 13) Cuba 14) EET 15) EST AlterPath BladeManager Manual 18) Eire 35) Jamaica 19) Etc 36) Japan 37) Kwajalein 54) Singapore 21) Factory 38) Libya 22) GB 39) MET...
- Page 170 [root@APM network]# setnetwork Primary Ethernet IP address: (S)tatic, (N)one or (K)eep current ? [K]: s Enter Primary Ethernet IP address: 192.168.48.48 33) Iran 50) Poland 34) Israel 51) Portugal 67) right 68) zone.tab Alterpath BladeManager Manual...
- Page 171 OBS: In this example, index = 0, 0:1, 0:9999 and 0.2 The third option, (K)eep command, gives you the option to skip to the next Ethernet interface without changing the configuration of the current interface. AlterPath BladeManager Manual...
-
Page 172: Changing The Escape Sequence
^C at the end, the script will ask if you want to make the changes effective now, in which case the script automatically runs /etc/init.d/ networking restart. SETNTP - sets the NTP server’s IP address. For example: root@APM_Paulo root]# setntp Enter the NTP server: *** Configuration changed! *** Execute saveconf to save the new values in flash. -
Page 173: Re-Defining The Interrupt Key
Ctrl+_ (that is: ^_) to prevent the system from directing this command to any application running on the foreground rather than to the console server. Unlike ^C, the latter is not a valid key combination for most servers including Sun, and should enable you to interrupt the console server as necessary. -
Page 174: Enabling Telnet
Note: xinetd services will be available after reboot, since this script is already included in the startup proceedure. 5-12 23/udp = REUSE = stream = no = root = /usr/kerberos/sbin/telnetd # transmission control protocol # user datagram protocol Alterpath BladeManager Manual... -
Page 175: Nis Configuration
What the status messages mean: Status: SUCCESS NOT FOUND UNAVAIL TRYAGAIN AlterPath BladeManager Manual Parameter Definition: Available: aliases, ethers, group, hosts, netgroup, network, passwd, protocols, publickey, rpc, services, and shadow. Available: nis (use NIS version 2), dns (use Domain Name Service), and files (use the local files). -
Page 176: User Authentication
Authenticate the user first through NIS, and if the user is not found or the NIS server is down, use the local database. passwd: compat [UNAVAIL=continue TRYAGAIN=continue] files shadow: compat [UNAVAIL=continue TRYAGAIN=continue] files group: compat [UNAVAIL=continue TRYAGAIN=coninue] file passwd_compat: nis shadow_compat: nis 5-14 Alterpath BladeManager Manual... -
Page 177: Active Directory Configuration
(dn) to bind with, and is composed by the common name (cn) plus the distinguished name of the search base, and bindpw is the password in the active directory server which corresponds to the common name given in the binddn statement. -
Page 178: Disabling Http To Use Only Https
E2000 using Secure Copy (SCP). To add or import new firmware, follow this procedure: 1. From the web (www.cyclades.com), download the firmware to your computer. 2. Using the CLI, use the SSH scp command to copy the firmware to E2000. -
Page 179: Upgrading The Apbm Firmware
You may upgrade the APBM firmware by downloading the upgraded software from the web to the E2000. 1. From the Cyclades website (www.cyclades.com), download and copy the firmware to the E2000 via Secure Copy (SCP). The firmware is composed of two files: •... -
Page 180: Backup And Restore Commands
Replacing the existing BladeManager - You back up ALL data to an exter- nal server. The BladeManager is then replaced with a new unit to which all data is restored. The new unit will have the same configuration as the original unit. -
Page 181: Managing Log Files
Managing Log Files You can back up these files to another server using the secure shell SCP program. Backing Up Log Files to a Remote Server You can copy rotated logs to another server that is more suited for holding... -
Page 182: Changing The Database Configuration
. . . apmdb The system creates a corresponding database. The system creates a corresponding database user. apmdb max_connections in my.cnf file is set to greater or equal db.apm.maxconnectiuons value. localhost the new host is available on the network. Alterpath BladeManager Manual... -
Page 183: Installing Ssl Certificates
Installing SSL Certificates This section explains how to add or import your own SSL certificate to the BladeManager instead of using the Cyclades default SSL certificate. A certificate for the HTTP security is created by a Certification Authority (CA). Using a public algorithm such as RSA or X509, certificates are commonly obtained by generating public and private keys. - Page 184 Step 3: Upon receipt, install the certificate Once the CSR is approved, the CA sends a certificate (e.g., jcertfile.cer) to the origin and stores a copy on a directory server. If you are satisfied that the certificate is valid, then you can import the certifi- cate to your keystore using the -import command: keytool -import -alias joe -file jcert.cer...
- Page 185 If you are satisfied that the certificate is valid, then you can add it to your key store as follows: keytool -import -alias tomcat -file jcertfile.cer This creates a trusted certificate entry in the keystore, with the data from the file jcertfile.cer, and assigns the alias tomcat to the entry. AlterPath BladeManager Manual 11:81:AD:92:C8:E5:0E:A2:01:2E:D4:7A:D7:5F:07:6F 5-23...
- Page 186 5: Advanced Configuration 5-24 Alterpath BladeManager Manual...
- Page 187 Access Control List (ACL) Authentication Basic In/Out System (BIOS) Baud Rate Glossary-1 The ACL is used for security inside of programs and operating systems. For example, Windows NT uses ACLs for directory and file access; Lotus Domino uses ACLs for database access.
- Page 188 "hot pluggable" units of computing as they share a common high speed bus. IBM Definition: Blade Server refers to a chassis that can hold a number of hot-swappable devices called blades. That is, the entire package of chassis, server blades, and option blades.
- Page 189 Domain Name Server. The computer you use to access the DNS to allow you to contact other computers on the Internet. The server keeps a database of host computers and their IP addresses. The unique name that identifies an Internet site. Domain Names always have 2 or more parts, separated by dots.
- Page 190 Glossary Escape Sequence Ethernet Flash Flow Control Glossary-4 Network will have the same thing as the right-hand portion of their Domain Names (matisse.net in the examples above). It is also possible for a Domain Name to exist but not be connected to an actual machine.
- Page 191 Kerberos was created by MIT as a solution to network security problems. The Kerberos protocol uses strong cryptography so that a client can prove its identity to a server (and vice versa) across an insecure network connection. Glossary...
- Page 192 Glossary LDAP Glossary-6 After a client and server has used Kerberos to prove their identity, they can also encrypt all of their communications to assure privacy and data integrity as they go about their business. Keyboard, video and mouse interface to a server.
- Page 193 Network Mask Parity AlterPath Manager E2000 Manual connect to the Internet via PPP, you might want to set your machine's MTU to 576 too. Most Ethernet networks, on the other hand, have an MTU of 1500. A 32-bit number used to group IP addresses together or to indicate the range of IP addresses on a single IP network/ subnet/supernet.
- Page 194 Glossary PCMCIA Port Glossary-8 The following lists the available parity parameters and their meanings: Odd - Parity bit set so that there is an odd number of 1 bits Even - Parity bit set so that there is an even number of 1 bits None - Parity bit is ignored, value is indeterminate Personal Computer Memory Card International Association.
- Page 195 (ISP) or a corporate server that is configured to receive incoming calls. Usage setup of the ACS either as a Console Access Server (CAS), a Terminal Server, or a Remote Access Server. The technique in which one machine, usually a router, answers ARP (Address Resolution Protocol) requests intended for another machine.
- Page 196 Simple Mail Transfer Protocol. Specifies the format of messages that an SMTP client on one computer can use to send electronic mail to an SMTP server on another computer. Serial Over LAN. A protocol which permits secure remote access over a network from one computer to another.
- Page 197 A terminal emulation program for TCP/IP networks such as the Internet. The Telnet program runs on your computer and connects your PC to a server on the network. You can then enter commands through the Telnet program and they will be...
- Page 198 Glossary U Rack Height Unit Glossary-12 User Datagram Protocol uses a special type of packet called a datagram. Datagrams do not require a response; they are one way only (connectionless). Datagrams are usually used for streaming media because an occasional packet loss will not affect the final product of the transmission.
- Page 199 256MB CompactFlash Netlinos Open Source Networking OS RADIUS, TACACS+, Kerberos, LDAP, Active Directory, SSHv2, SSL Text-based console shell access, Cyclades web- based management (CWM) interface Height: 43mm (1.75 inches, 1 U) Depth: 508 mm (20 inches) Width: 430 mm (16.69 inches) Maximum Weight: 12.7 kg (28 lb) depending on...
- Page 200 Server off: 8% to 80% Approximate heat output in British thermal units (Btu) per hour: Minimum configuration: 307 Btu (90 watts) Maximum configuration: 850 Btu (250 watts) Sound power, operating: 6.5 bel maximum FCC Class A, CE AlterPath BladeManager Manual to 95 to 140...
- Page 201 Mozilla 1.0.2/java plugin 1.4.2 • Netscape 7.1/java plugin 1.4.2 • Internet Explorer 6.0/java plugin 1.4.2 The Java Runtime plugin is available from the Sun web site at: http://java.sun.com/products/plugin/ Supported AlterPath KVM/net Version: 1.1.0 and above. AlterPath BladeManager Manual A: BladeManager Hardware Specifications...
- Page 202 A: BladeManager Hardware Specifications AlterPath BladeManager Manual...
Need help?
Do you have a question about the AlterPath BladeManager and is the answer not in the manual?
Questions and answers