Table of Contents
Advertisement
Quick Links
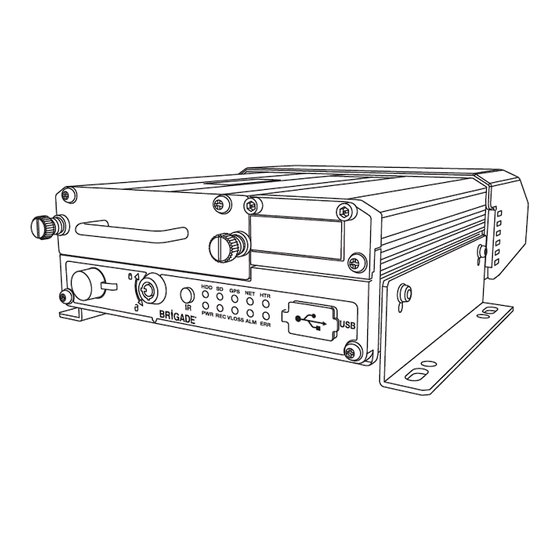
Mobile Digital Recorder
MDR-404GW-500
MDR-404G-500
MDR-404W-500
MDR-408GW-1000
MDR-408G-1000
MDR-408W-1000
MDR 400 Series Mobile and Wi-Fi Network Connectivity Software and Infrastructure Manual
(For Operators and Information Technology Professionals)
Please refer to
http://brigade-electronics.com/
for most up-to-date data on all products
Installation Guide 5018a
Advertisement
Table of Contents
Troubleshooting

Subscribe to Our Youtube Channel
Related Manuals for Brigade MDR 400 Series


Summary of Contents for Brigade MDR 400 Series
- Page 1 Mobile Digital Recorder MDR-404GW-500 MDR-404G-500 MDR-404W-500 MDR-408GW-1000 MDR-408G-1000 MDR-408W-1000 MDR 400 Series Mobile and Wi-Fi Network Connectivity Software and Infrastructure Manual (For Operators and Information Technology Professionals) Please refer to http://brigade-electronics.com/ for most up-to-date data on all products Installation Guide 5018a...
-
Page 2: Table Of Contents
Table of Contents Introduction to MDR 400 Series Technology ..........................3 1.1 Product Features ...................................3 MDR Server Requirements and Installation ..........................4 2.1 MDR Server Requirements ..............................4 2.2 MDR Server Installation (Mobile Network and Wi-Fi) ......................4 2.3 MDR Server Configuration (Mobile Network and Wi-Fi) ......................7 2.4 Firewall Requirements ................................9... -
Page 3: Introduction To Mdr 400 Series Technology
(e.g. a HDD write error during a severe collision). Mobile Network and Wi-Fi connectivity can be attained by upgrading the MDR 400 Series units. 8 channel models allow users to modular upgrade their units .These units can be upgraded by purchasing various expansion modules. 4 channel units do not have a modular design. -
Page 4: Mdr Server Requirements And Installation
MDR Server 1.0 is required software that runs on the server PC. This software enables an MDR unit to connect to the server PC. MDR Server controls the assignment of ports and its functionality. Note: This software runs on a yearly license. When nearing the expiration date, please visit Brigade’s website (http://brigade-electronics.com/) to download new license files. - Page 5 12051 MDR to Server (12) Website Port 12055 For Clients to obtain the Vehicle list from Server MDR 400 Series Products – Playback Video (13) MDR4 Streaming Media Server 12091 MDR 500 Series Products – Playback Video (14) MDR5 Streaming Media Server...
- Page 6 (k) Users can configure the destination location which is shown in MDR Server Location Figure 5. Warning: It is NOT recommended to change the default location. MDR Server Installation Figure 4 MDR Server Location Figure 5 (l) The next step is to select the features the MDR server will have. MDR Server Feature setup Figure 6 shows the services that are available. Please ensure that ALL services are ticked to be installed.
-
Page 7: Mdr Server Configuration (Mobile Network And Wi-Fi)
IE and Device Port Configuration Figure 10 Data and Blackbox Port Configuration Figure 11 Warning: DEVICE CONNECTED IP (IE and Device Port Configuration Figure 10) MUST be a STATIC PUBLIC IP address of Mobile Network Server (Firewall in some cases). (o) Users can now configure the SPEED and TEMPERATURE units. - Page 8 (1) Exit the MDR Server control window and run the application as administrator. See MDR Server Control Menu Figure 19. (2) Ensure that the MDR Server installation is not expired – check Brigade website for the latest license files. (3) Install the latest Microsoft .NET Framework.
-
Page 9: Firewall Requirements
(n) The MDR Server has a prompt message that will appear on the Server PC to inform the System Administrator that the MDR Server is nearing its expiration date. See MDR Server Expiry Prompt Figure 23. (o) The System Administrator will need to download new 1 year license files from Brigade’s website (Product Support area). MDR Server Expiry Prompt Figure 23 2.4 Firewall Requirements... -
Page 10: Hardware Communication Options
2.5 Hardware Communication Options Option 1 - Local Mobile Network Figure 24 Option 2 - Wi-Fi Only Figure 25 Option 3 - Hosted Mobile Network Figure 26... - Page 11 Option 4 – Hosted Wi-Fi Figure 27 Option 5 - Wi-Fi & Mobile Network Figure 28...
-
Page 12: Mdr-Dashboard 2.0 Requirements And Installation
Sources – HDD, SD & Clippings, Server, Remote Device, Evidence Sources – Exported files & Clippings View Events No option to view Events For more information on MDR-Player please refer to MDR 400 Series Installation&Operation Guide. 3.1 MDR-Dashboard 2.0 Requirements Table 10: Minimum requirements for MDR-Dashboard 2.0 COMPONENT... - Page 13 MDR-Dashboard Location Figure 31 MDR-Dashboard Setup Figure 30 (f) Users can then choose if a start menu folder should be created as shown in Start Menu MDR-Dashboard Figure 32. (g) Referring to Desktop Icon MDR-Dashboard Figure 33, users can choose if a desktop icon is created. Start Menu MDR-Dashboard Figure 32 Desktop Icon MDR-Dashboard Figure 33 (h) Users are now prompted to click NEXT to begin the installation.
-
Page 14: Wi-Fi Configuration
(j) On the REGISTER INFO page allocate a DEVICE ID to the MDR and take a note of it. See Wi-Fi Register Information Figure 40. This is a unique number used to identify this particular unit. In this example, 00708 has been chosen (this can be made up of alphanumeric characters). Brigade suggests using the vehicle registration number for device ID WITHOUT SPACES. -
Page 15: Mdr-Dashboard 2.0 Configuration (Wi-Fi)
(k) Configure the SUB-STREAM parameters in order to reduce the bandwidth used for live video transmission. The following settings were used: bitrate of 4096Kbps on 4 channels with CIF quality and 18fps. See MDR Sub-stream Settings Figure 41. Brigade suggests using 512Kbps with CIF quality at 5fps. -
Page 16: Connecting An Mdr To Mdr-Dashboard 2.0 (Wi-Fi)
Adding Wi-Fi Server Figure 46 Wi-Fi Server Saved Figure 47 Wi-Fi Login Information Figure 48 Wi-Fi Loading Screen Figure 49 4.2.2 Connecting an MDR to MDR-Dashboard 2.0 (Wi-Fi) (a) Center Servers indicate when the MDR unit has connected to a relevant MDR Server. (b) If the Chapter 4.1 MDR Unit procedure has been followed correctly, on the MDR, press the Enter button on the remote control and confirm the Center Server 1 has successfully connected. - Page 17 Enter the details in the Vehicle Equipment window VEHICLE NUMBER (MDR-Dashboard Add Vehicle Equipment) = DEVICE ID (MDR unit Register Info). Once completed click OK. The MDR will now appear under the group you assigned it to. ...
-
Page 18: Mobile Network Configuration
5 Mobile Network Configuration 5.1 MDR Unit Configuration (Mobile Network) 5.1.1 Mobile Digital Recorder Requirements The setup described in this installation guide requires a Mobile Network enabled MDR. Mobile Network/4G antenna (included) GPS antenna (included) Standard size SIM Card (not included) - required to connect to a mobile data network. For the Mobile Network operation of an MDR, a SIM card with a data connection is required. -
Page 19: Mdr-Dashboard 2.0 Configuration (Mobile Network)
(q) Configure the SUB-STREAM parameters in order to reduce the bandwidth used for live video transmission. The following settings were used: bitrate of 4096Kbps on 4 channels with CIF quality and 18fps. See MDR Sub-stream Settings Figure 41. Brigade suggests using 512Kbps with CIF quality at 5fps. -
Page 20: Connecting An Mdr To Mdr-Dashboard 2.0 (Mobile Network)
5.2.2 Connecting an MDR to MDR-Dashboard 2.0 (Mobile Network) Center Servers indicate when the MDR unit has connected to a relevant MDR Server. (g) If the Chapter 4.1 MDR Unit procedure has been followed correctly, on the MDR, press the Enter button on the remote control and confirm the Center Server 1 has successfully connected. -
Page 21: Mdr-Dashboard 2.0 Operation
6 MDR-Dashboard 2.0 Operation Usage scenarios must be clearly defined in order to meet and surpass the users’ needs. See the table below which displays the different benefits achieved using Mobile Network or Wi-Fi. Table 12: Mobile Network vs Wi-Fi Benefits Mobile Network Wi-Fi Vehicles are away from company site... - Page 22 (a) The fleet BRIGADE may be right-clicked to show a sub-menu. See Fleet Menu Figure 72. This allows the list of vehicles in that fleet to be EXPANDED or COLLAPSED. (b) Use the REFRESH button to update data for online vehicles. See Fleet Menu Figure 72.
-
Page 23: Type Of Operation (Area 2)
6.2.2 and 6.2.6. Note: Local data and server data can be accessed when the MDR-Dashboard 2.0 is in server mode. When the MDR-Dashboard 2.0 is in local mode there is limited functionality. See MDR 400 Series Installation&Operation Guide. 6.2.1 Live View (a) Users access live operation by clicking on the LIVE icon. - Page 24 (c) In each PLAYBACK mode users can clip recordings. During playback, users click on the clipping icon, shown in Playback Bar Figure 85. Playback Bar Figure 85 (d) Users are then presented with the tool bar shown in Clipping Toolbar Figure 86. This is used to either Play, Screenshot, Map Screenshot, Evidence Snapshot, Screenshot all channels or screenshot select.
- Page 25 Screenshot Select Figure 91 (k) Once satisfied with the snapshot list, users will then position the clipping markers to the start and end time of the desired clip. Click OK. As shown in Clipping Markers Figure 92. (l) The clip settings window will now be presented to users. This is shown in Clip Settings Figure 93. Users can manually set the START TIME and END TIME.
-
Page 26: Server
Completed Clippings Figure 95 6.2.3 Server (a) Users can search the server for MDR recordings. These searches can be based on dates, speed and events. See Server Search Figure 96. (b) Users can schedule data downloads from the MDR to the server based on time, dates and video channels. See Server Download Figure 97. (c) Once a user creates a scheduled download, a windows pops up to indicate this has been added successfully. - Page 27 Blackbox data Figure Device Calendar View Figure 101 (d) Double-click the desired date and choose which camera channels to view. See Channel Selection Figure 103. (e) Then click the PLAY button located above the channel selection. See Channel Selection Figure 103. Channel Selection Figure 103 (f) Once users click PLAY, the video will be displayed as shown in Playing a Video Figure 104.
- Page 28 (h) Each camera channel has two additional features, BLUR and ZOOM Note: ZOOM is available in LIVE mode. BLUR cannot be used in LIVE mode. (i) Users can use blur to create a mosaic setting of an area which will be blurred throughout video playback. See Creating Mosaic for Blur Figure 105, Setting the Blur Area Figure 106 and Blur Activated Figure 107.
-
Page 29: Hdd And Directory Playback
Frame Information Figure 111 Event Information Figure 112 6.2.5 HDD and Directory Playback 6.2.5.1 Directory Playback This procedure applies to recordings previously downloaded from the MDR and saved onto a USB flash drive or recordings manually saved directly onto a PC. (a) In order to read exported files click on the Directory tab found on the Data Source Access (area 1). -
Page 30: Hdd Playback
Device Directory Figure 117 Windows Explorer Folder Figure 116 (f) If there was a directory specified previously, click the refresh icon to get the directory to appear. This will be a green icon to indicate it is available for browsing. (g) Double-click the vehicle icon. - Page 31 (d) In order to refine the data displayed, users should setup the search criteria. Custom and Advanced searches can be created. HDD Search Figure 122. (e) Ensure that the DOWNLOAD BLACKBOX is always ticked. See Blackbox Setting Figure 123. This will ensure that all metadata (graphical) is shown with playback video.
- Page 32 (k) Fast Forward options (1x, 2x, 4x, 8x, 16x, 32x). Maximum Slow Forward option is x1/32. (l) Double-clicking an individual channel to make it full screen. There are other video viewing options as shown in Video View Options Figure 128. Full Screen Previous Page Next Page...
-
Page 33: Evidence
(c) Completed tasks automatically move to the Completed tab, see Completed Download Tasks Figure 132. (d) Right-click a completed task to access a sub-menu as shown in Completed Sub-menu Figure 133. Completed Download Tasks Figure 132 Completed Sub-menu Figure 133 6.2.5.2.2 Saving Snapshots (a) Click the desired channel;... -
Page 34: Evidence Playback
(h) Fill in all details shown in Evidence Upload Figure 136. The following details can be completed: Name, Vehicle (automatically populated), Driver, Keywords, and Description. (i) Click OK once all details are filled in. (j) To confirm that this evidence upload task has been created, click DOWNLOAD ... -
Page 35: Browsing Evidence
(e) A full list of evidence is now displayed as shown in Evidence List Figure 140. This list can be filtered by state (read or unread), importance level (mark evidence as important using ), keywords, name and description. Evidence List Figure 140 (f) Click on PLAYBACK operation button which will begin the evidence playback. - Page 36 Evidence Report top Figure 142 Evidence Report bottom Figure 143 (d) Uploaded evidence can be modified afterwards. This is to correct any erroneous data such as License registration number, Name, Driver, Keyword, and Description. (e) Users must highlight the evidence to be modified and then change the configurable data shown in Evidence Modification Figure 144. (f) MDR-Dashboard also tracks who accessed which evidence and when.
-
Page 37: Downloads And Alarm (Area 3)
Evidence Modification Figure 144 Query Users Figure 145 6.3 Downloads and Alarm (Area 3) DOWNLOAD allows users to setup local/server downloads and auto-download schedules. ALARM QUERY lets users access the ALARM CENTER which allows for searching alarms, setting alarm strategies and alarm e-mails. SYSTEM MANAGEMENT allows users to set FLEET INFORMATION. - Page 38 START DATE – this allows users to set the date for when the clipping must be taken from, this can also be set in the future. Must ensure that this setup when the MDR will be powered and online. ...
- Page 39 Task Monitor Figure 151 (k) TASK REPORT is used to search all tasks based on dates and task status. See Task Report Figure 152. (l) QUERY is used to update the list. See Task Report Figure 152. Table 14: Auto Downloads Task Status Information STATUS DESCRIPTION Suspended...
-
Page 40: Alarm Center
Task Option Figure 154 6.3.2 Alarm Center Alarm Center refers to an area which contains the following options: Alarm Search Alarm Configuration 6.3.2.1 Alarm Search This area is used to search all alarms based on the vehicle, time range, date, event type and alarm status. (a) Users will set their search parameters and then click on the SEARCH button. -
Page 41: View Settings (Area 5)
Map lock car: When there is an event, the vehicle in an alarm state will be shown in the map. Sound cue: When there is an event, an alarm sound indicator will be heard in the client software (MDR-Dashboard 2.0). ... -
Page 42: Video
Map View Figure 158 6.4.2 Video This mode is used to view Video data only. See Video View Figure 159. The order of the video channels may be changed by dragging the channel to another slot. Video View Figure 159 6.4.3 Video/Map This view is used to access both video and map data. -
Page 43: User And System Settings (Area 4)
(f) There is an alarm count which indicates the number of alarms that have occurred. Once this number is higher than 99, the alarm log will display “99+”. (g) Processing alarms refers to when a user clears an alarm (marks an alarm as dismissed) once the alarm has been reviewed. (h) ACTIVE ALERTS shows alarms that have not been processed by a user. - Page 44 Automatically switches to the main stream – tick this box to use the main stream (higher quality) or leave unticked to use the sub-stream. This is not supported for the MDR 400 Series. Loop Playback Video – this will play the entire selected video on repeat. This feature can be used for HDD or directory playback ...
-
Page 45: Fleet Information
System Manage Figure 171 6.6.1 Fleet Information Users can use this area to setup VEHICLE FLEETS (e.g. Brigade) under the COMPANY VEHICLE STRUCTURE TREE. This area can also be used to setup sub-groups which will be found under Vehicle Fleets. 6.6.2 Vehicle Device Information This area is used to setup VEHICLE EQUIPMENT. -
Page 46: Role Permissions
6.6.4 Role Permissions This area is used to create more permission types which USERS will be assigned to. (a) ROLES TREE shows the structure of permissions. See Creating New Roles Group Figure 174. (b) Clicking on GROUP PERMISSIONS PREVIEW shows the ROLE AUTHORITY window which will indicate the VEHICLE FLEETS and the sub-groups a role has access to. -
Page 47: User Information
(10.6) MDR MCU/firmware remote upgrade (11) Automatic download Auto download recording files (12) Report form This feature is not supported with MDR 400 Series products (13) Batch upgrade equipment (13.1) new task (13.1) New auto download task creating (13.2) update tasks (13.2) auto download task update... -
Page 48: Update
Updating User Accounts Figure 180 6.6.6 Update (a) This area is used to setup BATCH UPGRADES for MDR units. (b) Click on in order to create a new directory and upload the upgrade file. See the Catalogue Management Figure 181. Catalogue Management Figure 181 (c) Click which can be named as desired. - Page 49 Catalogue Management List Figure 184 (e) Click which will display the Batch Upgrade Equipment Figure 185 window. (f) TASK NAME can be chosen by the user. All other details are chosen from drop-down lists comprised of the CATALOGUE LIST. See Catalogue Management List Figure 184. (g) These upgrades can be done instantly or by appointment which is configured using TASK TYPE.
-
Page 50: Email
6.6.7 Email (a) Only the SYSADMIN account has privileges to access this area. (b) Under SYSTEM MANAGE, browse to the EMAIL tab. (c) The sending server IP must also be allowed to relay email. (d) It is advised to request your IT department to setup a Microsoft Exchange account to be used. Ensure that this is named appropriately (MDR-Dashboard 2.0) to ensure that email alerts are clearly understood. - Page 51 Alarm Notification Configuration Figure 192 (o) Once the Alarm Notification Configuration Figure 192 has been completed and OK has been clicked, the new alert will be added to the list shown in Alarm Mail Figure 193. Alarm Mail Figure 193 (p) An example of the email received when using Send real-time is shown in Send real-time Email Figure 194.
-
Page 52: Mobile Apps
App Installation (a) On your Apple device, go to the App Store. (b) Search for “Brigade Electronics” or “MDR 2.0”. See iOS App Store Search Figure 196. (c) Click the DOWNLOAD button to begin the installation. iOS App Download Figure 197. -
Page 53: Ios App Operation
(g) To log into the Wi-Fi server, ensure the device is connected to the SAME Wi-Fi network that the MDR Server and MDR unit is connected to. (h) Type in the Wi-Fi server address in MDR 2.0, eg. 192.168.1.14. (i) The USER by default is admin and the PASSWORD by default is admin. Brigade does NOT recommend using LOGIN AUTOMATICALLY if there are several servers available. - Page 54 (s) The iOS Video Window Figure 208 has the following options: Tap a selected channel as shown in iOS Video Window Figure 208 to enlarge the channel to full screen view. As shown in iOS Video Full Screen Figure 209. ...
-
Page 55: Android App
(a) Open the Google Play Store App (b) Search for “Brigade Electronics” or “MDR 2.0”. See Google Play Store Search Figure 215. (c) Tap the MDR 2.0 app. Click the INSTALL button as shown in Android MDR 2.0 Install Figure 216. -
Page 56: Android App Operation
(c) To log into the Wi-Fi server, ensure the device is connected to the SAME Wi-Fi network that the MDR Server and MDR unit is connected to. (d) Type in the Wi-Fi server address in MDR 2.0, eg. 192.168.1.14. (e) The USER by default is admin and the PASSWORD by default is admin. Brigade does not recommend using LOGIN AUTOMATICALLY if there are several servers available. - Page 57 Android Map View Figure223 Android Login Figure 222 Android Map Alarm Figure 224 Android Cars List Figure 225 Android Alarm Log Figure 226 Note: When connecting to the Wi-Fi server, if the Wi-Fi network does not have internet access then the map function will appear blank. The Wi- Fi network may be configured to have internet access if necessary, please contact your IT department.
- Page 58 (h) Further examples of typical android windows are shown Android Snapshot Save Figure 229 onwards. Android Snapshot Save Figure 229 Android Video Window Figure 230 Android Snapshot Result Figure 231 Android Settings Figure 232 (i) Android MDR 2.0 has an additional feature, which is channel zoom. (j) Open a single channel in full screen.
-
Page 59: Appendices
8 Appendices 8.1 Video Quality Table Quality level 1 (Highest) 8 (Lowest) D1 (Highest) 2048 1536 1230 1024 Video Streaming Data Rate (Kbps) depending 1280 on resolution CIF (Lowest) Example: Recording file size for 1 hour @ quality level 1 with resolution D1 will be: 60 minutes * 60 seconds = 3600 seconds 3600 seconds*2048Kbps/8/1024=900MB Note:... -
Page 60: Troubleshooting
MDR Server control Live Video window in MDR- 3. If it is not running, obtain the two new Dashboard license files. Go to http://brigade- electronics.com/ to obtain these files. LIC_DVRGTSERVICE and LIC_DVRSTSERVICE. Copy these files to the following path C:\Program Files (x86)\MDR Server\TransmitServer. - Page 61 Scenario Screenshot Resolution 1. Uninstall MDR Server Server 2. Install the latest Microsoft .NET services Framework from the following refuse to website: start https://www.microsoft.com/net/download This installation will replace any current .NET installation automatically 3. Re-install MDR Server 4. Run MDR Server as administrator. I can only 1.
-
Page 62: Wi-Fi Mdr Unit Status Troubleshooting
9.2 Wi-Fi MDR unit Status Troubleshooting Wi-Fi Status Screenshot Explanation Wi-Fi Net: ON Wi-Fi is enabled in the MDR OSD Menu Wi-Fi Net; NONE Wi-Fi is disabled in the MDR OSD Menu Wi-Fi IP: 192.168.1.16 Successfully obtained an IP address from network –... -
Page 63: Mobile Network Mdr Unit Status Troubleshooting
9.3 Mobile Network MDR unit Status Troubleshooting Mobile Network Screenshot Explanation Status SIM CARD: ON Detected that a SIM card has been inserted SIM CARD VALID Detected SIM card and it is valid, this can be used to connect to a mobile network provider DIAL UP: Not connected to a mobile network... -
Page 64: Glossary
Approvals UNECE Regulation No. 10 Revision 4 (“E-marking”) Brigade Electronics MDR-404xx-500/ MDR-408xx-1000 This device complies with part 15 of the FCC Rules. Operation is subject to the following two conditions: (1) This device may not cause harmful interference, and (2) this device must accept any interference received, including interference that may cause undesired operation. - Page 65 10/10/2016 10:37:00 MDR 400 Series Network Connectivity SW&Infrastructure Manual - v3.0 - ENG (5018a)
Need help?
Do you have a question about the MDR 400 Series and is the answer not in the manual?
Questions and answers