Table of Contents
Advertisement
Advertisement
Table of Contents

Related Manuals for Sony Alpha 7 II


Summary of Contents for Sony Alpha 7 II
- Page 1 User Manual of Product 1: Sony Alpha 7 II | Full-Frame Mirrorless Camera ( 24.3 Megapixels, Fast Hybrid Autofocus, 5-axis in-body optical image stabilisation, XAVC S Format Recording ) User Manual of Product 2: Sony SEL50F18F E Mount Full Frame 50 mm F1.8 Prime Lens...
- Page 2 4-564-359-12(1) Interchangeable Lens Digital Camera Instruction Manual E-mount “Help Guide” (Web manual) Refer to “Help Guide” for in-depth instructions on the many functions of the camera. http://rd1.sony.net/help/ilc/1450/h_zz/ ILCE-7M2...
- Page 3 The model and serial numbers are located on the bottom. Record the serial number in Learning more about the the space provided below. Refer to these numbers whenever you call your Sony camera (“Help Guide”) dealer regarding this product. Model No. WW328278 (ILCE-7M2) Serial No.
- Page 4 Caution: Do not handle damaged or lithium ion batteries. leaking Lithium-Ion batteries. • Be sure to charge the battery pack using a genuine Sony battery charger or a device Battery pack and lens (if lens that can charge the battery pack. supplied) •...
- Page 5 Model No.: WW328278 turning the equipment off and on, the user Responsible Party: Sony Electronics Inc. is encouraged to try to correct the Address: 16530 Via Esprillo, interference by one or more of the San Diego, CA 92127 U.S.A.
- Page 6 Manufacturer: Sony Corporation, 1-7-1 This symbol on the Konan Minato-ku Tokyo, 108-0075 Japan product, the battery or For EU product compliance: Sony on the packaging Deutschland GmbH, Hedelfinger Strasse indicates that the 61, 70327 Stuttgart, Germany product and the battery shall not be treated as household waste.
- Page 7 Select MENU t (Setup) t [Certification Logo]. If display is not possible due to problems such as camera failure, contact your Sony dealer or local authorized Sony service facility.
-
Page 8: Table Of Contents
Table of contents Introduction of functions ..........10 Before use Notes on using your camera ..........12 Checking the supplied items ..........16 Identifying parts .............. 17 Front side ..............17 Rear side ..............18 Top side/Side view ............. 20 Bottom view ............... - Page 9 Preparing the camera Charging the battery pack ..........48 Charging time (Full charge) ........50 Charging by connecting to a computer ...... 51 Checking the remaining battery charge ...... 51 To remove the battery pack ........52 Inserting a memory card (sold separately) ...... 53 Memory cards that can be used ........
- Page 10 Using Wi-Fi functions Using the Wi-Fi and NFC one-touch functions ....77 Connecting the camera to a wireless access point ..78 Using applications Adding applications to the camera (Application downloading) .............. 79 Downloading applications .......... 79 Launching the application .......... 80 Viewing images on a computer Using the software ............
-
Page 11: Introduction Of Functions
Introduction of functions This section introduces some frequently used shooting functions and other unique functions. See the pages in parentheses for details. Shooting functions used frequently Exposure Comp. (37) You can adjust the exposure to change the brightness of the entire image. Even when the shooting mode is set to M, you can adjust the exposure if the ISO sensitivity is set to [ISO AUTO]. - Page 12 Introduction of functions Creative Style (71) You can select the desired style from among 13 styles. You can also adjust certain image factors, such as exposure, using the selected style as the base. Movie recording with manual adjustments (69) You can adjust the exposure in P, A, S, or M mode even when shooting movies.
-
Page 13: Before Use
Sony cannot compensate for failure to automatically creates an image database record or loss or damage of recorded file using some of the memory card’s content due to a malfunction of the camera capacity. - Page 14 Notes on using the lenses and • The monitor and electronic viewfinder accessories are manufactured using extremely high- It is recommended that you use Sony precision technology, and over 99.99% lenses/accessories designed to suit the of the pixels are operational for effective characteristics of this camera.
- Page 15 PlayMemories Home • When shooting with the viewfinder, you from the following website: may experience symptoms such as http://www.sony.net/pm/ eyestrain, fatigue, travel sickness, or nausea. We recommend that you take a Notes when playing movies on other...
- Page 16 Notes on wireless LAN • Movies recorded in 1080 60p/1080 50p format can be played back only on 1080 If your camera is lost or stolen, Sony bears 60p/1080 50p-supported devices. no responsibility for the loss or damage • Movies recorded in XAVC S format can...
-
Page 17: Checking The Supplied Items
Before use Checking the supplied items The number in parentheses indicates the number of pieces. Supplied with all models: • Body cap (1) (Attached on the • Camera (1) camera) • AC Adaptor AC-UD10/AC- UUD11 (1) The shape of the AC Adaptor may differ depending on the country/ •... -
Page 18: Identifying Parts
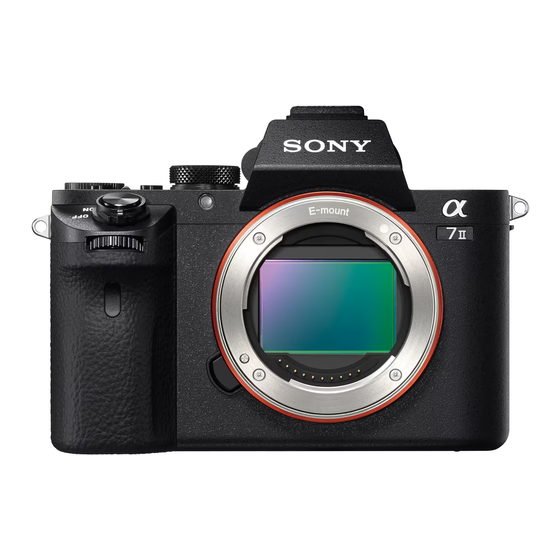
Identifying parts See the pages in parentheses for details on operation for the parts. Front side When the lens is removed AF illuminator (37)/Self-timer lamp Mount index Image sensor* Mount Contacts* *1 Do not cover this part during movie recording. Doing so may cause noise or lower Power switch/Shutter button the volume. -
Page 19: Rear Side
Identifying parts Rear side Eyepiece cup (62) Diopter-adjustment dial Viewfinder • Adjust the diopter-adjustment dial according to your eyesight MENU button (35) until the display appears clearly in the viewfinder. Eye sensor Monitor (24) • You can adjust the monitor to an easily viewable angle and shoot from any position. - Page 20 Identifying parts For shooting: AF/MF (Auto focus/manual focus) button/ AEL button (28) For viewing: (Image index) button (76) MOVIE button (65) For shooting: Fn button (33) For viewing: (Send to Smartphone) button • You can display the screen for [Send to Smartphone] by pressing this button.
-
Page 21: Top Side/Side View
Identifying parts Top side/Side view Image sensor position Charge lamp (49) mark HDMI micro jack Speaker Multi interface shoe* m (Microphone) jack • Some of the accessories may not be inserted fully and • When an external microphone protrude backward from the is connected, the microphone is Multi interface shoe. - Page 22 * For details on compatible accessories for the multi interface shoe and the Multi/Micro USB Terminal, visit the Sony website, or consult your Sony dealer or local authorized Sony service facility. You can also use accessories that are compatible with the accessory shoe.
-
Page 23: Bottom View
Identifying parts Bottom view Connection plate cover Battery insertion slot (48) Use this when using an AC-PW20 Battery cover (48) AC Adaptor (sold separately). Tripod socket hole Insert the connection plate into the • Use a tripod with a screw less battery compartment, and then pass than 5.5 mm (7/32 inches) long. -
Page 24: Lens Fe 28-70 Mm F3.5-5.6 Oss (Supplied With Ilce-7M2K)
Identifying parts Lens FE 28-70 mm F3.5-5.6 OSS (Supplied with ILCE- 7M2K) Focusing ring Zoom ring Focal-length scale Focal-length index Lens contacts* Mount index * Do not touch this part directly. -
Page 25: List Of Icons On The Monitor
List of icons on the monitor The status of the monitor is set to [Display All Info.] in the default settings. When you change the [DISP Button] setting, and press DISP on the control wheel, the screen status will change to the viewfinder mode. You can also display the histogram by pressing DISP. - Page 26 List of icons on the monitor Display Indication Image size of movies Display Indication (73) Shooting mode (69) P P* A S Remaining battery (51) Remaining battery warning Flash charge in progress APS-C Size Capture Register number (69) (41) Setting Effect OFF (40) Scene Recognition AF Illuminator (37) icons...
- Page 27 List of icons on the monitor Display Indication Display Indication 35mm View Mode (67) Lens focal length White balance (Auto, Preset, Underwater Auto, Custom, Color temperature, Color 100-0003 Folder - file number filter) (37) 7500K A5 G5 Protect (43) D-Range Optimizer/ XAVC S Recording mode of Auto HDR (72)
- Page 28 List of icons on the monitor Display Indication z Lock-on Lock-on AF guide EV scale Exposure compensation (37)/Metered Manual REC 0:12 Recording time of the movie (m:s) Focus 1/250 Shutter speed F3.5 Aperture Value ISO400 ISO sensitivity (37) ISO AUTO AE lock/FEL lock Shutter speed indicator Aperture indicator...
-
Page 29: Functions List
Functions list Functions that can be operated using the buttons/dials You can set up or operate various functions using these buttons/dials. For the location of the buttons/dials, see “Identifying parts” (page 17). Mode dial (69) Switches the shooting mode. MENU button (35) Displays the menu screen for setting menu items. -
Page 30: How To Use The Quick Navi Screen
How to use the Quick Navi screen Using the Quick Navi screen, you can change settings directly on the recording information display when the screen mode is set to [For viewfinder] (Quick Navi). The displayed contents and their position shown below are just a guideline, and may differ from the actual display. - Page 31 How to use the Quick Navi screen Set the item with the front dial. • Some setting values can be finely adjusted by turning the rear dial. • Pressing the center of the control wheel turns on the designated screen used to set up the selected item (page 31).
-
Page 32: Operating The Camera
Operating the camera How to use the control wheel • You can turn the control wheel or press up/down/left/right on the control wheel to move the selection frame. Press z in the center of the control wheel to set the selected item. In this manual, the action of pressing the up/down/left/right side of the control wheel is indicated by v/V/b/B. -
Page 33: How To Use The Front Dial/Rear Dial
Operating the camera How to use the front dial/rear dial You can turn the front dial or rear dial to change the settings required for each shooting mode with immediate effect. -
Page 34: Selecting A Function Using The Fn (Function) Button
Selecting a function using the Fn (Function) button This button is used for setting up or executing functions used frequently in shooting, except for functions from the Quick Navi screen. Press the DISP on the control wheel to set the screen mode to other than [For viewfinder]. -
Page 35: Functions That Can Be Registered Using The Fn (Function) Button
Selecting a function using the Fn (Function) button Functions that can be registered using the Fn (Function) button You can select the functions to be displayed when you press the Fn (Function) button. MENU button t (Custom Settings) t [Function Menu Set.] t Assign the function to the desired location. -
Page 36: Functions That Can Be Selected Using The Menu Button
Functions that can be selected using the MENU button You can set up the basic settings for the camera as a whole, or execute functions such as shooting, playback, or other operations. Press the MENU button to display the menu screen. Select the desired setting item using v/V/b/B on the control wheel or by turning the control wheel, and then... - Page 37 Functions that can be selected using the MENU button (Camera Settings) Image Size Selects the size of still images. (L: 24M/M: 10M/S: 6.0M (3:2) L: 20M/M: 8.7M/S: 5.1M (16:9) L: 10M/M: 6.0M/S: 2.6M (APS-C size, 3:2) L: 8.7M/M: 5.1M/S: 2.2M (APS-C size, 16:9)) Aspect Ratio Selects the aspect ratio for still images.
- Page 38 Functions that can be selected using the MENU button Focus Area Selects the area of focus. (Wide/Zone/Center/Flexible Spot/Lock-on AF) Focus Settings Allows you to focus using the front dial, rear dial or control wheel. AF Illuminator Sets the AF illuminator, which provides light for a dark scene to aid focusing.
- Page 39 Functions that can be selected using the MENU button Long Exposure Sets noise reduction processing for shots with a shutter speed of 1 second or longer. (On/Off) High ISO NR Sets noise reduction processing for high-sensitivity shooting. (Normal/Low/Off) Center Lock-on AF Sets the function to track a subject and continue focusing when pressing the center button in the shooting screen.
- Page 40 Functions that can be selected using the MENU button Audio Recording Sets whether to record audio when shooting a movie. (On/Off) Audio Rec Level Adjusts the audio recording level during movie recording. (0 to 31) Audio Out Timing Sets the timing of audio output during the movie recording. (Live/Lip Sync) Wind Noise Reduct.
- Page 41 Functions that can be selected using the MENU button Peaking Level Enhances the outline of in-focus ranges with a specific color when focusing manually. (High/Mid/Low/Off) Peaking Color Sets the color used for the peaking function. (Red/Yellow/White) Exposure Set. Guide Sets the guide displayed when exposure settings are changed in the shooting screen.
- Page 42 Functions that can be selected using the MENU button e-Front Curtain Shut. Sets whether to use the electronic front curtain shutter function. (On/Off) S. Auto Img. Extract. Sets whether to save all the images that were shot continuously in [Superior Auto]. (Auto/Off) Exp.comp.set Sets whether to reflect exposure compensation value to flash...
- Page 43 Functions that can be selected using the MENU button Custom Key Settings Assigning functions to the various keys allows you to speed up operations by pressing the keys. (Control Wheel/Custom Button 1/Custom Button 2/Custom Button 3/Custom Button 4/Center Button/Left Button/Right Button/Down Button/AEL Button/AF/MF Button/Focus Hold Button*) * You can assign a function to the focus hold button on the...
- Page 44 Functions that can be selected using the MENU button Edit Device Name You can change the device name under Wi-Fi Direct, etc. Disp MAC Address Displays the MAC address of the camera. SSID/PW Reset Resets the SSID and password of smartphone connection. Reset Network Set.
- Page 45 Functions that can be selected using the MENU button (Setup) Monitor Brightness Sets the screen brightness. (Manual/Sunny Weather) Viewfinder Bright. Sets the brightness of the electronic viewfinder. (Auto/Manual) Finder Color Temp. Sets the color temperature of the viewfinder. Volume Settings Sets the volume for movie playback.
- Page 46 Functions that can be selected using the MENU button HDMI Settings Sets the HDMI settings. (HDMI Resolution/ 24p/60p Output* /HDMI Info. Display/ TC Output/ REC Control/CTRL FOR HDMI) USB Connection Sets the USB connection method. (Auto/Mass Storage/MTP/PC Remote) USB LUN Setting Enhances compatibility by limiting the functions of USB connection.
- Page 47 Functions that can be selected using the MENU button Certification Logo* The certification can be displayed on the camera. Setting Reset Restores settings to their defaults. Select [Initialize] to restore all settings to their default values. (Initialize/ Camera Settings Reset) *1 Only for 1080 60i compatible models.
-
Page 48: Using The In-Camera Guide
Using the In-Camera Guide You can use [Custom Key Settings] to assign In-Camera Guide to the desired button. The In-Camera Guide displays explanations for the currently selected menu function or setting. MENU button t (Custom Settings) t [Custom Key Settings] t Select the desired button assigned to the function. -
Page 49: Preparing The Camera
Preparing the camera Charging the battery pack When using the camera for the first time, be sure to charge the NP-FW50 battery pack (supplied). The InfoLITHIUM™ battery pack can be charged even when it has not been fully depleted. It can also be used when it has not been fully charged. The charged battery pack is discharged little by little, even when you do not use it. - Page 50 Charging the battery pack Close the cover. Connect the camera to the AC Adaptor (supplied) using the micro USB cable (supplied), and connect the AC Adaptor to the wall outlet (wall socket). The charge lamp lights orange, and charging starts. •...
-
Page 51: Charging Time (Full Charge)
• When charging is finished, disconnect the AC Adaptor from the wall outlet (wall socket). • Be sure to use only genuine Sony brand battery packs, micro USB cable (supplied) and AC Adaptor (supplied). Charging time (Full charge) The charging time is approximately 150 min. using the AC Adaptor (supplied). -
Page 52: Charging By Connecting To A Computer
Charging the battery pack Charging by connecting to a computer The battery pack can be charged by connecting the camera to a computer using a micro USB cable. Connect the camera to the computer with the camera turned off. Notes •... -
Page 53: To Remove The Battery Pack
Charging the battery pack To remove the battery pack Turn off the camera. Slide the lock lever Lock lever after confirming that the access lamp (page 19) is off, and remove the battery pack. Be sure not to drop the battery pack. -
Page 54: Inserting A Memory Card (Sold Separately)
Inserting a memory card (sold separately) Slide the lever to open the cover. Insert the memory card. • With the notched corner facing as illustrated, insert the memory card until it clicks into place. Ensure the notched corner faces correctly. Close the cover. -
Page 55: Memory Cards That Can Be Used
Inserting a memory card (sold separately) Memory cards that can be used You can use the following types of memory cards with this camera. However, proper operation cannot be guaranteed for all types of memory cards. Memory card For still images For movies Memory Stick PRO Duo™... -
Page 56: Attaching A Lens
Attaching a lens Set the power switch of the camera to OFF before you attach or remove the lens. Remove the body cap from the Front lens cap camera and the rear lens cap from the rear of the lens. •... - Page 57 Attaching a lens Notes • When attaching a lens, do not press the lens release button. • Do not use force when attaching a lens. • The Mount Adaptor (sold separately) is required to use an A-mount lens (sold separately). To use the Mount Adaptor, refer to the operating manual supplied with the Mount Adaptor.
-
Page 58: Setting The Date And Time
Setting the date and time When you turn on the camera for the first time or after you initialize the functions, the screen to set the date and time appears. Set the power switch to ON to turn on the camera. The screen to set the date and time appears. -
Page 59: Checking Or Resetting The Date/Time And Area
Setting the date and time Checking or resetting the date/time and area The date and time setup screen appears automatically when the power is turned on for the first time or when the internal rechargeable backup battery has been discharged. To reset the date and time, use the menu. MENU button t (Setup) t [Date/Time Setup] or [Area Setting]... -
Page 60: Shooting A Clear Image Without Camera Shake
Shooting a clear image without camera shake “Camera shake” refers to unwanted movement of the camera that occurs after the shutter button has been pressed, resulting in a blurred image. To reduce camera shake follow the instructions below. Camera shake warning indicator In situations where the camera may be subject to camera-shake, the (Camera shake warning) indicator... - Page 61 [SteadyShot Adjust.] is set to [Manual], the current set value of the SteadyShot focal length will display to the side of • When using a Sony lens with a teleconverter, etc., set [SteadyShot Adjust.] to [Manual] and set the focal length.
-
Page 62: Holding The Camera Properly
Shooting a clear image without camera shake Holding the camera properly Stabilize your upper body and take a position that keeps the camera from moving. Viewfinder mode Monitor mode Viewfinder mode (vertical position) Point One hand holds the grip of the camera, and the other hand supports the lens. Point Take a secure stance with your feet shoulder-width apart. -
Page 63: Removing The Eyepiece Cup
Removing the Eyepiece cup When attaching the FDA-A1AM Angle Finder (sold separately) to the camera, remove the Eyepiece cup. Put your fingers under the Eyepiece cup, and slide it upward. Notes • When an FDA-A1AM Angle Finder (sold separately) is attached to the camera, switch the display between the viewfinder and the screen by setting [FINDER/ MONITOR] in (Custom Settings). -
Page 64: Shooting And Viewing Images
Shooting and viewing images Shooting still images In [Auto Mode], the camera analyzes the subject and allows you to shoot with the appropriate settings. Set the power switch to ON to turn on the camera. Set the mode dial to (Auto Mode). - Page 65 Shooting still images Press the shutter button halfway down to focus. • When the image is in focus, a beep sounds and the z or indicator lights. Press the shutter button fully down to shoot an image. • If [Auto Obj. Framing] is set to [Auto], when shooting faces, close-up (macro) subjects, or subjects tracked by Lock-on AF, the camera analyzes the scene and automatically trims the captured image into a suitable composition.
-
Page 66: Recording Movies
Recording movies Press the MOVIE button to start recording. • Since the [MOVIE Button] is set to [Always] in the default setting, movie recording can be started from any shooting mode. MOVIE button Press the MOVIE button again to stop recording. Notes •... -
Page 67: Playing Back Images
Playing back images Press the button. button Select an image by pressing the b/B on the control wheel. • To play back movies, press z on the control wheel. If you press V on the control wheel while playing back a movie, the control panel will be displayed. -
Page 68: Switching Between Still Images And Movies
Playing back images Switching between still images and movies To play back still images, set [View Mode] to [Folder View(Still)], and to play back movies, set [View Mode] to [Folder View(MP4)], [AVCHD View] or [XAVC S View]. When you select [Date View], both still images and movies will be displayed on the screen, sorted by date. -
Page 69: Deleting Images
Deleting images Once you have deleted an image, you cannot restore it. Be sure that you want to delete the image before proceeding. While displaying the image you want to delete, press the (Delete) button. (Delete) button Select [Delete] with v/V on the control wheel, then press z. •... -
Page 70: Selecting A Shooting Mode
Selecting a shooting mode Selecting a shooting mode Turn the mode dial and set to the desired shooting mode. The following shooting modes are available. (Auto Mode) Allows you to shoot still images with the settings adjusted automatically. (Program Auto) Allows you to shoot with the exposure (the shutter speed and the aperture value) adjusted automatically. -
Page 71: Functions Available For Each Shooting Mode
Functions available for each shooting mode The functions you can use depend on the selected shooting mode. In the table below, indicates the function is available, and a – indicates the function is not available. Exposure Cont. Face Smile Auto Obj. Shoot Mode Self-timer Comp. -
Page 72: Various Functions
Various functions Using the various functions This manual mainly provides an introduction on the use of the camera and a list of functions. To learn more about the camera, refer to “Help Guide” (page 2), which offers in-depth instructions on the many functions. Creative Style You can select the desired kind of image processing from among 13 styles, and you can also adjust the contrast, saturation, and sharpness for each... -
Page 73: Dro/Auto Hdr
Using the various functions DRO/Auto HDR Using the [DRO/Auto HDR] function, you can capture various gradations of the contrast of images. [D-Range Opt.]: By dividing the image into small areas, the camera analyses the contrast of light and shadow between the subject and the background, and produces an image with the optimal brightness and gradation. -
Page 74: Record Setting
Using the various functions Notes • When shooting with [ File Format] set to [XAVC S], an SDXC memory card (64 GB or more and Class 10 or faster) is required (page 54). • You cannot create a disc using the software PlayMemories Home with a movie that was recorded when [ File Format] was set to [XAVC S] or [MP4]. -
Page 75: Customizing The Picture Quality (Picture Profile)
Using the various functions When [ File Format] is set to [MP4] Record Setting Bit-rate Description 1440×1080 12M Approx. 12 Mbps (Avg.) Records movies at 1440 × 1080. VGA 3M Approx. 3 Mbps (Avg.) Records movies at VGA size. Notes •... -
Page 76: Audio Settings For Movie Recording
Using the various functions Audio settings for movie recording In addition to HD quality movie settings, the following items can be set: [Audio Rec Level], [Audio Level Display] and [Audio Out Timing]. MENU button t Set the mode dial to (Custom Settings) t [Audio Level (Movie). -
Page 77: Playback Functions
Using the various functions Playback functions Convenient functions for playback are as follows: Magnifies or reduces Deletes unnecessary images. images. Changes to the playback • Turn the control wheel to screen. magnify or reduce an image. Turn the front or rear dial to switch to the next/previous image. -
Page 78: Using Wi-Fi Functions
Using Wi-Fi functions Using the Wi-Fi and NFC one-touch functions You can perform the following operations using the camera’s Wi-Fi and NFC One-touch functions. Saving images to a computer. Transferring images from the camera to a smartphone. Using the smartphone as a remote Viewing still images on a TV. -
Page 79: Connecting The Camera To A Wireless Access Point
• If a connection is not established, see the wireless access point operating instructions or contact the administrator of the access point. • To save images to a computer, install the following dedicated software on your computer. When using Windows: PlayMemories Home http://www.sony.net/pm/ When using Mac: Wireless Auto Import http://www.sony.co.jp/imsoft/Mac/... -
Page 80: Using Applications
• You can upload images to network services directly from the camera. Downloading applications Access the application downloading website. http://www.sony.net/pmca/ Follow the instructions on the screen and acquire a service account. • If you have an account, sign in to the application download site. -
Page 81: Launching The Application
Adding applications to the camera (Application downloading) How to download applications directly using the Wi-Fi function of the camera You can download applications using the Wi-Fi function without connecting to a computer. Select MENU button t (Application) t [Application List] t (PlayMemories Camera Apps), then follow the instructions on the screen to download applications. -
Page 82: Viewing Images On A Computer
Use the following applications to optimize use of the images shot with your camera. • Image Data Converter • PlayMemories Home • Remote Camera Control For details on installation, see pages 82 to 85. System requirements You can find the system requirements for the software at the following URL: http://www.sony.net/pcenv/... -
Page 83: Using Image Data Converter
Click [Start] [All Programs] [Image Data Converter] [Help] [Image Data Converter Ver.4]. Image Data Converter support page (English only) http://www.sony.co.jp/ids-se/ Installing Image Data Converter Download the software from the following URL and install it on your computer. Windows: http://www.sony.co.jp/imsoft/Win/ Mac: http://www.sony.co.jp/imsoft/Mac/... -
Page 84: Using Playmemories Home
Using the software Using PlayMemories Home The software PlayMemories Home allows you to import still images and movies to your computer and use them. PlayMemories Home is required for importing XAVC S movies or AVCHD movies to your computer. Playing back imported images Importing images from your camera For Windows, the following functions are also... -
Page 85: Installing Playmemories Home
• Refer to the following URL for Mac software: http://www.sony.co.jp/imsoft/Mac/ • If the software PMB (Picture Motion Browser), supplied with models released before 2011, has already been installed on your computer, it will be overwritten by PlayMemories Home during the installation. -
Page 86: Using Remote Camera Control
Connection] [PC Remote] Installing Remote Camera Control Using the Internet browser on your computer, go to the following URL. Windows: http://www.sony.co.jp/imsoft/Win/ Mac: http://www.sony.co.jp/imsoft/Mac/ Follow the instructions on the screen to download and install Remote Camera Control. Notes • An Internet connection is required to install Remote Camera Control. -
Page 87: Others
The table below shows the approximate number of images that can be recorded on a memory card formatted with this camera. The values are defined using Sony standard memory cards for testing. The values may vary depending on the shooting conditions and the type of memory card used. - Page 88 – The battery pack is used at an ambient temperature of 25°C (77°F). – Using the lens FE 28-70 mm F3.5-5.6 OSS – Using Sony Memory Stick PRO Duo (Mark2) media (sold separately) – [Viewfinder Bright.] is set to [Manual] [±0].
- Page 89 Checking the number of images and recordable time of movies Available recording time for a movie The table below shows the approximate total recording times using a memory card formatted with this camera. The recording time for XAVC S and AVCHD movies is the recording time when shooting with [Dual Video REC] set to [Off].
- Page 90 Checking the number of images and recordable time of movies Notes • The recordable time of movies varies because the camera is equipped with VBR (Variable Bit-Rate), which automatically adjusts image quality depending on the shooting scene. When you record a fast-moving subject, the image is clearer but the recordable time is shorter because more memory is required for recording.
- Page 91 Checking the number of images and recordable time of movies • If you observe the following points, the recording time will be longer. – Keep the camera out of direct sunlight. – Turn the camera off when it is not being used. •...
-
Page 92: Specifications
Total number of dots: 2 359 296 dots Camera Type: Interchangeable Lens Frame coverage: 100% Digital Camera Magnification: Approx. 0.71 × with Lens: Sony E-mount lens 50 mm lens at infinity, –1 m –1 Eye Point: Approx. 27 mm from the [Image sensor]... - Page 93 (switchable between 1/3 EV and File format: JPEG (DCF Ver. 2.0, 1/2 EV steps) Exif Ver. 2.3, MPF Baseline) When using exposure compliant, RAW (Sony ARW 2.3 compensation dial: ±3.0 EV format) (1/3 EV step) Movie (XAVC S format): MPEG-4 AVC/H.264 XAVC S ver.1.0...
- Page 94 Specifications [Power, general] [Wireless LAN] Battery pack: Rechargeable battery Supported format: IEEE 802.11 b/g/n pack NP-FW50 Frequency band: 2.4 GHz bandwidth Security: WEP/WPA-PSK/WPA2- [Power consumption (while shooting)] Connection method: WPS (Wi-Fi When using an FE 28-70 mm F3.5- Protected Setup)/Manual 5.6 OSS* Access method: Infrastructure mode When using the viewfinder:...
- Page 95 Specifications Lens FE 28-70 mm F3.5-5.6 On image data compatibility • This camera conforms with DCF OSS (Supplied with ILCE-7M2K) (Design rule for Camera File Focal length: 28 mm – 70 mm system) universal standard Lens groups–elements: 8–9 established by JEITA (Japan Angle of view: 75°...
- Page 96 • Facebook and the “f” logo are • XAVC S and are registered trademarks or registered trademarks of trademarks of Sony Corporation. Facebook, Inc. • “AVCHD Progressive” and the • YouTube and the YouTube logo are “AVCHD Progressive” logotype are...
-
Page 97: Index
Index Index Area Setting ........58 Exposure compensation dial ..28 Audio settings ......75 Eye sensor ........18 AUTO .........63 Eyepiece cup ......62 Auto Mode........63 File Format......... 72 Battery pack........48 Fn ......... 33, 34 Focus Magnif. Time....39 Function button ....33, 34 Camera shake......59 Charge lamp........49 Charging battery pack....48... - Page 98 Index Memory card......53, 54 Scene Selection ......38 Memory recall......39 Set the clock ....... 57 MENU........35 Shooting mode ......69 Microphone jack ......20 Shooting still images....63 Monitor ........24 Shoulder strap ......21 MOVIE ........65 Software ........
- Page 99 Index...
- Page 100 Index...
- Page 101 Additional information on this product and answers to frequently asked questions can be found at our Customer Support Website. ©2014 Sony Corporation Printed in Thailand...
- Page 102 • レンズを斜めに差し込まないでください。 Votre objectif est conçu pour les appareils photo à 1 Lens hood index monture E de type Sony α. Il ne peut pas être utilisé 取りはずしかた (イラスト–参照) 2 Focusing ring pour les appareils photo à monture A.
- Page 103 按住相机上的镜头释放按钮,逆时针转动 Para más información sobre compatibilidad, visite formato de 35 mm y el ángulo de visión 2 es el valor el sitio Web de Sony de su área, o consulte a su 镜头直至其停止,然后拆下镜头。 para cámaras digitales de lentes intercambiables proveedor Sony o a un centro de servicio local equipadas con un sensor de imágenes de tamaño...
Need help?
Do you have a question about the Alpha 7 II and is the answer not in the manual?
Questions and answers
Hello, my camera is plugged in and shutting down after 5 min of use (it goes on standby mode). How to stop it to go on standby? It is Sony 7ii
To prevent your Sony 7 II camera from going into standby mode after 5 minutes, adjust the [Pwr Save Start Time] setting in the Setup menu. Set it to a longer duration or turn it off.
This answer is automatically generated