Table of Contents
Advertisement
Quick Links
Advertisement
Table of Contents

Related Manuals for IONODES CitySafe

Summary of Contents for IONODES CitySafe
- Page 1 Implementation Guide Document Version 1.0...
- Page 2 The information in this publication is provided “as is” without warranty of any kind. The entire risk arising out of the use of this information remains with the recipient. In no event shall IONODES be liable for any direct, consequential, incidental, special, punitive, or other damages whatsoever (including without...
-
Page 3: Table Of Contents
Contents About IONODES CitySafe ............................5 How it works ..............................5 What is included with the PERCEPT Gateway? ....................7 Installing the PERCEPT Gateway .......................... 8 Enrolling the PERCEPT Gateway to PERCEPT Cloud ..................9 Creating a new PERCEPT Cloud organization ....................9 Claiming a PERCEPT Gateway into your organization ................. - Page 4 Appendix 6 Product Compliance ..........................41 Appendix 7 Industry Canada Compliance Statement .................... 42 Appendix 8 Statement Limited Warranty ....................... 43...
-
Page 5: About Ionodes Citysafe
Featuring built-in Genetec Security Center integration, IONODES CitySafe provides instant access to live and recorded video from any connected camera, from any remote site connected to IONODES CitySafe. - Page 6 (read-only) of local IP cameras, however cameras must have spare streaming capacity to not affect any local NVR or DVR functions. IONODES CitySafe includes native support through a Genetec Security Center VMS plugin that allows your Genetec system to securely connect to PERCEPT Cloud to access on-demand, live or recorded video from any camera, from any enrolled PERCEPT Gateway.
-
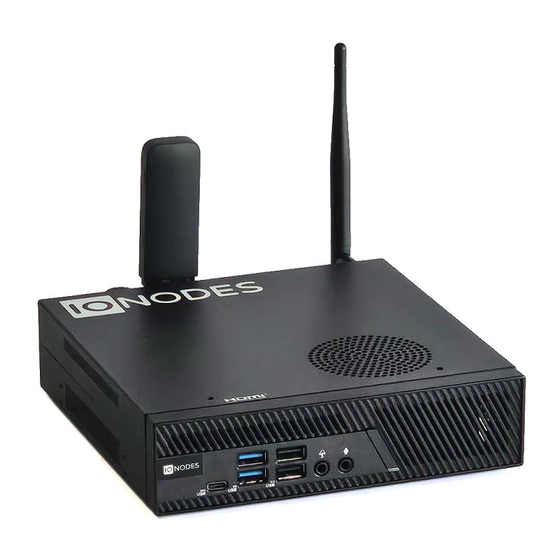
Page 7: What Is Included With The Percept Gateway
Make sure all items have been delivered and that no items are missing. Contact your IONODES reseller should you find any damages or defects. Warning: Operation, maintenance, and servicing of this device must be done by a trained professional,... -
Page 8: Installing The Percept Gateway
3 Installing the PERCEPT Gateway The PERCEPT Gateway can be placed on a flat surface, such as a desktop, or mounted via the available mounting bracket. When installing the PERCEPT Gateway, position the unit to allow for cable clearance at the rear of the unit. -
Page 9: Enrolling The Percept Gateway To Percept Cloud
4 Enrolling the PERCEPT Gateway to PERCEPT Cloud The following steps are required to enroll the PERCEPT Gateway on your PERCEPT Cloud account: 1. Create an organization, or log into your existing organization. 2. Claim the PERCEPT Gateway. 4.1 Creating a new PERCEPT Cloud organization An organization in PERCEPT Cloud represents the main PERCEPT Cloud account for your deployment in which you will be able to manager user accounts, enroll PERCEPT Gateways and share access to live and recorded video with your partners and / or with Genetec Security Center. - Page 10 1. Click on the Create new organization button and fill out the form for your organization account. Click Next when completed. 2. In the next screen, fill out the form for the Owner Account, this will be the main administrative user account attached to your organization.
- Page 11 3. On the next screen, review the information to validate it and click Submit to complete organization creation. 4. Once the organization is created, a registration confirmation link will be sent to the email address provided for your Owner Account. Go to your Owner Account email box and follow the confirmation link provided.
-
Page 12: Claiming A Percept Gateway Into Your Organization
4.2 Claiming a PERCEPT Gateway into your organization To attach a PERCEPT Gateway to your organization, log into PERCEPT Cloud and follow these steps: 1. Expand Devices and select Overview. 2. From the / Devices / Overview page, click the Add button. The following fields are required to add a PERCEPT Gateway to your organization: Display Name: Friendly name to be displayed in PERCEPT Cloud •... -
Page 13: Adding A Percept Gateway Using A Qr Scan
4.2.1 Adding a PERCEPT Gateway using a QR scan 1. In the PERCEPT Cloud Add Devices dialog, click on the QR Code Mode button (1). If prompted, grant your web browser access to your device’s camera. 2. Scan the QR code found on the label affixed to the bottom of the PERCEPT Gateway QR Code label example... -
Page 14: Completing The Onboarding Of Your Percept Gateway
4.2.2 Completing the onboarding of your PERCEPT Gateway Once the device configuration code is entered in PERCEPT Cloud using one of the above methods, a default Display Name will be generated. It consists of ‘Device_’ followed by the PERCEPT Gateway’s MAC address. This can be updated to a friendlier, meaningful name before pressing on the + button. -
Page 15: Powering And Connecting For The First Time
5 Powering and connecting for the first time Upon power up, the PERCEPT Gateway will seek to connect to PERCEPT Cloud automatically by the following methods, in that order: 1. DHCP over the WAN (LAN1) or the Camera LAN (LAN2) 2. -
Page 16: Managing Your Percept Gateways
6 Managing your PERCEPT Gateways From the devices overview page shown in the previous section, click on the desired PERCEPT Gateway’s Open Device Profile button. The device profile will open on the Details tab. 6.1.1 Setting the PERCEPT Gateway’s geolocation From the device’s Details tab. -
Page 17: Configuring The Percept Gateway's Network Settings
6.1.2 Configuring the PERCEPT Gateway’s network settings From the device’s Network tab, verify status and configuration of network interfaces. To view further details on a specific network interface, click on its Edit icon. In the following dialog window, click again on the Edit icon to change this network interface’s settings. 1. -
Page 18: Attaching Ip Cameras To Your Percept Gateway
2. Enable / Disable DHCP on the network interface. When DHCP is disabled, the IPv4 and DNS v4 sections underneath will become editable to configure static IP settings 3. For the wireless network adapter, use the Discover Networks to scan for and select Wi-Fi networks within range of the PERCEPT Gateway 4. - Page 19 3. Click Next Note: The IONODES CitySafe solution is intended to provide real-time situational awareness to remote users over the internet. For optimal performance, it is recommended to select camera media profiles that meet this objective with low bandwidth usage. Recommended settings:...
- Page 20 1. Enter a friendly Display Name and Description for this camera. 2. Click Next In the Summary tab, verify entered info and click Done to add the camera. If needed, use the Back button to correct any oversight or change settings before finalizing.
-
Page 21: Performing Maintenance Operations On Your Percept Gateway
PERCEPT Cloud, no additional download or files are required. 2. Download System Info. This downloads an encrypted file containing detailed configuration and logs. IONODES technical support may request this file when assisting with a support request. 3. Reboot. Shuts down and restarts the device. -
Page 22: Integrating With Genetec Security Center
Before installing the plugin, you must update your Security Center license to include the required certificates. To update your license, contact us and provide the part numbers listed in this topic. Part number Description Minimum Requirements GSC-JPS-IONODES-CLOUD This package provides a perpetual Security Center 5.10 and over license for PERCEPT Cloud plugin. GSC-OM-1C-IONODES... -
Page 23: Configuring The Plugin In Genetec Security Center
7.2 Configuring the plugin in Genetec Security Center 1. In the Genetec Config Tool, from the Tasks pane, select Plugins. - Page 24 2. Click Add an entity, then Plugin:...
- Page 25 3. Select the plugin type IONODES PERCEPT Plugin. Click Next, at the bottom of this dialog and the following one, leaving all settings to default, and finally clicking Create.
-
Page 26: Generating An App Key In Percept Cloud
7.3 Generating an APP Key in PERCEPT Cloud Integration with Genetec Security Center requires generating an application key in PERCEPT Cloud and sharing it with the remote Genetec Security Center PERCEPT Cloud plugin. The application key and associated permissions can be deleted at any time to revoke access. The key provides access to real-time streams and recorded video on all PERCEPT Gateways registered with the organization. - Page 27 Warning: Deleting an Application Client is irreversible. Granting access back requires generating and sharing a new key. The Application Client Key generated and saved in steps above can now be used to configure the Genetec Security Center IONODES PERCEPT Cloud Plugin.
-
Page 28: Configuring The App Key In Genetec Security Center
7.4 Configuring the APP Key in Genetec Security Center Click on the Green “+” to add a new organization. Provide a Config name for the connection and paste the App Key generated in PERCEPT Cloud. -
Page 29: Confirming The Installation
7.5 Confirming the installation Once the key is entered, the organization should be visible in the right table. Note that it can take up to one minute for the data to refresh. Once the organization details are populated, the list of available PERCEPT Gateways will be available in the Devices tab. -
Page 30: Troubleshooting The Percept Cloud Plugin
In some cases, it could be required to refresh the plugin’s configuration. To achieve this, from the Plugins task, right-click on the IONODES PERCEPT Plugin, select Maintenance, then Deactivate Role. Once the Plugin is deactivated, it can be re-activated following the same process. - Page 32 The diagnostic menu can be used to validate the plugin state. Expected output:...
-
Page 33: Appendix 1 Local Device Connection
Appendix 1 Local Device Connection The PERCEPT Gateway is configured to automatically connect to PERCEPT Cloud. In some cases, it might be required to manually configure the device to diagnose or setup its connectivity. The following methods are available to configure the device locally: 1. - Page 34 Configuring the PERCEPT Gateway using a monitor, mouse and keyboard When a monitor is connected, the PERCEPT Gateway will show network and PERCEPT Cloud connection status. Below is an example from an already configured PERCEPT Gateway. Each network interface can show the following statuses: Connected: Interface is enabled and connected, with or without internet access.
-
Page 35: Appendix 2 Setup The Initial Device Password
Appendix 2 Setup the Initial Device Password Upon first connection, the PERCEPT Gateway will request setting the ’admin’ password. Upon setting the ‘admin’ password, the management interface will open to its Dashboard page, showing information such as model / serial numbers, MAC address, hardware, and firmware versions, etc. Select the Configuration page, Network tab. -
Page 36: Appendix 3 Configuring Wi-Fi Connectivity (Optional)
Appendix 3 Configuring Wi-Fi Connectivity (optional) Note: Start at Appendix 1 for steps to connect to the PERCEPT Gateway management interface. 1. From the Network Interfaces section, select the Wireless 1 button. 2. Select the desired wireless network SSID from the drop-down menu list. Clicking the Refresh button will force a rescan of available SSIDs within range. -
Page 37: Appendix 4 Retrieving Connection Information
Appendix 4 Retrieving Connection Information In case the device label is not available, connection information can be retrieved directly from the PERCEPT Gateway management interface. 1. From the Cloud tab of the Configuration page, ensure the Enable PERCEPT Cloud box is checked 2. - Page 38 1. From the PERCEPT Gateway’s management interface, click on Copy Configuration String 2. In the PERCEPT Cloud Add Devices dialog, click on the Paste button...
-
Page 39: Appendix 5 Resetting Device To Factory Settings
Appendix 5 Resetting Device to Factory Settings Resetting the PERCEPT Gateway to factory settings can be warranted in certain circumstances, such as loss of login credentials, or configuring from a clean slate. From PERCEPT Cloud If the device is claimed by a PERCEPT Cloud organization, see section 6.1.4 to reset from PERCEPT Cloud. From Management Interface If credentials for the PERCEPT Gateway’s ‘admin’... - Page 40 2. Connect a monitor, USB keyboard and USB mouse 3. Power ON the PERCEPT Gateway 4. When the device displays the ‘IONODES Starting system services’ splash screen shown below, press and hold both the LEFT SHIFT and RIGHT SHIFT keys on the keyboard 5.
- Page 41 • connected. Consult the dealer or an experienced radio/TV technician for help. Changes or modifications to • this product not authorized by IONODES could void the electromagnetic compatibility (EMC) and wireless compliance and negate your authority to operate the product.
- Page 42 Appendix 7 Industry Canada Compliance Statement The product has been tested to comply to ICES-3(B)/NMB-3(B). This digital apparatus does not exceed the Class B limits for radio noise emissions from digital apparatus set out in the interference-causing equipment standard entitled: “Digital Apparatus,” ICES-003 of the Canadian Department of Communications.
- Page 43 Appendix 8 Statement Limited Warranty Please visit https://www.ionodes.com/limited-hardware-warranty/ for the latest warranty information.
Need help?
Do you have a question about the CitySafe and is the answer not in the manual?
Questions and answers