Advertisement
Quick Links
User Manual
BILD: Bitte Beschriftung auf 90Hz 10bit ändern. Der Operator braucht eine Brille
UHD-resolution, 8 MP (3.840 x 2.160)
Native 4K-resolution @ 90Hz with 10bit
Circular line-by-line polarization 3D technology
Optional head-tracking and gesture control
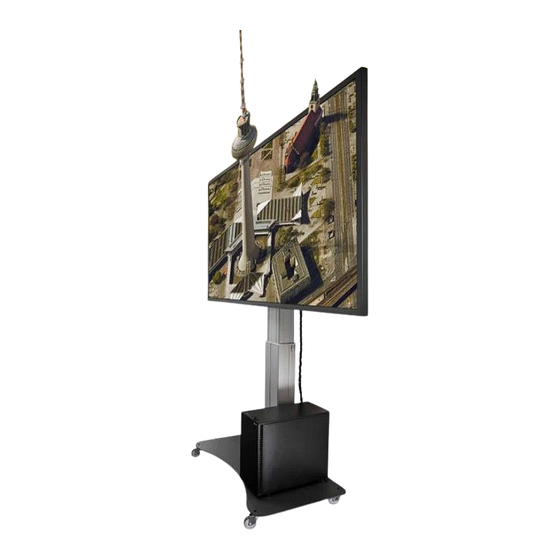
Innovative, height-adjustable mounting solution
Optional wall mounting solution
Advertisement

Related Manuals for Schneider digital 3D GLOBE VIEW

Summary of Contents for Schneider digital 3D GLOBE VIEW
- Page 1 User Manual BILD: Bitte Beschriftung auf 90Hz 10bit ändern. Der Operator braucht eine Brille UHD-resolution, 8 MP (3.840 x 2.160) Native 4K-resolution @ 90Hz with 10bit Circular line-by-line polarization 3D technology Optional head-tracking and gesture control Innovative, height-adjustable mounting solution Optional wall mounting solution...
- Page 2 2D Monoscope or 3D-Stereo 4K passive-stereo LCD display to move seamlessly between 2D and continuous high-quality 3D- stereo with passive glasses. Highlights • 2D or 3D-stereo with one click 4K Resolution 3.840 x 2.160 @ 90Hz in 2D Mode The 3D GlobeView can display 3D-stereo and •...
- Page 3 Circularly polarized 3D glasses together with microfiber cleaning cloth and storage bag Tracking camera Tracking targets Please check that the package is complete and contact Schneider Digital as soon as possible if any of the items listed above are missing or damaged. Unpacking For transport, unpacking and positioning of 3D GlobeView Monitor its highly recommended to work in pairs.
- Page 4 Position the 3D GlobeView transport box in an upright position on a flat solid even surface. Please ensure that the transport box does not fall or tip over, as otherwise danger of the monitor damage exists. On one side of the wooden box there is a side door. Open this door and take the cardboard box with the 3D GlobeView out.
- Page 5 In case you choose to mount the monitor on the wall, please make sure that the wall can support the weight of the monitor. An optional wall mounting for fixture the 3D GlobeView monitor on a flat, vertical surface is available as an accessory (see additional component parts). WARNING! Please keep the complete packaging material (both: wooden and cardboard boxes, foam padding) for possible return shipments in case of support- or warranty claim.
- Page 6 3D GlobeView 80“ control elements Terminal panel for power supply with power switch and signal inputs. Monitor operation The 3D GlobeView monitor is designed in such a way, that the best performance and highest image quality can be achieved at a resolution of 3840 x 2160 und a refresh rate of 90 Hz. At lower refresh rates, the static/moving image or video may appear distorted or blurred.
- Page 7 2. Press the MENU (M) / MENU (R) button to call the OSD (On Screen Display) menu. You can navigate to different menu elements using the UP/DOWN (M, R) keys. 3. Select menu element, which settings you want to configure. Press again the MENU (M) / OK (R) button and use the UP/DOWN (M, R) keys to set settings as desired.
- Page 8 The settings of the 3D GlobeView monitor can be as well configured by means of Windows elements in the following way: 1. Select Start > Settings > System > Display. 2. Select display, which settings you want to modify. 3. Open Display Settings. 4.
- Page 9 5. To change the refresh rate, scroll down to Advanced display. 6. In the display tab, under refresh rate, select the rate of 90 Hz.
- Page 10 Enabling 3D on your NVIDIA graphics card The NVIDIA graphics driver and hardware settings can be configured with help of the NVIDIA control panel. To enable the stereo mode please perform the following steps: 1. Right click on the desktop and select NVIDIA Control Panel.
- Page 11 2. Select Change Resolution under the Display header in the left-hand menu, choose desired resolution and refresh rate. In Apply the following settings tab, you can further configure the NVIDIA color settings.
- Page 12 3. Select Manage 3D Settings under the 3D Settings header.
- Page 13 4. Select Technology, specific for your software, under the Global Settings.
- Page 14 5. Use the drop down menu next to Stereo – Display mode and select Horizontal interlaced stereo display.
- Page 15 6. Scroll down to Stereo – Enable and from the drop down menu select On.
- Page 16 7. Select Adjust image settings with preview under 3D Settings in the lefthand menu of the screen and select Use the advanced 3D image settings.
- Page 17 Enabling 3D on your AMD graphics card To enable the stereo mode for your AMD graphics card please perform the following steps: 1. Right click on the desktop and select AMD Software. 2. Select Advanced Settings under Performance. In the Graphics tab, activate Quad Buffer Stereo (when available, yields best quality stereo output).
- Page 18 3. Use the dropdown menu next to Stereo mode and select Auto-Stereo (Horizontal Interleaved).
- Page 19 NVIDIA/AMD Drivers For correct stereo mode operation and 3D presentation please ensure that your 3D GlobeView monitor is connected to the out port on the GPU and not to the integrated video port on the motherboard (check under System - Display - Advanced Display - Display information, shown below) and you have the latest drivers for your graphics card.
- Page 20 If you are experiencing a problem with stereo mode, please check whether the scaling for the display of text, apps and other elements has been set to a value other than 100%. If so, change the scaling to 100%. Under certain circumstances, this may resolve the error. If the text size appears too small, you can make the font size bigger globally using the following steps: 1.
- Page 21 3. Under the Text size use the slider to select the new font size. Once the text size fits, click on Apply.
- Page 22 BILD: Maße! Technical Data of 3D GlobeView Stereo Monitor Display size 80″ (2032 mm) Display Resolution 3.840 × 2.160, RGB-Stripe arrangement 1,07 Billon Colors (10bit) 400 cd/m brightness (Center 1point, Typ.) Screen aspect ratio: 16:09 LED Backlight-Technology 8 ms Reaction time G/G 178°/178°...
- Page 23 Vertical up to 120 Hz, Horizontal 74 MHz Frame rate Pixel Interspace 0,453 x 0.453 mm Monitor Type Passive 3D Stereo Monitor 3D Technology Passive Stereo, circular line by line polarization 3D Characteristics 200 cd/m2 brightness with glasses 3.840 x 1.080 resolution per eye 3D Format Horizontal interlaced scanning Windows / Linux / MacOS compatible...
- Page 24 Technical Notice Remote control Warranty 12 Months Bring-in-Service ~ 150 – 600 cm Optimum Viewing Distance Visible Display Size 1.740 x 980 mm VESA Mount 600 x 400 mm...
- Page 25 If the monitor produces abnormal smells, noises or smoke, switch off the 3D GlobeView Monitor and disconnect it from the power supply. Please contact your dealer or service team at Schneider Digital. Further continued use of the monitor may be dangerous or may cause fire or electric shock.
-
Page 26: Cleaning Instructions
NOTE TO 24/7 OPERATION MODE This product is not designed for 24h/7 days operation mode ADDITIONAL INFORMATION INSTRUCTIONS FOR ERGONOMIC USE Do not install or use the monitor against a glaring background or in a dark room to avoid any risk of eye fatigue. - Page 27 POLARIZED FILTER GLASSES The polarization glasses must only be cleaned using the microfiber eyeglass cleaning cloth provided in the 3D GlobeView delivery package.
- Page 28 The sole responsibility for issuing this declaration of conformity shall be borne by the manufacturer. Manufacturer / Authorized signatory: Schneider Digital Josef J. Schneider e. K. Maxlrainer Str. 10 D-83714 Miesbach Object of the declaration: A17115 3D GlobeView 80"...
Need help?
Do you have a question about the 3D GLOBE VIEW and is the answer not in the manual?
Questions and answers