Table of Contents
Advertisement
Quick Links
Advertisement
Table of Contents

Subscribe to Our Youtube Channel
Related Manuals for TDE MACNO BDF DIGITAL OPDE SD 22

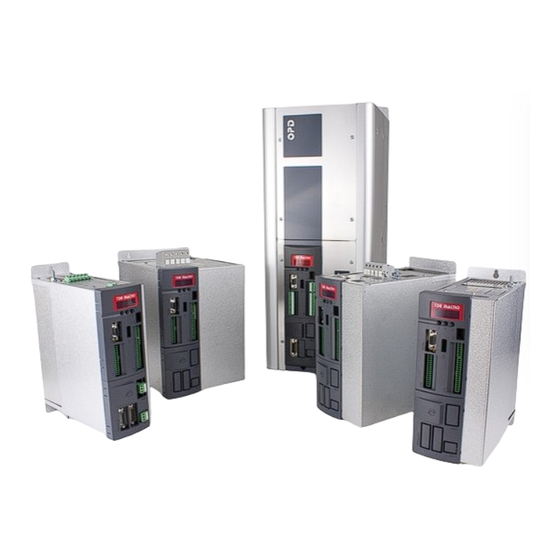
Summary of Contents for TDE MACNO BDF DIGITAL OPDE SD 22
- Page 1 Products Tde Macno Installation OPDE DC-DC...
- Page 3 INDEX INTRODUCTION ................................. 2 SYMBOLS USED IN THE CONVERTER MARKING ..................2 WARRANTY ..............................3 CE MARKING / RATING PLATE ........................3 IMPORTANCE OF THE MANUAL ........................3 READING HINTS ............................4 INTENDED USE................................5 STATE OF “SWITCHED OFF” DEVICE ......................5 NAME OF THE DEVICE .............................
- Page 4 1 INTRODUCTION This manual contains the necessary instructions for installing the OPDE DC-DC equipment. For other product information please refer to the "User's Manual" for the specific type of converter. SYMBOLS USED IN THE CONVERTER MARKING The OPDE DC-DC converter bears - outside and inside (in the accessible parts for wiring) - labels that indicate the presence of danger for people.
-
Page 5: Warranty
WARRANTY Within the limits set forth in this warranty, the undersigned manufacturer undertakes to repair any and all manufacturing defects that occur during the warranty period. The warranty becomes void if the purchaser does not properly follow all the instructions described in these "Installation Instructions". - Page 6 This manual shall be available for the authorized operators at any time and shall always be well stored and protected close to the equipment. THIS MANUAL SHALL ALWAYS BE AVAILABLE FOR THE AUTHORIZED OPERATORS AND SHALL ALWAYS BE CLOSE TO THE EQUIPMENT, WELL STORED AND PROTECTED. THE MANUFACTURER SHALL NOT BE MADE LIABLE FOR ANY DAMAGES TO PEOPLE, ANIMALS AND/OR THINGS CAUSED BY THE INOBSERVANCE OF THE INSTRUCTIONS AND WARNINGS HEREIN CONTAINED.
-
Page 7: Intended Use
2 INTENDED USE The OPDE DC-DC converter has been designed and implemented for the following intended use: Field of use DC/DC power conversion Place of use In a close, covered, and dry environment showing the temperature and humidity values indicated under TAB. - Page 8 3 NAME OF THE DEVICE The device in question is called as follows: OPDE DC-DC The code OPDE-SD DC-DC that is shown on the device label is described below. 6= level 6 Level D1= OPDE OPDE D= OPDE-SD DC-DC Type 022= 22A - 032= 32A - 040= 40A - 048= 48A - 060= 60A - 070= 70A - 090= 90A 110= 110A 150= 150A...
- Page 9 4 NAME OF THE COMPONENTS AND MECHANICAL DIMENSIONS FIG. 3, FIG. 4, FIG. 5, FIG. 6, FIG. 7, TAB. 3A, TAB. 3B, TAB 3C, TAB 3D, TAB 3E represent and show the names of the main components and the overall dimensions of the OPDE DC-DC converter. FIG.
- Page 10 LEGEND 3: Bottom ventilation openings Ground terminal for motor cable Ventilation openings Connector for management of motor thermal probes and simulated encoder (M4) Terminal board for motor and braking resistor connection Case Feedback boards (option) Removable plastic cover Digital and analog I/O connector (M1) 10.
- Page 11 FIG. 4 – Name of the components OPDE SD 40, 48 and 60 MP01200E00 V_1.0...
- Page 12 LEGEND FIG. 4: Bottom ventilation openings Ground terminal for motor cable Ventilation openings Connector for management of motor thermal probes and simulated encoder (M4) Terminal board for motor and braking resistor connection Case Feedback boards (option) Removable plastic cover Digital and analog I/O connector (M1) 10.
- Page 13 FIG. 5 – Name of the components OPDE SD 70, 90, 110 and 150 MP01200E00 V_1.0...
- Page 14 LEGEND FIG. 5: 26. Case 27. Extractable cooling fan 28. Feedback boards (option) 29. Removable plastic cover 30. Fixed plastic cover 31. Digital and analog I/O connector (M1) 32. Serial port 485/422 (J1) 33. Connector for parameterization key 34. Push buttons to set and display the parameters 35.
- Page 15 FIG. 6 – Name of the components OPDE SD 175, 220 and 250 MP01200E00 V_1.0...
- Page 16 LEGEND FIG. 6: Case supporting shoulders or wall hooking +24V power supply connector for cooling fans (X8) Case Cooling fans of the power module Panel covering the power terminals Mounting holes Feedback boards (option) Removable plastic cover Fixed plastic cover 10.
- Page 17 FIG. 7 – Name of the components OPDE SD 310, 370 and 460 MP01200E00 V_1.0...
- Page 18 LEGEND FIG. 7: Case supporting shoulders or wall hooking +24V power supply connector for cooling fans (X8) Case Cooling fans of the power module Panel covering the power terminals Mounting holes Feedback boards (option) Removable plastic cover Fixed plastic cover 10.
-
Page 19: Storage - Handling
5 STORAGE - HANDLING STORAGE ENVIRONMENTAL CONDITIONS If the OPDE DC-DC converter has to remain stored for a long time, it is necessary to store it in a safe environment with an adequate temperature and humidity degree, and protected against dust. Temperature -20÷60 °C... -
Page 20: Limits Of Use
6 LIMITS OF USE OPDE DC-DC has to be installed inside an electrical panel, which can also not be conditioned. In this case, the environmental limits of use are given below. CLIMATIC CONDITIONS Measure Environmental parameter Limits ment unit Operating temperature -20÷50 °C Humidity... -
Page 21: Installation Instructions
7 INSTALLATION INSTRUCTIONS OPDE DC-DC has to be installed under the ambient conditions specified in the section "Limits of use" and in compliance with the following instructions: Position the OPDE DC-DC converter observing the minimum positioning measures. Connect the OPDE DC-DC converter to the wall using screws, according to the dimensions shown. Prevent metallic residues resulting from drilling or works performed on connection electrical cables from falling into the converter. -
Page 22: Electric Connections
SOME PARTS OF THE CONVERTER METAL CASE MAY EXCEED 70 °C DURING OPERATION. THEY ARE MARKED BY THE SPECIAL LABEL "CAUTION, HOT SURFACE" SHOWN HERE ON THE SIDE. ELECTRIC CONNECTIONS ALL THE FOLLOWING OPERATIONS ARE NECESSARY TO PREPARE THE ELECTRIC CONNECTION OF OPDE DC-DC CONVERTER. - Page 23 Here below, there is the list of the main power and input/output ports of OPDE DC-DC: FIG. 8 – Electric connections MP01200E00 V_1.0...
- Page 24 7.2.1 Power side The OPDE SD converter is a two legs DC/DC converter with four IGBT bridge, it is bidirectional and operates in two quadrant mode. DC input power supply is the standard configuration. Three phase AC input power supply can be required as an option, in this case the unit become an AC/DC converter with diode input bridge and unidirectional operation mode.
- Page 25 FIG. 10 – Power stage with AC input (optional) MP01200E00 V_1.0...
-
Page 26: Examples Of Connection
7.2.2 EXAMPLES OF CONNECTION In order to be used in energy conversion applications, the OPDE DC-DC converter must be connected to other additional components necessary for its proper operation, in fact the OPDE DC-DC converter is a power and control unit of a four-IGBT bridge. - Page 27 7.2.3 AVAILABLE POWER CONNECTIONS The following figures show the arrangement of the power connections. TO ACCESS POWER CONNECTIONS, IT’S COMPULSORY TO DISCONNECT THE DC SIDE VOLTAGE, WAIT FOR A DISCHARGE TIME EQUAL TO 8 min AND THEN REMOVE THE REMOVABLE PANEL THAT COVERS THE CONNECTIONS. “+”...
- Page 28 “+” “-“: DC side input “U” “W”: DC side output “PE”: protective conductor connection FIG. 12 – Power connections OPDE SD 32, 40, 48, 60 MP01200E00 V_1.0...
- Page 29 “+” “-“: DC side input “U” “W”: DC side output “PE”: protective conductor connection FIG. 13 – Power connections OPDE SD 70, 90, 110, 150 (CASE 1C) MP01200E00 V_1.0...
- Page 30 “+” “-“: DC side input “U” “W”: DC side output “PE”: protective conductor connection FIG. 14 – Power connections OPDE SD 175, 220, 250 (CASE 2) “+” “-“: DC side input “U” “W”: DC side output “PE”: protective conductor connection FIG.
-
Page 31: Power Supplies
7.2.4 POWER SUPPLIES OPDE DC-DC requires two auxiliary power supply voltages: one for the power supply of the control (adjustment) side and driver, and one for the power supply of the cooling fans. The adjustment and driver power supply must be provided through the removable terminal X3, which is located on the front of OPDE DC-DC. - Page 32 -M1/M2 L.O.x O32 - ENABLE AFE FANS /L.O.x FIG. 16 – Example of connection of the fans power terminal (X8) and fans enabling terminal (X7). On the left, connection with fans always on. On the right, connection with fans controlled via L.O.x logical output set as "O32 – Enable DC-DC fans"...
-
Page 33: Logical Connections
7.2.5 LOGICAL CONNECTIONS FIG. 18A – Logical Connections OPDE SD 22÷150 MP01200E00 V_1.0... - Page 34 FIG. 17B – Logical Connections OPDE SD 70÷150 (side view) MP01200E00 V_1.0...
- Page 35 FIG. 17C – Logical Connections OPDE SD 175÷460 MP01200E00 V_1.0...
- Page 36 7.2.5.1 Digital and Analog Logical Connections FUNCTION DESCRIPTION L.I.1 Configurable logical inputs (see FIG. 18A) L.I.2 All inputs are optically isolated from the internal regulation. L.I.C. is the common of the inputs L.I.1, L.I.2, L.I.3, L.I.4. L.I.3 24Vdc ±10% Imax=10mA L.I.4 Common of the logical inputs to be connected to the negative of the input L.I.C...
- Page 37 FIG. 18B – Configurable analog input FIG. 18A – Configurable logical inputs FIG. 18D - Configurable analog output FIG. 18C – Configurable logical outputs 7.2.5.2 Frequency Input DESCRIPTION FUNCTION Channel A input, if differential (otherwise not connected). f max 300 kHz - 5÷24V Channel /A frequency input or frequency input.
- Page 38 7.2.5.3 Digital and Analog Logical Connections FUNCTION DESCRIPTION L.I.5 Configurable logical inputs (see FIG. 18A) L.I.6 All inputs are optically isolated from the internal regulation. L.I.C. is the common of the inputs L.I.5, L.I.6, L.I.7, L.I.8. 24Vdc ±10% Imax=10mA L.I.7 L.I.8 Common of all logical inputs to be connected to the negative of the input L.I.C...
- Page 39 7.2.5.4 Management of the Resistor Thermal Sensor M4 / X4 FUNCTION DESCRIPTION PTC Bimetallic Resistor thermal probe input (PTC or NTC or KTY84). /PTC Bimetallic N.C. +Vcc Vmax = 27Vdc CHANNEL /C CHANNEL C CHANNEL /B Connections for Simulated Encoder (NOT MANAGED) CHANNEL B CHANNEL /A...
-
Page 40: Code Versions
Vo OUTPUT VOLTAGE FEEDBACK BOARD 4V0056 FIG. 19 – Isolated Voltage Transducer The 4V0056 board is a voltage transducer that convertr a DC/AC High Voltage into -10V ÷ 10 V normalized signals, with galvanic isolation between input and output. There are different versions according to the Full Scale value and hardware filter. - Page 41 OUTPUT AND SUPPLY ARE NOT ISOLATED: THE INPUT GROUND HAS THE SAME VOLTAGE POTENTIAL OF THE OUTPUT GROUND FIG. 20 – 4V0056 connections DESCRIPTION FUNCTION Output voltage -10..+10 Vdc (protected against short-circuit) Output voltage reference DESCRIPTION FUNCTION Power supply: +24V 5mA rated Range 8..30Vdc (protected against reverse polarity) Negative of power supply Protection Earth...
- Page 42 CONNECTION OF OPTIONAL CARDS 7.4.1 CAN BUS The pin assignment of the optional card for CAN BUS communication is given here below. SWITCH CAN H TERM BUS 2 - CAN L main SWITCH CAN H CAN L BUS 1 Code 274B000110VV FIG.
- Page 43 7.4.2 PROFIBUS The pin assignment of the optional card for PROFIBUS – CAN BUS communication is given here below. 5) GNDISO 4) DE 8) B 3) A 6) +5VISO 1) SHIELD CAN H CAN L Code 274B000220VV FIG. 22 – Profibus card PIN n°...
- Page 44 7.4.3 ETHERCAT AND PROFINET FIG. 23 – Ethercat card FIG. 24 – Profinet card The card is equipped with two interfaces 10/100 Base-T RJ45. The individual contacts of the RJ45 port are assigned according to the "T 568-B" standard. Ethernet patch or crossover cables in CAT5e quality or better can be used as the connection cable. CAT5e is an Ethernet network cable standard defined by the EIA/TIA.
- Page 45 7.4.4 ANYBUS JUMPER J1 CAN H CAN L DIPSWITCH CAN H CAN L Code 274B000000V FIG. 26 – Anybus card This board accommodates in slot3 of the drive, in addition to acting as an interface for ANYBUS communication, on request, can provide two connectors for a CAN single channel output ( CAN A and CAN B). The selection of CAN channel can make it through the SW1 dipswitch.
- Page 46 CONNECTION OF THE RS422/485 SERIAL LINE The serial line present on the OPDE DC-DC drives foresees the connection for the "4-wire" transmission of data and, therefore, it has the ability to communicate in full-duplex mode. In fact, by virtue of the protocol used (MODBUS RTU) it always communicates in "half-duplex"...
-
Page 47: Technical Data
8 TECHNICAL DATA This chapter contains all the information for the correct use of the OPDE DC-DC. MOD. OPDE DC/DC ENERGY OPDE SD 22 OPDE SD 32 OPDE SD 48 OPDE SD 60 DC input data (Vbus) Maximum input voltage [V d.c.] Operating voltage [V d.c.]... - Page 48 MOD. OPDE DC/DC ENERGY OPDE SD 70 OPDE SD 90 OPDE SD 110 OPDE SD 150 DC input data (Vbus) Maximum input voltage [V d.c.] Operating voltage [V d.c.] 200830 Maximum operating current [A d.c.] Intermediate circuit capacity 2050 2870 3280 3280 [F]...
- Page 49 MOD. OPDE DC/DC ENERGY OPDE SD 175 OPDE SD 220 OPDE SD 250 DC input data (Vbus) Maximum input voltage [V d.c.] Operating voltage [V d.c.] 200830 Maximum operating current [A d.c.] Intermediate circuit capacity 13600 13600 13600 [F] Overvoltage category Input data for auxiliary power supplies Auxiliary power for regulation [V d.c.]...
- Page 50 MOD. OPDE DC/DC ENERGY OPDE SD 310 OPDE SD 370 OPDE SD 460 DC input data (Vbus) Maximum input voltage [V d.c.] Operating voltage [V d.c.] 200830 Maximum operating current [A d.c.] Intermediate circuit capacity 20400 20400 20400 [F] Overvoltage category Input data for auxiliary power supplies Auxiliary power for regulation [V d.c.]...
- Page 51 ELECTRIC CONNECTIONS 8.1.1 EXAMPLES OF CONNECTION FIG. 32 - Example of connection with DC power supply (standard) MP01200E00 V_1.0...
- Page 52 FIG. 33 - Example of connection with AC three-phase power supply (optional). MP01200E00 V_1.0...
- Page 53 8.1.2 COMPONENTS FOR THE CONNECTION TO OUTPUT Vo The OPDE DC/DC ENERGY require an external LC filter on output terminals U/W in order to generate the output voltage Vo. The filter is made by: Inductors L1-L2; capacitors bank C1. Other components can be connected depending on the application: DC contactor K1 K2;...
- Page 54 Output inductors L1-L2 OPDE SD OPDE SD OPDE SD Size OPDE SD [mH] Inductance [mH] 0.785 0.614 0.543 [Arms] Effective thermal current [Arms] 109.7 140.2 158.6 [Arms] Effective overload current [Arms] 125.4 160.2 181.2 Overload 120% 30s [Vdc] Rated voltage [Vdc] [Hz] Rated frequency [Hz] [%Ith]...
- Page 55 8.1.2.2 Output capacitor bank Size Capacitor bank for LC filter OPDE SD (Ft = 100 Hz / Start-up time = 12.8 ms @ Io=In Vo=415V) Current Peak Capacity Minimum voltage @Fpmw Current [F] [Vdc] [Arms] OPDE SD 22 OPDE SD 32 OPDE SD 40 1 236 OPDE SD 48...
- Page 57 Via dell’Oreficeria, 41 36100 Vicenza - Italy Tel +39 0444 343555 Fax +39 0444 343509 www.bdfdigital.com...
Need help?
Do you have a question about the BDF DIGITAL OPDE SD 22 and is the answer not in the manual?
Questions and answers