Table of Contents
Advertisement
Available languages
Available languages
MODELOS
MODELS
LEA TODAS LAS INSTRUCCIONES ANTES DE USAR ESTE APARATO
BLSTXPG-BW_BLSTXPG-BGW_24SEM1 (LA).indd 1
BLSTXPG-BW_BLSTXPG-BGW_24SEM1 (LA).indd 1
BLSTXPG-BW
BLSTXPG-BGW
Manual de Instrucciones
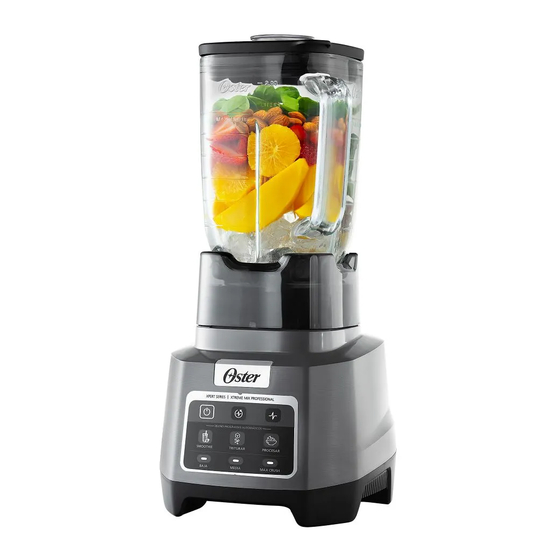
LICUADORA PROFESIONAL XTREME MIX
Instruction Manual
XTREME MIX PROFESSIONAL BLENDER
READ ALL INSTRUCTIONS BEFORE USING THIS APPLIANCE
2024/1/23 09:28
2024/1/23 09:28
Advertisement
Table of Contents

Related Manuals for Oster XTREME MIX BLSTXPG-BW


Summary of Contents for Oster XTREME MIX BLSTXPG-BW
- Page 1 BLSTXPG-BW MODELOS BLSTXPG-BGW MODELS Manual de Instrucciones LICUADORA PROFESIONAL XTREME MIX LEA TODAS LAS INSTRUCCIONES ANTES DE USAR ESTE APARATO Instruction Manual XTREME MIX PROFESSIONAL BLENDER READ ALL INSTRUCTIONS BEFORE USING THIS APPLIANCE BLSTXPG-BW_BLSTXPG-BGW_24SEM1 (LA).indd 1 BLSTXPG-BW_BLSTXPG-BGW_24SEM1 (LA).indd 1 2024/1/23 09:28 2024/1/23 09:28...
-
Page 2: I Nf O Rma C I O Ne S I Mp Orta Nte S
No opere ningún electrodoméstico que tenga el cable o enchufe dañado, si no funciona correctamente, se ha dejado caer o está dañado de cualquier otra forma. Lleve el artefacto al Centro de Servicio Autorizado de Electrodomésticos Oster más cercano para su revisión, reparación o ajuste eléctrico o mecánico. ®... - Page 3 No opere ningún electrodoméstico que tenga el cable o enchufe dañado, si no funciona correctamente, se ha dejado caer o está dañado de cualquier otra forma. Lleve el artefacto al Centro de Servicio Autorizado de Electrodomésticos Oster más cercano para su revisión, reparación o ajuste eléctrico o mecánico. ®...
- Page 4 18. Si su licuadora está equipada con un enchufe de conexión a tierra, solo conéctela a tomacorrientes diseñados adecuadamente para conexión a tierra. Para modelos con los mini vasos o los vasos portátiles Blend-N-Go: 19. Asegúrese que el vaso esté bien colocado en la base antes de utilizarlo. 20.
-
Page 5: D Esc Rip Ción Del A Rte Facto
D ESC RIP CIÓN DEL A RTE FACTO PANEL DE CONTROL SMOOTHIE ESMAGAR PROCESSAR 1. Copa de alimentación 11. Vaso Blend-N-Go (solamente para los modelos con 2. Tapa para vaso de vidrio Boroclass de 2 L. accesorio Blend-N-Go) ® 3. Vaso de vidrio Boroclass con capacidad de 2 L 12. - Page 6 U TIL I Z A NDO S U LIC UA DO RA Su licuadora incluye las siguientes características y tecnología: • iBlend programas automáticos - 3 Programas automáticos que garantizan una velocidad y un tiempo de operación precisos para ofrecer resultados perfectos. - Programa para smoothie ( ) - Programa para triturar ( ) - Programa para procesar (...
- Page 7 2. Coloque el anillo sellador sobre la cuchilla (Fig. 2). 3. Preparando el vaso de 2 litros: a. Coloque la jarra boca abajo y coloque el collar en la abertura pequeña/inferior del vaso, asegurándose de que las muescas del collar encajen en las cuatro lengüetas del vaso (Fig.
- Page 8 UTILIZANDO LA CONFIGURACIÓN DE CONTROL MANUAL Los botones manuales incluyen: • Velocidad MAX CRUSH • Velocidad Media • Velocidad Baja • Pulso • Pulso reversible Use estos botones para realizar recetas a su gusto personal o para continuar licuando después de que finalice uno de los iBlend programas automáticos. 1.
- Page 9 UT I L IZ A N DO EL VA SO BLE ND-N-GO (SOLAMENTE PARA LOS MODELOS CON ACCESORIO BLEND-N-GO) IMPORTANTE: ASEGÚRESE DE UTILIZAR LAS SIGUIENTES PARTES PARA EL VASO BLEND-N-GO: Gris Gris Negro Palanca de Correcto bloqueo Correcto Incorrecto Antes de lavar los componentes, asegúrese de que la licuadora esté apagada y desenchufada.
- Page 10 5. Coloque el vaso ensamblado sobre la base de la licuadora sin el collar para el vaso de vidrio (Fig. 33). Sostenga el vaso en posición. Ponga en marcha la licuadora de acuerdo con las instrucciones de este manual. Licúe hasta obtener la consistencia deseada. 6.
-
Page 11: Cuidado Y Mantenimiento
CU IDA DO Y MA NT ENIM IE NTO Limpieza del vaso de 2 L y sus accesorios SMOOTHIE TRITURAR PROCESAR ADVERTENCIA: La cuchilla es afilada. Manipúlela con cuidado. Retire la cuchilla de la parte inferior del vaso girando la cubierta de la parte inferior del vaso hacia la izquierda. -
Page 12: C Ons Ejos Par A Licua R
A L MA C EN A MI ENTO Vuelva a armar la licuadora para guardarla. ADVERTENCIA: Nunca coloque el vaso, o ninguna de las demás piezas, en un horno microondas. Nunca guarde alimentos o bebidas en el vaso. C ONS EJOS PAR A LICUA R Líquidos Coloque primero los líquidos en el vaso, a menos que la receta indique lo contrario. - Page 13 Do not disconnect by pulling on cord. Do not operate any appliance with a damaged cord or plug or after the appliance malfunctions, or is dropped or damaged in any manner. Take the appliance to the nearest Authorized Oster Appliance Service Center for examination, repair ®...
-
Page 14: Important Safeguards
Do not disconnect by pulling on cord. Do not operate any appliance with a damaged cord or plug or after the appliance malfunctions, or is dropped or damaged in any manner. Take the appliance to the nearest Authorized Oster Appliance Service Center for examination, repair ®... - Page 15 For containers with no lids or vents (when inserted in the blender), such as personal Blend and Go containers: 19. Make sure the jar is correctly placed onto the base before using the appliance. 20. Do not blend carbonated, hot or boiling liquids and ingredients, as this may create pressure buildup.
-
Page 16: Description Of The Appliance
DE SCRI P TIO N OF THE APPLIA NCE CONTROL PANEL SMOOTHIE ESMAGAR PROCESSAR 1. Filler cap 12. Grey sealing ring for Blend-N-Go cup (models with 2. Lid for 2 L Boroclass glass jar. Blend-N-Go accessory only) ® 3. 2 L (8-Cup) heat resistant, Boroclass glass jar 13. -
Page 17: U Sin G You R Ble Nde R
U SIN G YOU R BLE NDE R Your product includes the following technology and features: • 3 iBlend Automatic Programs – iBlend Automatic Programs ensure precise speed and operating time to deliver perfect results. - Smoothie Program ( ) - Ice Crushing Program ( ) - Food Processor Program ( •... - Page 18 2. Install the sealing ring over the blade (Fig. 2). 3. Preparing the 2 L jar: a. Turn jar upside down and place the collar on the small/bottom opening of the jar ensuring the notches in the collar fit into the four tabs on the jar (Fig. 3). 4.
- Page 19 USING THE MANUAL CONTROLS The Manual Controls include: • Speed MAX CRUSH • Speed Medium • Speed Low • Pulse • Reverse Pulse Use these buttons for personal recipes or to continue mixing after an iBlend automatic program is finished. 1.
-
Page 20: U Sin G You R B Le Nd-N-G O
U SIN G YOU R B LE ND-N-G O (M ODEL S W IT H BLE ND-N-GO ACCESSORY ONLY) IMPORTANT NOTE: The Blend-N-Go cup attachment is only compatible with the GRAY threaded jar bottom with the locking lever and the GRAY sealing ring with notches. - Page 21 6. Remove cup from base (Fig. 34). 7. Remove threaded jar bottom. 8. Place lid on cup and turn clockwise to tighten (Fig. 35). You’re now ready to enjoy your blended drink! incorrect incorrect correct correct Fig. 27 Fig. 28 Fig.
-
Page 22: Care And Maintenance
C A RE A ND MA INTE NANCE After Use: 1. Lift the jar straight up from the base, remove the lid and empty the jar. 2. If necessary, use a rubber spatula to scrape foods away from the sides of the jar. Cleaning the 2 L jar and its accessories WARNING: Blade is sharp. -
Page 23: Bl En Din G Tips
STORI NG Reassemble the blender for storage. Leave the lid open a gap so no odors are retained. WARNING: Never put the jar, or any other parts, in a microwave oven. Never store foods or drinks in the jar. BL EN DIN G TIPS Liquids Put liquids into the jar first, unless the recipe says otherwise. - Page 24 Garantía limitada de un año – por favor consulte los detalles en el inserto. © 2024 Sunbeam Products, Inc. All rights reserved. One year limited warranty – please see insert for details. www.oster.com Impreso en México / Printed in Mexico P.N. 2206659 / NWL0001603279 BLSTXPG-BW_BLSTXPG-BGW_24SEM1 (LA)_GCDS-JC BLSTXPG-BW_BLSTXPG-BGW_24SEM1 (LA).indd 12...
Need help?
Do you have a question about the XTREME MIX BLSTXPG-BW and is the answer not in the manual?
Questions and answers