Table of Contents
Advertisement
Quick Links
Advertisement
Table of Contents

Related Manuals for Vicpas CTC Parker Automation MotionPanel


Summary of Contents for Vicpas CTC Parker Automation MotionPanel
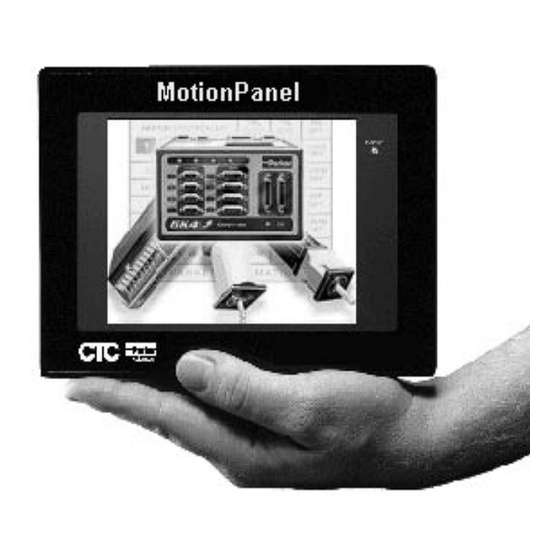
- Page 1 MotionPanel User Guide...
- Page 2 MotionPanel User Guide CTC Parker Automation Phone: 513-831-2340 50 W. TechneCenter Drive, Milford, Ohio 45150 Technical Support: 513-248-1714 A3-06166-100...
- Page 3 Copyright and Trademark Notice Copyright © 2000 by CTC Parker Automation. All rights reserved. No part of this publica- tion may be reproduced, transmitted, transcribed, stored in a retrieval system, in any form or by any means, mechanical, photocopying, recording or otherwise, without the prior written consent of CTC Parker Automation.
-
Page 4: Table Of Contents
Table of Contents Manual Overview and Support Services ....1 Using this Manual ........2 MotionPanel Documentation . - Page 5 Table of Contents Configuring the CMOT driver for serial communication ..27 Cable diagrams ........29 MachineShop for MotionPanel .
- Page 6 Table of Contents Motaxis ..........50 Servost .
- Page 7 Table of Contents MotionPanel User Guide...
- Page 8 List of Figures Figure 2-1: Connecting an Ethernet Cable to MotionPanel....13 Figure 2-2: Connecting an Ethernet Cable to the Controller ....13 Figure 2-3: Connecting Power to MotionPanel and the Controller .
- Page 9 List of Figures Figure 3-1: MachineShop Select Operation ......33 Figure 3-2: FlashBack Utility Dialog Box ....... . 36 Figure 4-1: MotionPanel Main Menu .
- Page 10 List of Figures Figure 4-27: Trigin..........55 Figure 4-28: BrickMenu.
- Page 11 List of Figures viii MotionPanel User Guide...
- Page 12 C h a p t e r 1 M a n u a l O v e r v i e w a n d S u p p o r t S e r v i c e s Thank you for purchasing the MotionPanel workstation.
-
Page 13: Manual Overview And Support Services
Chapter 1: Manual Overview and Support Services Using this Manual Using this This manual is designed to help you set up and use your MotionPanel workstation. Manual The manual is divided into the following chapters: Chapter 1 — Manual Overview and Support Services: Presents an overview of this manual, the other documen- tation and software provided with MotionPanel, and advice about getting started with MotionPanel. -
Page 14: Motionpanel Documentation
Chapter 1: Manual Overview and Support Services MotionPanel Documentation MotionPanel The MotionPanel documentation set contains the infor- mation that you need to configure, install, and use Documentation MotionPanel. The documentation set is described below. The MotionPanel and PowerStation Model P1 User Guides are contained in PDF files on the MachineShop for MotionPanel Installation CD. -
Page 15: Related Documentation
Chapter 1: Manual Overview and Support Services Related Documentation Related In addition to the MotionPanel documentation described earlier, you will find the following documentation useful. Documentation The software documentation is contained in PDF files on the MachineShop for MotionPanel Installation CD. Software MachineShop Installation Booklet —... -
Page 16: Software Components
Chapter 1: Manual Overview and Support Services Software Components Software ® Each MotionPanel is shipped with the MS-DOS 6.22 operating system, the MachineShop Shell, and a complete Components Interact runtime application installed on a Compact Flash (CF) card. The application consists of over 45 pre-config- ured screens created with Interact’s Panel Toolkit Module (PTM). -
Page 17: Getting Started
Chapter 1: Manual Overview and Support Services Getting Started Getting Started Now that you have opened the MotionPanel package, you can complete the following steps to get started with MotionPanel: • Unpack the unit • Connect it to a Compumotor 6K controller •... -
Page 18: Configuring And Downloading Applications
Chapter 1: Manual Overview and Support Services Getting Started Configuring and Although the Interact runtime screens in MotionPanel are pre-configured, program flow operations and data input Downloading functions are application-specific. You will need to Applications configure them using MachineShop for MotionPanel on a development PC, save your settings in PTM, and then download them to the MotionPanel CF card. -
Page 19: Documentation Standards
Chapter 1: Manual Overview and Support Services Documentation Standards Documentation This manual uses the following documentation standards: Standards 1. Commands, buttons, tabs, menu items, and important terms are shown in bold. 2. Text to be entered from the keyboard is shown in Courier font. -
Page 20: Customer Support Services
Chapter 1: Manual Overview and Support Services Customer Support Services Customer CTC Parker welcomes your thoughts and suggestions on our products and services. You can contact CTC Parker by Support telephone, email, or fax. You can also visit CTC Parker on Services the World Wide Web to learn the latest about our hard- ware, software, and customer support services. -
Page 21: Training And New Business Development
Chapter 1: Manual Overview and Support Services Customer Support Services Training and New Our Training and New Business Development department provides service in two areas: training and consulting. Business CTC Parker offers training on all our products, either at Development CTC Parker in our state-of-the-art training center or at your site. - Page 22 C h a p t e r 2 G e t t i n g S t a r t e d w i t h M o t i o n P a n e l MotionPanel can communicate with any Compumotor 6K controller via Ethernet or serial connection.
-
Page 23: Getting Started With Motionpanel
Chapter 2: Getting Started with MotionPanel Controller Compatibility Controller MotionPanel is factory-configured to communicate with any Compumotor 6K controller via Ethernet or serial Compatibility connection. The Compumotor 6K series includes the following: • • • • MotionPanel also can communicate with any of the following Compumotor devices by serial connection only. -
Page 24: Setting Up A 6K Network
Chapter 2: Getting Started with MotionPanel Setting up a 6K Network Setting up a 6K You can enable your MotionPanel to communicate with a Compumotor 6K controller via Ethernet or serial connec- Network tion. This section explains how to create both types of connections. -
Page 25: Figure 2-3: Connecting Power To Motionpanel And The Controller
Chapter 2: Getting Started with MotionPanel Setting up a 6K Network 3. Connect power (24 VDC) to the MotionPanel and the controller, as shown in Figure 2-3. Figure 2-3: Connecting Power to MotionPanel and the Controller Compumotor 6K controllers are factory-configured to communicate through their serial ports. -
Page 26: Figure 2-4: Selecting The 6K Controller
Chapter 2: Getting Started with MotionPanel Setting up a 6K Network 4. On the Product tab, select the 6K controller that you will use, as shown in Figure 2-4. Figure 2-4: Selecting the 6K Controller Note The default port setting for the development PC is COM1. -
Page 27: Figure 2-6: Ntfen1 Commands
Chapter 2: Getting Started with MotionPanel Setting up a 6K Network 7. Type the following commands in the Terminal1 screen, as shown in Figure 2-6. Press Enter after each command. NTFEN1 NTADDR 192,168,10,30 NTMASK 255,255,255,0 Figure 2-6: NTFEN1 Commands 8. Type TNT in the Terminal1 screen, as shown in Figure 2-7, and then press Enter. -
Page 28: Figure 2-8: Turning On Motionpanel
Chapter 2: Getting Started with MotionPanel Setting up a 6K Network 11. Turn on the MotionPanel, as shown in Figure 2-8. Figure 2-8: Turning On MotionPanel The MotionPanel Main Menu will appear, as shown in Figure 2-9. Figure 2-9: MotionPanel Main Menu You can now run the MotionPanel Interact applica- tion. -
Page 29: Ethernet Settings In Motionpanel
Chapter 2: Getting Started with MotionPanel Setting up a 6K Network Ethernet settings in MotionPanel Ethernet settings in MotionPanel are factory-configured. You can verify them in the MachineShop Shell. To verify MotionPanel’s Ethernet settings, complete the following steps: 1. Connect a keyboard to the MotionPanel. 2. -
Page 30: Figure 2-12: Tcp/Ip Network Setup Menu
Chapter 2: Getting Started with MotionPanel Setting up a 6K Network 4. On the TCP/IP Setup menu, select NET SETUP. The TCP/IP Network Setup menu will appear, as shown in Figure 2-12. Figure 2-12: TCP/IP Network Setup Menu 5. On the Network Setup menu, select NET 1. The NET 1 submenu will appear, as shown in Figure 2-13. - Page 31 Chapter 2: Getting Started with MotionPanel Setting up a 6K Network 6. Select the button for each of the settings listed in the left column below, and verify that the settings match those shown in the right column. Note You must select the IFACE TYPE setting first in order to activate the other setup buttons.
-
Page 32: Cable Diagrams
Chapter 2: Getting Started with MotionPanel Setting up a 6K Network Cable diagrams If you must construct an Ethernet cable for your 6K network, refer to the diagrams in Figure 2-14 . Figure 2-14: Ethernet Cable Diagrams Setting up Serial To set up serial communication between MotionPanel and a 6K controller, you must complete the following steps: Communication... -
Page 33: Connecting Motionpanel And A 6K Controller
Chapter 2: Getting Started with MotionPanel Setting up a 6K Network Connecting MotionPanel and a 6K controller To connect MotionPanel and a 6K controller via serial cable, complete the following steps: 1. Connect power (24 VDC) to the MotionPanel and the controller, as shown in Figure 2-15. -
Page 34: Figure 2-16: Machineshop Settings Submenu
Chapter 2: Getting Started with MotionPanel Setting up a 6K Network Figure 2-16: MachineShop Settings Submenu 3. On the Settings submenu, select TCP/IP. The TCP/IP Setup menu will appear, as shown in Figure 2-17. Figure 2-17: TCP/IP Setup Menu 4. On the TCP/IP Setup menu, select NET SETUP. The TCP/IP Network Setup menu will appear, as shown in Figure 2-18 on page 24. -
Page 35: Figure 2-18: Tcp/Ip Network Setup Menu
Chapter 2: Getting Started with MotionPanel Setting up a 6K Network Figure 2-18: TCP/IP Network Setup Menu 5. On the Network Setup menu, select NET 2. The NET 2 submenu will appear, as shown in Figure 2-19. Figure 2-19: NET 2 Submenu 6. - Page 36 Chapter 2: Getting Started with MotionPanel Setting up a 6K Network After you have entered each setting, select NET 2 to return to the NET 2 submenu, and select another button to enter a new setting. 7. When you have finished entering the network settings, select Back to return to the TCP/IP Setup Menu and Back again to return to the Shell Main Menu.
-
Page 37: Figure 2-20: Selecting The 6K Controller
Chapter 2: Getting Started with MotionPanel Setting up a 6K Network Figure 2-20: Selecting the 6K Controller Note The default port setting for the development PC is COM1. If you wish, you can confirm this by selecting the Port tab. 5. -
Page 38: Configuring The Cmot Driver For Serial Communication
Chapter 2: Getting Started with MotionPanel Setting up a 6K Network Figure 2-22: NTFEN0 Commands Configuring the CMOT driver for serial communication To configure the CMOT driver for serial communica- tion, complete the following steps: 1. On your development PC, launch MachineShop for MotionPanel from the shortcut on your Windows desktop. -
Page 39: Figure 2-24: Interact Icon
Chapter 2: Getting Started with MotionPanel Setting up a 6K Network 4. Select the Interact icon in the middle of the Machine- Shop toolbar, as shown in Figure 2-24. Figure 2-24: Interact Icon Interact will open the MotionPanel application, and the Application browser will appear, as shown in Figure 2-25. -
Page 40: Cable Diagrams
Chapter 2: Getting Started with MotionPanel Setting up a 6K Network Figure 2-27: CMOT Driver Serial Connection Click OK to accept your new setting, and Exit Interact. You can now run the MotionPanel application. Cable diagrams If you must create a serial cable to connect to the Motion- Panel, refer to the diagrams in Figure 2-28. - Page 41 Chapter 2: Getting Started with MotionPanel Setting up a 6K Network MotionPanel User Guide...
- Page 42 C h a p t e r 3 M a c h i n e S h o p f o r M o t i o n P a n e l The MotionPanel workstation comes with a copy of MachineShop for MotionPanel software, distributed on the MachineShop for MotionPanel Installation CD (KA-83233).
-
Page 43: Machineshop For Motionpanel
Chapter 3: MachineShop for MotionPanel Introducing MachineShop for MotionPanel Introducing You can customize your Interact application screens using a specially designed version of CTC’s MachineShop HMI MachineShop software called MachineShop for MotionPanel. for MotionPanel Important Although the Interact runtime screens on Motion- Panel’s CF card are pre-configured, program flow operations and data input functions are applica- tion-specific. -
Page 44: Figure 3-1: Machineshop Select Operation
Chapter 3: MachineShop for MotionPanel Introducing MachineShop for MotionPanel 3. In the Run dialog box, next to the word “Open,” type D:\Setup.EXE, and click OK. (If necessary, substitute your CD-ROM drive letter for D.) The Setup Welcome dialog box will appear. 4. - Page 45 Chapter 3: MachineShop for MotionPanel Introducing MachineShop for MotionPanel • FlashBack Utility • Adobe Acrobat Reader • Documentation Documentation includes online help for Machine- Shop and Interact; the Interact Online Tutorial; and PDF files for the MotionPanel User Guide, Power- Station Model P1 User Guide, MachineShop Getting Started Guide, and the MachineShop Runtime Guide.
-
Page 46: Using The Flashback Utility
Chapter 3: MachineShop for MotionPanel Using the FlashBack Utility Using the MotionPanel uses a Compact Flash card as its startup drive. This card contains the MS-DOS 6.22 operating FlashBack system, the MachineShop Shell, and all of MotionPanel’s Utility pre-configured application screens. If any of these files is deleted or becomes corrupted, and you wish to replace it, or if you want to create a new, bootable CF card, you can do so easily by using the FlashBack utility. -
Page 47: Figure 3-2: Flashback Utility Dialog Box
Chapter 3: MachineShop for MotionPanel Using the FlashBack Utility 5. Select the Run Flashback Utility button. The FlashBack Utility dialog box will appear as shown in Figure 3-2. Figure 3-2: FlashBack Utility Dialog Box 6. Click the Help button to find complete, online instructions for operating the FlashBack utility. -
Page 48: Motionpanel Screens
C h a p t e r 4 M o t i o n P a n e l S c r e e n s MotionPanel is a runtime system. The MachineShop Shell and a complete Interact application, created with Interact’s Panel Toolkit Module (PTM), are factory-installed on a Compact Flash (CF) card shipped with all MotionPanel workstations. -
Page 49: Screen Topology
Chapter 4: MotionPanel Screens Screen Topology Screen Table 4-1, below and on page 39, illustrates the overall structure of the Interact runtime screens in MotionPanel. Topology Subsequent sections describe the individual screens and their functions. Main Menu Setup/Control Driveen Homlimstat Jogax1 Jogax2 Program... - Page 50 Chapter 4: MotionPanel Screens Screen Topology Main Menu I/O Information (continued) Brick I/O Status Expanio Diagnostics Terminal Entry Drvstat Load Panel A list of all of the preconfigured screens that can be used to call up a screen Additional Screens Exit Tlarge Table 4-1: Screen Topology...
-
Page 51: Figure 4-1: Motionpanel Main Menu
Chapter 4: MotionPanel Screens Screen Descriptions Screen This section provides brief descriptions of each of the Interact runtime screens used by MotionPanel. The Descriptions Compumotor 6K/6000 (CMOT) Device Driver commands supported by each screen appear in paren- theses after each description. For detailed definitions of these commands, see the Compumotor 6K Series Command Reference. -
Page 52: Figure 4-2: Navigation Buttons
Chapter 4: MotionPanel Screens Screen Descriptions • Task Information — These screens display impor- tant task and error information • Axis Information — These screens provide current information about motion parameters. • I/O Information — These screens provide current expansion I/O information. •... -
Page 53: Figure 4-4: Driveen
Chapter 4: MotionPanel Screens Screen Descriptions To move to another category of screens, select Main. You will return to the Main Menu. Setup/Control These screens enable you to set up or download programs and conduct terminal operations. They also provide infor- mation about communication between Interact and the CMOT driver and enable you to enable or disable drives. -
Page 54: Figure 4-5: Homlimstat
Chapter 4: MotionPanel Screens Screen Descriptions Homlimstat This screen provides Home limit status information. It also allows you to test Home by selecting a negative or a positive Home. (TAS 5, 15, 16) Figure 4-5: Homlimstat Jogax1 This screen provides jogging capabilities for Axes 1 through 4. -
Page 55: Figure 4-7: Jogax2
Chapter 4: MotionPanel Screens Screen Descriptions Jogax2 This screen provides jogging capabilities for Axes 5 through 8. Figure 4-7: Jogax2 Program This screen enables you to download programs (*.prg) from MotionPanel. Also available on this screen are options to reset the 6K controller and kill any program before downloading. -
Page 56: Figure 4-9: Paucon
Chapter 4: MotionPanel Screens Screen Descriptions Paucon You can pause (or continue) each task shown in this screen by selecting the appropriate button. The Supervi- sory Task button enables you to pause or continue all tasks at once. Figure 4-9: Paucon Kill You can use this screen to kill each individual task, the supervisory task, or all tasks simultaneously. -
Page 57: Figure 4-11: Comstatus
Chapter 4: MotionPanel Screens Screen Descriptions Comstatus This screen shows the status of communication between Interact and the CMOT driver: Online or Offline. It also displays error information concerning communication between Interact and the driver. Figure 4-11: Comstatus Task Information These screens display important task and error informa- tion. -
Page 58: Pgrstate
Chapter 4: MotionPanel Screens Screen Descriptions Pgrstate This screen displays the most important program status bits. (TSS bits 12, 13, 14, and 15) Figure 4-13: Pgrstate Tasker This screen provides formatted error status information related to multi-tasking. (TER bits 6, 7, 8, 16) Figure 4-14: Tasker MotionPanel User Guide... -
Page 59: Transcmd
Chapter 4: MotionPanel Screens Screen Descriptions Transcmd This screen reports the program execution status of each task. (TEX) Figure 4-15: Transcmd Axis Information These screens provide current information about motion parameters for axes. Motpar This screen displays the motion parameters shown. (TPC, TPE) Figure 4-16: Motpar MotionPanel User Guide... -
Page 60: Motpar2
Chapter 4: MotionPanel Screens Screen Descriptions Motpar2 This screen displays the motion parameters shown. (TPER, TVEL, TVELA) Figure 4-17: Motpar2 Motaxis This screen displays the motion axis status bits for each axis. (TAS 1, 2, 3, 4) Figure 4-18: Motaxis MotionPanel User Guide... -
Page 61: Cotrlmod
Chapter 4: MotionPanel Screens Screen Descriptions Servost This screen provides the servo-related status bits for each axis. (TAS 23, 24, 25) Figure 4-19: Servost Cotrlmod This screen groups the controller mode status bits for each axis. (TAS 6, 7, 8, 9) Figure 4-20: Cotrlmod MotionPanel User Guide... -
Page 62: Advmot
Chapter 4: MotionPanel Screens Screen Descriptions Advmot This screen functionally groups the most important following parameters for each axis. (TPMAS, TVMAS) Figure 4-21: Advmot Advmot2 This screen also groups important following parameters. (TPSLV, TNMCY) Figure 4-22: Advmot2 MotionPanel User Guide... -
Page 63: Follsta
Chapter 4: MotionPanel Screens Screen Descriptions Follsta This screen allows you to monitor the most important following status commands for each axis. (TFS, 4, 5, 6) Figure 4-23: Follsta Advfolst This screen enables you to monitor advanced following status information for each axis. (TFS 9, 10, 13, 24) Figure 4-24: Advfolst MotionPanel User Guide... -
Page 64: I/O Information
Chapter 4: MotionPanel Screens Screen Descriptions I/O Information These screens provide current I/O information for users. Onbdlim This screen provides the current status of Home limit, the positive end of travel limit, and the negative end of travel limit for each axis. (TLIM) Figure 4-25: Onbdlim Onbdout This screen provides the current status of onboard outputs. -
Page 65: Trigin
Chapter 4: MotionPanel Screens Screen Descriptions Trigin This screen provides onboard trigger input status. (TIN) Figure 4-27: Trigin Brickmenu This screen summarizes information about the I/O bricks connected to the controller. Up to eight bricks can be connected to each 6K controller. Four expansion configu- rations (sims) can be included in each brick: analog input, analog output, discrete input, and discrete output. -
Page 66: Brick I/O Status
Chapter 4: MotionPanel Screens Screen Descriptions Brick I/O Status This group of eight screens provides specific information about the sims in each I/O brick. Figure 4-29: Brick I/O Status Expanio This screen enables you to view expansion I/O informa- tion available when you take advantage of the module or external/I/O capabilities of a 6K controller. -
Page 67: Diagnostics
Chapter 4: MotionPanel Screens Screen Descriptions Diagnostics These screens provide diagnostic information about 6K controller operations. Terminal This screen allows you to use buttons to execute Compu- motor terminal commands. Figure 4-31: Terminal Entry The Entry screen allows you to enter any terminal support command. -
Page 68: Drvstat
Chapter 4: MotionPanel Screens Screen Descriptions Drvstat This screen displays the drive status of each axis. (TAS 13, 14, 15, and TASX .5) Figure 4-33: Drvstat Load Panel If you select the Load Panel button on the Main Menu, MotionPanel will display a list of all of its preconfigured screens. -
Page 69: Additional Screens
Chapter 4: MotionPanel Screens Screen Descriptions Additional Screens Exit From this screen you can exit Interact and return to the MachineShop Shell. Figure 4-35: Exit Tlarge This screen provides a “blow-up” of displays that read back information from the 6K controller. Figure 4-36: Tlarge MotionPanel User Guide... -
Page 70: Index
Index Index Numerics 6K controller Interact configuring for serial communica- application installed in Motion- tion 25–26 Panel 1, 31, 37 controllers supported by Motion- downloading applications 7 Panel 12 Online Tutorial 4, 34 enabling the Ethernet port 14–17 Panel Toolkit Module (PTM) 1, 5, 7, 32, 37 screens in MotionPanel (See Mo- tionPanel screens) - Page 71 Index screen topology 38–39 Pause/Continue Tasks 46 serial cable diagrams 29 Pgrstate 48 setting up a serial network 21–29 Program 45 setting up an Ethernet network Servost 51 13–21 Setup/Control 43–47 User Guide 3, 34 Systat 47 MotionPanel screens Task Information 47–49 Additional Screens 59 Tasker 48 Advfolst 53...
Need help?
Do you have a question about the CTC Parker Automation MotionPanel and is the answer not in the manual?
Questions and answers