Table of Contents
Advertisement
Available languages
Available languages
Quick Links
Slush maker
EN
Instruction manual
Slushmaker
NL
Gebruikshandleiding
Machine à granité
FR
Mode d'emploi
Model • Model • Modèle • Modell • Modello • Modelo:
UA044_UA045_UA046_ML_A5_v1_20240112.indb 1
UA044_UA045_UA046_ML_A5_v1_20240112.indb 1
2
15
28
UA044 / UA045 / UA046
Slush maker
Instruction manual
Slush-Maschine
DE
Bedienungsanleitung
Macchina per slush
IT
Manuale di istruzioni
Granizadora
ES
Manual de instrucciones
41
54
67
2024/1/12 10:10
2024/1/12 10:10
Advertisement
Table of Contents

Related Manuals for Polar Electro UA044


Summary of Contents for Polar Electro UA044
- Page 1 Macchina per slush Gebruikshandleiding Manuale di istruzioni Machine à granité Granizadora Mode d’emploi Manual de instrucciones Model • Model • Modèle • Modell • Modello • Modelo: UA044 / UA045 / UA046 UA044_UA045_UA046_ML_A5_v1_20240112.indb 1 UA044_UA045_UA046_ML_A5_v1_20240112.indb 1 2024/1/12 10:10 2024/1/12 10:10...
-
Page 2: Safety Instructions
Safety instructions The appliance must only be used by trained personnel in accordance with these instructions. • Position on a flat, stable surface. • Install the appliance where it can be overseen by trained personnel. • Always carry, store and handle the appliance in a vertical position. -
Page 3: Product Description
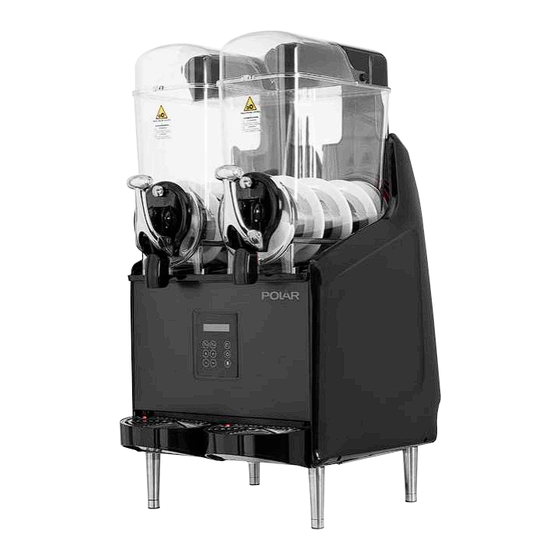
• Warning: Do not use electrical appliances inside the food storage compartments of the appliance. Product Description UA044 - Polar slush maker - 1 x 12Ltr tank UA045 - Polar slush maker - 2 x 12Ltr tank UA046 - Polar slush maker - 3 x 12Ltr tank UA044_UA045_UA046_ML_A5_v1_20240112.indb 3... -
Page 4: Pack Contents
16°C and 32°C. • Drip Tray: • Adequate clearance is kept around UA044 x 1/UA045 x 2/UA046 x 3 the appliance to enable personnel to • Seal of auger: operate without constraints. UA044 x 1/UA045 x 2/UA046 x 3 •... -
Page 5: Installing The Handle
Installing the handle Fig.35 1. Fix the ‘A’ position of the handle to the ‘B’ position of the bowl. 2. Lift the handle up then pull it down, ensuring it is clicked onto the ‘C’ positions of the bowl. 3. Tighten the screw on the ‘E’ position. -
Page 6: Operation
Operation Warning: There are moving parts inside the bowl, which may cause injuries. Therefore, ensure to turn off and unplug the appliance Before the first time use, ensure to: before carrying out any operations inside • Let a specialized technician check the the bowl. - Page 7 To serve with cold drinks • If desired to perform a thorough cleaning or sanitization to the machine, please ensure the 1. Press the mode button to select the juice machine is powered off. For details, please see mode. The icon ‘COOL’ will be shown. Section “Cleaning, Care &...
-
Page 8: Cleaning, Care And Maintenance
To use the defrost function To turn off the appliance After use: Press the on/off switch 1. Press the mode button until the icon ‘DEF’ • to turn is shown. The defrost mode is now activated. off the appliance. • In case of freezing, switch off and unplug the appliance. -
Page 9: Removing The Lid
Removing the lid 2. Hold the handle and outlet, then lift upward. 1. Remove the lock and lift the front lid. 2. Push forward a little to get the whole lid out. 3. Remove the stopper and clean with warm water. -
Page 10: Removing The Bowl
Removing the bowl 4. Take out the auger then remove the auger seal. Removal of each bowl is fundamental to ensure thorough cleaning and sanitization. 1. Remove the lid and handle seat as instructed previously. 2. Raise the front part of the bowl to release, then remove the bowl from its seat by pushing and tapping lightly on the rear. - Page 11 Re-assembly 3. Apply the bowl seal, lubricating the entire surface as indicated by the arrow. All the removed parts must be re-located in place. Some components must be adequately lubricated to ensure they can work efficiently. 1. Apply the seal (A) on the auger as shown. 4.
- Page 12 6. Install the handle as instructed previously. 7. Fixing the lid: Align the notch of the lid with the edge of the bowl, put it down and press backward. Rinsing cycle Caution: After re-assembly and before re-starting the appliance for serving, make sure to carry out the rinsing cycle.
-
Page 13: Troubleshooting
Technical Specifications Note: Due to our continuing program of research and development, the specifications herein may be subject to change without notice. Power Current Capacity Model Voltage Bowls Refrigerant (litres) UA044 220-240V~ 435W 2.23A R290 50Hz UA045 765W 3.5A R290 UA046 1040W 4.9A... -
Page 14: Electrical Wiring
Electrical Wiring POLAR appliances are supplied with a 3 pin BS1363 plug and lead. The plug is to be connected to a suitable mains socket. POLAR appliances are wired as follows: • Live wire (coloured brown) to terminal marked L •... - Page 15 Veiligheidsinstructies Het apparaat mag alleen worden gebruikt door opgeleid personeel in overeenstemming met deze instructies. • Plaats het product op een vlakke en stabiele ondergrond. • Installeer het apparaat waar het door opgeleid personeel in het oog kan worden gehouden. •...
- Page 16 • Waarschuwing: Gebruik geen elektrische apparaten in de bewaarruimten van het apparaat. Productomschrijving UA044 - Polar slushmaker - 1 x 12 l tank UA045 - Polar slushmaker - 2 x 12 l tank UA046 - Polar slushmaker - 3 x 12 l tank UA044_UA045_UA046_ML_A5_v1_20240112.indb 16...
- Page 17 • Lekbak: • Het apparaat mag alleen werken op UA044 x 1/UA045 x 2/UA046 x 3 plaatsen met een omgevingstemperatuur • Afdichting van vijzel: tussen 16°C en 32°C. UA044 x 1/UA045 x 2/UA046 x 3 •...
- Page 18 De handgreep installeren Afb. 35 1. Bevestig de ‘A’-positie van de handgreep op de ‘B’-positie van de kom. 2. Til de handgreep op en trek deze dan omlaag. Controleer hierbij of deze is vastgeklikt op de ‘C’- posities van de kom. 3.
- Page 19 Bediening 5. Sluit het deksel. (Probeer de machine nooit te starten terwijl het deksel open is.) Vóór het eerste gebruik moet u zorgen voor het volgende: Waarschuwing: Er zijn bewegende onderdelen in de kom die verwondingen • Laat een gespecialiseerde technicus de correcte werking van de functies van kunnen veroorzaken.
- Page 20 reinigingsproces te ondersteunen. Vul de Opmerking: Onder de slushmodus is het bijbehorende kom met warm en schoon water temperatuurbereik -12°C ~ -2°C. Wanneer (niet hoger dan het maximale niveau dat op de de slush te hard is, kan deze blijven kom staat aangegeven).
-
Page 21: Reiniging, Zorg & Onderhoud
2. In de STOP-modus stopt de kom met roeren 3. Schakel het apparaat uit en trek de stekker uit en koelen. het stopcontact. De ontdooiingsfunctie gebruiken Het apparaat uitschakelen • Na gebruik: Druk op de aan/uit-schakelaar 1. Druk op de modusknop tot het pictogram ‘DEF’... - Page 22 De handgreephouder verwijderen zijdelingse beschermingen worden verwijderd. Til, indien nodig, het bovenste deel op om 1. Verwijder de schroef aan de bovenzijde. het te verwijderen. Zodra u klaar bent met de reiniging, plaatst u het onderdeel terug op zijn plaats. Het deksel verwijderen 1.
- Page 23 4. Reinig de handgreephouder en andere 3. Verwijder de afdichting van de kom aan de reserveonderdelen met warm water. achterkant. Afdichting kom 4. Verwijder de vijzel en verwijder dan de afdichting van de vijzel. De kom verwijderen Het verwijderen van de kom is fundamenteel om een grondige reiniging en ontsmetting te garanderen.
- Page 24 3. Breng de afdichting op de kom aan en smeer het Belangrijk: De ontsmettingsoplossing gehele oppervlak zoals aangegeven door de pijl. moet voldoen aan de regelgevingen die van kracht zijn op het ogenblik waarop het apparaat wordt gebruikt. Opnieuw monteren Alle verwijderde onderdelen moeten opnieuw op hun plaats worden teruggezet.
- Page 25 6. Installeer de handgreep installeren zoals in de voorgaande instructies. 7. Het deksel vastmaken: Lijn de inkeping van het deksel uit op de rand van de kom, zet deze neer en duw naar achter. Spoelcyclus Opgelet: Na het opnieuw monteren en vóór het opnieuw starten van het apparaat voor het opdienen, moet u de spoelcyclus uitvoeren.
-
Page 26: Technische Specificaties
Opmerking: Als gevolg van ons voortdurende programma van onderzoek en ontwikkeling, kunnen de specificaties hierin zonder voorafgaande kennisgeving worden gewijzigd. Vermogen Stroom Capaciteit Model Spanning Kommen Koelmiddel (liters) UA044 220-240V~ 435 W 2,23 A R290 50Hz UA045 765 W 3,5 A R290... -
Page 27: Elektrische Bedrading
Elektrische bedrading Men dient de stekker op een geschikt stopcontact aan te sluiten. POLAR-apparaten worden als volgt bedraad: • Stroomkabel (bruin) naar de aansluitklem gemarkeerd met L • Neutraalkabel (blauw) naar de aansluitklem gemarkeerd met N • Aardekabel (groen/geel) naar de aansluitklem gemarkeerd met E Deze apparaten moeten geaard zijn. - Page 28 Consignes de sécurité L'appareil doit être utilisé uniquement par du personnel qualifié, conformément à ces instructions. • Placez l’appareil sur une surface plane, stable. • Installez l'appareil dans un endroit où il peut être surveillé par du personnel qualifié. • Transportez, entreposez et manipulez toujours l’appareil en position verticale.
-
Page 29: Description Du Produit
Description du produit UA044 - Machine à granité Polar - 1 réservoir de 12 litres UA045 - Machine à granité Polar - 2 réservoirs de 12 litres UA046 - Machine à granité Polar - 3 réservoirs de 12 litres UA044_UA045_UA046_ML_A5_v1_20240112.indb 29... -
Page 30: Contenu De L'emballage
Introduction Installation Nous vous invitons à consacrer quelques instants à lire attentivement de ce mode d’emploi. L’entretien Le congélateur n’est pas conçu pour être et l’utilisation appropriés de cette machine vous utilisé dans les fourgons ou les remorques, permettront de tirer le meilleur de votre produit les cantines ambulantes ou autres véhicules POLAR. -
Page 31: Installation De La Poignée
Installation de la poignée Fig.35 1. Fixez la position « A » de la poignée à la position « B » du bol. 2. Soulevez la poignée puis tirez- la vers le bas, en veillant à ce qu'elle s'enclenche sur les positions «... - Page 32 Fonctionnement 5. Fermez le couvercle. (N'essayez jamais de mettre la machine en marche si le couvercle est ouvert). Avant la première utilisation, il convient de : • laisser un technicien spécialisé vérifier Avertissement : Il y a des pièces mobiles à le bon fonctionnement de l'appareil ;...
- Page 33 2. Le bol arrête la réfrigération, mais la tarière Remarque : En mode Granité, la plage de continue de tourner. température est comprise entre -12 °C Remarques : et -2 °C. Lorsque le granité est trop dur, • Dans ce mode, aucun gaz réfrigérant ne circule il peut rester collé...
-
Page 34: Nettoyage, Entretien Et Maintenance
Pour vider le bol 1. Appuyez sur le bouton du mode pour sélectionner le mode STOP pour le bol Remarque : correspondant. L'icône « STOP » s'affiche. • Le bol doit être nettoyé et désinfecté au moins une fois par jour et plus fréquemment en fonction des produits utilisés, et dans tous les cas, conformément aux règles d’hygiène en vigueur. -
Page 35: Retrait Du Couvercle
• NE lavez PAS les pièces dans un lave-vaisselle. 4. Laissez agir pendant 30 minutes. • NE séchez PAS les pièces dans un four 5. Essuyez la partie inférieure deux fois ou plus conventionnel ou à micro-ondes. avec une éponge propre imbibée d'eau propre. •... - Page 36 4. Nettoyez l'assise de la poignée et les autres 3. Retirez le joint du bol qui se trouve à l'arrière. pièces détachées à l'eau chaude. Joint du bol 4. Retirez la tarière puis le joint de la tarière. Retrait du bol Il est essentiel de retirer chaque bol pour pouvoir le nettoyer et le désinfecter soigneusement.
- Page 37 Ré-assemblage 3. Installez le joint du bol en lubrifiant toute la surface comme indiqué par la flèche. Toutes les pièces retirées doivent être remises en place. Certains composants doivent être suffisamment lubrifiés pour fonctionner efficacement. 1. Installez le joint (A) sur la tarière comme indiqué.
- Page 38 6. Installez la poignée comme indiqué précédemment. 7. Fixation du couvercle : Alignez l'encoche du couvercle avec le bord du bol, posez-le et appuyez vers l'arrière. Cycle de rinçage Attention : Après le ré-assemblage et avant de redémarrer l'appareil pour le service, assurez-vous d'effectuer le cycle de rinçage.
-
Page 39: Dépannage
Remarque : en raison de notre programme continu de recherche et de développement, les spécifications du présent document peuvent être modifiées sans préavis. Puissance Courant Capacité Modèle Tension Bols Réfrigérant (litres) UA044 220-240 V~ 435 W 2,23 A R290 50 Hz UA045 765 W 3,5 A R290... -
Page 40: Raccordement Électrique
Raccordement électrique La fiche doit être branchée à la prise secteur qui convient. Les appareils POLAR sont câblés comme suit : • Fil conducteur (brun) à la borne marquée L • Fil neutre (bleu) à la borne marquée N • Fil de terre (vert/jaune) à... - Page 41 Sicherheitshinweise Das Gerät darf nur von geschultem Personal in Übereinstimmung mit dieser Anleitung verwendet werden. • Auf eine flache, stabile Fläche stellen. • Stellen Sie das Gerät so auf, dass es von geschultem Personal beaufsichtigt werden kann. • Gerät immer in vertikaler Position tragen, lagern und handhaben. •...
- Page 42 Ablagefächer des Geräts, sofern sie nicht der Typ. Produktbeschreibung UA044 - Polar Slush-Maschine - 1 x 12 L Behälter UA045 - Polar Slush-Maschine - 2 x 12 L Behälter UA046 - Polar Slush-Maschine - 3 x 12 L Behälter UA044_UA045_UA046_ML_A5_v1_20240112.indb 42...
-
Page 43: Montage
Polar Slush-Maschine Geräts. • Abtropfschale: • Das Gerät darf nur an Orten mit einer UA044 x 1/UA045 x 2/UA046 x 3 Umgebungstemperatur von 16 °C - 32 °C • Dichtung der Schnecke: betrieben werden. UA044 x 1/UA045 x 2/UA046 x 3 •... -
Page 44: Anbringen Des Griffs
Anbringen des Griffs Abb. 35 1. Befestigen Sie die Position „A“ des Griffs an der Position „B“ des Behälters. 2. Heben Sie den Griff an und ziehen Sie ihn nach unten, sodass er in der Position „C“ des Behälters einrastet. 3. -
Page 45: Bedienung
Bedienung 5. Schließen Sie den Deckel. (Versuchen Sie niemals, das Gerät zu starten, wenn der Deckel offen ist). Stellen Sie vor der ersten Inbetriebnahme Folgendes sicher: Warnung: Im Behälter befinden sich • Lassen Sie das Gerät von einem spezialisierten Techniker auf seine bewegliche Teile, die zu Verletzungen führen können. - Page 46 Hinweise: Hinweis: Im Slush-Modus liegt der • In diesem Modus fließt kein Kältemittel-Gas Temperaturbereich zwischen -12 °C ein, aber die Schnecke dreht sich weiter, um und -2 °C. Wenn der Slush zu hart ist, die Reinigung zu unterstützen. Bitte füllen kann er am Auslass festkleben und nicht Sie warmes und sauberes Wasser in den reibungslos auslaufen.
-
Page 47: Reinigung, Pflege Und Wartung
1. Vor der Reinigung muss der Behälter geleert werden. 2. Stellen Sie den Behälter auf den einfachen Reinigungsmodus ein. Lassen Sie dann den gesamten Inhalt des Behälters in ein 2. Im STOP-Modus hört die Schüssel auf zu geeignetes Gefäß abfließen. rühren und zu kühlen. - Page 48 der vorgeschriebenen Hygienestandards zu 5. Wischen Sie den unteren Teil zweimal oder gewährleisten. öfter mit einem sauberen, mit klarem Wasser • Stellen Sie nach Abschluss aller Reinigungs- getränkten Schwamm ab. und Wartungsarbeiten, dass alle entfernten 6. Lassen Sie den Deckel gut trocknen. oder geöffneten Schutzabdeckungen wieder Entfernen des Griffsitzes angebracht und ordnungsgemäß...
- Page 49 4. Reinigen Sie den Griffsitz und andere 3. Nehmen Sie die Dichtung der Schüssel auf der Ersatzteile mit warmem Wasser. Rückseite heraus. Behälterdichtung 4. Nehmen Sie die Schnecke heraus und entfernen Sie die Schneckendichtung. Abnehmen des Behälters Um eine gründliche Reinigung und Desinfizierung sicherzustellen, muss der Behälter abgenommen werden.
- Page 50 3. Bringen Sie die Behälterdichtung an und Wichtig: Die Desinfektionslösung muss schmieren Sie dabei die gesamte Oberfläche, den zum Zeitpunkt der Verwendung wie durch die Pfeile angezeigt. des Geräts geltenden Vorschriften entsprechen. Wiederzusammenbau Alle entfernten Teile müssen wieder an ihren Platz gebracht werden.
-
Page 51: Reinigen Des Filters
6. Bringen Sie den Griff wie zuvor beschrieben an. 7. Befestigen des Deckels: Richten Sie die Aussparung des Deckels am Rand des Behälters aus, setzen Sie ihn auf und drücken Sie ihn nach hinten. Spülvorgang Achtung: Führen Sie nach dem Wiederzusammenbau und vor der Wiederinbetriebnahme des Geräts den Spülvorgang durch. -
Page 52: Störungssuche
Hinweis: Aufgrund unseres kontinuierlichen Forschungs- und Entwicklungsprogramms können sich die hier aufgeführten Spezifikationen ohne vorherige Ankündigung ändern. Leistung Stromstärke Fassungsvermögen Modell Spannung Behälter Kühlmittel (Liter) UA044 220-240 V~ 435 W 2,23 A R290 50 Hz UA045 765 W 3,5 A R290... - Page 53 Elektroanschlüsse Der Stecker muss in eine geeignete Steckdose gesteckt werden. Verdrahtung von POLAR-Geräten: • Stromführender Leiter (braun) an Klemme L • Neutralleiter (blau) an Klemme N • Erdleiter (grün/gelb) an Klemme E Dieses Gerät muss geerdet sein. Bei Fragen wenden Sie sich bitte an einen qualifizierten Elektriker. Elektroisolierpunkte dürfen nicht blockiert werden.
- Page 54 Istruzioni per la sicurezza Questo apparecchio deve essere utilizzato solo da persone competenti, rispettando le presenti istruzioni. • Posizionare su una superficie piana e stabile. • Installare l'apparecchio dove possa essere supervisionato da personale specializzato. • Trasportare, riporre e maneggiare l'apparecchio sempre in posizione verticale.
-
Page 55: Descrizione Del Prodotto
Descrizione del prodotto UA044 - Macchina per slush Polar - 1 serbatoio da 12 litri UA045 - Macchina per slush Polar - 2 serbatoi da 12 litri UA046 - Macchina per slush Polar - 3 serbatoi da 12 litri UA044_UA045_UA046_ML_A5_v1_20240112.indb 55... -
Page 56: Contenuto Della Confezione
Intorno all'apparecchio deve rimanere • Vassoio raccogligocce: uno spazio adeguato per consentire al UA044 x 1 / UA045 x 2 / UA046 x 3 personale di agire senza difficoltà. • Guarnizione della coclea: UA044 x 1 / UA045 x 2 / UA046 x 3 Installazione del vassoio •... -
Page 57: Pannello Di Controllo
Installazione della Fig. 35 maniglia 1. Fissare il punto "A" della maniglia nel punto "B" del contenitore. 2. Sollevare la maniglia e tirarla verso il basso, verificando che scatti nelle posizioni "C" del contenitore. 3. Serrare la vite nella posizione "E". Avvertenza: installare i componenti correttamente, come mostrato;... -
Page 58: Funzionamento
Funzionamento Avvertenza: il contenitore contiene parti in movimento che possono causare lesioni. È quindi importante spegnere e scollegare Prima del primo utilizzo: l'apparecchio prima di eseguire qualsiasi • Incaricare un tecnico specializzato di operazione all'interno del contenitore. verificare il corretto funzionamento dell'apparecchio. - Page 59 Note: Nota: in modalità slush la temperatura è • In questa modalità il gas refrigerante non compresa tra -12 °C e -2 °C. Se lo slush è circola, ma la coclea rimane in funzione per troppo duro potrebbe addensarsi sull'uscita e facilitare la pulizia.
-
Page 60: Pulizia, Cura E Manutenzione
2. In modalità STOP il contenitore interrompe la 2. Impostare il contenitore sulla modalità di pulizia miscelazione e la refrigerazione. semplice. Erogare quindi tutto il contenuto del contenitore e riporlo in un recipiente adeguato. Utilizzo della funzione di sbrinamento 3. Spegnere e scollegare l'apparecchio. 1. -
Page 61: Rimozione Del Coperchio
Rimozione della sede della maniglia protezioni laterali. Se necessario, sollevare la parte superiore per rimuoverla. Al termine della 1. Rimuovere la vite nella parte superiore. pulizia, riposizionarla. Rimozione del coperchio 1. Rimuovere il blocco e sollevare il coperchio anteriore. 2. Premere leggermente in avanti per estrarre il coperchio. - Page 62 4. Pulire la sede della maniglia e gli altri componenti con acqua calda. Guarnizione del contenitore 4. Estrarre la coclea e rimuovere la guarnizione della coclea. Rimozione del contenitore Per garantire l'accuratezza della pulizia e dell'igienizzazione è fondamentale rimuovere ogni contenitore.
- Page 63 Riassemblaggio 3. Applicare la guarnizione del contenitore lubrificando tutta la superficie come indicato dalla freccia. Tutti gli elementi rimossi devono riposizionati. Alcuni componenti devono essere adeguatamente lubrificati affinché funzionino in modo efficiente. 1. Applicare sulla coclea la guarnizione (A) come mostrato.
- Page 64 6. Installare la maniglia come indicato in precedenza. 7. Fissaggio del coperchio: allineare la tacca del coperchio e il bordo del contenitore, posare il coperchio e premere all'indietro. Ciclo di risciacquo Attenzione: dopo il riassemblaggio e prima di riavviare l'apparecchio per il servizio, è importante eseguire il ciclo di risciacquo.
-
Page 65: Risoluzione Dei Problemi
Nota: a seguito delle continue attività di ricerca e sviluppo, le specifiche qui riportate sono soggette a modifiche senza preavviso. Potenza Corrente Capacità Modello Tensione Contenitori Refrigerante (litri) UA044 220-240 V ~ 435 W 2,23 A R290 50 Hz UA045 765 W 3,5 A R290... -
Page 66: Cablaggio Elettrico
Cablaggio elettrico La spina deve essere collegata a una presa di corrente appropriata. Il cablaggio degli apparecchi POLAR è descritto qui di seguito: • Filo sotto tensione (colore marrone) a terminale L • Filo del neutro (colore blu) a terminale N •... - Page 67 Consejos de seguridad El aparato solamente debe ser utilizado por personal formado en conformidad con estas instrucciones. • Colóquela sobre una superficie plana, estable. • Instale el aparato en un lugar en el que pueda ser supervisado por personal formado. •...
-
Page 68: Descripción Del Producto
Descripción del producto UA044 - Granizadora Polar - 1 x depósito de 12 L UA045 - Granizadora Polar - 2 x depósito de 12 L UA046 - Granizadora Polar - 3 x depósito de 12 L UA044_UA045_UA046_ML_A5_v1_20240112.indb 68... -
Page 69: Contenido Del Conjunto
• La ubicación del aparato es plana y • Bandeja de goteo: sólida, y puede soportar su peso. UA044 x 1/UA045 x 2/UA046 x 3 • El aparato solo puede funcionar en • Sello del eje sinfín: lugares con una temperatura ambiente UA044 x 1/UA045 x 2/UA046 x 3 entre 16 °C y 32 °C. -
Page 70: Instalación Del Asa
Instalación del asa Fig. 35 1. Fije la posición ‘A’ del asa en la posición ‘B’ del recipiente. 2. Eleve el asa hacia arriba y, a continuación tire hacia abajo, asegurándose de que hace clic en las posiciones ‘C’ del recipiente. 3. -
Page 71: Selección Del Modo De Funcionamiento
Funcionamiento Advertencia: En el interior del recipiente hay piezas móviles que pueden causar lesiones. Por lo tanto, asegúrese de apagar Antes del primer uso, asegúrese de lo siguiente: y desenchufar el aparato antes de realizar • Permita que un técnico especializado cualquier operación en el interior del compruebe que el aparato funciona recipiente. - Page 72 Notas: Nota: En el modo de granizado, el intervalo • En este modo no entra gas refrigerante, pero el de temperaturas es de -12 °C ~ -2 °C. Si eje sinfín sigue girando para ayudar al proceso el granizado es demasiado duro, podría de limpieza.
-
Page 73: Limpieza, Cuidado Y Mantenimiento
2. En el modo STOP, el recipiente dejará de 3. Apague y desenchufe el aparato. remover y enfriar. Apagar el aparato Para usar la función de descongelación Después del uso: Pulse el interruptor de • 1. Pulse el botón de modo hasta encendido/apagado para apagar el aparato. - Page 74 Extracción de la tapa 2. Sostenga el asa y la salida y, a continuación, tire hacia arriba. 1. Retire el bloqueo y levante la tapa delantera. 2. Presione ligeramente hacia delante para extraer toda la tapa. 3. Extraiga el tope y limpie con agua tibia. Advertencia: •...
- Page 75 Extracción del recipiente 4. Extraiga el eje sinfín y, a continuación, retire el sello del eje sinfín. La extracción de los recipientes es vital para asegurar la limpieza y desinfección completas. 1. Extraiga la tapa y el asiento del asa según lo indicado anteriormente.
- Page 76 Remontaje 3. Aplique el sello del recipiente lubricando toda la superficie según indica la flecha. Todas las piezas extraídas deben volver a instalarse en posición. Algunos componentes deben lubricarse adecuadamente para asegurar su funcionamiento eficiente. 1. Aplique el sello (A) en el eje sinfín según se muestra.
-
Page 77: Limpieza Del Filtro
6. Instale el asa según lo indicado anteriormente. 7. Colocación de la tapa: Alinee la muesca de la tapa con el extremo del recipiente, bájelo y presione hacia atrás. Ciclo de aclarado Precaución: Después de volver a instalar y antes de poner en marcha el aparato para servir, asegúrese de realizar el ciclo de aclarado. -
Page 78: Resolución De Problemas
Nota: Debido a nuestro continuo programa de investigación y desarrollo, las especificaciones aquí expuestas pueden estar sujetas a cambios sin previo aviso. Potencia Corriente Capacidad Modelo Tensión Recipientes Refrigerante (litros) UA044 220-240 V~ 435 W 2,23 A R290 50 Hz UA045 765 W 3,5 A R290... -
Page 79: Cableado Eléctrico
Cableado Eléctrico El enchufe tiene que conectarse a una toma eléctrica adecuada. Los aparatos POLAR tiene los cables siguientes: • Cable cargado (de color marrón) al terminal marcado como L • Cable neutro (de color azul) al terminal marcado como N •... -
Page 80: Declaration Of Conformity
• Tipo di apparecchiatura • Tipo de equipo Modello • Modelo U-Series Slush Maker - Single 12ltr Tank UA044 (-E & -A) U-Series Slush Maker - Double 12ltr Tank UA045 (-E & -A) U-Series Slush Maker - Triple 12ltr Tank UA046 (-E &... - Page 81 +44 (0)845 146 2887 Eire 040 – 2628080 01 60 34 28 80 BE-NL 0800-29129 BE-FR 0800-29229 0800 – 1860806 901-100 133 UA044_UA045_UA046_ML_A5_v1_20240112.indb 81 UA044_UA045_UA046_ML_A5_v1_20240112.indb 81 2024/1/12 10:11 2024/1/12 10:11...
- Page 82 UA044_UA045_UA046_ML_A5_v1_20240112.indb 82 UA044_UA045_UA046_ML_A5_v1_20240112.indb 82 2024/1/12 10:11 2024/1/12 10:11...
- Page 83 UA044_UA045_UA046_ML_A5_v1_20240112.indb 83 UA044_UA045_UA046_ML_A5_v1_20240112.indb 83 2024/1/12 10:11 2024/1/12 10:11...
- Page 84 http://www.polar-refrigerator.com/ UA044_UA045_UA046_ML_A5_V1_2024/01/12 UA044_UA045_UA046_ML_A5_v1_20240112.indb 84 UA044_UA045_UA046_ML_A5_v1_20240112.indb 84 2024/1/12 10:11 2024/1/12 10:11...
Need help?
Do you have a question about the UA044 and is the answer not in the manual?
Questions and answers