Advertisement
- 1 INTRODUCTION
- 2 WHAT'S IN THE BOX
- 3 3-STAGE HEPA H13 AIR FILTRATION
- 4 SPECIFICATIONS
- 5 SET UP PURELLE
- 6 LET'S BEGIN
- 7 HOW TO USE
- 8 APPLE HOME (THREAD) SETUP
- 9 FILTER REPLACEMENT
- 10 CLEANING AND MAINTENANCE
- 11 TROUBLESHOOTING
- 12 IMPORTANT SAFETY INSTRUCTIONS
- 13 CUSTOMER SUPPORT
- 14 Documents / Resources
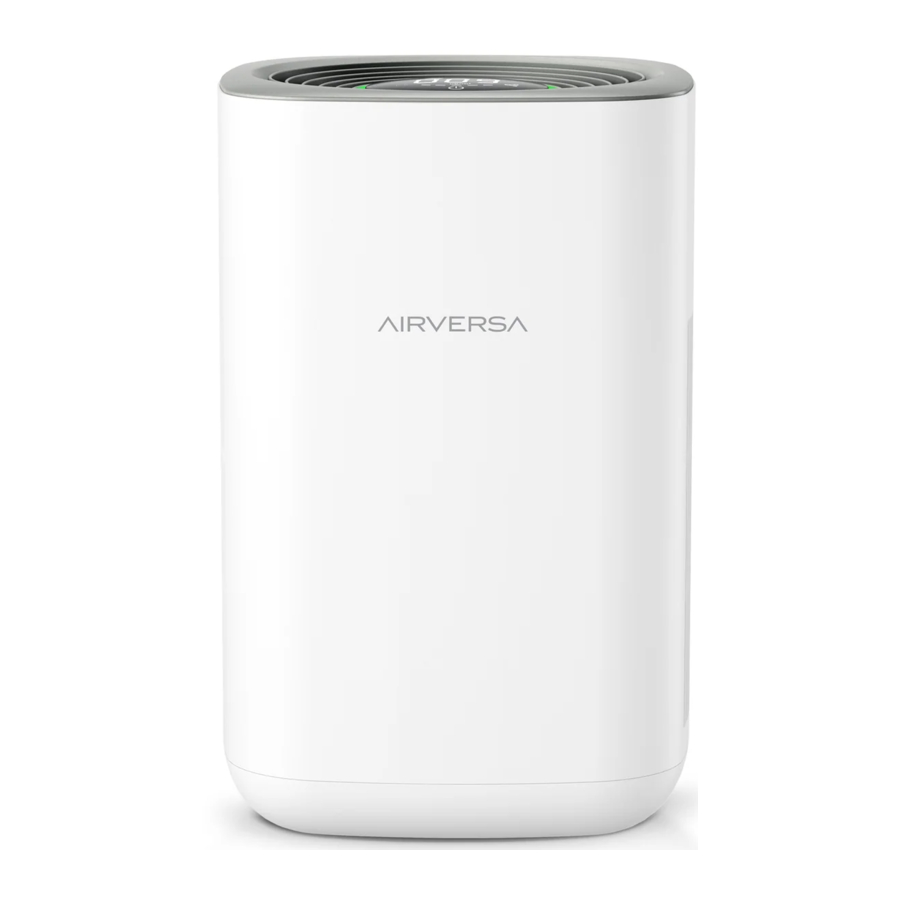
INTRODUCTION
Thank you for choosing Purelle, our latest innovative product that combines powerful air purification and smart capabilities. Airversa specializes in creating air treatment products that truly improve the quality of the air you breathe. A lot of technology have been built into the Purelle; it works with Apple HomeKit using Thread technology, the latest future proof wireless protocol for the smart home. With a thread-enabled Border Router (HomePod mini or 2021 Apple TV 4K), you can control your Purelle using your iOS devices anytime, anywhere. Its advanced 3-Stage True HEPA Filtration system removes 99.97% of airborne contaminants down to 0.3 microns.
Purelle is optimized for small and midsized rooms such as bedrooms, living rooms, basements, home gyms, kitchens, offices, and more. We make it compact and stylish enough to perfectly fit on a tabletop, and easy enough to move from room to room.
For now, please be sure to explore all of its features outlined in this manual. If you have any questions, feel free to just drop us an email anytime. We'd love to assist you to get the most out of it!
WHAT'S IN THE BOX

- Purelle Smart Air Purifier
- H13 True HEPA Composite Filter Set (Inside Device)
- User Manual
- *Power Adapter
* The image shown here is indicative only. If there is inconsistency between the image and the actual product, the actual product shall govern.
3-STAGE HEPA H13 AIR FILTRATION

Disposing of used filters
- Filters can't be cleaned or recycled. After removing a used filter, wrap it in an airtight plastic bag for disposal. As an extra precaution, wear gloves when handling a dirty filter.
- Please dispose the used filters as combustible rubbish.
 Do not wash and reuse the filters.
For optimal performance, only Airversa filters should be used with this unit.
To purchase replacement filters, please go to: www.airversa.com
SPECIFICATIONS
| Model Name | AP2 |
| Rated Input Voltage | 100-240 V 50/60 Hz |
| Rated Power | 24 W |
| Standby Power | 0.5 W |
| CADR | 130 CFM / 221 m³/h |
| Noise Level | 28 – 53 dB |
| Optimal Room Size | 28 m² or 300 sq. ft. |
| Working Temperature | 4–104°F / 0 – 40°C |
| Typical Filter Life | 3000 hrs |
| Product Weight | 2.96 kg |
| Product Dimension | L 8.66 x W 8.66 x H 13.58 in L 220 x W 220 x H 345 mm |
SET UP PURELLE
- Unscrew the knob on the base according to the directional marks.
![]()
- Remove and put aside the base.
![]()
- Take out the new filters (wrapped in plastic films) from the product.
![]()
- Remove the plastic films on the filters.
![]()
- Install the filters into the product. The pull tabs should face inward.
![]()
- Install the base to the product, tighten the knob according to directional marks.
![]()


LET'S BEGIN
- Once connected to the air purifier, plug the adapter to a standard AC outlet, and you will hear a "ding" sound.
![]()
- Tab the power button on the control panel to turn it on. Meanwhile, the screen lights up.
![]()


Real-time Air Quality Display


HOW TO USE
Control Panel Explained


Auto Mode Button
Tap to turn Auto Mode on/off
When Auto Mode is active, Purelle uses its built-in PM 2.5 sensor to adjust the fan speed automatically based on air quality. For example, the better the air quality, the lower the fan speed, or vice versa.

Timer Button
Tap to cycle through timer options
Each increment is 1 hour. The timer will count down from your selected time. When the time is finished, Purelle will turn off. To cancel a timer, tap the button repeatedly until the display reads "0".

Sleep Mode Button
Tap to turn Sleep Mode on/off
Sleep Mode operate quietly by using a fan speed lower than low speed. It will turn off the display after 10 seconds if no other buttons are touched. When the display is turned off, tap any button to turn the display back on.

Network Indicator
Indicates pairing status
Product has been paired to the network > Light stays on
Product has not been paired to the network > Light will blink and then turn off after 5 minutes each time when the product is powered on.
Press & hold 5s to enter pairing mode.

Fan Speed Button
Tap to cycle through fan speeds
Tapping the Fan Speed Button while the air purifier is in Auto Mode will exit that mode.

Child Lock Button
Prevents current settings from being changed
Press and hold for 5 seconds to turn Display Lock on/off. The indicator will blink 3 times along with 2 beeps when any other button is tapped to indicate that Display Lock is on.

Filter Status Indicator
Press & Hold to reset filters
Blinks red when the filter should be checked or replaced.
Press and hold for approx. 5s to reset the Filter Status Indicator.

Filter Life Indicator
Indicates filter consumption

Power Button
Tap to turn Purelle on/off
APPLE HOME (THREAD) SETUP
- Make sure you have the following Apple Home Hub already setup:
![]()
- Apple HomePod mini or;
- 2021 Apple TV 4K or later
- Download the Sleekpoint App from the Apple App Store, open it and create an account, or open the Apple Home App.
![]()


- Press & hold the Network button on the touch panel for approx. 5s to enter pairing mode along with 3 beeps.
![]()
- Make sure your iOS device is close to your accessory (less than 3m/10ft.) and Bluetooth is turned on in your iPhone settings.
- Add the accessory to the app following the on-screen instructions. As soon as it is added successfully, it will automatically connect to your Thread network.


Notice
When an accessory is added successfully for the FIRST TIME, it usually takes approx. 5-10 minutes to be able to connect to the Thread network. However, if it is still not able to connect to Thread after a while, reboot your iOS device or your Apple Home Hub and then check again.
FILTER REPLACEMENT
- Unscrew the knob on the base according to the directional marks.
![]()
- Remove and put aside the base.
![]()
- Pull the tabs to remove the old filters from the air purifier.
![]()
- Remove the plastic films on the new filters.
![]()
- Install the new filters into the the air purifier. The pull tabs should face inward.
![]()
- Install the base to the air purifier, tighten the knob according to directional marks.
![]()
- Once connected to the air purifier, plug the adapter to a standard AC outlet, and you will hear a "ding" sound.
![]()
- Press and hold the Filter Status Indicator for approx. 5s to reset the indicator.
![]()


CLEANING AND MAINTENANCE
Cleaning the Pre-Filter
It is recommended to vacuum the pre-filter once a month under normal usage:
- Unplug the air purifier.
- Unscrew the knob on the base according to the directional marks.
- Remove and put aside the base.
- Pull the tabs to remove the filters from the air purifier.
- Vacuum the light-color sides of the filters using the brush attachment of your vacuum cleaner, cleaning it thoroughly.
- Install the filters back into the air purifier. The tabs should face inward.
- Install the base to the product and tighten the knob according to directional marks.
- Once connected to air purifier, plug the adapter to a standard AC outlet, and you will hear a "ding" sound.
- Power on the air purifier, then press and hold the Filter Status Indicator for approx. 5s to reset the indicator.
Vacuum-cleaning the pre-filter help remove large particles partially and only. It does not extend the filter life.
TROUBLESHOOTING
| Problem | Possible Cause | Possible Solution |
| Air purifier does not operate | Not plugged in | Plug in the air purifier |
| Power button not pressed | Press  to turn it on to turn it on | |
| No power | Check circuits, fuses, try a different outlet | |
| Reduced airflow | The air inlet(s) or outlet may be blocked | Make sure side air inlets or top air outlet are not blocked |
| Pre-Filter needs vacuuming | Vacuum the pre-filter with the brush attachment of your vacuum cleaner | |
| The filter needs to be replaced | Replace the filter | |
| Reduced odor removal | The filter needs to be replaced | Replace the filter |
| Excessive noise | Air purifier is not level | Place the unit on a flat and level surface |
| Filter Status indicator remains lit after filter replacement | The Filter Status indicator needs to be reset | Press and hold the Filter Status Indicator for approx. 5s to reset the indicator |
If you need further assistance, please feel free to contact us via support@airversa.com
IMPORTANT SAFETY INSTRUCTIONS
READ ALL INSTRUCTIONS BEFORE USING.
IF THE POWER CORD OR UNIT DOES NOT WORK, CONTACT AIRVERSA CUSTOMER SERVICE IMMEDIATELY.
When using electrical products, especially when children are present, basic safety precautions should always be followed, including the following:
ATTENTION
- Check your air purifier cord and plug connections. Faulty wall outlet connections or loose plugs can cause the outlet or plug to overheat. Be sure the plug fits tightly in the outlet.
- This air purifier is not intended for use in bathroom, laundry areas, and similar moist indoor locations.
- To disconnect the air purifier, first turn controls to the off position, then remove the plug from outlet.
- Use this air purifier only for its intended use as described in this manual. Any other use not recommended by the manufacturer may cause fire, electrical shock, or injury to persons.
- To effectively clean air, keep windows and doors closed while the air purifier is on.
- This product is intended for household use only.
- This product is not intended for use by persons (including children) with reduced physical, sensory or mental capabilities, or lack of experience and knowledge, unless they have been given supervision or instruction concerning use of the appliance by a person responsible for their safety.
- This air purifier is not intended to be used to perseve documents or in art conservation.
MUST DOs
- Always unplug the air purifier when not in use for a long time.
- Always unplug the air purifier from the electrical outlet immediately before cleaning or replacing filters.
- Always keep the cord away from heated surfaces.
- Always place the air purifier on a firm, leveled surface.
- Always place the air purifier at least 6 inches away from walls and 3 feet from heat sources such as stoves, radiators, or heaters.

- Do not reach for the air purifier that has fallen into water. Unplug it immediately.
- Do not place or store appliance where it can fall or be pulled into a tub or sink.
- Do not place in or drop into water or other liquid.
- Do not operate in wet or moist conditions. Keep dry.
- Do not touch the air purifier or its power plug with wet hands.
- Do not attempt to defeat this safety feature. To do so could result in an electrical shock hazard.
- Do not operate the air purifier with a damaged cord or plug, or after the air purifier malfunctions, or has been dropped or damaged in any manner.
- Do not run the cord under carpeting.
- Do not cover the cord with throw rugs, runners, or similar coverings.
- Do not route cord under furniture or appliances. Arrange the cord away from traffic areas where it can be tripped over.
- Do not tilt or move the air purifier while it is in operation. Shut it off and remove the plug from the outlet before moving it.
- Do not insert or allow foreign objects to enter any ventilation or exhaust opening as this may cause an electrical shock or fire, or damage the air purifier.
- Do not block air intakes or exhaust in any manner. Do not use on any soft surface, like a bed, where openings may become blocked.
- Do not operate Purelle air purifier without filters.
- Do not wash and reuse the filters.
- Do not use outdoors.
CUSTOMER SUPPORT
If you have any questions or concerns about your new product, please feel free to contact our Customer Service Team.
support@airversa.com
www.airversa.com
Documents / Resources
References
Download manual
Here you can download full pdf version of manual, it may contain additional safety instructions, warranty information, FCC rules, etc.
Advertisement


Need help?
Do you have a question about the AP2 and is the answer not in the manual?
Questions and answers