NZXT Kraken Elite 360/280/240 RGB - Liquid Cooler Manual
- Installation manual (36 pages) ,
- Manual (43 pages)
Advertisement
COMPONENT LIST


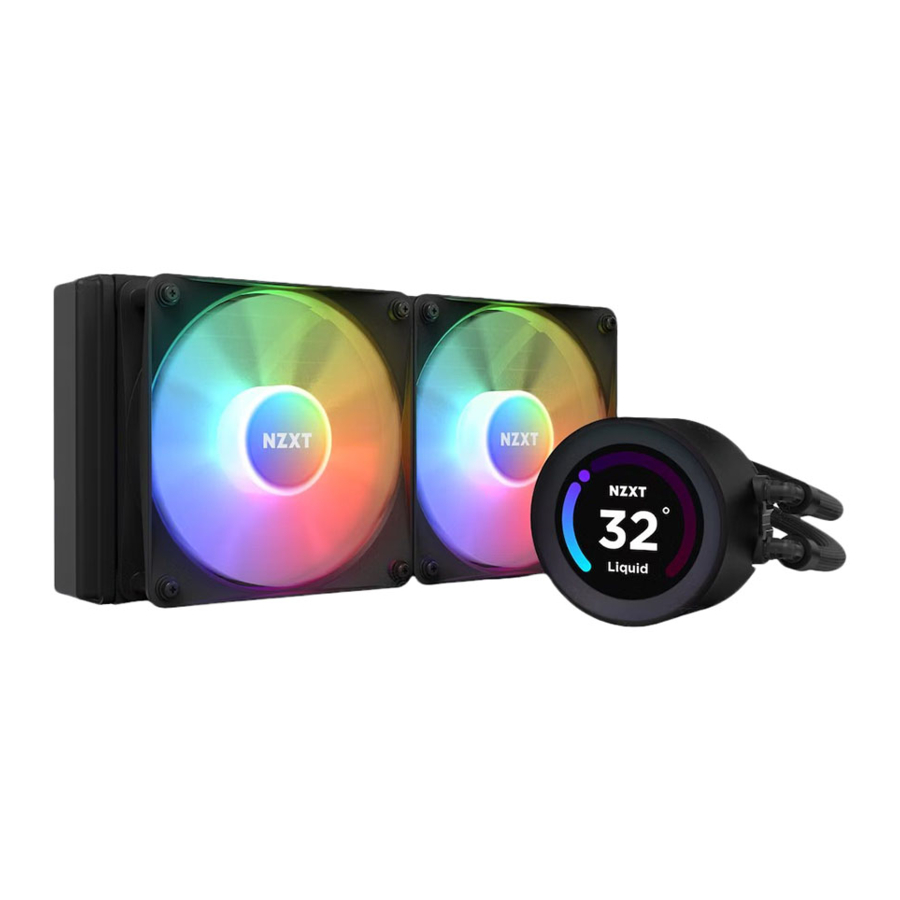
HARDWARE INTRODUCTION


INSTALLING THE PUMP: INTEL LGA 1700 & 1200 /115 X
STEP 1
Move all four sliders on the Intel backplate to:
- the innermost positions for Socket 1200 / 115X
- the outermost positions for Socket 1700


STEP 2
Install the Intel backplate on the rear of the motherboard.

STEP 3
From the front of the motherboard, install the four Socket standoffs.

STEP 4
Orient the pump's tube to fit your build. The display orientation can be adjusted in 90° increment via CAM.

STEP 5
Place the pump with the retention bracket onto the CPU. Ensure the standoffs go through the holes on the bracket and apply the thumb nuts in the order as shown.

INSTALLING THE PUMP: AMD SOCKET AM5, AM4, STRX4* & TR4*
STEP 1
Remove the stock AMD mounting bracket and keep the original backplate on the rear of the motherboard.

 Note: FOR SOCKET TR4, PLEASE SKIP TO AMD - STEP 4
STEP 2
From the front of the motherboard, install the four AMD sleeves. Make sure you use the right side of the sleeve. According to your socket, place the sleeves with the name of the socket facing up.

STEP 3
From the front of the motherboard, install the four AMD standoffs.

STEP 4: CHANGING THE RETENTION BRACKET
- Press and hold the Intel retention bracket firmly towards the pump.
![]()
- Rotate the Intel retention bracket counterclockwise to release.
![]()
- Pull out the Intel retention bracket.
![]()
- Follow these steps in reverse order to install the AMD retention bracket onto the pump.


For SocketTR4, Install the AMD SocketTR4 retention bracket included inside the Threadripper CPU retail box.
STEP 5
Orient the pump's tube to fit your build. We recommend installing with the tubes exit at the 6 o'clock position. The display orientation can be adjusted in 90° increment via NZXT CAM.

STEP 6
Place the pump with the retention bracket onto the CPU. Ensure the standoffs go through the holes on the bracket and apply the thumb nuts in the order as shown.

MOUNTING THE RADIATOR & FANS
DEPENDING ON YOUR RADIATOR MOUNTING SETUP,
PLEASE USE THE APPROPRIATE SCREWS TO MOUNT THE RADIATORS
Note: Always use washers to prevent damage.
DIRECT MOUNTING

For mounting in which the radiator fits directly onto the case, please install the fan(s) first using the 30mm fan screws and washers. Use the 5mm case screws and washers to mount the radiator.
INDIRECT MOUNTING

For mounting in which the fan(s) fit between the radiator and chassis, please use the 30mm fan screws and washers for mounting.
POWERING THE PUMP & FANS

STEP 1
Connect the breakout cable to the pump.

STEP 2
Connect the 4-pin PWM fan cable to an open header on the fan splitter.

STEP 3
Connect the pump 3-pin connector to the 4-pin CPU_FAN or AIO_PUMP connector on the motherboard.

Note: You may need to disable fan-fail warning within the motherboard BIOS if CPU_FAN is unused.
STEP 4
Connect the USB connector to an available USB 2.0 internal header on the motherboard.

STEP 5
Connect pump SATA power cable to an available SATA power connector.

LIGHTING SETUP
STEP 1
Connect the fan 4-pin NZXT RGB connector to an NZXT RGB lighting channel on your lighting controller.

STEP 2
Plug the USB Connector to an internal USB 2.0 header on the motherboard.

NOTE: If your motherboard only supports one USB header, use the USB Y-Cable to connect the pump & controller USB connectors to the USB 2.0 header on the motherboard.
STEP 3
Connect the controller SATA power cable to the power connector.

DOWNLOADING NZXT CAM
After setting up the Kraken, turn on your PC and proceed to download and install NZXT CAM software to enable Kraken controls: nzxt.com/camapp/

SUPPORT AND SERVICE
Visit nzxt.com/warranty and support.nzxt.com for information on warranty coverage and service.
If you have any questions or problems with the NZXT product you purchased, please don't hesitate to contact us using our support system: service@nzxt.com
Please include a detailed explanation of your problem and your proof of purchase. For comments and suggestions, you can e-mail our design team, designer@nzxt.com.
Lastly we would like to thank you for your support by purchasing this product. For more information about NZXT, please visit us online. NZXT Website: NZXT.com
Documents / Resources
References
![nzxt.com]() NZXT CAM | PC Monitoring and Configuration Software
NZXT CAM | PC Monitoring and Configuration Software![nzxt.com]() NZXT Custom & Prebuilt Gaming PCs, Parts, Peripherals | NZXT
NZXT Custom & Prebuilt Gaming PCs, Parts, Peripherals | NZXT
Download manual
Here you can download full pdf version of manual, it may contain additional safety instructions, warranty information, FCC rules, etc.
Download NZXT Kraken Elite 360/280/240 RGB - Liquid Cooler Manual
Advertisement


Need help?
Do you have a question about the Kraken Elite 360 RGB and is the answer not in the manual?
Questions and answers