Advertisement
- 1 Introduction
- 2 Before First Use
- 3 How to Use
- 4 Care, Cleaning, and Storage
- 5 General Dehydrating Information
- 6 Drying Meat/Poultry
- 7 Drying Fruit and Fruit Rolls
- 8 Fruit Rolls (Leather)*
- 9 Fruit Drying Guide
- 10 Drying Vegetables
- 11 Vegetable Drying Guide
- 12 Packaging and Storing Dried Food
- 13 Tips for Reconstituting and Using Dried Foods
- 14 Dehydrating Recipes
- 15 Recipes that Use Reconstituted Food
- 16 Pet Treat Recipes
- 17 IMPORTANT SAFEGUARDS
- 18 Consumer Service Information
- 19 Documents / Resources
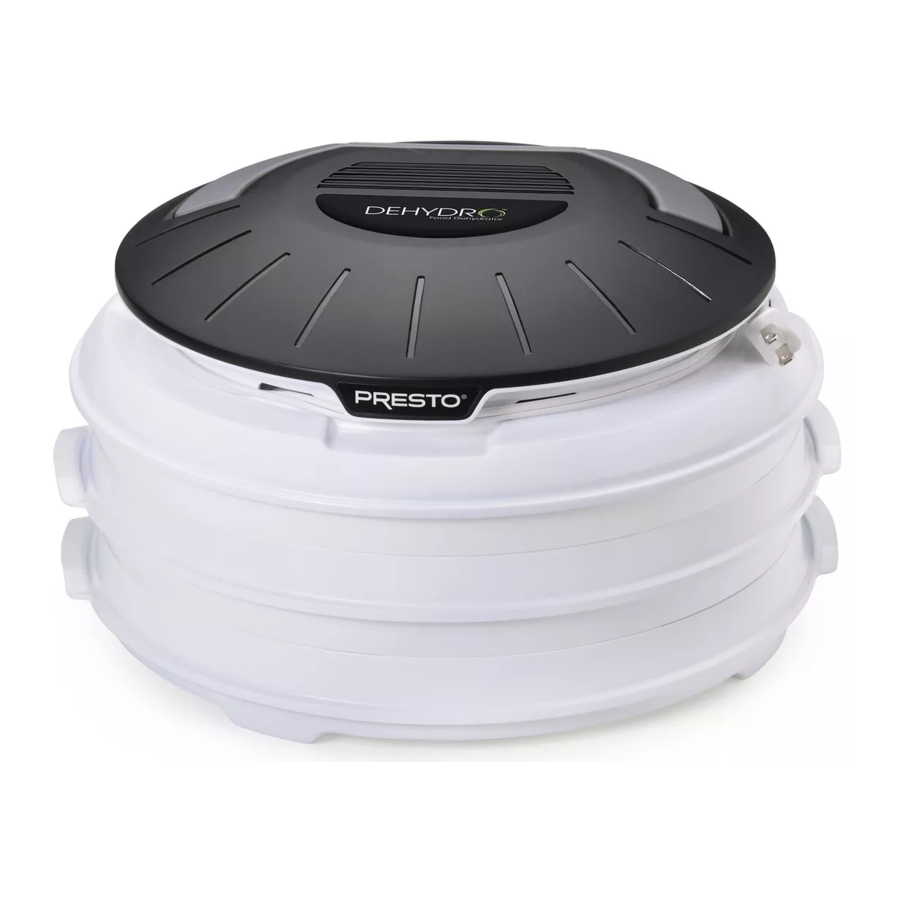
Introduction
- Great for jerky, pet treats, and fruit rolls.* Dehydrates fruits and vegetables too.
- Top-mounted fan and heating element provide consistent air flow for optimum drying. No tray rotation needed.
- Four drying trays included. Expands up to eight trays* for added drying capacity.
* Fruit roll sheets, nonstick mesh screens, and additional trays sold separately.
Before First Use
As received, your food dehydrator will be in the storage position. Use the gray handle to lift the power cover off the unit (Fig. A). The power cover includes a fan and heating element. Never immerse the power cover in water or other liquid.
Lift the four dehydrator trays from the base. Before using the dehydrator for the first time, wash the trays and base in warm water and a mild detergent. Do not wash these parts in the dishwasher.
For dehydrating, stack trays onto base as shown.

How to Use
- Lift the power cover and dehydrator trays off the base.
- Set the base, feet down, on a heat-resistant mat on a dry, level surface.
- Before loading the trays, note that each tray has a smooth surface on one side and raised ribs on the reverse side. Food goes on the smooth side, labeled "FOOD SIDE" (Fig. B1). The raised ribs should always be facing down (Fig. B2).
![]()
*Additional trays sold separately. Expands up to eight trays. - Select a tray with handles. Begin loading a single layer of food onto the smooth side of the tray.
- Place loaded tray onto base. The first tray placed onto the base MUST have handles (Fig. A).
- Select a tray without handles. Load food onto the smooth surface and stack tray without handles onto tray with handles.
- Continue filling and stacking trays, alternating trays with handles and without handles (Fig. A).
- Always use an even number of trays, starting with a tray with handles and ending with a tray without handles.
- For the cover to fit properly, the top tray must be one without handles.
- If you have only three trays of food to dehydrate, place an empty tray on the stack.
- Unwind the cord from the cover and plug into a 120VAC electrical outlet only. To operate properly, the dehydrator must have sufficient airflow; therefore, be sure the vents surrounding the cover are not obstructed at any time.
![]()
- Place the cover over the stacked trays.
- Begin dehydrating. See below for general dehydrating information and information for specific foods.
- When finished dehydrating, remove plug from wall outlet.


Care, Cleaning, and Storage
- Wipe the power cover with a damp cloth. Do not immerse the power cover in water or other liquid.
- Wash the dehydrator trays and base in warm water and a mild detergent. Do not wash these parts in the dishwasher. If necessary, a soft brush may be used to loosen dried on food particles.
Do not use steel wool scouring pads or abrasive cleaners on any of the dehydrator parts. - For compact storage, stack the trays onto the base. Begin with a tray with handles and stack it with the raised ribs facing up; the handles should read "UP FOR STORAGE." Place a tray without handles, smooth side up, on top of the first tray with handles. Alternate between trays until all of them are stacked on the base. Then place the power cover on top of the trays.
- Wrap the cord around the cover, securing the cord in the clips (Fig. A).
General Dehydrating Information
- This dehydrator operates at a preset temperature of approximately 165°F.
- When selecting food for drying, choose those that are at peak eating quality. Avoid overripe** or immature fruits and vegetables. Remove any parts of the food that are bruised or blemished.
- For even drying, cut food into uniform sizes, shapes, and thicknesses.
- Drying times are highly variable depending on the type and amount of food, thickness, evenness of food pieces, humidity, air temperature, personal preference, and even the age of the plant at the time of harvesting. Therefore, throughout the book you will notice that a range of average drying times is provided. You may need or prefer to dry your foods for shorter or longer periods than those listed. For best results, begin checking your food at the beginning of the range listed in the instructions. You should then gauge how often you should recheck the food based on how the drying is progressing. With some foods, such as jerky, that may mean every 30 minutes, and with other foods, such as fruits, that may mean every 1 to 2 hours.
- Dehydration prevents microbial growth; however, chemical reactions caused by enzymes in fruits and vegetables can occur unless the food is pretreated before drying. Although not required, pretreatment may prevent or minimize undesirable color and texture changes during drying and storage. See specific sections for recommended pretreatment.
- Place foods in a single layer on the trays. Do not allow foods to touch or overlap.
- When drying strong-smelling foods, such as onions and garlic, be aware that there will be a strong odor during the drying process. That odor may linger after drying has been completed.
- Individual pieces of food may not all dry at the same time. Foods that are appropriately dried should be removed before those that still require additional drying. Always check all of the trays for foods that are appropriately dried. Allow dried pieces to cool and then place in a covered container.
- If one tray of food is finished before the others, remove the dried food and return the empty tray to the unit rather than rearranging the trays.
- Do not add undried food to a partially dried load. This will add moisture and increase the drying time.
- Allow for continuous drying. Do not unplug dehydrator in the middle of the drying cycle and resume drying at a later time as this may result in poor quality and/or unsafe food.
![]()
For food safety, wash hands thoroughly prior to preparing food for dehydrating. Likewise, thoroughly clean all utensils, cutting boards, and surfaces that will be used for preparing food. Wash foods before preparing them for dehydrating.
**Slightly overripe fruits are acceptable for making fruit rolls.
Drying Meat/Poultry
Homemade jerky is a flavorful dried meat product that is especially popular with outdoor sports enthusiasts because it is light and easy to transport. Jerky can be made from most lean meat, including beef, pork, venison,‡ or poultry. Basic food safety precautions need to be observed when preparing and dehydrating meat/poultry:
- Wash hands thoroughly before and after handling raw food.
- Keep product refrigerated or frozen until ready to use.
- Raw meat/poultry and its juice should be kept away from other foods. Wash cutting boards, utensils, counters, etc. with hot, soapy water after contact with raw meat. After washing, sanitize with a solution of 1 tablespoon chlorine bleach per gallon of water and allow to air dry.
- Marinate meat/poultry under refrigeration. Discard marinade after meat/poultry is removed.
- Keep raw meat/poultry and dried jerky separate.

The United States Department of Agriculture (USDA) recommends that meat/poultry be precooked prior to dehydrating or baked after dehydrating to reduce the risk of foodborne illness.
‡Venison or wild game meat that has been contaminated with entrails should not be used for making jerky.
Preparing Jerky from Meat/Poultry Strips
Select lean meats such as beef and venison sirloin, rump, and round cuts; pork loin and ham cuts; and poultry breast, thigh, and leg. Trim meat of visible fat, connective tissue, and gristle. Remove skin and fat from poultry. Freeze meat/poultry until firm, but not solid, to make slicing easier. Slice into strips that are ¼ inch thick, 1 inch wide, and 5 to 6 inches long. Slice across the grain for a more tender jerky or with the grain for a chewier jerky.
Flavor the meat/poultry strips by marinating in your own favorite marinade, a commercial marinade, or use the marinade recipe below. Place marinade and strips in a resealable plastic storage bag. Seal bag and shake to thoroughly coat the strips. Refrigerate for 8 to 12 hours. Turn bag often to evenly coat the strips.
Refer to the CAUTION! note above about cooking the meat/poultry before or baking after dehydrating. For a more desirable texture, bake after dehydration. Meat/poultry that is precooked will have shorter drying times, but the end product will have a dry, crumbly texture. If cooking the meat before dehydrating is preferred, follow the instructions below:
Cooking before dehydrating — After marinating, place strips and liquid marinade into a shallow pan. If no liquid remains, add enough water to cover strips. Bring liquid to a boil and boil for 5 minutes.
Remove strips from marinade and place in a colander to drain. Pat strips dry. Then position them on dehydrator trays. Arrange strips close together but not overlapping.
The average drying time will be 4 to 8 hours. See "Determining Dryness" information below.
If you did not cook the meat/poultry prior to dehydrating, bake it after, following the instructions below.
Baking after dehydrating — Preheat oven to 275°F. (For an accurate temperature reading, check with an oven thermometer.) Remove jerky strips from dehydrator trays and place on a baking sheet close together, but not touching. Heat jerky in preheated oven for 10 minutes (jerky strips should be sizzling when removed from the oven). Remove jerky from baking sheet and cool to room temperature.
Preparing Jerky from Ground Meat
Mix 93% lean ground meat with your favorite commercially available jerky seasoning and cure, using the instructions provided on the seasoning/cure package. Place the ground meat mixture in a Presto™ jerky gun* or a cookie press and extrude meat directly onto dehydrator trays, making sure that the meat does not touch or overlap.
Dry jerky for 4 to 8 hours. See "Determining Dryness" information below. Bake the meat after dehydrating, following the instructions above.
*Presto™ Jerky Gun sold separately.
Determining Dryness
Begin checking jerky after about 4 hours and every 30 minutes thereafter. Drying time will depend on a variety of factors. These factors include the type of meat/poultry, the amount of fat, and whether or not it was precooked before dehydrating. In addition, times will vary depending on size/thickness of the pieces and how full the trays are. Jerky that is acceptably dry will crack when bent but will not break.
Packaging and Storage
After cooling, pat jerky with paper towels to remove any fat droplets which may have formed on the jerky. Follow "Packaging and Storing Dried Food" information. Jerky can be stored 1 to 2 months at room temperature. However, to maintain the best flavor and quality, store in the refrigerator or freezer.
Drying Fruit and Fruit Rolls
Dried fruits and fruit rolls (or leathers) are nutritious and portable snacks. Drying fruit intensifies the natural sweetness of the fruit because the moisture is removed.
Selection and Preparation
Select fruits that are at the peak of ripeness. Wash fruits to remove dirt and debris. There are many options when it comes to drying fruit and personal preference should be your guide. Fruits can be sliced, halved, or left whole (if small); peeled or unpeeled; pretreated or left untreated. Fruits that are sliced thin and peeled will dry the fastest. Fruits left whole will require the most drying time.
Slice fruit uniformly and in pieces about ¼ inch thick. Fruits that are left whole, such as blueberries, cranberries, and grapes, should be dipped in boiling water for 30 to 60 seconds and then plunged in ice water to crack the skin. This procedure will reduce the drying time.
Pretreatment
Many fruits will darken quickly once they are peeled and/or cut and will continue to darken even after the fruit is dried. This is due to the exposure of the natural enzymes in these fruits to air. There are several pretreatment options to prevent this discoloration. Pretreatment is not necessary but is recommended to preserve color and texture of the dried fruit. Some people may detect a slight flavor change with pretreated fruit. See the Fruit Drying Guide to determine which fruits will benefit from pretreatment. You may want to try the different options and see which you prefer:
Ascorbic acid (vitamin C) — Ascorbic acid, available in tablet or powdered form, is available at drugstores. Mix 2½ tablespoons of powdered ascorbic acid in 1 quart cold water. Vitamin C tablets (six 500 mg tablets equal 1 teaspoon ascorbic acid) should be crushed before mixing with water. Place cut fruit, such as bananas, peaches, apples, or pears, in mixture and soak for 10 minutes. Remove fruit and drain well before placing on drying trays.
Ascorbic acid mixtures — These commercially available products, such as Mrs. Wages Fresh Fruit Preserver,* are a combination of ascorbic acid and sugar and are commonly used for fresh fruits and for canning and freezing. Follow the manufacturer's directions for use of these mixtures.
Lemon juice — Mix equal parts lemon juice and cold water. Place cut fruit in solution and soak for 10 minutes. Remove fruit and drain well before placing on drying trays.
Place pieces of fruit on dehydrator trays in a single layer, close together but not touching or overlapping. Refer to the Fruit Drying Guide for suggested preparation, pretreatment, and drying times.
*Mrs. Wages is a registered trademark of Kent Precision Foods Group, Inc. Presto is not affiliated with this company.
Determining Dryness
Refer to the Fruit Drying Guide and begin checking the fruit at the beginning of the average drying time range. Remove a few pieces of fruit from each dehydrator tray and allow to cool to room temperature. Fruits are acceptably dry when they are soft and pliable, but not sticky. Fruit folded in half should not stick together. Apple and banana slices can be dried until crisp, if desired. If fruits seem to have a lot of moisture remaining, recheck every 1 to 2 hours. If fruits appear to be almost done, check again in 30 minutes. Always check fruits from each tray.
Conditioning
After drying, allow fruits to cool for 30 minutes to 1 hour before packaging. Dried fruits may have uneven amounts of moisture remaining because of differences in the size of various pieces. Although fruit appears to be dry, there may still be moisture remaining in some of the individual pieces. Conditioning is a procedure that can be used to more evenly distribute moisture, reducing the chance of mold growth, and allows you to determine if you've removed enough moisture before storing.
To condition, place the pieces of fruit loosely in a clean plastic or glass container and seal and let stand for 1 week. This will allow drier pieces of fruit to absorb excess moisture that may be present in other pieces. Daily shake the jar to separate the pieces and look for condensation. If condensation develops, remove the fruit and dehydrate for additional time. After conditioning, follow "Packaging and Storing Dried Food" information.
Fruit Rolls (Leather)*
Fruit rolls (or fruit leather) are made by drying a thin layer of puréed fruit on a flat surface. Once dried, the fruit layer is pulled from the surface and rolled. The term leather derives from the leather-like texture of the puréed fruit once it is dried.
Almost any fruit or combination of fruit can be puréed and dried for fruit rolls. The quality of the fruit roll depends on whether the fruit has a low or high amount of the naturally occurring starch called pectin. Fruits that have a high amount of pectin will bond together in a solid sheet and easily peel, while fruits that have little pectin will flake and crack rather than peel. When using fruits low in pectin, add another fruit that is high in pectin to improve the texture of the roll.
Fruits naturally high in pectin are apples, apricots, blueberries, cranberries, figs, grapes, peaches, pears, pineapples, and plums. Fruits low in pectin include cherries, citrus fruits, raspberries, and strawberries. When using a low pectin fruit with a high pectin fruit, use equal parts of each to produce the best results.
Preparation
You will need a Presto® Fruit Roll Sheet* to prepare fruit rolls. Apply a thin layer of vegetable oil or no-stick cooking spray to the fruit roll sheet.
If using cooking spray, be sure to spray away from the power cover, as spray is flammable.
Use about 1½ cups of puréed fruit for each fruit roll sheet.*
Select ripe or slightly overripe fruit and remove any bruised areas. Wash fruit and remove peel, seeds, and stems. Cut fruit into chunks and, using a food processor or blender, purée until smooth (applesauce consistency). To get the puréeing process started, you may need to add approximately 1 tablespoon of fruit juice or water.
If desired, fruit can be pretreated to preserve its natural color. Add 1½ teaspoons of lemon juice to each 1½ cups puréed fruit. See the Fruit Drying Guide to determine which fruits will benefit from pretreatment.
The natural sweetness of fruit is intensified with drying. However, if your preference is for a sweeter fruit roll, you can add honey, maple syrup, corn syrup, or sugar to the puréed fruit. Try different amounts of sweeteners, starting with 1 tablespoon for each 1½ cups of fruit purée, to find your preference. Fruit with sweeteners added will take longer to dry than fruit that is not sweetened.
Canned fruit can also be used to easily make fruit rolls. Drain juice from fruit, saving juice for later use. Place fruit in food processor or blender and purée until smooth. Applesauce can be used directly from the container.
For frozen fruit, thaw and purée until smooth.
Pour puréed fruit onto a lightly oiled fruit roll sheet and spread with a spatula to form a uniform layer about ¼ inch thick. Position filled fruit roll sheet on dehydrator tray and begin drying. Average drying time for all fruit rolls is 4 to 7 hours.
*Fruit roll sheets are sold separately.
Determining Dryness
Acceptably dried fruit rolls will be slightly tacky to the touch, but will not indent when touched in the center. Begin checking the fruit roll after 4 hours of drying. If additional drying time is needed, recheck every 30 minutes.
While slightly warm, starting from the outer edge, carefully peel the fruit roll from the sheet. Loosely roll in plastic wrap or waxed paper and follow "Packaging and Storing Dried Food" information. For immediate enjoyment, cut in strips or roll and cut into serving pieces.
NOTE: Remove fruit rolls from sheets prior to cutting them.
Fruit Drying Guide
Drying times are highly variable and dependent on the type and amount of food, thickness, evenness of food pieces, humidity, air temperature, personal preference, and the age of the plant at the time of harvesting.
| Fruit | Preparation | Pretreatment | Average Drying Time |
| Apples | Peel if desired, core, and cut in rings or slices ⅛˝ to ¼˝ thick. | Ascorbic acid, ascorbic acid mixture, or lemon juice. | 3–8 hours |
| Apricots | Cut in half, remove pit, and cut in quarters or ¼˝ thick slices. | See apples. | 7–15 hours |
| Bananas | Peel and cut into ¼˝ thick slices. | See apples. | 5–7 hours |
| Blueberries | Remove stems. Dip in boiling water for 30 to 60 seconds and then plunge in ice water to crack the skin. | None | 8–16 hours |
| Cherries | Remove stems and pit. Cut in half, chop, or leave whole. | None | 14–22 hours |
| Cranberries | Remove stems. Dip in boiling water for 30 to 60 seconds and then plunge in ice water to crack the skin. | None | 9–17 hours |
| Figs | Remove stems. Small figs can be left whole. Otherwise, cut in half. Dip whole figs in boiling water for 30 to 60 seconds and then plunge in ice water to crack the skin. | None | 7–14 hours |
| Grapes | Leave whole or cut in half. Dip whole grapes in boiling water for 30 to 60 seconds and then plunge in ice water to crack the skin. | None | 12–20 hours |
| Kiwi | Peel and cut into ¼˝ to ⅜˝ thick slices. | None | 3–5 hours |
| Nectarines | Cut in half and remove pit. May also quarter or slice ¼˝ thick. | See apples. | 5–9 hours (slices) 36–48 hours (halves or quarters) |
| Peaches | Peel if desired. Cut in half and remove pit. May also quarter or slice ¼˝ thick. | See apples. | 5–9 hours (slices) 36–48 hours (halves or quarters) |
| Pears | Peel, core, and slice ¼˝ thick. | See apples. | 6–12 hours |
| Pineapple | Peel, core, and slice ¼˝ thick. | None | 7–11 hours |
| Plums/Prunes | Halve or quarter and remove pit. | None | 7–14 hours |
| Rhubarb | Trim and discard leaves. Cut stalk into ¼˝ slices. | None | 5–8 hours |
| Strawberries | Remove the leafy crown. Halve or slice ¼˝ thick. | None | 5–11 hours |
Drying Vegetables
Vegetables dry much faster than fruits. At the end of the drying period, moisture loss is rapid. As a result, vegetables need to be checked often towards the end of the drying time to prevent overdrying. Food turns brown when it is overdried.
When drying smaller vegetables, such as peas or carrots, it is recommended that you use a mesh screen.* A mesh screen will help prevent smaller foods from falling through the grates in the tray during dehydration.
*Nonstick mesh screens are sold separately.
Selection and Preparation
Wash vegetables to remove dirt and debris. Trim vegetables to remove fibrous or woody portions or bruised and decayed areas, peel, and slice using the preparation information found on the Vegetable Drying Guide. Slice or cut vegetables into pieces that are uniform in size. See guide for pretreatment information on specific vegetables.
Pretreatment
The process of blanching involves subjecting vegetables to a high enough temperature to deactivate the enzymes. Blanching is necessary to stop the naturally occurring enzymes from causing loss of color and flavor during drying and storage. Blanching also relaxes the tissue walls so moisture can more readily escape during drying and enter during rehydrating. Blanching can be done in water or steam. Water blanching causes a greater loss of nutrients but is faster than steam blanching and achieves a more even heat penetration.
Steam blanching — Fill a deep pot with water and bring to a boil. Place vegetables loosely in a basket or colander that will allow steam to freely circulate around the vegetables. Do not fill basket or colander with more than a 2½-inch layer of vegetables. Position the basket or colander in the pot, making sure it does not contact the boiling water. Cover with a close fitting lid. Steam for the time indicated in the Vegetable Drying Guide.
Water blanching — Fill a large pot ⅔ full with water. Cover and bring to a boil. Place vegetables loosely in a basket or colander and submerge in the boiling water. Cover and blanch for the time indicated in the Vegetable Drying Guide. Water should return to a boil in less than 1 minute. If not, too many vegetables were added to the basket; reduce the amount of vegetables added for the next batch. Water blanch for the time indicated in the Vegetable Drying Guide.
Immediately after steam or water blanching, dip the vegetables in cold water to quickly cool them. Drain the vegetables and arrange them in a single layer on the dehydrator trays. Refer to the Vegetable Drying Guide for drying times.
Determining Dryness
Refer to the Vegetable Drying Guide and begin checking the vegetables at the beginning of the average drying time range. Remove a few pieces of vegetables from each dehydrator tray and allow to cool to room temperature. Test for dryness by breaking the pieces in half. Most vegetables will be crisp when appropriately dried and will break easily. If vegetables do not break easily, additional drying time is needed. If vegetables seem to have a lot of moisture remaining, recheck every 1 to 2 hours. If vegetables appear to be almost done, check again in 30 minutes. Always check vegetables from each tray.
Follow "Packaging and Storing Dried Food" information.
Vegetable Drying Guide
Drying times are highly variable and dependent on the type and amount of food, thickness, evenness of food pieces, humidity, air temperature, personal preference, and the age of the plant at the time of harvesting.
| Vegetable | Preparation | Pretreatment (blanching) | Average Drying Time |
| Asparagus | Cut into 1˝ pieces. | Water 3½–4½ minutes Steam 4–5 minutes | 5–7 hours |
| Beans, green or wax | Remove ends and strings. Cut into 1˝ pieces. | Water 2 minutes Steam 2–2½ minutes | 5–10 hours |
| Beets | Cook until tender. Cool and peel. Cut into shoestring strips ⅛˝ thick. | None—Already cooked | 3–6 hours |
| Broccoli | Cut into serving pieces. | Water 2 minutes Steam 3–3½ minutes | 3–7 hours |
| Carrots | Peel and cut off ends. Cut into ⅛˝ to ¼˝ slices. | Water 3 minutes Steam 3–3½ minutes | 3–9 hours |
| Cauliflower | Cut into serving pieces. | Water 3–4 minutes Steam 4–5 minutes | 4–7 hours |
| Celery | Trim ends. Cut into ¼˝ slices. | Water 2 minutes Steam 2 minutes | 2–4 hours |
| Corn, cut | Husk and remove silk. Blanch and cut corn from cob. | Water 1½ minutes Steam 2–2½ minutes | 6–10 hours |
| Mushrooms | Wash and slice ⅜˝ thick. | None | 2–6 hours |
| Onions | Remove outer skin. Cut off top and root ends. Cut into ¼˝ slices. | None | 2–6 hours |
| Peas | Shell. | Water 2 minutes Steam 3 minutes | 4–8 hours |
| Peppers and pimientos | Remove stem, core, and inner partitions. Cut into ¼˝ strips. | None | 5–9 hours |
| Potatoes | Peel and cut into ¼˝ slices. | Water 5–6 minutes Steam 6–8 minutes | 3–7 hours |
| Summer squash and zucchini | Trim ends. Cut into ¼˝ slices. | Water 1½ minutes Steam 2½–3 minutes | 3–5 hours |
| Tomatoes | Peel if desired. Cut into sections ¾˝ wide. | None | 5–10 hours |
Packaging and Storing Dried Food
- Dried foods need to be properly packaged to prevent reabsorption of moisture and microbial deterioration. Pack food in clean, dry, airtight containers. Glass jars or freezer containers with tight-fitting lids are good for storage. Resealable plastic freezer bags are also acceptable.
- Store packaged dried food in a dry, cool location away from light. Higher temperatures and exposure to light will shorten the storage time and result in loss of quality and nutrients. Most dried fruit, when properly packaged and stored, will be good for 1 year at 60°F or 6 months at 80°F. Fruit rolls should keep for up to 1 month at room temperature. Vegetables have about half the storage life as fruit. If food is to be kept longer, then store it in a freezer.
- Package vegetables and fruits in separate storage containers to avoid flavor transfer.
Tips for Reconstituting and Using Dried Foods
Fruit:
Dried fruits make great snacks. They also can be used as ingredients in trail mixes, cereals, muffins, breads, and other baked products.
Dried fruits can be used as is or softened prior to use. To soften dried fruits, submerge in boiling water and soak for 5 minutes or place fruit in a steaming basket over a pot of boiling water and steam for 5 minutes or until fruit is plumped.
Vegetables:
Dried vegetables have a unique flavor and texture. They are best used as ingredients for soups, stews, casseroles, and sauces rather than stand-alone side dishes. Dried vegetables can also be pulverized into flakes or powders using a blender. The flakes or powders can then be added to enhance the flavor of other foods.
When using dried vegetables in soups, they may be added without soaking. Dried vegetables used for other purposes need to be soaked before cooking. To soak, start with 1½ to 2 cups of boiling water for every 1 cup of dried vegetables. Soak for 1 to 2 hours or until vegetables have returned to nearly the same size they were before dehydrating. Vegetables that have been blanched will reconstitute more quickly than unblanched.
Additional water should be added as needed during the soaking process. After soaking, simmer the vegetables in the soaking water until tender, allowing excess water to evaporate.
Dehydrating Recipes
Jerky Marinade
1½–2 pounds of lean meat/poultry
¼ cup soy sauce
1 tablespoon Worcestershire sauce
1 teaspoon hickory smoke flavored salt
½ teaspoon onion powder
¼ teaspoon garlic powder
¼ teaspoon black pepper
Combine meat, soy sauce, Worcestershire, salt, onion powder, garlic powder, and pepper in a small bowl.
Follow "Preparing Jerky from Meat/Poultry Strips" instructions.
Marinated Mushrooms
1 cup red wine vinegar
2 tablespoons vegetable oil
2 tablespoons brown sugar
1 large clove garlic, minced
1 teaspoon Dijon mustard
¼ teaspoon salt
¼ teaspoon dried oregano
¼ teaspoon black pepper
¼ teaspoon red pepper flakes
8 ounces fresh crimini (baby Bella) mushrooms, stems removed, sliced ¼ inch thick
Mix vinegar, oil, brown sugar, garlic, mustard, salt, oregano, pepper, and red pepper flakes in a 1½-quart, narrow container. Gently stir in mushrooms and cover. Refrigerate overnight. Drain mushrooms well. Arrange on mesh screens* placed on dehydrator trays, or see note below. Dehydrate 2 to 6 hours.
Tip: Store marinade in refrigerator for use as salad dressing.
Suggested Uses: Add dried mushrooms to salads or simply enjoy as a snack.
NOTE: Parchment paper can be used as a substitute for mesh screens. Cut parchment paper to fit the drying surface of the tray, making sure to cut an opening in the center of the paper.
*Nonstick mesh screens are sold separately.
Recipes that Use Reconstituted Food
Mushroom Marinara Sauce
2 cups dried mushrooms
2 cups boiling water
1 tablespoon vegetable oil
2 large cloves garlic, minced
1 14.5-ounce can stewed tomatoes
1 14.5-ounce can diced tomatoes
1 tablespoon tomato paste
1 teaspoon sugar
1 teaspoon dried oregano
1 teaspoon dried basil
½ teaspoon dried rosemary
¼ teaspoon black pepper
Add dried mushrooms to a small bowl and cover with boiling water. Allow mushrooms to rehydrate for 1 hour. Drain mushrooms well, reserving 2 tablespoons liquid. Heat oil in medium saucepan. Add mushrooms and sauté for 2 to 3 minutes. Add garlic and sauté for 30 seconds. Add stewed tomatoes, diced tomatoes, reserved mushroom liquid, tomato paste, sugar, oregano, basil, rosemary, and pepper. Bring mixture to a boil; reduce heat and simmer uncovered 25 to 30 minutes.
Makes about 3 cups
Minestrone
1 tablespoon vegetable oil
1 pound lean beef, cut into 1-inch cubes
6 cups water
½ cup combination of dried green beans, carrots, and celery
½ cup dried onions
2 cloves garlic, minced
1 14.5-ounce can diced tomatoes
1 tablespoon tomato paste
1½ teaspoons dried basil
1 bay leaf
½ teaspoon salt
¼ teaspoon black pepper
2 ounces pasta, uncooked
1 15-ounce can cannellini beans
Parmesan cheese, grated
Heat oil in a large saucepan over medium high heat. Brown one-half of the beef at a time, removing the first batch from saucepan when done. Return first batch of beef, including juices, to the saucepan; add water, dried vegetables, and dried onions. Turn off heat and allow vegetables to rehydrate for 15 minutes.
Add garlic, tomatoes, tomato paste, basil, bay leaf, salt, and pepper. Turn heat to medium, bring to a boil. Reduce heat and simmer for 1 hour. Add pasta and beans and simmer for 25 minutes.
Serve soup topped with Parmesan cheese.
7 servings (serving size 1½ cups)
Harvest Crunch
3 quarts popped popcorn
1 cup dried apples, cut into ½-inch pieces
½ cup raisins
½ cup peanuts
¾ cup packed brown sugar
¼ cup butter
3½ tablespoons corn syrup
¼ teaspoon salt
1½ teaspoons pumpkin pie spice
¼ teaspoon ground ginger
¼ teaspoon ground allspice
¼ teaspoon baking soda
Preheat oven to 250°F. Spray a large mixing bowl lightly with no-stick cooking spray; add popcorn, apples, raisins, and peanuts to bowl and mix. Reserve.
Add brown sugar, butter, corn syrup, and salt to a heavy 2-quart saucepan. Bring to a boil over medium heat, stirring constantly. Lower heat and boil 5 minutes, without stirring. Remove from heat. Stir in pumpkin pie spice, ginger, allspice, and baking soda. Gradually pour sauce over reserved popcorn mixture, mixing well to coat. Spread popcorn evenly into a rimmed 17- x 12-inch baking pan.
Bake for 1 hour, stirring every 15 minutes. Remove from oven and cool completely. Store in an airtight container.
14 servings (serving size 1 cup)
Honey, Wheat, and Cherry Muffins
1 cup all-purpose flour
½ cup whole wheat flour
2 teaspoons baking soda
½ teaspoon ground cinnamon
¼ teaspoon allspice
¼ teaspoon salt
½ cup dried sweet cherries
1 egg, beaten
½ cup milk
½ cup honey
¼ cup cooking oil
Preheat oven to 350°F. Coat standard muffin pan with no-stick cooking spray or line muffin cups with paper baking cups.
Mix flours, baking soda, cinnamon, allspice, and salt in a large bowl. Stir in cherries. Whisk egg, milk, honey, and oil in a small bowl. Add to dry ingredients; mix until all ingredients are just moistened. Fill prepared muffin cups ¾ full. Bake 20 to 22 minutes. Immediately remove muffins from muffin pan unless using paper baking cups. If paper baking cups are used, allow muffins to remain in pan for 5 minutes.
8 standard size muffins
Granola
½ cup orange juice
3 tablespoons vegetable oil
¼ cup pure maple syrup
2 teaspoons vanilla extract
5½ cups old-fashioned oats
1 cup chopped walnuts, pecans, hazelnuts
1 cup sliced almonds
¾ cup flaked coconut
⅓ cup packed brown sugar
¼ cup flax seeds
2 teaspoons ground cinnamon
½ teaspoon ground nutmeg
2 cups assorted dried fruit
Preheat oven to 300°F. Spray 2 rimmed 17- x 12-inch baking pans with no-stick cooking spray.
Add orange juice, oil, and maple syrup to a small saucepan and bring to a boil. Remove from heat and stir in vanilla. Allow to cool. Mix oats, nuts, almonds, coconut, brown sugar, flax seeds, cinnamon, and nutmeg in a large bowl. Stir juice mixture into dry ingredients and continue to toss and stir until dry ingredients are thoroughly moistened. Spread mixture evenly between baking sheets.
Bake 30 minutes, stirring after 15 minutes. Add dried fruit. Bake 30 minutes, stirring after 15 minutes.
Remove from oven and cool completely. Store in an airtight container.
24 servings (serving size ½ cup)
Pet Treat Recipes
Chicken Jerky Treats
Select lean chicken breast, thigh, or leg meat. Remove skin and fat. Freeze poultry until firm, but not solid, to make slicing easier. Slice into strips that are ¼ inch thick and 1 inch wide. Slice across the grain for a more tender dog treat or with the grain for a chewier treat.
Position chicken strips on dehydrator trays, arranging treats close together but not overlapping. Dehydrate 4 to 5 hours.
Preheat oven to 275°F.* (For an accurate temperature reading, check with an oven thermometer.) Remove dog treats from dehydrator trays and place on a baking sheet close together, but not touching. Heat dog treats in preheated oven for 10 minutes. Remove treats from baking sheet and cool to room temperature.
*Refer to the CAUTION! about baking after dehydrating.
Chicken, Pumpkin, and Oat Treats
½ cup water
2 cups cooked chicken, chopped
1 cup puréed pumpkin
1 tablespoon molasses
1½ cups quick oats, uncooked
Place water and chicken into a blender or food processor. Process until no chicken pieces remain. Add pumpkin and molasses to the blender or processor and purée until a thick paste forms.
Transfer mixture to a large bowl; add oats and mix well. Add more oats if the mixture is runny.
Drop by level tablespoons onto the dehydrator trays. Dehydrate 5 to 7 hours or until dry to the touch, inside and out.
Store in an airtight container in the refrigerator.
About 50 treats
Sweet Potato Chews
Select small to medium sweet potatoes. Wash and scrub potatoes or peel, if desired. Cut potatoes lengthwise into strips ¼ inch wide or crosswise into ¼ inch thick chips.
Place cut sweet potatoes on dehydrator trays, arranging close together but not overlapping. Dehydrate 4 to 7 hours.
Tuna Treats
1 5-ounce can tuna packed in water
3 tablespoons cholesterol-free egg product
1 tablespoon quick oats, uncooked
1 tablespoon grated Parmesan cheese
Drain tuna, reserving 1 tablespoon of liquid. Add tuna and reserved liquid to medium bowl and break up tuna with a fork. Stir in egg substitute, oats, and cheese until all ingredients are mixed thoroughly.
Drop by 1 level teaspoon onto mesh screens** placed on dehydrator trays, or see note below; flatten mound slightly. Dehydrate 2 to 3 hours or until dry to the touch, inside and out.
Store in an airtight container in the refrigerator.
About 20 treats
NOTE: Parchment paper can be used as a substitute for mesh screens. Cut parchment paper to fit the drying surface of the tray, making sure to cut an opening in the center of the paper.
**Nonstick mesh screens are sold separately.
IMPORTANT SAFEGUARDS
To reduce the risk of personal injury or property damage when using electrical appliances, basic safety precautions should always be followed, including the following:
- Read all instructions.
- Do not touch hot surfaces. Use handles or knobs.
- To protect against electrical shock, do not immerse cord, plug, or the power cover in water or other liquid.
- Close supervision is necessary when any appliance is used by or near children.
- Unplug from outlet when not in use and before cleaning. Allow to cool before putting on or taking off parts, and before cleaning the appliance.
- Do not operate any appliance with a damaged cord or plug or in the event the appliance malfunctions or has been damaged in any manner. Return the appliance to the Presto Factory Service Department for examination, repair, or electrical or mechanical adjustment.
- The use of accessory attachments not recommended by the appliance manufacturer may cause injuries. Use only genuine Presto dehydrating trays and accessories with this dehydrator.
- Do not let cord hang over edge of table or counter or touch hot surfaces.
- Do not use outdoors.
- Do not place on or near a hot gas or electric burner or in a heated oven.
- Never use this appliance to dehydrate foods that contain alcohol or have been marinated in alcohol.
- Do not use appliance for other than intended use.
THIS APPLIANCE IS FOR HOUSEHOLD USE ONLY.
Important Cord Information
This appliance has a polarized plug (one blade is wider than the other). To reduce the risk of electric shock, this plug is intended to fit into a polarized outlet only one way. If the plug does not fit fully into the outlet, reverse the plug. If it still does not fit, contact a qualified electrician. Do not attempt to modify the plug in any way.
A short power supply cord is provided to reduce the risk of becoming entangled in or tripping over a longer cord. An extension cord may be used if care is properly exercised in its use.
If an extension cord is used, the marked electrical rating of the extension cord should be at least as great as the electrical rating of the appliance. The extension cord should be arranged so that it will not drape over the countertop or tabletop where it can be pulled on by children or tripped over unintentionally.
Connect the power supply cord to a 120VAC electrical outlet only.
Consumer Service Information
If you have any questions regarding the operation of your Presto® appliance or need parts for your appliance, contact us by any of these methods:
- Call 1-800-877-0441 weekdays 8:00 AM to 4:00 PM (Central Time)
- Email us through our website at www.GoPresto.com/contact
- Write:
National Presto Industries, Inc.
Consumer Service Department
3925 North Hastings Way, Eau Claire, WI 54703-3703
Inquiries will be answered promptly by email, telephone, or letter. When emailing or writing, please include a phone number and a time when you can be reached during weekdays if possible.
When contacting the Consumer Service Department, please indicate the model and series numbers for the dehydrator. These numbers can be found on the bottom of the power cover.
The Presto Factory Service Department is equipped to service Presto® appliances and supply genuine Presto® parts. Genuine Presto® replacement parts are manufactured to the same exacting quality standards as Presto® appliances and are engineered specifically to function properly with its appliances. Presto can only guarantee the quality and performance of genuine Presto® parts. "Look-alikes" might not be of the same quality or function in the same manner. To ensure that you are buying genuine Presto® replacement parts, look for the Presto® trademark.
Canton Sales and Storage Company
Presto Factory Service Department
555 Matthews Dr.
Canton, MS 39046-3251
Product Registration

Please go online and register this product within ten days of purchase. Proper registration will serve as proof of purchase in the event your original receipt becomes misplaced or lost. Registration will not affect warranty coverage, but it may expedite the processing of warranty claims. The additional information requested will help us develop new products that best meet your needs and desires. To register your product, visit www.GoPresto.com/registration or simply scan this QR code. If you do not have computer access, call the Consumer Service Department at 1-800-877-0441.

Get the most from your Presto®Food Dehydrator with these handy accessories...
Presto™ Jerky Gun (Part 08632)
Make delicious homemade jerky from beef, venison, or other meats. Includes jerky gun with three interchangeable nozzles.

The following accessories are for use with dehydrator models 0630005 and 0630106.
Presto® Fruit Roll Sheets (Part 06313)
Make healthy, nutritious snacks. These special sheets are ideal for making fruit rolls and strips from fresh, frozen, and canned fruit.
Sold in sets of two.

Presto® Nonstick Mesh Screens (Part 06314)
These flexible mesh screens fit into the dehydrator trays to keep foods that get very small when dried, such as berries, from falling through the tray grates. The flexible mesh allows for easy removal of foods that may stick to the grates, such as bananas and tomatoes.
Sold in sets of two.

Presto® Add-on Nesting Dehydrator Trays (Part 06315)
Expand the capacity of your Presto® Dehydro™ Dehydrator. Trays are designed to nest inside each other when not in use to save storage space.
Sold in sets of two.

Model 0630005 is designed to work with up to eight trays.
These dehydrator accessories should be available wherever
Presto® Dehydro™ Dehydrators are sold; however, if you would like to order them directly from Presto, see the information below.
How to Order:
Visit www.GoPresto.com. If you do not have computer access, call the Consumer Service Department at 1-800-877-0441 weekdays between 8:00 AM and 4:00 PM (Central Time). Please have your credit/debit card number and expiration date ready. Payment options on telephone orders limited to credit/debit cards only.
Documents / Resources
References
Download manual
Here you can download full pdf version of manual, it may contain additional safety instructions, warranty information, FCC rules, etc.
Advertisement


Need help?
Do you have a question about the 06300 and is the answer not in the manual?
Questions and answers