Advertisement
- 1 REPLACEMENT PARTS
- 2 PRODUCT OVERVIEW
- 3 ADDITIONAL FEATURES
- 4 ACCESSORIES
- 5 USING YOUR PRODUCT
- 6 CARE & MAINTENANCE
- 7 LP GAS
- 8 FREQUENTLY ASKED QUESTIONS
- 9 TROUBLESHOOTING
- 10 IMPORTANT SAFETY WARNINGS
- 11 SERVICE AND WARRANTY
- 12 Documents / Resources
REPLACEMENT PARTS

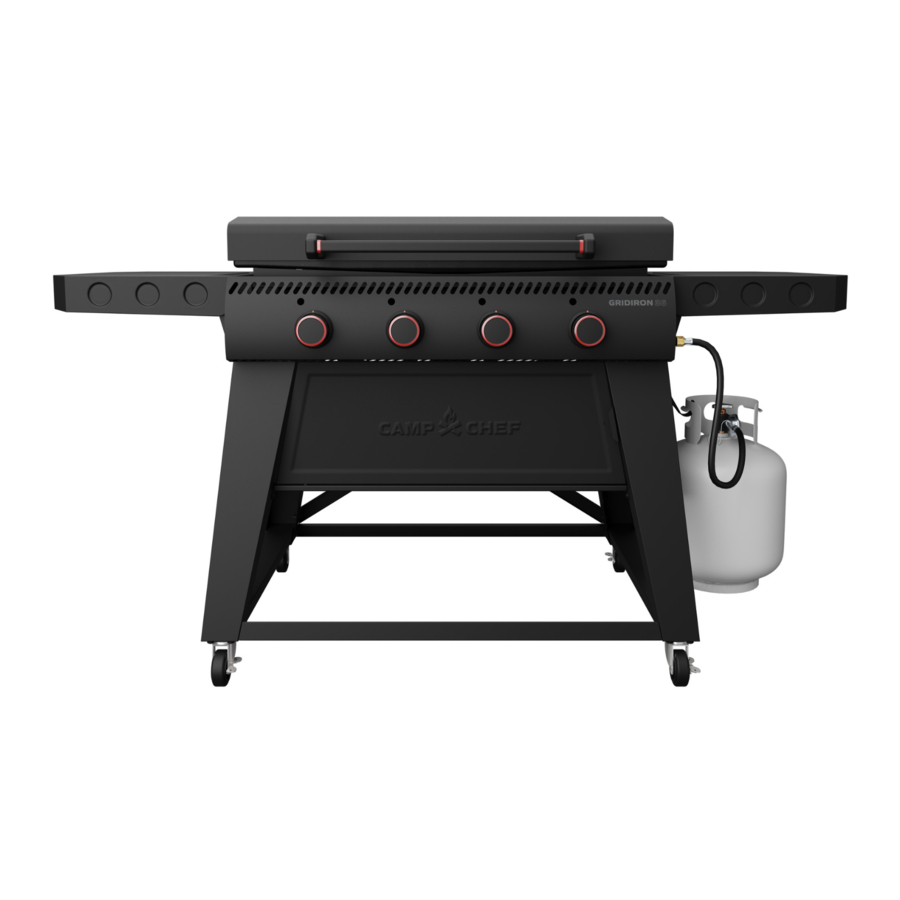
PRODUCT OVERVIEW

DESIGNED FOR YOU:
- GREASE TROUGH:
Large, centrally located hole allows grease and particles to easily drain away from food off the front of the griddle.

- GREASE CHUTE AND BUCKET:
Collect all the grease and particles in a large, easy-to-clean bucket. Use liners to make it even easier.

- MAGNETIC ACCESSORY SYSTEM:
Customize your griddle shelves to organize griddle tools, paper towels, or sauce bottles.

- FLAMETHROWER IGNITION:
Easy and reliable electric ignition for a seamless start-up.


ADDITIONAL FEATURES
- GRIDDLE LEVELER:
Adjust the griddle, even when hot, with the two bolts located on the back of grill.

- SPATULA NOTCH:
Keep your greasy spatula on the griddle. The notches on the side of the griddle allow the lid to be closed with the spatula handle sticking out the side.

- FOLDING SIDE SHELVES:
Oversized shelves fold down and are removeable for storage or transportation.


ACCESSORIES
Accessories are a grill's best friend, so whether you love flipping pancakes and eggs or smashing some burgers, we've got the tools for you.

BREAKFAST KIT
6-piece professional griddle breakfast kit

SPATULA SET
2-piece metal spatula set

BOTTLE CADDY
Magentic bottle holder with two queeze bottles

GRIDDLE CLEANING KIT
4-piece essential griddle cleaning kit

SMASH BURGER KIT
3-piece griddle smashed burger kit

GRILLING TONGS
Classic 14 in. grilling tongs

PAPER TOWEL HOLDER
Magnetic paper towel holder

REPLACEMENT SCOURING KIT
Replacement scouring pads and refinishing stone

GRIDDLE ESSENTIALS KIT
7-piece griddle essential kit

GRIDDLE SCRAPER
Heavy-duty 5 in. griddle scraper

PREMIUM GRILL COVER
Grill cover for the GRIDIRON 36

SILICONE GRIDDLE MAT
36 in. protective silicone mat
USING YOUR PRODUCT
Follow these basic instructions to get up and cooking your new griddle:
PRE-USE INSPECTION
Choose Your Location
Use your new grill ONLY on a level, stable noncombustible surface like bricks, concrete or dirt. Do NOT use this appliance on any surface that will burn or melt like wood, asphalt, vinyl, or plastic.
Keep the area clear of all combustible material and flammable liquids, including wood, dry plants and grass, brush, paper, and canvas.
Keep children and pets away from burner at all times.
 Do NOT use in a building, garage or any other enclosed area.
Never use this appliance as a heater.
Installation must conform with local codes, or in their absence with National Fuel Gas Code, NFPA 54/ANSI Z223.1, or Natural gas and propane installation code CSA B149.1 or propane storage and handling code B149.2. Handling and storage of LP cylinders must conform to LP Gas Code NFPA/ANSI 58. Appliance is not for use in or on recreational vehicle and/or boats.
Apartment Dwellers: Check with management to learn the requirements and fire codes for using an LP Gas appliance at an apartment. If allowed, use outside on the ground floor with a 10 foot clearance from walls or rails. Do NOT use appliance on or under any apartment, condominium balcony or deck.
Level Your Product
Use the provided wrench, level your griddle by adjusting the bolts on the back of your griddle as shown below.

You want the grease to freely run toward the front of the grill where the grease management system is located.
Your griddle comes pre-seasoned and has a natural non-stick surface.
Your griddle may have a light oily coating due to the manufacturing process. Before using, wash, rinse and dry thoroughly. Use mild, soapy warm water (never use abrasive detergent) and a stiff brush.

LP GAS
(LIQUEFIED PETROLEUM GAS)
Use appliance only with LP (propane) gas and the regulator/valve assembly supplied with the appliance.
Never use LP tank if visibly rusted, damaged, or out of date.
Installing the LP Gas Cylinder
- Check that the cylinder valve is closed by turning the knob clockwise.
- Hang the cylinder from the tank hook while aligning the cylinder ring into the tank holder at the bottom of legs.

- Orient the cylinder such that the valve opening faces the right side or the front of the grill, and so that the hose is not kinked or damaged.
![warning]() Never operate appliance with LP tanks out of correct position specified in Assembly Instructions.
Never operate appliance with LP tanks out of correct position specified in Assembly Instructions. - Attach or detach regulator to the LP gas cylinder only when cylinder is at rest in tank holder.
![warning]() Always close LP tank valve and remove coupling nut before moving LP tank from specified operating position.
Always close LP tank valve and remove coupling nut before moving LP tank from specified operating position. - Remove the protective cap from LP tank valve. Always use cap and strap supplied with valve.
![warning]() Do not use a POL transport plug (plastic part with external threads). It will defeat the safety feature of the valve.
Do not use a POL transport plug (plastic part with external threads). It will defeat the safety feature of the valve. - Hold regulator, insert nipple (A) into LP tank valve. Hand tighten coupling nut, holding regulator in a straight line (B) with LP tank valve so as not to cross thread the connection.
- Turn the coupling nut clockwise to tighten to a full solid stop. The regulator will seal on the back-check feature in LP tank valve, resulting in some resistance. An additional one-half to three quarters turn is required to complete connection. Tighten by hand only – do not use tools.
- Nipple has to be centered into the LP tank valve
![]()
- Hold coupling nut and regulator as shown for proper connection to LP tank valve
![]()
- Nipple has to be centered into the LP tank valve


If you cannot complete connection, disconnect regulator and repeat steps 6 and 7. If you are still unable to complete the connection, do not use this regulator!
If you see, smell, or hear escaping gas, immediately get away from the LP tank/appliance and call your fire department.
 Do not insert any foreign objects into the valve outlet. You may damage the valve and cause a leak. Leaking propane may result in explosion, fire, severe personal injury, or death.
Never attempt to attach this appliance to the self-contained LP gas system of a camper or trailer or motor home.
Overtime the seal in your LP Tank can be marked, damaged or deteriorate that might cause a leak even when connection is tightened. After every exchange, replace or fill, inspect the seal. Look for signs of damage, cracks, pitting, or other deterioration as seen below. If damage is found return tank unused to seller.

Leak Testing
Extinguish all open flames before connecting the gas supply to the appliance and before checking for leaks.
- Turn all control knob(s) to OFF.
- Be sure regulator is tightly connected to LP tank.
- Slowly open LP tank valve by turning hand wheel counter clockwise. If you hear a rushing sound, turn gas off immediately. There is a major leak at the connection. Correct the leak before proceeding.
- Brush 50/50 soap and water solution onto indicated connections shown.

- If "growing" bubbles appear, there is a leak. Close LP tank valve immediately and retighten connections. If leaks cannot be stopped, do not try to repair. Call for replacement parts. Order new parts by giving the serial number, model number and name of items needed to the Service Center at 1-435-752-3922.
- Always close LP tank valve after performing tank leak test or when appliance in not in use by turning hand wheel clockwise.

Do not use appliance until leak checked.
If you cannot stop a gas leak, immediately close LP tank valve and call LP gas supplier or your fire department!
LP Tank Leak Test
Appliance must be leak checked outdoors in well ventilated area, away from ignition sources such as gas fired or electrical appliances. During leak test, keep appliance away from open flames or sparks.
- Leak test must be repeated each time LP tank is exchanged or refilled.
- Do not smoke during leak test.
- Do not use an open flame to check for gas leaks.
Use a clean paintbrush and 50/50 soap and water solution. Use mild soap and water. Do not use household cleaning agents. Damage to gas train components can result. Brush soapy solution onto all weld seams and entire valve area.
If "growing" bubbles appear, do not use or move the LP tank. Contact an LP gas supplier or your fire department.
Hose Check
Before each use, clean and inspect the hose before each use of the appliance. If there is evidence of abrasion, wear, cuts or leaks, the hose must be replaced prior to the appliance being put into operation. Use only valve/hose/ regulator specified by manufacturer.
To prevent accidental fires, before using the appliance ensure that the hose is not damaged and all joints and connections are not leaking by turning on the cylinder valve, leave the burner valve closed, and apply a soapy solution to the joints and connections. If a continuous hissing sound is heard, or if the soapy solution bubbles, there is a leak. Do not use the appliance if there is a leak. Replace the faulty parts.
Keep the fuel supply hose away from any heated surfaces.
LIGHTING INSTRUCTIONS
Follow these instructions exactly:
Opening the LP Valve
- Check that all burner control knobs and the cylinder valve are turned to the "OFF" position.
- Turn on the fuel supply by rotating the cylinder valve knob counter-clockwise to full open.
DO NOT stand with head, body, or arms over the grill when lighting.
Lighting the Burners

- Make sure all control knobs are in the "OFF" position.
- Select the burner to be lit. Push and turn the control knob of that burner to the "HIGH" position.
- If ignition does NOT occur in 5 seconds, turn control knob to "OFF", wait 5 minutes to allow gas to dissipate and repeat lighting procedure.
- Repeat steps 2–3 for lighting each burner. If burner does not ignite, wait 5 minutes, see "Match Lighting the Burners" section.
- To turn off, turn each control knob clockwise until it locks in the "OFF" position. This does not turn off the gas flow from the cylinder.
Note: If burner does not light or flame is too low, you may have spider or other insect blockage in burner. See "Burner Assembly/Maintenance" under Care and Maintenance.
The regulator may make a humming or whistling noise during operation. This will not affect the safety or use of the appliance.
Match Lighting the Burners

- Turn the burner control knobs to "OFF".
- Place a paper match in the end of the match holder. Strike the match and place through lighting hole in the left hand side of the grill to approximately 1/2" (1 to 2 cm) from the burner.
- Turn on the FAR LEFT burner control knob to the "HIGH" position. The burner should light within 5 seconds.
- If the burner does not light, turn the control knob to "OFF" and wait 5 minutes for gas to dissipate and repeat lighting procedure.
- Once lit, light adjacent burners in sequence by pressing in and rotating the control knob to the "HIGH" position.
- If the burner does not light within the first few attempts of match lighting, there is a problem with the gas supply. Turn off the gas at the burner and cylinder. DO NOT attempt to operate the grill until the problem is found and corrected. See "Trouble Shooting" section of this manual.
Burner Flame Check

Light burner; rotate knob(s) from HIGH to LOW. You should see a smaller flame in LOW position than seen on HIGH. Always check flame prior to each use. A blue flame with little or no yellow flame provides the best heat.
Do not block holes in bottom or sides of appliance.
Do not modify this appliance. Modifications will result in a safety hazard. Questions regarding certification in other areas may be addressed to 1-435-752-3922.
HEATING UP YOUR PRODUCT
Giving your griddle time to pre-heat properly will ensure you're getting the best cooking performance possible.
- Start by setting your heat to Medium or Med-Low for about 5 minutes. This should bring the griddle surface temperature to about 350°-400°F, depending on the weather and environment.
- Then turn the heat to Med-Low or Low for 2-3 minutes for uniform heat across the entire cooking surface. The steel heats up quickly but cools slowly, so you'll have plenty of heat to work with even after you turn down the burners.
- You're ready to get cooking.
Managing the heat on your griddle is important to prevent any possible damage. While the steel is strong and durable, you should only use Low or Medium heat settings. This is especially important if you want to use different heat settings on a large griddle that covers multiple burners. You have the capability to warm a tortilla on one side and cook a fajita mix on the other, but you want to keep both settings on Medium or lower.

To avoid warping of the griddle never preheat on high. Preheat the griddle on medium heat and then slowly increase the heat as needed to achieve the desired griddle temperature.
Never leave unattended
Never operate the appliance without the grease cup installed under the appliance. See assembly instructions for proper assembly.
Use gloves or oven mitts to hold grease cans when moving to avoid spilling hot grease.
This appliance will be hot during and after use. Use insulated oven mitts or gloves for protection from hot surfaces or splatter from cooking liquids.
If you notice grease or other hot material dripping from appliance onto valve, hose or regulator, turn off gas supply at once. Determine the cause, correct, clean and inspect valve, hose and regulator before continuing. Perform a leak test.
Never use charcoal or wood briquets in a gas grill. Flavoring chips must be contained in a metal smoking box to contain ash and prevent fires.
Never place more than 25 pounds on the side shelf. DO NOT lean on the side shelf.
CLEANING YOUR PRODUCT
- After each use, clean off any food particles while the griddle is still warm. You might want to use a metal spatula or chain mail scrubber to remove stubborn bits.
- Then wash with hot water, mild dish soap (never use abrasive detergent), or our Cast Iron Cleaner.
- Rinse and dry thoroughly. Never scour or use a dishwasher, as this could chip the nice, seasoned finish you're going for.
- Apply a thin coat of Cast Iron Conditioner or cooking oil to the griddle and spread using a paper towel.
- Heat the griddle until it the oil starts to smoke. Then turn off the heat and wipe any excess oil off the griddle top.
- Store in a dry place.
STORING YOUR PRODUCT
Turning LP Grill Off
- Turn all knobs to OFF position.
- Turn LP tank OFF by turning hand-wheel clockwise to a full stop.
Protecting your griddle
To protect your grill from excessive rust, the unit must be kept clean, dry and covered at all times when not in use.
Always allow the appliance to cool before covering with a cover.
Safety first! Make sure your grill is totally cool before storing.
CARE & MAINTENANCE
Correct care and maintenance of your GRIDIRON 36 will keep your new griddle operating smoothly for years to come.
HOW TO CARE FOR YOUR PRODUCT
The GRIDIRON 36 professional griddle comes with a True-Seasoned Finish. To keep this finish in tip-top condition, your griddle needs a little TLC every now and then. By following the guide below, you will help keep your griddle clean, prevent rust, and build up the glass-like finish to keep food from sticking.
Heating up Your Product
Giving your griddle time to pre-heat properly will ensure you're getting the best cooking performance possible.
Start by setting your heat to Medium or Med-Low for about 5 minutes. This should bring the griddle surface temperature to about 350°-400°F, depending on the weather and environment.
Then turn the heat to Med-Low or Low for 2-3 minutes for uniform heat across the entire cooking surface. The steel heats up quickly but cools slowly, so you'll have plenty of heat to work with even after you turn down the burners.
You're ready to get cooking.
Managing the heat on your griddle is important to prevent any possible damage. While the steel is strong and durable, you should only use Low or Medium heat settings. This is especially important if you want to use different heat settings on a large griddle that covers multiple burners. You have the capability to warm a tortilla on one side and cook a fajita mix on the other, but you want to keep both settings on Medium or lower.
To avoid warping of the griddle never preheat on high. Preheat the griddle on medium heat and then slowly increase the heat as needed to achieve the desired griddle temperature.
Never leave unattended
Cleaning Your Griddle
- After each use, clean off any food particles while the griddle is still warm. You might want to use a metal spatula or chain mail scrubber to remove stubborn bits.
- Then wash with hot water, mild dish soap (never use abrasive detergent), or our Cast Iron Cleaner.
- Rinse and dry thoroughly. Never scour or use a dishwasher, as this could chip the nice, seasoned finish you're going for.
- Apply a thin coat of Cast Iron Conditioner or cooking oil to the griddle and spread using a paper towel.
- Heat the griddle until it the oil starts to smoke. Then turn off the heat and wipe any excess oil off the griddle top.
- Store in a dry place.
Cleaning Your Grease Chute
Allow your griddle to cool, then use a long handled, soft-bristled brush to push any remaining debris that may have lodged in the grease chute down into the grease bucket.
Seasoning Your Product
Apply a thin layer of Cast Iron Conditioner or cooking oil on your clean griddle. We recommend Cast Iron Conditioner because it has a palm oil base, which boasts a longer shelf life than any other natural oil. Be sure that the entire surface, including all corners, have been coated thoroughly. This will ensure that all surfaces of your cookware will be properly seasoned. This finish helps protect from rust and contributes to a nonstick cooking surface. Let your griddle cool, then wipe off excess conditioner or oil with a clean cloth. Rust, metallic taste or discolored foods are signs of improper or inadequate seasoning or may result from cooking acidic foods. If this occurs, wash thoroughly and re-season.
Cleaning Your Grill
Clean inside and outside of grill by wiping off with a damp cloth. Apply a light coat of vegetable oil or vegetable oil spray to the interior surface to prevent rusting.
Do not use oven cleaner, abrasive cleaners, or abrasive cleaning pads on the exterior surfaces of your grill.
Never apply paint to the interior surface.
Rust spots on the interior surface can be buffed, cleaned, then lightly coated with vegetable oil or vegetable oil spray to minimize rusting.
Storage
To protect your grill from excessive rust, the unit must be kept clean, dry and covered at all times when not in use.
Safety first! Make sure your grill is totally cool before storing.
CLEANING YOUR BURNERS
Spiders and small insects can spin webs and build nests inside the burner. This especially occurs in late summer and fall before frost when spiders are most active. These nests can obstruct gas flow and cause a fire in and around the burner and orifice. Such a fire can cause operator injury and serious damage to the appliance. To help prevent a blockage and ensure full heat output, clean and inspect burner tube often (once or twice a month). NOTE: Water or air pressure will not normally clear a spider web.
All cleaning and maintenance should only be done when the appliance is cool and with the fuel supply turned off at the LP cylinder. DO NOT clean any part in a self-cleaning oven. The extreme heat will damage the finish.
Burner Assembly/Maintenance
Although your burners are constructed of stainless steel, they may corrode as a result of the extreme heat and acids from cooking foods. Regularly inspect the burners for cracks, abnormal holes, and other signs of corrosion damage. If found, replace the burner.
DO NOT obstruct the flow of combustion and ventilation air. Burner tubes can become blocked by spiders and other insects building their nests. Blocked burner tubes can prevent gas flow to the burners and could result in a burner tube fire or fire beneath the grill.
To clean the Burner Assembly follow these instructions to clean and/or replace parts of burner assembly or if you have trouble igniting the grill.
- Turn gas off at control knobs and LP cylinder tank valve.
- Remove griddle.
- Remove screws using a screwdriver.

- Carefully lift each burner up and away from valve openings.
- Use a narrow bottle brush or a stiff wire bent into a small hook to run through each burner tube and flame port several times.
Note: Wear eye protection when performing procedure 6.

- Use compressed air to blow into burner tube and out the flame ports. Check each port to make sure air comes out each hole.
- Wire brush entire outer surface of burner to remove food residue and dirt.
- Clean clogged gas port holes with an opened paper clip.
- Check burner for damage, if any large cracks or holes are found replace burner. IMPORTANT: Burner opening must slide over valve nozzle.

- Orient burners CORRECTLY by aligning screw hole in burner to the left as shown. Note: Make sure burner tubes align evenly between cross over channels.
- Replace screw on each burner and follow the "Gas Leak Testing" section of this manual. Relight burners to verify proper operation.
- Replace griddle.


LP GAS
(LIQUEFIED PETROLEUM GAS)
LP gas is non-toxic, odorless and colorless when produced. For Your Safety, LP gas has been given an odor (similar to rotten cabbage) so that it can be smelled. LP gas is highly flammable and may ignite unexpectedly when mixed with air.
LP Tank Removal and Transport/Storage
- Turn OFF all control knobs and LP tank valve. Turn coupling nut counterclockwise by hand only – do not use tools to disconnect. Install safety cap onto LP tank valve. Failure to use safety cap as directed may result in serious personal injury and/or property damage. Place dust cap on cyclinder valve outlet whenever the cylinder is not in use. Only install the type of dust cap on the cylinder valve outlet that is provided with the cylinder valve. Other types of caps or plugs may result in leakage of propane.
- A disconnected LP tank in storage or being transported must have a safety cap installed. Do not store an LP tank in enclosed spaces such as a carport garage, porch, covered patio or other building. Never leave an LP tank inside a vehicle, which may become overheated by the sun.
- Store LP tanks out of reach of children.
- All spare LP tanks must have safety caps installed on the LP tank outlet.
- If the appliance is not in use, the gas mus be turned off at the supply cylinder.
- Storage of an appliance indoors is permissible only if the cylinder is disconnected and removed from the appliance.
LP Tank
This grill is designed to fit Worthington, Manchester or SMPC brand 20 lb. (9.1 kg) cylinders. Other brand DOT cylinders may fit this grill if the cylinder has similar dimensions of the top and bottom rings. The LP tank used with your appliance must meet the following requirements:
- Purchase LP tanks only with these required measurements: 12" (30.5cm) (diameter) x 18" (45.7cm) (tall) with 20 lb. (9 kg.) capacity maximum.
- Be constructed and marked in accordance with specifications for LP tank of the U.S. Department of Transportation (DOT) or the National Standard of Canada, CAN/ CSA-B339, Cylinders, Spheres and Tubes for the Transportation of Dangerous Goods.
- The propane cylinder used with this appliance must include a collar to protect the cylinder valve.
LP tank valve must have
- Type 1 outlet compatible with regulator or appliance.
- Safety relief valve.
- UL listed Overfill Protection Device (OPD). This OPD safety feature is identified by a unique triangular hand wheel. Use only tanks equipped with this type of valve.
- LP tank must be arranged for vapor withdrawal.
LP Tank Filling
- Use only licensed and experienced dealers.
- LP dealer must purge tanks before filling.
- Dealer should NEVER fill LP tank more than 80% of LP tank volume. Volume of propane in tanks will vary by temperature.
- A frosty regulator indicates gas overfill. Immediately close LP tank valve and call local LP gas dealer for assistance.
- Do not release liquid propane (LP) gas into the atmosphere. This is a hazardous practice.
- To remove gas from LP tank, contact an LP dealer or call a local fire department for assistance. Check the telephone directory under "Gas companies" for nearest certified LP dealers.
LP Tank Exchange
- Many retailers that sell appliances offer you the option of replacing your empty LP tanks through an exchange service. Use only those reputable exchange companies that inspect, precision fill, test and certify their cylinders. Exchange your tank only for an OPD safety feature-equipped tank as described in the "LP Tank" section of this manual.
- Always keep new and exchanged LP tanks in upright position during use, transit or storage.
- Leak test new and exchanged LP tanks BEFORE connecting to appliance.
FREQUENTLY ASKED QUESTIONS
| Can I use my griddle indoors? | No. All of our products have been safety tested and approved to outdoor use only. |
| My griddle is rocking, can I level it? | Using the provided wrench, level your griddle by adjusting the bolts on the back of your griddle. You want the grease to freely run toward the front of the grill where the grease management system is located. |
| What is the griddle made of and is it pre-seasoned? | The griddle is made from a cold-rolled steel that has an allnatural seasoning that is baked on. |
| Do I need to pre-heat my griddle? | Yes. For the best performance pre-heat your griddle to medium or medium-low for approximately 5 minutes. This should produce a griddle surface temperature of 350 – 400F. Then turned heat to medium low to low for 2-3 minutes for uniform heat and you are ready to cook. |
| Do I have to light the burners in any certain order? | No. You can turn on all the burners and then light the far burner and the rest will light or they can light each of them one at a time. |
| Do I need to season my griddle before the first use? | No, it is pre-seasoned and ready to use right out of the box. |
| Do I need to clean my griddle after every use? | Yes. Be sure to allow for your griddle to cool completely. Wash with hot water and or a mild dish soap, rinse, and store in a dry place. |
| Do I need to re-season my griddle after use? | Yes. Re-seasoning your griddle is key. Slowly warm up your griddle. Apply a thin coat of Camp Chef Conditioner or olive oil. Make sure you cover all corners and crevasses. Wipe any excess oil off, turn off your burner, and store in a dry place once completely cooled. |
| Is this a nonstick surface, like Teflon? | All Camp Chef griddles come with a True Seasoned non-stick, ready to cook baked on layer. It will have a surface similar to our cast iron skillets. The more you cook and care for it, the longer the life of your griddle. |
| Why are there black flaky pieces peeling off? | The black flaky pieces coming off, is just baked-on seasoning. This can happen as you use the grill. |
| Is there any way to prevent rust on my griddle? | Yes. Be sure to re-season your griddle/cast iron after every use by using the Camp Chef Conditioner. |
| What does it mean if my food tastes rusty or metallic? | This means is a sign of improper or inadequate seasoning. If this occurs, wash thoroughly and re-season. |
| Why did my griddle warp? | The only reason it would warp is if there was an uneven heat across the griddle. This can happen a few different ways. One way would be to heat the griddle up to quickly, by turning the burners on above medium heat setting. We do suggest using the griddles on medium heat or lower and having all the burners on at the same time, and not only heating part of the griddle. Also, if your griddle is already hot and you place frozen or cold food only on one side of the griddle, it will shock the steel causing warping. |
| Is there any way to straighten my warped griddle? | Try this. Place two pots of water on top of the warped griddle. Turn the burners on medium heat and begin heating up the large pots of water. Once the water is almost boiling, turn the unit off and allow the griddle to cool (with the weight of the pots of water sitting on it.) |
| How can i actively prevent warping? | Adjust your heat up slowly and keep all burners at the same output setting for an even cook and to avoid warping. Do not heat your griddle on high. |
| Are there hot spots on my griddle? | No. Our griddles have heat diverter plates welded to the bottom of the griddle to help disperses heat. However, there are different heat ones. For example, the center area is slightly cooler and is often used as a warming area. Camp Chef flat top griddles have been tested alongside top competitors in the business and have the most consistent overall heat displacement. |
| Can weather play a factor in my cooking? | Possibly. The wind can blow the flame around, causing the flame to heat more on one side than the other. |
| Why is my griddle sticky? | We have found the best seasoning/oil to use on griddles is olive oil or coconut oil. Note that cooking spray's like Pam, will leave a sticky residue. |
| Is there any way to remove the top coat of my griddle after using a cooking spray? | Yes. Try pouring Coca-Cola on the griddle surface and rub with a ball of tin foil. Repeat, rinse with water, then dry with a paper towel. Re-season by applying olive oil or coconut oil. |
TROUBLESHOOTING
Can I use my product indoors? | No. All of our products have been safety tested and approved to outdoor use only. |
| My griddle does not heat up. The flame lit and the griddle is running on high, but it isn't getting hot. | The regulator is equipped with a low flow safety device. To keep your regulator out of Low Flow Mode, ensure that all control knobs on the stove and tank are turned OFF. Use a wrench to connect hose to stove. Connect regulator to tank. Securely tighten. Twist open the knob on your propane tank slowly. When opened too quickly, the regulator will enter into Safety Mode, which greatly reduces heat output and gas flow to your stove. |
My grease management door keeps opening | Loosen the screws that hold the door magnets. Adjust the magnets forward so they will engage with the door and tighten the screws down. |
For more troubleshooting resources visit our Help Center by scanning this QR code:

IMPORTANT SAFETY WARNINGS
FOR OUTDOOR USE ONLY

If you smell gas:
- Shut off gas to the appliance at the tank.
- Extinguish any open flame.
- Open lid
- If odor continues, keep away from the appliance and immediately call your fire department.

Failure to follow these instructions could result in fire, explosion or burn hazard, which could cause property damage, personal injury or death.
- To installer or person assembling this appliance: Leave this manual with this appliance for future reference.
- To consumer: Keep this manual with this appliance for future reference.
This instruction manual contains important information necessary for the proper assembly and safe use of this product. Read and follow all warnings and instructions before assembling and using this appliance. Do not discard this instruction manual.
- DO NOT store a spare LP gas cylinder under or near this appliance.
- Never fill the cylinder beyond 80% full.
- If the information above is not followed exactly, a fire causing death or serious injury could occur.
- DO NOT store or use gasoline or other flammable liquids or vapors in the vicinity of this or any other appliance.
- An LP cylinder not connected for use shall not be stored in the vicinity of this or any other appliance.
- Never operate this appliance unattended.
- Never operate this appliance within 10 ft (3 m) of any structure, combustible material or other gas cylinder.
- Never operate this appliance within 25 ft (7.5 m) of any flammable liquid.
- Never allow oil or grease to get hotter than 400°F (200°C). If the temperature exceeds 400°F (200°C), or if oil begins to smoke, immediately turn burner or gas supply OFF.
- Heated liquids remain at scalding temperatures long after the cooking process. Never touch cooking appliance until liquids have cooled to 115°F (45°C) or less.
![burn hazard]() If a fire should occur, keep away from appliance and immediately call your fire department. Do not attempt to extinguish an oil or grease fire with water.
If a fire should occur, keep away from appliance and immediately call your fire department. Do not attempt to extinguish an oil or grease fire with water.
This appliance shall only be used in an above ground open-air situation with natural ventilation, without stagnant areas, where gas leakage and products of combustion are rapidly dispersed by wind and natural convection
Any enclosure in which the appliance is used shall comply with one of the following:
- An appliance with shelter no more inclusive than with walls on three sides, but with no overhead cover; all openings shall be permanently open; sliding doors, garage doors, windows, or screened openings are not considered as permanent openings.
![]()
- An appliance is considered to be outdoors if installed with shelter no more inclusive than within a partial enclosure that includes an overhead cover and no more than two sidewalls. The sidewalls may be parallel, as in a breezeway, or at right angles to each other; all openings must be permanently open; sliding doors, garage doors, windows, or screened openings are not considered as permanent openings.
![]()
- An appliance is considered to be outdoors if installed with shelter no more inclusive than within a partial enclosure that includes an overhead cover and three sidewalls, as long as 30% or more of the horizontal periphery of the enclosure is permanently open. All openings must be permanently open; sliding doors, garage doors, windows, or screened openings are not considered as permanent openings.
![]()


READ AND FOLLOW ALL INSTRUCTIONS BEFORE INSTALLING AND USING THE APPLIANCE
Please read this entire manual before installation and use of this appliance. Failure to follow these instructions could result in property damage, bodily injury, or even death. Contact local building or fire officials about restrictions and installation inspection requirements in your area. SAVE THESE INSTRUCTIONS.
TO INSTALLER OR PERSON ASSEMBLING THIS APPLIANCE:
Leave this manual with this appliance for future reference.
TO CONSUMER: Keep this manual with this appliance for future reference.
This instruction manual contains important information necessary for the proper assembly and safe use of this product.
FOR OUTDOOR USE ONLY
THIS PRODUCT IS NOT INTENDED FOR COMMERCIAL USE.
THE USE OF ALCOHOL, PRESCRIPTION OR NON-PRESCRIPTION DRUGS MAY IMPAIR YOUR ABILITY TO PROPERLY ASSEMBLE OR SAFELY OPERATE THIS APPLIANCE.
NEVER OPERATE APPLIANE WHEN AMBIENT TEMPERATURE IS LESS THAN 0˚F (-17.8 C)̊
CARBON MONOXIDE WARNING
Follow these guidelines to prevent this colorless, odorless gas from poisoning you, your family or others:
- Know the symptoms of carbon monoxide poisoning: headache, dizziness, weakness, nausea, vomiting, sleepiness, and confusion. Carbon monoxide reduces the blood's ability to carry oxygen. Low blood oxygen levels can result in loss of consciousness and death.
- See a doctor if you or others develop cold or flu-like symptoms while cooking or in the vicinity of this appliance. Carbon monoxide poisoning, which can easily be mistaken for a cold or flu, is often detected too late.
- Alcohol consumption and drug use increase the effects of carbon monoxide poisoning.
- Carbon monoxide is especially toxic to mother and child during pregnancy, infants, the elderly, smokers and people with blood or circulatory system problems, such as anemia, or heart disease.
- Never use this appliance as a heater.
SAVE THESE INSTRUCTIONS
FIRE HAZARD:
- Never operate this appliance unattended. The user must remain in the immediate area of the product and have a clear view of the product at all times during operation.
- Never operate this appliance within 10 ft (3 m) of a stored LP cylinder.
- Never operate this appliance within 25 ft (7.5 m) of any flammable liquid.
![burn hazard]() If a fire should occur, stay clear from flames and immediately call your fire department. Do not attempt to extinguish an oil or grease fire with water.
If a fire should occur, stay clear from flames and immediately call your fire department. Do not attempt to extinguish an oil or grease fire with water.- Minimum distance from sides and back of the unit to walls or railings is 36".

- Do not operate under overhead construction.
![burn hazard]() NEVER store a spare LP tank under or near appliance or in enclosed areas. NEVER fill the cylinder beyond 80% full. An overfilled spare LP tank is hazardous due to possible gas released from the safety relief valve. Failure to follow these instructions exactly could cause a fire resulting in death or serious injury.
NEVER store a spare LP tank under or near appliance or in enclosed areas. NEVER fill the cylinder beyond 80% full. An overfilled spare LP tank is hazardous due to possible gas released from the safety relief valve. Failure to follow these instructions exactly could cause a fire resulting in death or serious injury.- When cooking with oil or grease, fire extinguishing materials shall be readily accessible. In the event of an oil or grease fire do NOT attempt to extinguish with water. Use a Type BC dry chemical fire extinguisher or smother fire with dirt, sand or baking soda.

CLEANING:
- All cleaning and maintenance should only be done when the appliance is cool and with the fuel supply turned off at the LP cylinder.
- The grease bucket must be removed and emptied after each use.
- Do not remove grease bucket until griddle has completely cooled.
- Correct care and maintenance will keep your appliance operating smoothly. Clean regularly as determined by the amount of use. NOTE: Clean the entire appliance each year and tighten all hardware on a regular basis (1-2 times a year or more depending on usage). Cleaning should be done where detergents won't harm patio, lawn, or the like.
SERVICE AND WARRANTY
Proof of purchase is required to obtain warranty services.
To obtain warranty services submit a warranty request at www.campchef.com/warranty-information or call (800) 650-2433. Our English speaking Product Specialists are happy to help and are available Monday - Friday, between 9 am to 5 pm, MST at (800) 650-2433.
www.CampChef.com | 1.800.650.2433
301 Camp Chef Way, Hyde Park, UT 84318, USA
Documents / Resources
References
Download manual
Here you can download full pdf version of manual, it may contain additional safety instructions, warranty information, FCC rules, etc.
Advertisement


Need help?
Do you have a question about the FTG36 and is the answer not in the manual?
Questions and answers