Advertisement
Introduction
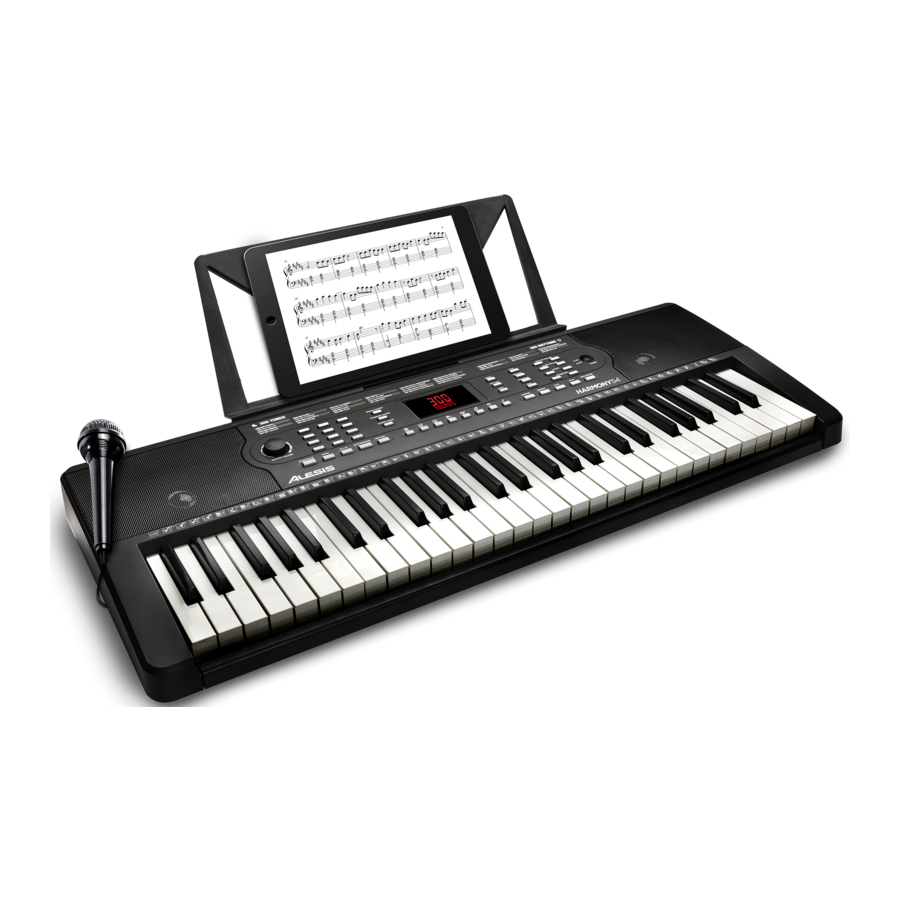
Box Contents
Harmony 54
Microphone
Power Adapter Music Rest
User Guide
Safety & Warranty Manual
Support
For the latest information about this product (system requirements, compatibility information, etc.) and product registration, visit alesis.com.
For additional product support, visit alesis.com/support.
Setup
Connection Diagram
Items not listed in Introduction > Box Contents are sold separately.

Features
Top Panel

- Power On/Off: Press this button to turn the keyboard on or off.
Note: After 5 minutes of inactivity, Harmony 54 will power off. If you press any key, it will turn back on. - Display: This LED Display will update when you make changes to settings such as the tone, rhythm, tempo, etc. Upon power up, the Display shows the currently selected tempo by default.
- Master Volume: Turn the Master Volume knob to increase or decrease the overall volume of the keyboard.
- Number buttons and + / - buttons: Use these buttons to change the tone, accompaniment rhythm, or demo song. Before using the Number or + / - buttons, press the button corresponding to the setting that you would like to change.
- Demo: Press this button to begin playback of one of the demonstration songs. See Operation > Demo Songs for more information.
- Tone: Press this button and then use the Number buttons or + / - buttons to select a tone. See Operation > Choosing Your Keyboard Tone for more information.
- Sustain: Press this button to activate or deactivate the sustain effect. See Operation > Choosing Your Keyboard Tone for more information.
- Vibrato: Press this button to activate or deactivate the vibrato effect. See Operation > Choosing Your Keyboard Tone for more information.
- Dual: Press this button to layer two tones together. See Operation > Choosing Your Keyboard Tone for more information.
- Split: Press this button to use one tone on one side of the keyboard and a separate tone and the other side. See Operation > Choosing Your Keyboard Tone for more information.
- Percussion: Press this button to play percussion sounds with the keys. On will temporarily appear on the Display when the percussion sounds are activated. See the image above each key in order to know what drum sound a key will play. Press the Percussion button again to disable this function. When disabled, OFF will temporarily appear on the Display.
- Transpose: Press the Transpose + or Transpose – button to increase or decrease the pitch of the keyboard by a half-step. See Operation > Choosing Your Keyboard Tone for more information.
- Beat: Press this button to cycle between the different metronome settings: 1/4, 2/4, 3/4, 4/4, and Off. When you power on the keyboard, the metronome will be set to Off by default. When changing the setting, the Display will show the selected setting temporarily. When the metronome is playing, the Display will flash three dots for the first beat of every measure and a single dot for each remaining beat. Use the Tempo + / - buttons to change the tempo of the metronome.
- Rhythm: Press this button and then use the Number buttons or + / - buttons to select an accompaniment rhythm. See Operation > Adding Background Music > Accompaniment Rhythms for more information.
- Start/Stop: Press this button to start or stop an accompaniment rhythm. See Operation > Adding Background Music > Accompaniment Rhythms for more information.
- Sync: Press this button to activate the Sync feature. When the Sync feature is activated, playing any key below G2 will automatically start the currently selected accompaniment rhythm (so that you do not have to press the Start/Stop button). See Operation > Adding Background Music > Accompaniment Rhythms for more information.
- Fill In: While an accompaniment rhythm is playing, press this button to make the keyboard temporarily play a new rhythm or "drum fill." See Operation > Adding Background Music > Accompaniment Rhythms for more information.
- Intro/Ending: Press this button to make the keyboard play either an introductory or ending drumbeat, depending on whether an accompaniment rhythm is already playing. See Operation > Adding Background Music > Accompaniment Rhythms for more information.
- One-Key: Press this button to activate the one-key feature. When this feature is activated, you can play one key at a time to perform a demo song. See Operation > Demo Songs for more information.
- Tempo: Press the Tempo + or Tempo – button to change the keyboard's BPM setting. This will affect playback of the rhythm and chord accompaniments, demo songs, and metronome. Press the Tempo + and Tempo – buttons simultaneously to reset to the default tempo (120 BPM).
- Rhythm Volume: Press the Rhythm Vol + or Rhythm Vol – button to increase or decrease the accompaniment rhythm volume. Press the Rhythm Vol + and Rhythm Vol – simultaneously to reset to the default volume level (A07).
- Single Chord: Press this button to enable the accompaniment chord feature. When this feature is enabled, you can use the keys below G2 to produce chords that automatically play along with the selected accompaniment rhythm. Pressing the Single Chord button (as opposed to Fingered Chord) allows you to use condensed chord shapes instead of using all the keys normally required for a full chord. See Operation > Adding Background Music > Accompaniment Chords for more information.
- Fingered Chord: Press this button to enable the accompaniment chord feature. When this feature is enabled, you can use the keys below G2 to produce chords that automatically play along with the selected accompaniment rhythm. Pressing the Fingered Chord button (as opposed to Single Chord) requires that you play full chord shapes instead of a condensed set of keys for each chord. See Operation > Adding Background Music > Accompaniment Chords for more information.
- Chord Clear: Press this button to turn the accompaniment chord feature off.
- Chord Volume: Press the Chord Vol + or Chord Vol – button to increase or decrease the accompaniment chord volume. Press the Chord Vol + and Chord Vol – buttons simultaneously to reset the accompaniment chords to their default volume level (u07).
- Program: Press this button to program a custom accompaniment rhythm. See Operation > Adding Background Music > Rhythm Programming for more information.
- Record: Press this button to record a song. See Operation > Recording for more information.
- Play: Press this button to play a custom accompaniment rhythm or recorded song.
- Drum Kit Buttons: Press these buttons to play percussion sounds. See the images on the buttons to note which button plays which type of sound. The Drum Kit Buttons are particularly useful for the Rhythm Programming feature. See Operation > Adding Background Music > Rhythm Programming for more information.
Rear Panel
Note: Plugging into the Phones output will mute the keyboard's internal speakers.

- Mic: Connect the included microphone here to sing while playing the keyboard.
- Phones (1/8" / 3.5 mm TRS): Connect headphones (not included) to this output to hear the keyboard.
- Power Input: Connect the included power adapter here.
Bottom Panel

- Battery Compartment: Install 6 AA batteries here to power the keyboard when you are not using the power adapter.
Operation
Choosing Your Keyboard Tone
Harmony 54 comes with 300 unique tones for you to choose from.
To select a tone for the keyboard:
- Press the Tone button.
- Use the Number buttons to pick a specific tone or use the + / – buttons to cycle through the tones one-by-one. Follow the guide at the top of the keyboard to see which tones correspond to which numbers. The number corresponding to the currently selected tone will update on the keyboard's Display.
- Play the keyboard to hear the tone you selected.
To enhance the tone with the keyboard's sustain effect, press the Sustain button. SUS will temporarily appear on the Display. If this feature is activated, the keys will sound out longer when played, mimicking the effect of an acoustic piano's sustain pedal. This feature can be applied to any of the keyboard's 300 tones. To deactivate the effect, press the Sustain button again, and OFF will temporarily appear on the Display.
To enhance the tone with the keyboard's vibrato effect, press the Vibrato button. Vib will temporarily appear on the Display. If this feature is activated, the pitch of the keys will be slight bent up and down when they are played. This feature can be applied to any of the keyboard's 300 tones. To deactivate the effect, press the Vibrato button again, and OFF will temporarily appear on the Display.
To increase or decrease the pitch of the keyboard by a half-step, press the Transpose + or Transpose – button. The keyboard can be transposed up or down within six half-steps. The Display will temporarily show the new setting once it is changed. Press the Transpose + and Transpose – buttons simultaneously to reset the keyboard to its default pitch range of C1–F6 (indicated by the numbers 00 on the Display).
Dual Mode
Dual Mode allows for two different tones to be layered together.
To layer two tones together:
- Press the Dual button. dOU will temporarily appear on the Display. The tone that was selected before you pressed the Dual button will automatically be used as the first tone in the layer.
- To change the tone for the added layer, use the Number buttons to pick a specific tone or use the + / – buttons to cycle through the tones one-by-one. Follow the guide at the top of the keyboard to see which tones correspond to which numbers. The number corresponding to the currently selected tone will update on the keyboard's Display.
Note: When you reach Step 2, the tone that you most recently used for the added layer will be automatically selected. If it is the first time you are entering Dual Mode since powering on the keyboard, t48 (Ensemble) will be automatically selected. - Play the keyboard to hear the two tones at the same time.
To exit Dual Mode, press the Dual button again. OFF will temporarily appear on the Display.
Split Mode
Split Mode allows you to split the 54 keys into two zones so that you can have one tone for each hand on the keyboard. For example, you may want one of the piano tones for your right hand and one of the bass tones for your left hand.
To use Split Mode:
- Press the Split button. SPL will temporarily appear on the Display. The tone that was selected before you pressed the Split button will be applied to the left-hand zone of the keyboard.
Note: The left-hand zone of the keyboard will be raised one octave, while the right-hand zone of the keyboard will be lowered one octave. This means that, if the keyboard is set to its default transposition, the left-hand zone will be C2–B3, and the right-hand zone will be C2–F4. - To select the tone for the right-hand zone of the keyboard, use the Number buttons to pick a specific tone or use the + / – buttons to cycle through the tones one-by-one. Follow the guide at the top of the keyboard to see which tones correspond to which numbers. The number corresponding to the currently selected tone will update on the keyboard's Display.
- Play the keyboard to hear the tones you selected.
To exit Split Mode, press the Split button again. OFF will temporarily appear on the Display.
Note: Split Mode and Dual Mode cannot be used at the same time.
Adding Background Music
Accompaniment Rhythms
If you would like to have a drum loop accompany you while you're playing the keyboard, Harmony 54 comes with 300 unique rhythms that you can choose from.
To select an accompaniment rhythm:
- Press the Rhythm button.
- Use the Number buttons to pick a specific rhythm or use the + / – buttons to cycle through the rhythms one-by-one. Follow the guide at the top of the keyboard to see which rhythm styles correspond to which numbers. The number corresponding to the currently selected rhythm will update on the keyboard's Display.
To start or stop playing the currently selected accompaniment rhythm, press the Start/Stop button.
Tip: To observe the timing of the accompaniment rhythm, look at the Display, which will flash three dots for the first beat of every measure and a single dot for each remaining beat.
To change the tempo of the accompaniment rhythm, press the Tempo + button or Tempo - button to increase or decrease the tempo. Press the Tempo + and Tempo - buttons simultaneously to reset to the default tempo (120 BPM).
To adjust the volume of the accompaniment rhythm, press the Rhythm Vol + or Rhythm Vol – button. Press the Rhythm Vol + and Rhythm Vol – buttons simultaneously to reset to the default volume level (indicated on the Display as A07).
To insert a drum fill into the accompaniment rhythm, press the Fill In button while the accompaniment rhythm is playing. The accompaniment rhythm will automatically return to its regular pattern after the fill. The drum fill will vary depending on when you press the Fill In button.
To play an introductory drumbeat for the selected accompaniment rhythm, press the Intro/Ending button while the accompaniment rhythm is not playing. The introductory drum beat will be two bars long, and then the accompaniment rhythm will automatically begin playing.
To play an ending drumbeat for the selected accompaniment rhythm, press the Intro/Ending button while the accompaniment rhythm is playing. After you press the button, the ending drumbeat will play for two bars, after which the accompaniment rhythm will automatically stop.
To make the accompaniment rhythm automatically start when you play the keys:
- Select the desired accompaniment rhythm (as described earlier in this section of the manual).
- Press the Sync button. To indicate that Sync is activated, a dot on the Display will pulse in time with the currently selected tempo.
- Play any of the keys below G2. As soon as you play the key(s), the currently selected accompaniment rhythm will automatically start (without you having to press the Start/Stop button).
- When you are finished with the accompaniment rhythm, press the Start/Stop button to stop it. If you want to use the Sync feature again, repeat Steps 1–2.
Accompaniment Chords
If you would like to have both a drumbeat and chordal harmonies accompany you while you're playing the keyboard, you can use the accompaniment chord feature.
With this feature activated, the keyboard will automatically play music centered on a specific piano chord, which may be arpeggiated and/or joined by other instruments (such as a bass guitar). The music played will match the style of the currently selected accompaniment rhythm. The music will also adjust when a drum fill or introductory/ending drumbeat is selected.
You need to use the keys below G2 to produce the accompaniment chord. There are four options: a major, minor, dominant seventh, or minor seventh chord.
To use the accompaniment chord feature:
- Select the desired accompaniment rhythm (as described in the previous section of this manual).
- Press the Single Chord button or the Fingered Chord button. The Display will temporarily update to show which option was selected. Read further for more information on these two options.
- Press the Start/Stop button to begin playing the accompaniment rhythm.
Note: It does not matter in which order you perform Steps 2 and 3. - Play the keys required to produce the desired accompaniment chord. What keys you need to play depend on whether you used the Single Chord or Fingered Chord button. Read further for more details.
Single Chord:
If you press the Single Chord button, you can use a condensed set of keys to quickly produce an accompaniment chord.
To produce a chord, press the keys corresponding to the chord that you want to play (as diagrammed below). The dots in the diagrams show the keys you would play for a C chord, but the same overall shapes can be applied to any root note. Remember that you need to be using the keys below G2.

Fingered Chord:
If you press the Fingered Chord button, you need to play a full major, minor, dominant seventh, or minor seventh chord in order to hear it play in time with the accompaniment rhythm.
To produce a chord, play the full major, minor, dominant seventh, or minor seventh chord shape. For example, the four C chords are pictured below, with dots on each key in the chord. Remember that you need to be using the keys below G2.

To adjust the volume of the accompaniment chord, press the Chord Vol + or Chord Vol – button. Press the Chord Vol + and Chord Vol – buttons simultaneously to reset to the default volume level (indicated on the Display as u07).
To stop the accompaniment chord from automatically playing, press the Chord Clear button.
Note: With the accompaniment chord feature activated, you can use Dual Mode but not Split Mode. Pressing the Split button while the accompaniment chords are playing will stop the chords.
To make both the accompaniment rhythm and the accompaniment chord automatically start when you play the keys:
- Select the desired accompaniment rhythm (as described in the previous section of this manual).
- Press the Sync button. To indicate that Sync is activated, a dot on the Display will pulse in time with the currently selected tempo.
- Press the Single Chord or Fingered Chord button to activate the accompaniment chord feature.
- Play the keys required to produce the desired accompaniment chord. As soon as you play the key(s), the currently selected accompaniment rhythm and accompaniment chord will automatically start (without you having to press theStart/Stop button).
- When you are finished with the accompaniment rhythm and chord, press theStart/Stop button to stop them.
Rhythm Programming
You can use the rhythm programming feature to create your own custom drum rhythm to accompany you while you play the keys.
To create a custom accompaniment rhythm:
- Press the Program button to enter Programming Mode. Prg will appear on the Display, and the keys will automatically shift to percussion sounds.
- Program the rhythm by playing each drum sound in the order that you want to hear them repeat in the rhythmic pattern. You can play the drum sounds with the keys or with the Drum Kit buttons. If using the keys, see the image above each key in order to know what drum sound a key will play. The programmed rhythm can contain up to 32 drum sounds. Each drum sound in the pattern will be the length of a quarter note.
Note: You cannot program two percussion sounds to play at the same time. - Press Play to stop programming and hear the rhythm play on a loop. Ply will appear on the Display.
- After pressing Play, the keys will automatically switch back to the last selected tone, and you can play along to your custom rhythm.
To change the tempo of the custom rhythm, press the Tempo + button or Tempo - button. Press the Tempo + and Tempo - buttons simultaneously to reset to the default tempo (120 BPM).
To adjust the volume of the custom rhythm, press the Rhythm Vol + or Rhythm Vol – button. Press the Rhythm Vol + and Rhythm Vol – buttons simultaneously to reset to the default volume level (indicated on the Display as A07).
To stop the custom rhythm from playing, press the Play button again. The keyboard will re-enter Programming Mode, and you can program a new rhythm or press the Play button to start the previously programmed rhythm. Alternatively, you can stop a custom rhythm from playing by pressing the Program button, which will make the keyboard exit Programming Mode and erase the rhythm that was playing. When you exit Programming Mode, OFF will temporarily appear on the Display.
Note: If you turn off the keyboard while using a custom rhythm, the custom rhythm will be erased.
Tip: With Programming Mode activated, press the Single chord button while a custom rhythm is playing or stopped. This will allow you to use the abbreviated chord shapes (pictured in the previous section) on the keys below G2 to play full chords. The chords will not automatically play along with the custom rhythm; they will stop ringing out after you release the keys. However, you will still have the ability to play full chords at the quick touch of 1-3 adjacent keys.
Recording
You can use the recording feature on Harmony 54 to record yourself playing the piano.
To record your playing:
- Press the Record button to enter Recording Mode. REC will remain on the Display.
- When you are finished playing what you wanted to record, press thePlay button to stop the recording and automatically hear it play back. Ply will remain on the Display.
- After the recording finishes playing, the keyboard will re-enter Recording Mode. You can then make a new recording by playing the keys or press Play to hear the previous recording again.
Note: If a recording is still playing, you can press the Play button to stop it and re-enter Recording Mode.
Note: If the keyboard's memory fills up while you are recording, the Display will read FUL, and the keyboard will re-enter Recording Mode. You can then press Play to hear the recording or overwrite it by playing the keys.
To exit Recording Mode, press the Record button. This will erase the recording.
Note: If you turn off the keyboard while in Recording Mode, any recording will be erased.
Note: In Recording Mode, you cannot use Split Mode, Dual Mode, or the accompaniment rhythms/chords.
Demo Songs
Harmony 54 comes with 40 demo songs for you to choose from and play.
To begin playback of a demo song, press the Demo button. The currently selected demo song will remain on the Display and begin playing.
To change the demo song, use the Number buttons or the + / - buttons while a demo song is playing. The Display will update as you select a new song.
To stop a currently playing demo song, press the Demo button again.
One-Key
The One-Key feature allows you to play a demo song using Harmony 54's keys. Each time you press any single key, a short segment of the demo song will play. By repeatedly pressing any of the keys in time, you can play the full demo song. This feature is especially good for beginner pianists, since it allows them to experience what it's like to play a song on the keyboard without requiring that they know the right keys to play.
To use the keys to play a demo song:
- Press the One Key button. The currently selected demo song (as shown on the Display) will automatically start playing. If you'd like to change the song, use the Number buttons or + / - buttons.
- Press and release any key, which will stop the demo song from automatically playing.
- Repeatedly press any of the keys in time to play the demo song.
- When you are finished, press the One Key button again to exit this mode.
Tones
| 000–007 Piano | 072–079 Flute | 144–159 Synth Guitar |
| 008–015 Mallet | 080–087 Lead | 160–199 Synth Orchestra |
| 016–023 Organ | 088–095 Pads | 200–219 Synth Brass |
| 024–031 Guitar | 096–103 FX | 220–239 Synth Reeds |
| 032–039 Bass | 104–111 Ethnic | 240–245 Synth Electronic |
| 040–047 Strings | 112–119 Percussion | 246–299 Synth World |
| 048–055 String Ensemble | 120–128 Pads | |
| 056–063 Brass | 129–133 Synth Percussion | |
| 064–071 Clarinet | 134–143 Synth Organ |
Rhythms
| 000–052 Pop/Dance | 128–163 Soul/R&B | 243–299 Ballad |
| 053–062 Jazz | 164–179 Rock | |
| 063–118 Latin/World | 180–228 Swing/Bossa | |
| 119–127 Waltz | 229–242 Country/Western |
Technical Specifications
| Power | 6 "AA" batteries or included power adapter (9V DC, 500 mA) |
| Dimensions (width x depth x height) | 12.8" x 32.68" x 3.27" 32.5 x 83 x 8.3 cm |
| Weight | 7.7 lbs. 3.5 kg |
Specifications are subject to change without notice.
Documents / Resources
References
Download manual
Here you can download full pdf version of manual, it may contain additional safety instructions, warranty information, FCC rules, etc.
Advertisement


Need help?
Do you have a question about the Harmony 54 and is the answer not in the manual?
Questions and answers