Advertisement
Introduction
Box Contents
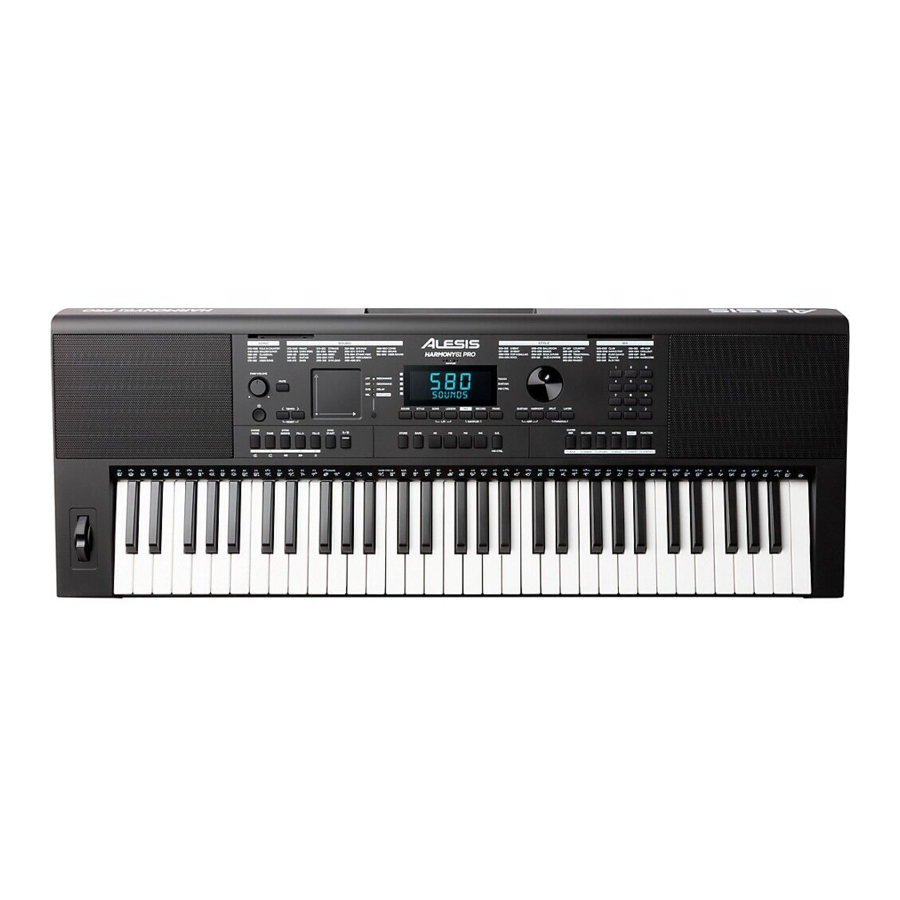
Harmony 61 Pro
Music Rest
Power Adapter
User Guide
Safety & Warranty Manual
Support
For the latest information about this product (system requirements, compatibility information, etc.), product registration, and translations of this guide in Spanish, French, Italian, and German, visit alesis.com. For additional product support, visit alesis.com/support.
Setup
Connection Diagram
Items not listed in Introduction > Box Contents are sold separately.
Note: Make sure to unplug/remove headphones before moving away from the keyboard.

Features
Top Panel

- Power On/Off: Press this button to turn the keyboard on or off.
- Master Volume: Turn this knob to adjust the Master Volume.
- Mute: Press this button to mute the Master Volume.
- Tempo: Press the Tempo buttons [<] or [>] to increase or decrease the speed of the accompaniment, demo song and/or metronome. Press the [<] and [>] buttons simultaneously to reset to the default value.
- Touch Pad: Touch the Touch Pad and move your finger along the X- and Y-axis to control the selected effect. Use the Effect button to change the parameters controlled by the Touch Pad.
- Effect: Press this button to select a group of parameters, and then use the Touch Pad to control the selected parameters in real time. See Operation > Touch Pad for a list of selectable parameters.
- LCD: This screen shows settings information and displays the notes you play in real time.
- Built-in Microphone: Use this microphone to record your own sounds when the Sampler is engaged. See Operation > Using the Sampler for more information.
- Data Dial: Turn this dial to select a value or adjust a parameter.
- [<] / [>] / Numeric Buttons: Press the left or right directional buttons to select a value or set a parameter. You can also use the numeric buttons to enter a value. Press both directional buttons at the same time to reset current parameter to its default setting.
- Sound: Press this button to enter Sound mode and select a sound for the keyboard. See Operation > Playing a Sound for more information and > Sound List for a full list of instruments.
- Style: Press this button to enter Style mode and choose an accompaniment rhythm style. See > Style List for a full list of playable styles.
- Song: Press this button to enter Song mode and play stored songs. See > Song List for a full list of playable songs.
- Lesson: Press this button to select and play a Lesson. When song playback is stopped, press this button to enter or exit Lesson mode. Press Lesson and Song buttons at the same time to select a hand-part to practice: L → R → L+R. See Operation > Using Lesson Mode for more information.
- Mix: Press this button to enter Mix mode and adjust accompaniment instrument levels. Press Mix and Record buttons at the same time to engage the sampler. See Operation > Using the Mixer to learn more and > Mix Pattern List for a full list of mix patterns.
- Record: Press this button to record a custom song. See Operation > Recording for more detailed instructions.
- Piano: Press this button to turn Piano Mode on or off. Piano mode is a setting optimized for concert piano performances. See Operation > Piano Mode for more information.
- Sustain: Press this button to activate a sustain effect which simulates a sustain pedal when playing the keyboard. Press this button again to disable the sustain effect. Press the Sustain and Harmony buttons at the same time to turn the Arpeggiator on or off. See Operation > Performance Enhancement for more information about using the Arpeggiator.
- Harmony: Press this button to turn the harmony function on or off. The Harmony function can be set to play a specific interval above each note you play. See Operation > Performance Enhancement for more information.
- Split: Press this button to split the keyboard into two different sounds. The sound that you were using before pressing the Split button will be applied to the left-hand side of the keyboard. To select a sound for the right-hand side, enter a number for the sound or use the + and – buttons. Press the Split button again to disable the keyboard split. Press Split and Layer buttons at the same time to turn Twinova function on or off. See Operation > Twinova for more information.
- Layer: Press this button to layer two sounds together. The sound that you were using before pressing the Layer button will be used for one part of the layer. To select the other sound for the layer, enter a number for the sound or use the [<] and [>] buttons. Press the Layer button again to disable the layer function.
- Chord Mode: Press this button to enter Chord mode and select how you play chords on the keyboard. See Operation > Chord Mode for more information.
- Fade: Press this button to fade an accompaniment track in or out.
- Intro/Ending: Press this button to play an intro and then start playback of an accompaniment rhythm. Press this button while the accompaniment rhythm is playing to play an outro and then stop playback of an accompaniment rhythm.
- Fill A: Press this button to have the first of two types of temporary rhythm play during the accompaniment rhythm.
- Fill B: Press this button to have the second of two types of temporary rhythm play during the accompaniment rhythm.
- Sync Start: Press the Sync button, and then play the keys in the lowest two octaves (corresponding to the chords/notes). The playalong feature will start immediately when playing a key, instead of having to press the Start/Stop button to start it.
- Start/Stop: Press this button to start or stop playing a style, song, or mix pattern.
- Store: Press and hold this button, then press one of the Memory buttons M1 – M4 to save the current panel settings.
- Bank: Press this button to enter Memory Mode and select a memory bank. See Operation > Performance Memory for more details.
- M1 - M4: Press one of these buttons while in Memory Mode to store or recall panel settings. See Operation > Performance Memory for more details.
- Quick Setting [Q.S.]: Press this button to turn the Quick Setting function on or off. See Operation > Quick Setting for more information.
- Chord Ref.: Press this button to turn the chord reference function on or off. This function allows you to view a dictionary of chord diagrams on the LCD screen. See Operation > Chord Reference for more information.
- SD Card: Press this button to enter the SD card menu. See Operation > Connecting an SD Card for more information.
- Mixer: Press this button to enter the Mixer menu. See Operation > Playing Mixes for more information.
- Metro: Press this button to start the metronome. Press this button again to change the time signature of this button or turn off the metronome. See Operation > Using the Metronome for more information.
- Demo: Press this button to begin playback of the demonstration songs. Use the number buttons or [<] / [>] buttons to select another demonstration song. Press this button again to stop the playback.
- Function: Press this button to enter the function menu. See Operation > Using the Function Menu for more information.
- Pitch Bend Wheel: Roll this wheel up or down to apply a pitch-bending effect to the notes you play.
![]()

Rear Panel

- SD Card port: Insert an SD Card containing MIDI or WAV music files here.
- USB Port: Insert a USB-B cable here to connect the USB-A keyboard to a computer or a mobile device.
Note: The Harmony 61 Pro features a class compliant plug-and-play connection, and this USB port enables sending and receiving MIDI data, as well as sending and receiving audio between the Harmony 61 Pro and a connected computer. To use these features, simply connect the Harmony 61 Pro to your computer and select it for use in your software or system preferences. - Sustain Input: Connect a sustain pedal with a 1/4" (6.35 mm) cable here.
- Phones Output: Plug a pair of headphones into the 1/4" (6.35 mm) output here.
- Aux Input: Connect an external audio source, such as an MP3 or CD player, using a 1/8" (3.5mm) cable here.
- MIC Input: Connect a microphone with a 1/4" (6.35 mm) cable to the input here to sing along with the keyboard output.
- Power Input: Plug in the included power adapter here.
Bottom Panel (Not shown)
- Battery Compartment: Install 6 "AA" batteries here to power the keyboard if you are not using the power adapter.
Operation
Playing a Sound
- Press theSound button to enter Sound mode. The "R1" indicator will light up. The LCD will show the current Sound name and number.
- Use the data dial or[<] / [>] buttons to select a sound. Alternatively, use the numeric buttons to enter a preset sound number. See > Sound List for a full list of sounds.
- Play the keyboard to use this Sound for performance.
Using Layer Mode:
- Press theLayer button to enter Layer mode. The "R2" indicator will light up. The LCD will show the current layer sound name and number.
- Use the data dial or[<] / [>] buttons to select a layer sound. Alternatively, use the numeric buttons to enter a preset sound number.
- Play the keyboard. You will hear two different sounds playing together.
- In Layer mode, press theLayer button to exit this mode.
Using Split Mode:
- Press theSplit button to enter Split mode. The "L" indicator will light up. The LCD shows the current split sound name and number. The default split point is F#3 (19). You can change the split point in the function menu.
- Use the data dial or[<] / [>] buttons to select a split sound. Alternatively, use the numeric buttons to enter a preset sound number.
- Play the keyboard. You will hear different sounds from the left- and right-hand sections.
- In Split mode, press theSplit button to exit this mode.
Note: When layer and split sounds are in use, only the right-hand area plays the layered sound. Use the mixer to adjust the volume of each part.
Touch Pad
The Touch Pad controls vibrato depth and speed by default when no effect LED is lit.
Press the Effect button repeatedly to cycle through different sets of effects. When you select one from the 2-5 sets, the corresponding effect LED will turn on.
After selecting a set of effects, use the Touch pad to control these effects in real time.
| # | X-axis | Target | Y-axis | Target |
| 1 | Vibrato Speed | Vibrato Depth | ||
| 2 | LPF | Global | Resonance (LPF) | Global |
| 3 | HPF | Global | Resonance (HPF) | Global |
| 4 | Reverb | Global | Delay | Channel |
| 5 | Release | Channel | Sidechain Comp | Channel |
Piano Mode
Press the Piano button to enter or exit Piano Mode.
In Piano Mode, all parameters become optimized for concert piano performance. You can start style playback, but it will play the rhythm track only.
Notes: When in Piano Mode is engaged, the Fingered function will be automatically turned off. In Piano Mode, the Layer and Split functions will not be available.
Twinova
The Twinova function splits the keyboard into two areas with the same sound and octave range, for the convenience of playing together with a friend or instructor.
Press the Split and Layer buttons at the same time to turn Twinova on or off. The default split point is E4 and F4.
To change the Twinova octave:
- Press theFunction button to enter the function menu.
- Use the data dial to select "TwinoOct".
- Use the[<] / [>] buttons to change the octave setting.
Pressing both [<] and [>] buttons at the same time will reset to the default octave setting.
Note: The Twinova mode and the split / layer functions cannot be used at the same time.
Using the Metronome
To turn the metronome on or off:
- Press theMetro button to turn on the metronome. The beat indicators on LCD will blink and you will hear the metronome sound.
- Press this button again to turn off the metronome.
The default metronome beat is 4; this can be changed in the Function menu.
To change the metronome beat:
- Press theFunction button, then use the data dial to select "Beat".
- Use the[<] / [>] buttons to change the beat setting. The setting range is 0, 2 ~ 9.
Notes:
- If you turn on the metronome during style playback, the metronome sound will start from the next beat. Its time signature and tempo will be reset to match the selected style.
- If you turn on the metronome during MIDI recording, the metronome sound will not be recorded. But if you turn on the metronome in Audio recording, the metronome sound will be recorded
Performance Enhancement
Arpeggiator:
Press the Sustain and Harmony buttons at the same time to turn on the arpeggiator. The "ARP." indicator lights up on LCD. Repeat this operation to turn off the arpeggiator.
Arpeggiator split point:
When the arpeggiator is in use, the keyboard will be split into two sections. You can play chords with the left-hand side and play melody with the right-hand side. The default split point is F#3 (19) (same as the split point in Split mode). You can change the split point in the Function menu.
Harmony:
Press the Harmony button to turn this function on or off.
When harmony is in use, the "HARMONY" indicator will light up on the LCD. Turn on the Fingered function, then play a chord in the chord section. When you play in the right-hand section, it will add a harmony effect to the notes.
Setting the harmony type:
Press the Function button to enter the function menu. Use the data dial to select "HrmXXXX", then use the [<] / [>] buttons to change the harmony type. Pressing [<] and [>] buttons at the same time will reset to the default setting.
Note: Harmony types "1+5" and "octave" are always available, but the rest will not work until you turn on the Fingered function and then play a chord in the chord section.
Playing a Style
- Press the Style button to enter Style mode. The LCD will show the current style name and number.
- Use the data dial or[<] / [>] buttons to select a style. Or use the numeric buttons to enter a preset style number. Please see > Style List for a full list of playable styles.
- Press the Chord Mode button to select Fingered mode or Full Range mode.
- Press the Start/Stop button to start the rhythm track. Alternatively, press the Sync Start button to engage sync start function, then play a key on keyboard to start the rhythm track.
To fade a style in or out:
- When style is stopped, press the Fade button to turn on the fade-in function. The "FADE" indicator will light up on the LCD. When the style starts playing, the volume will increase from low to high.
- During style playback, press the Fade button to turn on the fade-out function. The volume will decrease from high to low until the style is stopped.
The default fade-in / fade-out time setting is 10 seconds. You can change this time setting in the function menu.
To set the tempo:
- Press the [Tempo </>] buttons to edit the tempo value.
- When the tempo value is blinking on the LCD, use the[Tempo </>] buttons, [<] / [>] buttons or the data dial to change the tempo value.
- Press [Tempo <] and [Tempo >] at the same time to reset to the default tempo.
Note: When style playback is stopped, changing the style will automatically reset the tempo. However, changing the style during style playback will not result in tempo change.
Playing Songs
- Press the Song button to enter Song mode. LCD shows the current song name and number.
- Use the data dial or[<] / [>] buttons to select a song. Or use the numeric buttons to enter a song number. Please see > Song List for a full list of playable songs.
- Press the Start/Stop button to start playing the song.
- During song playback, press the Start/Stop button to stop. When playback is stopped, press the Style and Record buttons to exit this mode.
Notes:
- While Song Mode is enabled, you cannot access the Memory Buttons, Quick Settings, Function Menu, Twinova, Record, or Chord Mode features. To regain access to these features, exit Song mode by the pressing Piano, Style, or Mix buttons.
- By default, all songs will loop in order. You can change the playback mode in the function menu.
Controlling Song Playback:
Before the Intro section begins, the measure will start counting down from 4. When the measure goes to "1", the melody will start playing. You can use the group of buttons lettered A – E (Chord Mode, Fade, Intro/Ending, Fill A, Fill B) to control the playback. Their playback functions are indicated underneath the letters.
During playback:
- Press the A button to loop the selected song.
- Press the B button to loop all of the songs in order.
- Press the C button to rewind the song.
- Press the D button to fast forward the song.
- Press the E button to pause song playback.
Adjusting the Song volume:
You can adjust the song playback volume in the mixer menu. Press the Mixer button to enter the Mixer menu. Use the data dial to select "MusicVol", then use the [<] / [>] buttons to change the volume setting. Pressing [<] and [>] buttons at the same time will reset to the default volume.
Chord Mode
Entering Chord Mode:
Press the Chord Mode button to enter Chord mode. Press the button repeatedly to cycle between FINGERED, FULL RANG, and OFF.
- In Fingered mode, the keyboard is divided into two sections. The chord section is in the left-hand area. You can play Single Finger and Multi Finger chords in the chord section.
- In Full Range mode, the entire keyboard is the chord section. Only Multi-finger chords will be detected in the chord section.
Playing in Chord Mode:
- Press the Sync Start button to engage the sync start function.
- Play a chord in the chord section, and it will start playing auto accompaniment of all tracks. Alternatively, press theStart/Stop button to start percussion playback, and then play a chord in the chord section to start playing all tracks.
Single Finger:
Single-finger makes it easy to produce major, seventh, minor and minor seventh chords by pressing a minimum number of keys on the auto accompaniment section.

Multi-finger:
Multi-finger allows you to play chords in normal fingering.
Full Range:
In Full Range mode, it detects chords played in normal fingering (Multi-finger) over the entire keyboard range.
Quick Setting
- Press the Q.S. button to turn on the Quick Setting function. The "Q.S." indicator will light up on the LCD. The Fingered function will be turned on automatically.
- Press one of the M1 - M4 buttons to recall panel settings (including sound and effects) that match the current style. Each style has 4 preset Q.S. settings.
Note: Memory function is not available when Q.S. is in use.
DSP Effects (Reverb/Chorus)
Digital Signal Processing is turned on by default. The "DSP" indicator will light up on the LCD.
To change the DSP setting:
- Press the Function button to enter the function menu.
- Use the data dial to select "DSP". The LCD will temporarily show "DSP ON".
- Use the [<] / [>] buttons to turn the DSP on or off.
- Pressing [<] and [>] buttons at the same time will reset to the default setting.
Note: There may be a slight pause in the sound if you switch the DSP effect on/off while style or song is playing.
Using Lesson Mode
The Lesson, and L/R buttons are available only when song playback is stopped.
Lesson 1:
In Lesson 1, you will learn to play at the correct timing. As long as you play a key at the right time, the correct note will sound.
- When song playback is stopped, press the Lesson button to enter Lesson 1. The "LESSON 1" indicator will light up.
- Repeatedly press theSong and Lesson buttons to select to practice the L hand part, R hand part or both parts.
- Press theStart/Stop button to start the lesson. Your performance will be evaluated when the lesson is finished. No score will be given if you stop halfway.
Lesson 2:
In Lesson 2, you will learn to play the correct notes. If you play a wrong note, the lesson will stop and wait until you correctly play the note displayed on the LCD.
- When song playback is stopped, press the Lesson button twice to enter Lesson 2. The "LESSON 2" indicator will light up.
- Repeatedly press theSong and Lesson buttons to select to practice the L hand part, R hand part or both parts.
- Press the Start/Stop button to start the lesson.
Your performance will be evaluated when the lesson is finished.
Note: In Lesson 2, notes will not sound until they are played correctly on the keyboard.
Lesson 3:
In Lesson 3, you will learn to play the correct notes with the correct timing.
- When song playback is stopped, press the Lesson button three times to enter Lesson 3. The "LESSON 3" indicator will light up.
- Repeatedly press the Song and Lesson buttons to select to practice the L hand part, R hand part or both parts.
- Press the Start/Stop button to start the lesson.
Your performance will be evaluated when the lesson is finished.
Note: In Lesson 3, all notes you play will sound. However, if no keys are played on the keyboard, only the accompaniment will be played back.
Playing Mixes
Mix mode consists of Patterns, Sections and Tracks. A pattern is a song structure that includes 5 sections. There are 6 separate instrument tracks in each section that you can turn on or off.
- Press the Mix button to enter Mix mode. The LCD will show the current Mix pattern name and number. The Sync Start function will be engaged.
- Press the Start/Stop button or press any key in the chord section on the left-hand side. The Mix Pattern will immediately start playing. Use the [<] / [>] buttons to change the Mix Pattern.
- During Mix playback, press the Start/Stop button to stop. When playback is stopped, press the Style and Song buttons to exit this mode.
Mix Sections:
- During Mix playback, press the A - E buttons to shift between these sections. The LCD indicators will show the currently selected section.
- During Mix playback, if you press and hold the button of the currently selected Section, it will apply a slicer effect to this Section.
- Harmony 61 Pro provides two kinds of slicers, selectable from the function menu.
Mix Tracks:
During Mix playback, you can press the track buttons T1 – T6 (Chord Ref., SD Card, Mixer, Metro, Demo, and Function) to mute the corresponding instrument track. Press the same button again to unmute the corresponding track. The Track on/off information is displayed on LCD.
- Pressing the T1 (Chord Ref.) button during playback will mute the Kick drum track.
- Pressing the T2 (SD Card) button during playback will mute the Snare drum track.
- Pressing the T3 (Mixer) button during playback will mute the whole drums track.
- Pressing the T4 (Metro) button during playback will mute the Bass track.
- Pressing the T5 (Demo) button during playback will mute the Synth 1 track.
- Pressing the T6 (Function) button during playback will mute the Synth 2 track.
In Mix mode, you can press the MIX CTRL. button to shift the track buttons back to their primary functions (the names printed above these buttons). The "MIX CTRL" indicator will turn off. You can also press the Q.S. button to switch between the primary and secondary functions of the track buttons.
Chord Reference
- Press theCHORD REF. button to turn on this function. The LCD will show "ChordRef". The Fingered function will be automatically turned on.
- Use the keys C4~B5 to assign the chord type. Use the keys C6~B6 to assign the chord root. When the chord type and chord root are assigned, the LCD will show the chord name and chord notes. Try to play this chord in the chord section.
Detailed chord types in the Chord Reference:
| Note | Chord | Note | Chord | Note | Chord |
| C6 | C | C4 | M | C5 | 7(b9) |
| C#6 | C#/Db | C#4 | M(9) | C#5 | 7(9) |
| D6 | D | D4 | 6 | D5 | 7(#9) |
| Eb6 | Eb/D# | Eb4 | mM7 | Eb5 | 7(b13) |
| E6 | E | E4 | M7 | E5 | 7(13) |
| F6 | F | F4 | M | F5 | 7(#11) |
| F#6 | F#/Gb | F#4 | M(9) | F#5 | dim7 |
| G6 | G | G4 | M6 | G5 | dim |
| Ab6 | Ab/G# | Ab4 | M7(9) | Ab5 | 7aug |
| A6 | A | A4 | M7 | A5 | aug |
| Bb6 | Bb/A# | Bb4 | M7b5 | Bb5 | 7sus4 |
| B6 | B | B4 | 7 | B5 | sus4 |
Recording
MIDI Recording:
In MIDI recording, you can save your recording as a User Song on the instrument or export it to a connected SD card. The saved user songs will not be lost when you turn off the power. When there is no SD card connected, the unit will automatically switch the record function to MIDI.
Note: You can only record audio to an SD Card. If you want to record a User Song, but then save it to an SD card at a later date, it will be saved as a MIDI file, not an Audio file.
To prepare and start recording:
- Press the Record button to enter the user song menu. The LCD will show the current user song number, such as "001 RecSong". If there is no user song, the LCD will show "No File!". Use the data dial or the [<] / [>] buttons to select a user song to save your recording.
- Press the Record button again to engage the recorder. The "REC" indicator will light up. The beats indicators on the LCD will start blinking. You can then select the desired sound, style, tempo, etc.
- Press the Start/Stop button or simply play the keyboard to start recording. Alternatively, turn on the Fingered function. Recording will start when you play a chord in the chord section.
To stop recording:
During recording, press the Record button. It will stop recording and save the recorded song automatically. If the storage becomes used up during recording, recording will stop and be saved automatically. If you are recording with accompaniment, recording will stop when the ending section is finished.
Note: If the selected user song has data, the previous data will be overwritten by new recording.
To play back recording:
- After recording, the recorded song will be automatically selected. Alternatively, press Song to enter the Song interface, then use data dial or [<] / [>] buttons to select a user song.
- Press the Start/Stop button to start the playback.
To delete recordings:
Hold down the Record and Song buttons at the same time, then turn on the power. This operation will delete all user songs. Alternatively, hold down the [<] and [>] buttons at the same time, then turn on the power. This operation will delete all user data on the instrument.
Audio Recording:
In audio recording, you can save your recording as a WAV file to the connected SD card. When an SD card is connected, the unit will automatically switch the record function to Audio.
- Connect an SD card to the SD card port on the Rear Panel of the instrument. The SD card indicator will light up on the LCD screen when it is recognized. This instrument will automatically engage audio recording and will save the recorded song to the root directory of the connected SD card. You can then select the desired panel settings and be prepared for the recording.
- Press theRecord button to start recording. The LCD will temporarily read "RECSTART". This button LED and the "AUDIO REC" indicator will light up. All the sounds that you hear from the instrument will be recorded, such as accompaniment, keyboard sounds, song playback, demo playback, music from Aux In, vocal singing from the connected microphone, etc.
- To stop recording, press the Record button. The button LED and "AUDIO REC" indicator will turn off. The recorded song will be saved in the SD card with the name "Audio xxx.wav". The LCD will then automatically show the name of the recorded song.
- Press the Start/Stop button to play back this recorded song. Alternatively, you can choose to play back the recorded song from the SD card play menu. See Operation > Connecting an SD Card for details.
Note: Do not remove the SD card or turn off the power when song saving is in progress, otherwise, it may cause damage to the audio files and the SD card.
Connecting an SD Card
The Harmony 61 Pro recognizes SD cards in FAT32 format. It does not support multi-partitioned SD cards. We recommend formatting the SD card on the instrument before using. Do not edit the backup files saved on the SD card from the instrument.
Note: An SD card in FAT32 format supports up to 512 files under its root directory. Exceeding this limit will make it unable to save or record to the SD cards.
Basic Operations:
- When the connected SD card is successfully recognized, the SD card indicator will light up on the LCD. Then, press theSD Card button to enter the play menu. If the connected SD card is not yet recognized, the LCD will show "WAIT...!". If the SD card recognition fails, the LCD will show "DiskErr!". If no SD card is inserted, the LCD will show "NoDisk!", then return to the previous screen.
- While in the play menu, you can use the data dial to select the other menus: "Save", "Load" and "Format". Then, press [>] to proceed or press [<] to go back.
- When playing back a MIDI file, you can adjust the playback volume by editing the "MusicVol" parameter in the Mixer menu.
- Press the SD Card / Song / Style buttons to exit this mode.
Playing back files saved on an SD Card:
- Press the SD Card button to enter SD card mode, then use the data dial to select "Play".
- Press the [>] button, and it will show all the MIDI and WAV files under the root directory of the SD card.
- Use the data dial to select a file.
- Press the Start/Stop button to start or stop the playback.
Note: This function supports playing back MIDI and WAV files only.
Loading files from the SD Card:
- Press the SD Card button to enter SD card mode, then use the data dial to select "Load".
- Press the [>] button to view all the MIDI files under the root directory of the SD card.
- Use the data dial to select a file and press [>] button to confirm. Then, the LCD will show a user song name "xxxx RecSong" or "xxxx No Flile!".
- Use the data dial to select a user song slot, then press [>] button to execute loading.
Notes:
- If the selected user song slot is blank, when the loading process is finished, the LCD will show this user song name.
- If the selected user song slot has data (occupied), the LCD will prompt you with "Sure?", indicating that this loading operation will overwrite the existing data. You can then press the [>] button to execute loading. The data that has been overwritten cannot be recovered. Alternatively, you can press [<] to cancel loading.
Saving files to the SD Card:
- Press the SD Card button to enter SD card mode, then use the data dial to select "Save".
- Press the [>] button, to save all the user songs from the instrument to the SD card with the name "UserSong00X_NUB.mid". If the user song has no data, the LCD will prompt "No File!".
- When the saving process is finished, the LCD will temporarily show "save ok!", then return to show the root directory of the SD card.
- The file names "UserSong00X_NUB.mid" and "UserSong00X" are the user song name and number, corresponding to the user songs on the instrument. "NUB" is the file number of the saved song (001~512).
Formatting the SD Card:
- Press the SD Card button to enter SD card mode, then use the data dial to select "Format".
- Press the [>] button, and the LCD will prompt you with "Sure?" indicating it will format this SD card.
- Press the [>] button again to confirm formatting, or press [<] to cancel formatting.
Note: This operation will delete all data on the SD card. This data cannot be recovered after formatting. Do not remove the SD card or turn off the power during the formatting progress, otherwise, it may cause damage to the SD card.
Performance Memory
Note: Hold down both the Store and M1 buttons, then turn on the power. This operation will reset the performance memory to factory default setting.
To save the panel settings:
Hold down the Store button, then press one of the M1 - M4 buttons to save the current panel settings to that memory.
Note: This operation will overwrite the previous data.
To recall a panel setting:
Press one of the M1 - M4 buttons. This will recall the settings saved in that memory and reset the related parameters on the control panel.
Note: Performance memory cannot be recalled when Q.S. function is in use.
To select a memory bank:
- Press theBank button. The LCD will show the current bank number.
- Press this button repeatedly to select a desired bank number.
Using The Sampler
The Harmony 61 Pro allows you to record your own sounds using the built-in microphone located above the LCD and then play them using the keyboard. Each sample can contain up to 2 seconds of audio. User Samples will be stored at the end of the sound library.
Recording a user sample:
- Press the Mix and Record buttons simultaneously to enter Sampler mode. The Sampler will then enter a standby mode, the LCD will read "Standby," and the center LED light will flash.
- Now, use the data dial to select a slot in which to save the sample.
- Once you have selected a slot, sample recording will be triggered by the sound itself. When the sound volume reaches the trigger level, sampling will start automatically, and the LCD will read "Sampling". When the sound volume drops beneath the trigger level or when the recording time reaches 2 seconds, the Sampler will stop automatically and save the sound; the LCD will read "Finished".
- The pitch correction function is turned on by default. The sampled pitch will be automatically recognized and corrected to the nearest key. When pitch correction is turned off, the sampled pitch will be corrected and set as C4. You can turn this function on or off in the Function Menu. See Using the Function Menu to learn more.
Note: The next available empty slot will be selected automatically before the next sample recording begins. For example, if the first slot has data, the second slot will be automatically selected. If all slots are used up, then the first slot will be selected. Please note that when sampling again on the slot with data, the original data will be overwritten.
Playing a user sample:
- After sampling is complete, the unit will return to Sound mode automatically. LCD will display the sample you've just recorded as a sound named with the slot number, such as "User01".
- Play the keyboard to use this sample for performance.
- Use the numeric buttons, the [<] / [>] buttons or the data dial to select other saved samples.
- Use the Touch Pad to play your sample with effects.
Deleting a user sample:
Hold down the [<] and [>] buttons, then turn the power off. All user data will be deleted.
Using the Mixer
- Press the Mixer button to enter the mixer menu. The instrument will automatically show the mixer parameters that are available for the current mode. For example, when in Song mode, if you enter the mixer menu, it will show "MusicVol" on top of the menu.
- Use the data dial to select the parameters in the mixer menu.
- Use the [<] / [>] buttons to change the volume setting of the selected parameter.
- Pressing [<] and [>] buttons at the same time will reset to the default volume setting. If the current volume setting is the same as the default setting, pressing the [<] and [>] buttons will mute/unmute the selected parameter.
Notes:
- The available mixer parameters may vary when in different modes.
- The mixer menu will close automatically if there is no operation in 3 seconds.
Detailed parameters and their volume ranges:
| Parameter | LCD | Range | |
| Rhythm sub. volume | Rhythm_ | xxx | 0 - 127 |
| Rhythm master volume | Rhythm_ | xxx | 0 - 127 |
| Bass volume | Bass: | xxx | 0 - 127 |
| Chord 1 volume | Chord1: | xxx | 0 - 127 |
| Chord 2 volume | Chord2: | xxx | 0 - 127 |
| Chord 3 volume | Chord3: | xxx | 0 - 127 |
| Phrase 1 volume | Phrase1: | xxx | 0 - 127 |
| Phrase 2 volume | Phrase2: | xxx | 0 - 127 |
| Sound R1 volume | Upper1: | xxx | 0 - 127 |
| Sound R2 volume | Upper2: | xxx | 0 - 127 |
| Sound L volume | Lower: | xxx | 0 - 127 |
| Music volume (Song, SD card, Accompaniment) | MusicVol: | xxx | 0 - 127 |
| Microphone volume | Mic Vol: | xxx | 0 - 127 |
| Metronome volume | MetroVol: | xxx | 0 ~ 127 |
Using the Function Menu
- Press the Function button to enter the function menu. The LCD will show the current parameter.
- Use the data dial to select a parameter to edit.
- Use the [<] / [>] buttons to change the setting. Pressing [<] and [>] buttons at the same time will reset to the default setting.
Note: It will exit the function menu if there is no operation in 3 seconds.
| No. | Parameter | LCD Display | Range | Description |
| 1 | Tune | xxx Tune | -50 ~ +50 (default: 0) | Adjust the pitch of the entire keyboard up or down by 2 cents within the range of ±50. |
| 2 | Touch Response | xxx Touch | OFF, 1, 2, 3, 4, 5 (default: 2) | Set the velocity response of the keyboard. |
| 3 | Transpose | xxx Transpos | -12 ~ +12 (default: 0) | Shift the pitch of the entire keyboard up or down by a maximum of one octave in semitone steps. |
| 4 | Split Point | xxx Split Pt | 1 ~ 61 (default: 19) | Adjust the split point in the Twinova mode, the Fingered function and the Split mode. |
| 5 | Metronome Beat | xxx Beat | 0, 2 ~ 9 (default: 4) | Set the number of beats in one measure. |
| 6 | Pedal Type | xxx Ped **** | Ped Sust Ped Soft Ped St/T Ped Mem (default: 001 Ped Sust) | Assign different functions to the sustain pedal. 001 Sustain 002 SoftPedal 003 Start/Stop (to start/ stop style playback) 004 Memory (to switch the Performance Memory) |
| 7 | EQ Type | xxx EQ **** | EQ Flat EQ Pop EQ Rock EQ Class EQ Jazz EQDance (default: 001 EQ Flat) | Select the EQ type of the instrument. Flat, Pop, Rock, Classical, Jazz, Dance |
| 8 | Octave | xxx Octave | -2 ~ +2 (default: 0) | Shift the pitch of the current sound layer up or down by one octave. |
| 9 | Reverb Type | xxx Rev***** | Rev Room1 Rev Room2 Rev Room3 Rev Hall1 Rev Hall2 Rev Hall3 Rev Chrh1 Rev Chrh2 Rev Gara1 Rev Gara2 (default: 004 Rev Hall1) | Select the reverb type of the instrument. Room1, Room2, Room3, Hall1, Hall2, Hall3, Church1, Church2, Garage1, Garage2 |
| 10 | Reverb Level | xxx Rev Lev | 0 ~ 127 (default: 40) | Adjust the reverb level. |
| 11 | Chorus Type | xxx Chr***** |
| Select the chorus type of the instrument. Duet 1, Duet 2, Trio 1, Trio 2, Flanger1, Flanger2, GM Rotary Speaker1, GM Rotary Speaker2 |
| 12 | Chorus Level | xxx Chr Lev | 0 ~ 127 (default: 0) | Adjust the chorus level. |
| 13 | Harmony Type | xxx Hrm***** |
| Select the harmony type of the instrument. Duet, Trio, 1+5, Octave, CtryDuet, Block, 4Close1, 4Close2, 4Open |
| 14 | Scale Switch | xxx Scale Sw | OFF, ON (default: OFF) | Turn the scale tuning on or off. |
| 15 | Scale Type | xxx Scale*** |
| Select the scale type of the instrument. Pythagorean, Just Major, Just Minor, Meantone, Werckmeister, Kirnberger |
| 16 | Scale Root | xxx Scale: ** |
| Specify the scale root note when scale tuning is turned on. C, C#, D, D#, E, F, F#, G, G#, A, A#, B |
| 17 | MIDI In | xxx MIDI In | 1 ~ 16, ALL (default: ALL) | Specify the MIDI In channel. |
| 18 | MIDI Out | xxx MIDI Out | 1 ~ 16 (default: 1) | Specify the MIDI Out channel. |
| 19 | Record Type | xxx Rec **** | 1 Rec MIDI 2 Rec WAV (default: 001 Rec MIDI) | Select the format of recording files. MIDI, WAV |
| 20 | Twinova Octave | xxx TwinoOct | -2~+2 (default: 0) | |
| 21 | Fade Time | xxx FadeTime | 1 ~ 20 (default: 10) | Specify the time period of fade-in and fade-out in style playback. |
| 22 | DSP | xxx DSP | OFF, ON (default: ON) | Turn the DSP effect on or off. |
| 23 | Slicer Type | xxx Slicer | 1 ~ 2 (default: 1) | Specify the Slicer effect applied to the sections in Mix playback. |
| 24 | Touch Pad Control | xxx Pad **** | 1 Pad Rele 2 Pad Hold (default: 001 Pad Rele) | Release: Effects will be reset to default when the finger is released from the Touch pad. Hold: Effects will be held after the finger is released from the Touch pad. |
| 25 | Song Loop | xxx SongLoop | 001,ALL,OFF (default: ALL) | Specify how the songs will be played back. 001,ALL,OFF |
| 26 | Sampler Pitch Correction | xxx Pitch Co | OFF, ON (default: ON) | Turn the sampler's pitch correction on or off. |
| 27 | Power Off Time | xxx PowerOff | OFF, 030, 060 (default: 30) | The instrument will automatically shut down after 30 minutes of inactivity; you can disable this function or change the time setting. |
Troubleshooting
The speakers produce a pop sound whenever the power is turned on or off.
This is normal and is no cause for alarm.
Speakers do not produce sound when the keyboard is played:
- Check if the master volume is set too low.
- Check if the R1/R2/L sound volume is set too low in the mixer menu.
- Check if headphones are plugged into the PHONES output.
The speakers produce noise when a mobile phone is put near them. Using a mobile phone in close proximity to the instrument may cause interference. To prevent this, turn off the mobile phone or use it farther away from the instrument.
The auto accompaniment does not play back even when Sync is in standby and a key is pressed. You may be playing keys in the right-hand range of the keyboard. To start the accompaniment with Sync Start, make sure to play keys in the left-hand range.
Certain notes seem to be in the wrong pitch. Make sure that the tune value is set to 0. Press and hold the [<] and [>] buttons and turn on the power to restore factory settings.
When connecting to computer, the instrument cannot be recognized. Check if the USB cable is firmly connected. Try connecting another USB port on the computer. This instrument is plug and play and should work without installing a driver.
The pedal does not respond
Check if the pedal cable is firmly connected.
It cannot read/save to the SD card
Make sure your SD card is in FAT32 format and not multi-partitioned.
It shuts down after a period of time
The auto power off function will turn off the instrument after a preset period of time when the instrument is not in use. You can adjust the auto-off function in the function menu.
The Harmony function does not work
Harmony function is not available when Sound R1 is a drum kit.
Factory Reset
To perform a factory reset:
Hold down the [<] and [>] buttons at the same time, then turn on the power. It will reset to factory default settings, and delete all user data on the instrument, including user songs, user memory and user sounds. The LCD will show "Loading!". When factory reset is completed, the instrument will start normally.
Specifications
| Keys | 61 full-size keys with touch response | |
| LCD Screen with Notation | Yes | |
| Pitch Bend Wheel | Yes | |
| X-Y Touch FX Pad | Yes | |
| Max Polyphony | 64 | |
| Sounds | 580 + 5 user samples (10 seconds in total) | |
| Songs | 177 + 5 user songs | |
| Accompaniment Styles | 180 | |
| Mix Patterns | 30 x 5 variations | |
| Reverb | 10 types | |
| Chorus | 8 types | |
| Metronome Range | 5-280 beats per minute | |
| Amplifier | 30W (15W x 2) | |
| Speakers | 4.72" (12cm) x 2 | |
| Controls | Microphone | 1/4" (6.35mm) input |
| Phones | 1/4" (6.35mm) input | |
| Pedals | 1/4" (6.35mm) Sustain pedal input | |
| USB | USB (MIDI and audio) | |
| Aux | 1/8" (3.5mm) input | |
| SD Card | SD Card input (128 GB max) | |
| Power | 12V DC 3A, center-pin positive power adapter (included) | |
| Optional Battery Power | 6 AA-size batteries (not included) | |
| Dimensions: (LengthxWidthxHeight) | 946mm x 360mm x 118mm | |
| Weight | 11.24 lbs (5.1kg) | |
* Specifications are subject to change without notice.
Sound List


Style List


Song List


Mix Pattern List

Documents / Resources
References
Download manual
Here you can download full pdf version of manual, it may contain additional safety instructions, warranty information, FCC rules, etc.
Advertisement


Need help?
Do you have a question about the Harmony 61 Pro and is the answer not in the manual?
Questions and answers