Advertisement
- 1 Technical Specification
- 2 Box Contents
- 3 Setup
- 4 Rear Panel Connection Diagram
- 5 Front/Rear Panel Connection Diagram
- 6 Top Panel
- 7 Rear Panel
- 8 Bottom Panel
- 9 Quick Start
-
10
Advanced Function Mode
- 10.1 Setting the Click Tone
- 10.2 Touch Sensitivity
- 10.3 Transpose
- 10.4 Lesson Mode
- 10.5 Reverb
- 10.6 Chorus
- 10.7 Adjust Volume
- 10.8 Metronome
- 10.9 Setting the MIDI channel
- 10.10 Setting MIC Parameters
- 10.11 MP3 Function
- 10.12 Auto Power Off
- 10.13 Non-Volatile Settings Memory
- 10.14 Restore Factory Default Settings
- 11 Troubleshooting
- 12 PRECAUTIONS
- 13 Documents / Resources
Technical Specification
| Keyboard | 88 Piano Keys |
| Touch panel | Supported |
| Polyphony | 128 Notes |
| Tones | 10 tones |
| Demos | 10 songs |
| Keyboard control | Split, Lesson function |
| Effect Control | Dual voice, Reverb, chorus |
| Metronome | 10 |
| Setting Memory | Non Volatile |
| MIC | Electret Microphone |
| Accessories | User Guide, Power |
| Included | Adapter, Music Stand |
| Input/output | Microphone, Aux Input/Output, Headphones |
| Pedal Inputs | Sustain, Soft, Sostenuto Pedal |
| USB-MIDI | Supported |
| MP3 | Supported |
| Power Adapter | DC 12V - 2A |
| Output Power | 2 x 12 W |
| Size | 125 x 29 x 9 cm |
| Weight | 6.8 kg |
Box Contents
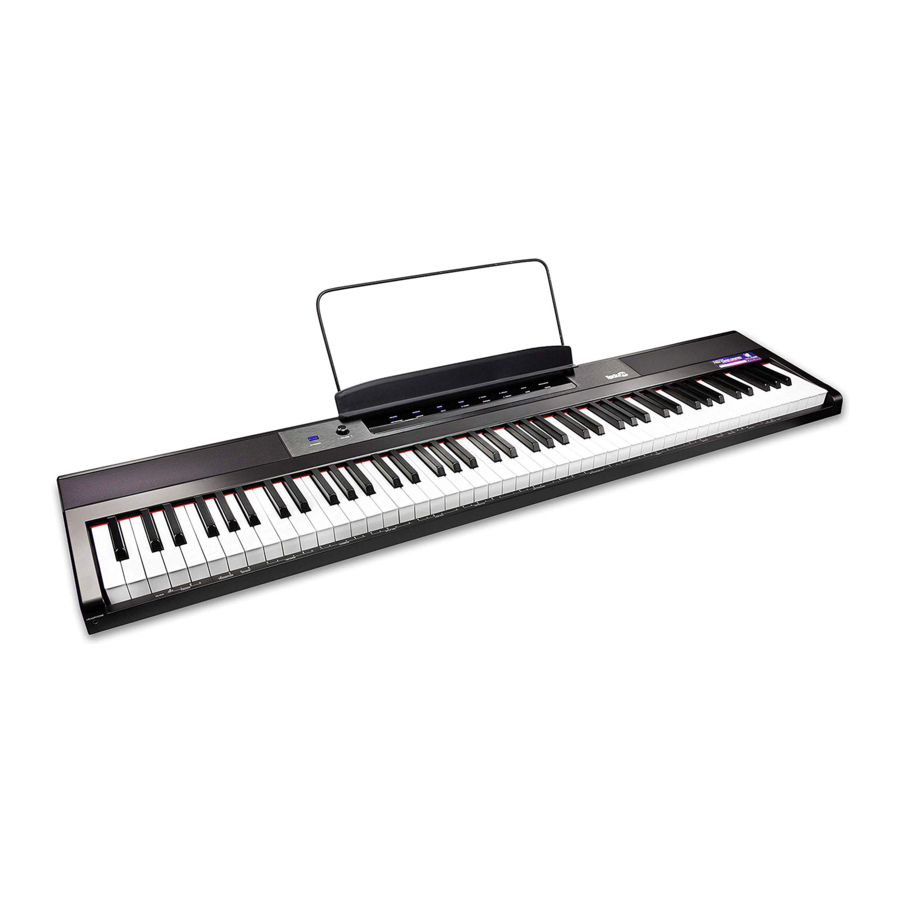
- RockJam Digital Piano
- Music Stand
- Power Adapter
- User Guide
- Tablet Clip x2
Setup

Rear Panel Connection Diagram

Front/Rear Panel Connection Diagram

Top Panel

- Power Switch: Turn the piano's power on or off. In order to save energy, the piano will automatically shut down after 30 minutes if it is not used.
- Master Volume Knob: Adjust the master volume for Line Output and Headphone Output.
Note: If the internal speakers do not produce any sound, check that the Master Volume knob is not set too low or if headphones plugged into the Headphone Output. - Reverb Button: Touch this button to turn the reverb effect on or off, the indicator light will turn on or off accordingly.
- Chorus Button: Touch this button to turn the chorus effect on or off. The indicator light will turn on or off accordingly.
- Demo Button: Touch this button to turn the Demo on or off.
- Metronome Button: Touch this button to turn the metronome on or off. The LED light will turn on or off accordingly.
- Function Button: Touch the lesson button and the metronome button at the same time to enter or exit Advanced Function Mode, LED light will turn on or off.
- Lesson Button: Touch this button to turn the Lesson Mode on or off, the LED light will turn on or off accordingly
- Split Button: Touch this button to enter or exit Split Mode, the LED light will turn on or off accordingly.
- Voice Select Buttons: Touch one of these buttons to select a preset voice, the selected voice the LED light will turn on or off.
Rear Panel

- Power Connector: Use only dedicated AC-DC power adapter for this piano.
- Back Headphone Output: Connect stereo headphones with a 1/4"(6.35mm) stereo connector. When headphones are connected, the internal speakers will automatically turn off and sound will only be heard from the headphones.
- Front Headphone Output: Connect stereo headphones with a 3.5mm stereo connector. When headphones are connected, the internal speakers will automatically turn off and sound will only be heard from the headphones. Front and back headphones can be used at the same time.
- MIC Input: Connect electret Microphone with a 1/4"(6.35mm) stereo connector.
Note: the piano only supports electret microphone, not moving-coil microphone - USB-MIDI Port: Allows for transfer of MIDI data to a computer.
- AUX IN Port: Allows Input audio signals from other audio devices, such as mp3, mobile phone and other media devices to the keyboard.
- AUX OUT Port: Allows connect external audio equipment such as an amplifier, mixer, or recorder.
- Soft Pedal Input: Connect a standard 1/4"(6.35mm) soft pedal here.
- Sustain Pedal Input: Connect a standard 1/4"(6.35mm) sustain pedal here.
- PEDAL Port: Three pedals can be connected to PS2 interface (Delay pedal, Soft pedal, Tone pedal)
- USB Port: After connecting the USB drive, you can play songs in mp3 format stored on the USB drive. (USB drive not included).
Bottom Panel
Battery Compartment: Install 6"D" batteries here to power the digital piano if you are not using the power adapter. Being careful to follow the polarity marking on the inside of the compartment, replace the compartment cover, make sure that it locks firmly in place.


Do not use different kinds of batteries at the same time, or mix old and new batteries. When the batteries run down, the low voltage will lead to the weaker volume and distortion of tone, replace them with new batteries. If the instrument is not to be in use for a long time, remove the batteries from it, in order to prevent possible fluid leakage from the battery.
Quick Start
Playing Demo
The Digital Piano has 10 demo songs built-in.
| Voice Demo List | |||
| VOICE | DEMO | VOICE | DEMO |
| Piano | Marriage Of Love | Church Organ | Nobody |
| Grand Piano | Autumn Moon On A Clam L | SYNTH | The Sun Sank |
| Electric Piano | Mozart Piano | Bass | Pop Dance Music |
| Strings | Blue Danube | Percussion | Charming Night |
| Hammond Organ | Butterfly Love | Guitar | Romance De Amor |
To play the demo songs:
- Touch "Demo" button, the piano will enter the Demo Mode and play 10 demo songs in a continuous loop. The indicator light will flash during demo playback. Touch "DEMO" button again to exit this mode.
- Each Voice Demos on the panel is preset with a voice demo. Firstly touch and hold "DEMO" button, then press one of the voice buttons and then release it at the same time. To exit Demo Mode, Touch "DEMO" button again and the LED will turn off.
Tones Selection
- Touch one of Tone buttons, the corresponding LED will be lit for that voice.

- Play the keys to hear the tone accordingly.

Layer Mode
Layer Mode allows for two different voices to be layered together for a more full and rich sound.
To Enable Layer Modes:
- Touch and hold one voice button firstly, then press another voice button to select the two voices that you want tolayer together and then release these Voices buttons at the same time. The piano will enter Layer Mode and the corresponding voice button LEDs will be lit for the currently selected voices.
- Play the keys to hear the two different voices layered together.
- To disable Layer Mode, touch one of the Voice buttons.
Note: The first Voice button you press when you are selecting which voices to be layered will be set as the "Upper" voice and the second Voice button you press will be set as the "Lower" voice.
See the Advanced Functions section of this manual to learn how to adjust the level of the "Upper" and "Lower" voices.
Split Mode
Split Mode allows you to split the 88 keys into two zones so that you can have two different voices for each of your hands. For example, you may want the Piano voice for your right hand and the Brass voice for your left hand.
When split Mode is enabled, the left hand voice is referred to as the Split voice.
To Enable Split Mode:
- Select the voice you would like to be in the right-hand zone.
- Touch and hold the Split button, then press one of the Voice buttons to select the Split voice for the left-hand zone and then release those two buttons at the same time to enter Split Mode. The corresponding LEDs will be lit when Split Mode is enabled.
- Play the keys and you will hear that the right-hand and left-hand zones will have different voices.
To disable Split Mode, touch the Split button again. The split button LED will turn off when Split Mode is disabled.
To Set Split Point:
To set the key for where the split point between the right-hand voice and left-hand voice occurs, use the following procedure:
- Touch and hold the Split buttons, and then Touch the key where you would like the split to occur.
- Release the Split button to confirm the new split point.
Note: When you are using Split Mode and Layer Mode at the same time, the right-hand zone of the split will play both of the layered voices and the left-hand zone of the split will play the Split voice only.
See the Advanced Functions section of this manual to learn how to adjust the level of the Split voice.
Advanced Function Mode
How to Enter and Exit Advanced Function Mode:
To enter Advanced Function Mode, touch the "Metronome" and Lesson buttons at the same time, the function LED will be lit  Then use the keys that correspond to graphics below to change to your desired setting
Touch both the "Metronome" and "Lesson" buttons again to exit Advanced Function Mode.


Setting the Click Tone
When the click tone is on, you will hear a click sound whenever you change a setting or parameter. You can turn the click tone on or off in Advanced Function Mode.
To turn the click tone on or off:
- Enter Advanced Function Mode, the function LED will be lit on.
- Touch the key marked "Click" to turn the tone on or off.
- Exit Advanced Function Mode.
Touch Sensitivity
The keyboard is equipped with touch response to control level of the voice with your playing strength. That means the harder you play the keys, the greater volume comes from the speakers. Turning this function off results in a fixed touch response no matter how hard or how soft you play the keys. There are 3 types of touch settings (off, 1, 2, 3)
| Parameters | Description |
| OFF | Fixed |
| 1 | Soft |
| 2 | Medium |
| 3 | Hard |
To Set The Sensitivity:
- Enter Advanced Function Mode. The function LED will be lit.
- Use the "Touch" keys to select an appropriate touch level.
- Exit Advanced Function Mode.
Transpose
This function allows the overall pitch of the piano to be transposed up or down.
To change the transposition:
- Enter Advanced Function Mode. The function LED will be lit.
- Use the keys marked Transpose+ or Transpose – to set the transpose value from (-6 to 6). Press both keys together to reset the transposition back to default value of 0.
- Exit Advanced Function Mode.
Lesson Mode
The Lesson Mode feature divides the 88 keys into two zones with the same pitch and voice. This enables both the student and teacher to easily watch and or play together during instruction, without having to reach over each other to play the same pitch.
Note: In Lesson Mode, the layer and Split Modes will be automatically disabled.
Set Other Functions In Lesson Mode:
- To select a voice for both zones in Lesson Mode, touch one of the Voice buttons.
- To change the split point in Lesson Mode, touch and hold the Split button, press a key between C3 to B5, and the release the Split button. The default split point is C4.
To Change the Octave of both Zones in Lesson Mode:
- Enter Advanced Function Mode. The function LED will be lit on.
- Use the keys marked " Octave+" or " Octave-" to adjust the octave value from (-3 to 3). Touch both keys at the same time to restore the default octave value to 0. (octave value can only be adjusted in Lesson Mode, and has no effect in other functions)
- Exit Advanced Function Mode.
Reverb
You can also add an adjustable effect to your sound, this piano has five types of reverb. "Reverb" effect will be default enabled when piano is turn on.
| Parameters | Reverb Type |
| 1 | Room 1 |
| 2 | Room 2 |
| 3 | Room 3 |
| 4 | Hall 1 |
| 5 | Hall 2 |
To Turn on/off The Reverb Effect:
- Touch the " Reverb " button to turn off theReverb effect. The button LED will be turn off.
- Touch the button again to turn on the Reverbeffect.
To Adjust The Reverb Type:
- Enter Advanced Function Mode. The function LED will be lit.
- Use the keys marked "Reverb" 1-5 to select the desired reverb type.
- Exit Advanced Function Mode.
Chorus
You can also add an adjustable chorus effect to your sound. There are five types chorus effect to be selected.
| Parameters | Chorus Type |
| 1 | Chorus 1 |
| 2 | Chorus 2 |
| 3 | Chorus 3 |
| 4 | Chorus 4 |
| 5 | Chorus 5 |
To Enable The Chorus Effect:
- Touch the "Chorus" button to turn on thechorus effect. The button LED will be lit.
- Touch the button again to turn off the choruseffect.
To Adjust The Chorus Type:
- Enter Advanced Function Mode. The function LED will be lit.
- Use the keys marked "Chorus" (1-5) to select the desired chorus type.
- Exit Advanced Function Mode.
Adjust Volume
You can set the volume of each voice in Layer and Split Mode by using Advanced Function Mode.
- Enter Advanced Function Mode. The function LED will be lit on.
- Use the keys marked Upper Volume 1-5 to change the volume of the upper voice in Layer Mode. 1 is the lowest volume, and 5 is the highest volume.
- Exit Advanced Function Mode.
You can follow the above steps to set the volumes for the lower voice in the Layer Mode and the split voice in the Split Mode, using the Lower Volume 1-5 and Split volume 1-5 keys respectively.
Metronome
Turn the metronome on, and the speaker has a tick sound which provides a steady beat to aid in practicing at a consistent tempo. Press the "Metronome" button to turn the metronome on or off. When the metronome is in use, the Metronome button LED will flash along with the current tempo which can be freely adjusted from 30 to 400 beats per minute.
To Set The Metronome Time Signature:
- Enter Advanced Function Mode. The function LED will be lit on.
- Use the keys marked "Metronome speed" (0-9) to set the time signature.
- Exit Advanced Function Mode.
- You can set keys marked Metronome speed 0-9 as 1/4,2/4,3/4,4/4,6/4,3/8,6/8,7/8,9/8,12/8.
To set the metronome volume level:
- Enter Advanced Function Mode. The function LED will be lit on.
- Use the keys marked "Metronome Volume" (1-5) to set the metronome volume. 1 is lowest volume, and 5 is the highest volume.
- Exit Advanced Function Mode.
To Set The Metronome Tempo:
- Enter Advanced Function Mode. The function LED will be lit on.
- Use the keys marked "TEMPO+" or "TEMPO-" to adjust the tempo value. If you touch both keys at the same time, the metronome will be restored to the default tempo of 120.
- You can also use the keys marked "Metronome" (0-9) to set the tempo value. You will need to touch 3 keys total to enter the tempo value. For example, touch 1,2,0 in sequence to enter a tempo value of 120, or touch 0,6,4 in sequence to enter a tempo value of 64.
Alternatively, you may tap the marked TAP to get the desired tempo. The piano will start the Metronome sound at the speed of the last two presses. - Exit Advanced Function Mode.
Setting the MIDI channel
You can also set the MIDI channel for USB-MIDI output by using Advanced Function Mode.
- Enter Advanced Function Mode. The function LED will be lit.
- Use the keys marked "MIDI Ch+" or "MIDI Ch-" to set the MIDI Out channel from Channels 1-16. Touch both keys at the same time to restore the default channel setting to 1.
Note: The keyboard uses only one MIDI channel at a time, even if you are using Split Mode or Layer Mode. - Exit Advanced Function Mode.
Setting MIC Parameters
- Enter Advanced Function Mode. The function LED will be lit on.
- Touch "MIC VOL+" to increase voice volume or "MIC VOL-" to decrease the voice volume.
- Touch the "MIC echo+" to increase echo effect or "MIC echo-" to decrease the echo effect.
- Exit Advanced Function Mode.
MP3 Function
Play songs from a USB stick. Insert the USB stick into the USB port.
- Enter Advanced Function Mode. The function LED will be lit on.
- Touch MP3 key "
![]() " to play or pause songs.
" to play or pause songs. - Touch the MP3 Play key to choose the one you desired.
- Touch the MP3 "
![]() " or "
" or " ![]() " to skip forward or back.
" to skip forward or back. - Touch
![]() or
or ![]() to adjust volume.
to adjust volume. - Exit Advanced Function Mode.
 " to play or pause songs.
 " or "
  " to skip forward or back.
 or
or  to adjust volume.
Auto Power Off
In order to save energy, the piano will automatically shut down after 30 minutes if it is not used.
To enable or disable the Auto Power Off function:
- Enter Advanced Function Mode. The function LED will be lit on.
- Use the keys marked Auto Power Off to enable or disable the Auto Power Off function.
- Exit Advanced Function Mode.
Non-Volatile Settings Memory
The following settings are restored after power off/on
The selected tone (The 1st tone in layer mode)
Reverb and Chorus on/off setting
Split point of the left and right hand
Click sound on or off
Touch sensitivity level
Transpose level
Octave level
Reverb level
Chorus level
Metronome, Tempo/Volume/Time signature
MIDI Channel
Auto power off setting
The following settings are not restored
Split mode
Microphone Volume and Echo
MP3 Player Volume
Restore Factory Default Settings
- Enter Advanced Function Mode. The function LED will be lit on.
- Pressing the reset key means the following parameters will be reset to their default values:
Reverb
Chorus
Metronome
Tempo
Metronome
Time signature
Metronome Volume
Upper Volume
Lower Volume
Split Volume
Split point
MIDI Channel
Touch
Sensitivity
Auto Power off - Exit Advanced Function Mode.
Troubleshooting
| Problem | Possible Cause and Solution |
| The speakers produce a pop sound whenever the power is turned on/off. | This is normal and is no cause for alarm |
| The speakers do not produce sound when the keys are played | Check if the master volume is set too low or if headphones are plugged into the Headphone Output. The speakers will be muted if there are headphones plugged into the Headphone Output. |
The speakers are producing a noise or interference | Using a mobile phone in close proximity to the piano may produce interference. To prevent this, turn off the mobile phone or keep it away from the piano. |
Certain notes produce the wrong pitch | Make sure that the transpose value is set to 0. If that does not work, then restore the factory default settings according to Advanced Functions. |
The notes sound weak or distorted | If the piano is being powered by batteries, make sure new batteries are installed. |
PRECAUTIONS
Please be sure to read the following information carefully and keep this in the safe place for your further reference.


In order to avoid serious casualties caused by electric shock, short circuit, fires or other dangers, please be sure to obey the following information at all times. The precautions are as follows:
- Do not open the digital piano or try to disassemble any part of it. If it should appear to be malfunctioning, discontinue using immediately and have it inspected by qualified service personnel.
- To avoid damaging the piano, please do not place it in a wet environment. Do not place any vessel holding water onto the piano as spillage may occur and damage the internal parts of the piano.
- If the power cord or plug becomes damaged, the piano suddenly cuts off during use or an unusual smell/ smoke is detected, please turn off the power and unplug the power adaptor as soon as possible. Then find the qualified service personal to inspect the piano.
- Please use the specified adaptor only. Using the wrong adaptor can result in damage to the instrument.
NOTICE
- Please remove the power adaptor from the outlet if the piano is not used for a long period of time.
- Do not expose the instrument to excessive dust, vibrations or extreme hot/cold environments (such as direct sunlight or heaters).
- Please unplug the power adaptor or other external devices before moving the keyboard.
- When cleaning the instrument, use a soft, dry cloth. Do not use paint thinner, solvents, cleaning fluids, or chemical-impregnated wiping cloths which may cause discolouration.
- Before connecting the instrument to other electronic components, turn off the power and set all volume levels to minimum. You can then adjust the minimum volume gradually to an appropriate level once the music is playing.
- Do not place the piano on an uneven surface.
- Do not place heavy objects on the piano or hit the keys with excessive force.
- The electric piano has been designed with enough volume redundancy which is suitable for classroom and such places. When using the Piano, please adjust the volume to an appropriate level. Excessive loud volume levels for long periods of time may damage your hearing.
RockJam is a registered trademark of:
PDT Ltd
Unit 4B, Greengate Industrial Estate, White Moss View
Middleton, Manchester M24 1UN, UK
Email: info@pdtuk.com
Documents / ResourcesDownload manual
Here you can download full pdf version of manual, it may contain additional safety instructions, warranty information, FCC rules, etc.
Advertisement


Need help?
Do you have a question about the RJ88DP and is the answer not in the manual?
Questions and answers