
Related Manuals for Life Fitness ATV15-E-01 Series

Summary of Contents for Life Fitness ATV15-E-01 Series
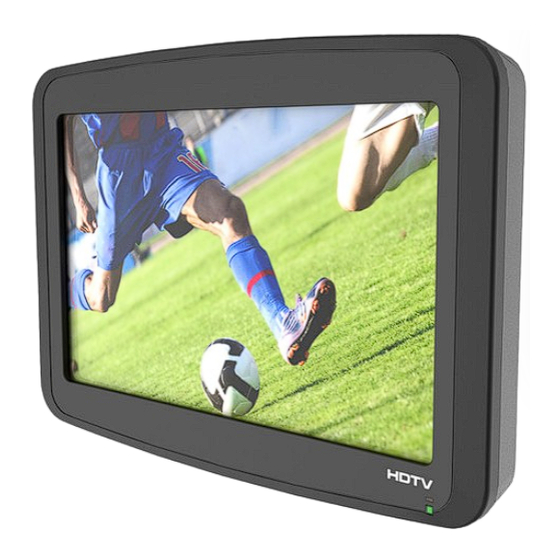
- Page 1 15” ATTACHABLE TV (PRO:IDIOM / IPTV) ATV15-XXXE-01 Owner's Manual 1023071-0001 REV AA...
- Page 3 Latin America and Caribbean* Germany, Austria, and Switzerland Hong Kong Life Fitness, LLC Life Fitness Europe GMBH Life Fitness Asia Pacific LTD 10601 W Belmont Ave Neuhofweg 9 26/F, Global Trade Square Franklin Park, IL 60131 U.S.A. 85716 Unterschleißheim...
-
Page 4: Table Of Contents
Copyright 2023, Life Fitness, LLC. All Rights Reserved. Life Fitness, Hammer Strength, Cybex, ICG and SCIFIT are registered trademarks of Life Fitness, LLC and its affiliated companies and subsidiaries. Disclaimer: Images and specifications are current as of the date of publication and are subject to change. -
Page 5: Getting Started
• Life Fitness Family of Brands does not warrant nor guarantee that component parts used in the manufacture of products offered under the Life Fitness Family of Brands are latex-free. Users of these products must take all necessary precautions to prevent accidental contact that could lead to an adverse latex reaction. -
Page 6: Radio Frequency Interference
• Connect the equipment into an outlet on a circuit different from that to which the receiver is connected. • Consult Life Fitness, the dealer or an experienced radio/TV technician for help. CAUTION: Any changes or modifications not expressly approved by the party responsible for compliance could void the user's authority to operate the equipment. -
Page 7: Specifications
Specifications 15.6” Diagonal Wide Screen Format Aspect Ratio: 16:9 Viewing Angle: 160 degrees horizontal x 160 degrees vertical HD Channel Ready: High-definition television will accept content up to 1080p Visible Screen Size: 13.5" L x 7.6" H (34.4 cm L x 19.4 cm H) Brightness: 250 nits (cd/m2) Display Color:... -
Page 8: Media Connections
Media Connections Item Connection Description Connector Type Power In 12 Volt Power Input Power Jack TV Input (RJ45) 10 / 100 / 1000 Ethernet interface RJ-45 Style High-Def Input 1 High-Definition Audiovisual Connection High-Definition High-Def Input 2 High-Definition Audiovisual Connection High-Definition USB Input USB Type A... -
Page 9: Prerequisite Requirements
Prerequisite Requirements Facility will need to provide: • Access to their IPTV network through a CAT-5e/CAT-6 wired connection for each and every Pro:Idiom IPTV Attachable TV. Do not support Pro:Idiom over a Wireless LAN connection. • Static IP address (IPv4 – 32-bit) assignment for each and every Pro:Idiom IPTV Attachable TV. •... -
Page 10: Installation Setup
Installation Setup The initial setup of a fitness facility with the Pro:Idiom IPTV Attachable TV requires obtaining vital setup information including: • Static IP address assignment for each Pro:Idiom IPTV Attachable TV • The IPTV channel list from the A/V integrator or facility manager for integration into the TV directly. Without this information, this TV cannot be setup. - Page 11 Quick Reference Setup Instructions 1. Enter the Static IP Address for the TV (unique for every TV within the same facility). 2. Setup VLAN (if one is required, otherwise skip). 3. Enter each IP Address + Port once, which includes the channel(s).* NOTE: * For MPTS setups, the possible multiple underlying channels will be made visible after the Auto Channel Scan.
- Page 12 Setup Instructions Follow the Setup Wizard prompts using Go To Next Step to set up Language > Time > Network Settings including Static IP address entry and VLAN assignment. The Setup Wizard will appear only on the First Time Setup. See Initial Setup: Setup Wizard.
- Page 13 Device Static IP Address 1. If the Setup Wizard is exited, press Menu on the IR TV remote. 2. Press to navigate to Setup. 3. Press to navigate to Network Settings. Press Enter. 4. Enter the Static IP address under Device IP section. Each of the four boxes (the first is in green) needs to be filled out using the numeric keypad and right and left arrows for navigation.
- Page 14 VLAN ID Setup After the Static IP address is entered, you can enable VLAN (Virtual Local Area Network) to add in a VLAN ID or VLAN tag assignment. The VLAN ID is to be provided by the facility manager or A/V integrator. This feature is not required but assists with directing traffic that contains both Internet and IPTV together.
- Page 15 Number IP Address Port Channel Number Channel Name 239.10.10.26 1234 239.10.10.27 1234 WEATH 239.10.10.28 1234 HIST 239.10.10.29 1234 239.10.10.30 1234 WTTW 239.10.10.31 1234 ESPN 239.10.10.31 1234 WFLD 239.10.10.31 1234 239.10.10.31 1234 239.10.10.31 1234 239.10.10.31 1234 239.10.10.31 1234 There are two Channel Setup / Creation Options: •...
- Page 16 Channel Setup Option 1: Channel List Load Feature The channel list load feature is a method to create a channel list on a PC within an importable text file. This text file can allow the input of a Static IP address, VLAN parameters, and all channel setup parameters including IP address, Port assignment, channel number, and channel name.
- Page 17 Channel IP Address List & Edit feature under Channels or edit the IP_list.txt file and re-load the channel list. NOTE: Please see the following KB article Life Fitness Attachable TV Pro:Idiom Ethernet Tuner PC Channel List Load for more details. Quick Fixes •...
- Page 18 Channel Setup 2: Manual Channel List Setup 1. Navigate the TV menu to navigate to Channels. 2. Press to navigate to Channel IP Address Input. Press Enter or . NOTE: The IPTV Channel List needs to be provided by the facility manager, IT personnel, or the A/V integrator. The information needed for each channel is the IP address, the port assignment, channel name, and channel number.
- Page 19 4. After all the desired channels are entered, select Menu > Channels > TV Channel Auto Scan. 5. A prompt to confirm you selection will appear. Press to select No or Yes. After the scan, all channels with the correct address and port assignment parameters will play back content. 6.
- Page 20 Channel Cloning After the channel list has been created and verified, use the Clone feature and a USB flash drive to Export / Import the TV settings to other TVs within the facility. 1. Insert a blank USB flash drive into the port on the initial TV with the created channel list. 2.
-
Page 21: Quick Reference
2. Quick Reference Console TV Controls Integrity SL TV Controls Item Description TV Power Channel Up / Down Arrows Closed Caption Adjust Volume TV Front Panel The Blue LED indicator is located on front of the attachable TV under the HDTV wording. Blue LED Status TV Status Blinking... -
Page 22: Tv Menu Access
TV Menu Access LIFE FITNESS recommends programming the 15” Attachable TV by using an IR TV Remote. The TV can also be programmed through Integrity SL console. Please follow the guidelines below to program the TV. NOTE: The password key on the attachable TVs is always 0000. -
Page 23: Ir Tv Remote
IR TV Remote Programming is easier with the optional IR TV Remote. Contact Life Fitness to order one or more IR TV Remote controls if desired. Item Description Power Press to turn TV ON / OFF. Mute Press to mute the sound. - Page 24 Item Description Input Press to cycle through the available input sources (TV, AV, S- Video, PC, HDMI). PMODE Press repeatedly to cycle through available picture modes (Dynamic, Standard, Mild, Personal). SMODE Press to cycle through available sound settings (Standard, Music, Movie, Sports, Personal). Sleep Select the amount of time in minutes before your TV automatically turns off.
- Page 25 Install Batteries Two 1.5V-AAA batteries are included and necessary for operation. 1. Open the battery compartment cover on the back side. 2. Insert two 1.5 V AAA size batteries in correct polarity. IMPORTANT: Do not mix old or used batteries with old ones. 3.
-
Page 26: Operation
3. Operation Main On Screen Display (OSD) Menu Navigation Use the IR TV Remote to access and navigate through the Main On Screen Display (OSD) and TV menus. 1. Press Menu to display the OSD. 2. Use the Left and Right Arrow Keys to select desired menu (Picture, Sound, Time, Setup, Lock, or Channels). 3. -
Page 27: Menus
Menus Main Menus Sub-Menus • Menu Language • Select Time Initial Setup: Setup Wizard • Network Settings • Input Channel IP Address • Picture Mode Picture • Color Temperature • Advanced Settings • Sound Mode • Balance Sound • Audio Language •... -
Page 28: Initial Setup: Setup Wizard
Initial Setup: Setup Wizard Initial setup steps required to connect to a configured IPTV network. MENU NAVIGATION • Use the Up and Down Arrow Keys to select desired menu item. • Use the Left and Right Arrow Keys to move through menu item options. •... - Page 29 NETWORK SETTINGS Network Settings Page 27 of 51...
-
Page 30: Picture Menu
Picture Menu MENU NAVIGATION • Use the Up and Down Arrow Keys to select desired menu item. • Use the Left and Right Arrow Keys to move through menu item options. • Press Enter or use the Right Arrow Key to select desired menu item option. •... -
Page 31: Sound Menu
Sound Menu MENU NAVIGATION • Use the Up and Down Arrow Keys to select desired menu item. • Use the Left and Right Arrow Keys to move through menu item options. • Press Enter or use the Right Arrow Key to select desired menu item option. •... -
Page 32: Time Menu
Time Menu Menu Navigation • Use the Up and Down Arrow Keys to select desired menu item. • Use the Left and Right Arrow Keys to move through menu item options. • Press Enter or use the Right Arrow Key to select desired menu item option. •... -
Page 33: Setup Menu
Setup Menu MENU NAVIGATION • Use the Up and Down Arrow Keys to select desired menu item. • Use the Left and Right Arrow Keys to move through menu item options. • Press Enter or use the Right Arrow Key to select desired menu item option. •... - Page 34 CLOSED CAPTION • Closed Caption (CC) Mode CC Off / CC On / CC On Mute • Available Analog Caption Types CC1 - CC4 / Text1 - Text4 • Available Digital Caption Types Service1 - Service6 Page 32 of 51...
- Page 35 CLOSED CAPTION OPTIONS NOTE: Closed Captioning Option only available with DTV, Components, or HDMI input selections. Default for CC selection is • Digital CC Preset Default / Custom) NOTE: The Mode sub-menu is shown / accessible only when Mode is set to Custom. •...
- Page 36 NETWORK SETTINGS • Device Static IP Address The static IP address for the TV is added here. The static IP address is provided by the facility manager, IT personnel, or the A/V integrator. This allows the TV to access the IPTV network. Each TV within the facility needs to have its own unique static IP address •...
- Page 37 CLONE Feature used to import and export channel list settings from one TV to another within a facility. Requires a USB flash drive which is inserted into the TV’s USB Type-A port before execution of these commands. The cloned channel list file name will be TVClone.dat •...
-
Page 38: Lock Menu
Lock Menu MENU NAVIGATION • Use the Up and Down Arrow Keys to select desired menu item. • Use the Left and Right Arrow Keys to move through menu item options. • Press Enter or use the Right Arrow Key to select desired menu item option. •... - Page 39 SYSTEM LOCK Lock or unlock buttons on the TV. On / Off Page 37 of 51...
- Page 40 U.S. RATING - TV • NOTE: Only available when System Lock is On. • Restricts movies and TV programs by the U.S. content rating system. Press Enter to restrict / unrestrict. Rating Audience TV-Y This program is aimed at a very young audience, including children from ages 2–6. TV-Y7 Programs designed for ages 7 and up.
- Page 41 CANADA RATING - TV • NOTE: Only available when System Lock is On. • The rating settings include Canada English and Canada French. Canada English Rating Audience Exempt Programs that are exempt from ratings (news and sports) Children under the age of 8 Children 8 years and older General audience Intended for general audiences, but may not be suitable for children under the age of...
- Page 42 HOTEL MODE NOTE: The following settings only work when Hotel Mode is set to On. • Channel HOTEL MENU: CHANNEL • OSD HOTEL MENU: OSD • Source HOTEL MENU: SOURCE • Volume HOTEL MENU: VOLUME • Power Management HOTEL MENU: POWER MANAGEMENT •...
- Page 43 Lock Menu - Hotel Menu MENU NAVIGATION • Use the Up and Down Arrow Keys to select desired menu item. • Use the Left and Right Arrow Keys to move through menu item options. • Press Enter or use the Right Arrow Key to select desired menu item option. •...
- Page 44 HOTEL MENU: SOURCE • Input In Channel List • Source Lock Block input sources • TV: (Block / Unblock) • Hi-Def 1: (Block / Unblock) • Hi-Def 2: (Block / Unblock) HOTEL MENU: VOLUME • Speaker On / Off • Default Volume Last / 0-100 •...
- Page 45 HOTEL MENU: POWER MANAGEMENT Auto Power On On / Off HOTEL MENU: KEY MANAGEMENT Main Menu Lock On / Off Page 43 of 51...
-
Page 46: Channels Menu
Channels Menu MENU NAVIGATION • Use the Up and Down Arrow Keys to select desired menu item. • Use the Left and Right Arrow Keys to move through menu item options. • Press Enter or use the Right Arrow Key to select desired menu item option. •... - Page 47 CHANNEL IP ADDRESS INPUT UDP / RTP IP Channel Add Insert the multicast IP address for each channel using the 4 cells (IP0 through IP3). NOTE: Multicast IP range is 224.0.0.0 – 239.255.255.255 • IP0: 224-239 • IP1: 0-255 • IP2: 0-255 •...
- Page 48 TV CHANNEL AUTO SCAN Automatically searches for channels that have been created within the IP Channel List. Sub-menu with a Yes and No option will appear. • TV Channels Found: Total count of channels found during the scan process. • Channel IP Address: Displays current IP address being scanned into the TV.
- Page 49 TV CHANNEL EDIT Menu to edit channel details and order. Channel Edit Menu to show full channel list and allow for editing. • Rename: Press numeric 1 key • Index Edit: Press numeric 2 key • Skip: Press numeric 3 key •...
-
Page 50: Maintenance And Troubleshooting
Cleaning Regularly (at least once a week) clean the Life Fitness Attachable TV and cardio equipment using mild soap and water. Lightly dampen a soft clean cloth with the mild soap and water solution and wipe the product. Do not use too much solution on the cloth and do not spray or pour any solution directly on the products. -
Page 51: Returning Equipment To Life Fitness
Returning Equipment to Life Fitness To return equipment to Life Fitness for any reason, you must contact Life Fitness to obtain a return maintenance authorization (RMA) number (see page one for contact information).When you request an RMA number, please explain why you are returning the equipment. -
Page 52: Warranty
Who Pays Transportation and Insurance For Service If the Product or any covered part must be returned to a service facility for repairs, We, Life Fitness Family of Brands, will pay all transportation and insurance charges for the first year. You are responsible for transportation and insurance charge after the first year. -
Page 53: Changes In Warranty Not Authorized
Changes in Warranty Not Authorized No one is authorized to change, modify or extend the terms of this limited warranty. Effects of State Laws This warranty gives you specific legal rights, and you may have other rights which vary from state to state and country by country.
Need help?
Do you have a question about the ATV15-E-01 Series and is the answer not in the manual?
Questions and answers