
Related Manuals for Inalto IIFF341


Summary of Contents for Inalto IIFF341
- Page 1 U S E R M A N U A L I N A L T O . H O U S E 341L Integrated Fridge/Freezer M O D E L C O D E / S I I F F 3 4 1 F O R A L L A U S T R A L I A N H O M E S V 1 .
- Page 2 Again, thank you for choosing an InAlto appliance and we look forward to being of service to you. Scan to Register your InAlto Appliance or go to: → AU: www.inalto.house/registration → NZ: www.inalto.house/nz/registration By registering your product, you will receive advanced support, stay updated with the latest from InAlto and find out about new products and promotions.
-
Page 3: Table Of Contents
Welcome Contents Safety Instructions Before First Use Fridge/Freezer Tips Crisper Drawer Your Integrated Fridge Using Your Fridge Defrosting Installation Reversing the Door Maintenance & Cleaning Troubleshooting Electrical Information Usage Tips Technical Specifications Purchase/Receipt Warranty Information... -
Page 4: Safety Instructions
Customer Care InAlto recommends the use of original spare parts. When contacting our customer service team on 1300 11 4357, please ensure that you have the following information at hand (which can be found on your appliances’ rating plate). -
Page 5: Before First Use
Before First Use Before first use You must allow the fridge to settle for at least twenty four hours prior to switching the power on. It is recommended that you clean the interior of the appliance prior to first use, using a solution of bicarbonate of soda and warm water and then thoroughly drying the interior. - Page 6 Fridge Tips • Never put liquids in the refrigerator uncovered. • Never put hot foods in the refrigerator. Warm food should be allowed to cool to room temperature before being put into the refrigerator. • Nothing should rest against the rear wall of the refrigerator, as this will cause frost and possible condensation problems which will be di cult to remove.
-
Page 7: Fridge/Freezer Tips
Freezer Tips • The freezer compartments are designed to store only frozen food. • Never put hot or warm foods in the freezer, allow them to cool fully before putting them into the freezer. • Follow the instructions on the food packaging for storage of frozen food. -
Page 8: Crisper Drawer
Crisper Drawer The crisper drawer within this appliance features a humidity level adjustment slider. Vegetables and similar produce that are subject to wilting (e.g. rocket, spinach leaves, herbs such as basil etc.) should be kept in the crisper drawer and the adjustment slider kept closed (fully to the left - high). -
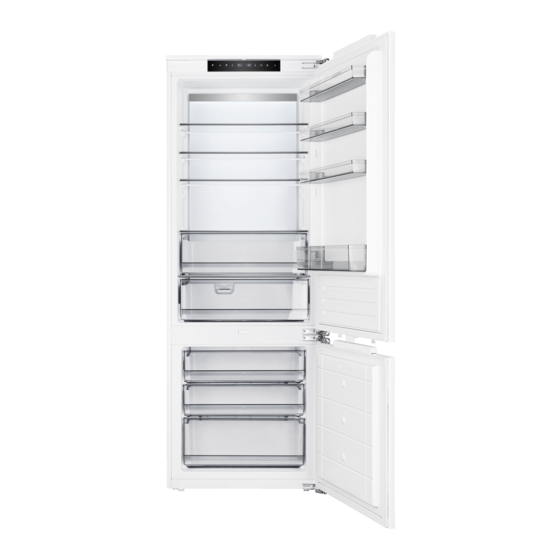
Page 9: Your Integrated Fridge
Your Integrated Fridge Storage The fridge section is for short term food storage. Although low temperatures can be maintained, extended periods of food storage is not recommended. As the cold air circulates within the fridge, the temperature can vary between the di erent sections. As such, foods should be stored in di erent sections according to type. -
Page 10: Using Your Fridge
Using Your Fridge Control Panel Display Fig. 3 A. Adapt zone temperature adjustment sensor This button is used to adjust the temperature within the adapt zone. Press this button once to alter the display to show the current temperature in the adapt zone, and then as many times as necessary until the desired level is selected. - Page 11 D. Fridge temperature adjustment This button is used to adjust the temperature within the fridge. Press this button once to activate adjustment, and then as many times as necessary until the desired level is selected Display This is where you can see the current temperature in the fridge (left) and freezer (right) E.
- Page 12 Defrosting the Freezer Defrosting the freezer The freezer has a no frost system which is designed to prevent the heavy build up of ice. Under normal use, there should be no need to regularly defrost the freezer system. To help in times of service or cleaning, the appliance has a forced defrost mode which can be activated by touching and holding sensors A and C in Fig.
- Page 13 Defrosting the Fridge Defrosting the fridge The fridge is self-defrosting. Any water created will run out of the fridge through the channel at the back of the fridge. The defrosted water is collected in the evaporating tray at the back of the appliance and dissipated by evaporation.
-
Page 14: Installation
Installation This appliance must never be installed close to heat sources, e.g. heating elements or cookers, nor in damp places. Seek the help of another individual, or two, when installing this appliance. This appliance may have sharp edges. Wear adequate PPE for the task and environment. - Page 15 Ventilation The main consideration when installing any refrigeration unit into a fitted kitchen is ventilation. The heat removed from the cooling compartment needs to be dissipated into the atmosphere. Incorrect ventilation can lead to premature compressor failure, excessive power consumption, total system failure and may invalidate the warranty provided with the appliance.
- Page 16 Installation Instructions (Continued) Refrigerator The top of the cabinet needs to be outline An air intake vented into the room should be provided somewhere in Recommended size of vent opening: the cabinet run to 500 x 40mm allow free air in. In this example, a If the furniture does not allow free air plinth vent is shown...
- Page 17 The open channel at the rear is clearly shown. For the correct operation of the appliance it is important that the top of the housing unit is not blocked o . A channel depth of 40-50mm is normal with most units. A ventilation hole is required in the plinth of the unit;...
- Page 18 Installation Instructions (Continued) Mounting the fascia doors Fig. 9 - Fitting the decor door bracket Remove the white decorative cover (Fig. 8) by lifting it upwards. Obtain the below measurements: Dimension B = Measure from the underside surface of kitchen unit to the bottom of fixing bracket.
- Page 19 position. Secure the fixing bracket (2) using screws(1). Fig. 11 - Fitting the decor door Place the decor door onto the appliance door by inserting adjustment bolts into the slots on the Fig. 11 fixing bracket. Locate the washers and screw the nuts onto the adjustment bolts.
- Page 20 Installation Instructions (Continued) Fitting the decorative cover Re-fit the decorative cover, that you removed in the first step, on to the decor door fixing bracket. Check that the whole door assembly operates smoothly and that the door seal of the refrigerator is still creating a seal.
-
Page 21: Reversing The Door
Reversing the Door We recommend you seek the help of another individual to support the doors whilst performing this operation. 1. Carefully prise o the white cover caps for the side that you wish to switch the hinges to 2. With the door closed remove the hinge caps and the screws from the top hinge attaching the hinge to the door, support the door whilst doing this, then remove the screws from the lower hinge 3. - Page 22 Reversing the Door (Continued) Ensuring the door seals correctly: It is normal for the seal to be compressed after the door has been reversed. With the door closed, use a hair dryer to expand the seal and fill the gap between the door and the body of the appliance. Take care not to use the hair dryer too close to the appliance, which could damage the seal.
-
Page 23: Maintenance & Cleaning
Maintenance & Cleaning Always disconnect the appliance from the power supply before any cleaning or maintenance. The fridge and freezer sections should be cleaned using a solution of bicarbonate of soda and lukewarm water. Do not use abrasive products or detergents. After washing, rinse and dry thoroughly. Clean the shelves and balconies separately by hand with a mild solution of washing up liquid and water. -
Page 24: Troubleshooting
Troubleshooting Troubleshooting If you have any problems with your appliance, you should check the troubleshooting prior to calling ...Customer Care. If the appliance is not working, check: • That there is power to the appliance. • The house fuses are intact and the fuse in the plug has not blown. •... - Page 25 If ice has formed on the back wall of the fridge: • It is normal for some ice droplets to form on the back wall of the fridge. This does not constitute a fault with the appliance. • Ensure that no items inside the fridge are in contact with the back wall.
-
Page 26: Electrical Information
Electrical Information Warning! This appliance must be earthed. Green and yellow to earth Brown to live 13A Fuse Cord Clamp Blue to Neutral Fig. 14 The mains lead of this appliance has been fitted with a BS 1363A 13Amp fused plug. To change a fuse in this type of plug, follow the steps below: 1. - Page 27 Important: Do not use the appliance without the fuse cover in position. How to connect an alternative plug If the fitted plug is not suitable for your socket outlet, then it should be cut o and disposed of safely to avoid possible shock hazard. A suitable alternative plug of at least 13 Amp rating to BS 1363 should be used.
-
Page 28: Usage Tips
Usage Tips The information about the climate range of the appliance is provided on the rating plate. It indicates at which ambient temperature (that is room temperature in which the appliance is working) is optimal for the operation of the appliance. Climate class Allowable ambient temperature Extended Temperate... - Page 29 Practical tips Due to the natural circulation of the air in the appliance, there are di erent temperature zones in the refrigerator chamber. The coldest area is directly above the vegetable drawers. Use this area for all delicate and highly perishable food such as: •...
-
Page 30: Technical Specifications
Technical Specifications MODEL IIFF341 CAPACITY 341L RATED VOLTAGE 220-240V~ 50Hz R600a, 60g REFRIGERANT ENERGY RATING (MEPS) 4 Stars 84kg/90kg NET/GROSS WEIGHT 690 × 550 × 1937mm PRODUCT SIZE (W x D x H mm) - Page 31 Purchase Details For future reference, please record the following information in the form below. The product details can be found on the rating plate, and purchase details which can be found on your sales invoice. STORE DETAIL S STORE NAME ADDRESS TELEPHONE PURCHASE DATE...
-
Page 32: Warranty Information
Warranty Information AUSTRALIAN WARRANTY TERMS & CONDITIONS (h) ‘you’ means the purchaser of the Appliance not having purchased the Appliance for re-sale, and REFRIGERATION APPLIANCES ‘your’ has a corresponding meaning. This document sets out the terms and conditions of the This warranty only applies to Appliances purchased product warranties for Residentia Group Appliances. - Page 33 (a) the Appliance is damaged by: if the Appliance fails to be of acceptable quality and the failure does not amount to a major failure. accident (ii) misuse or abuse, including failure to The benefits to you given by this warranty are in properly maintain or service addition to your other rights and remedies under a law in relation to the Appliances or services to which...
- Page 34 Simply visit the below website, or ask your retailer 24 months on the microwave magnetron; Waste for help: www.inalto.house/nz/registration disposers have a 12 month warranty. The provision of service under this warranty is...
- Page 35 THIS PAGE IS INTENTIONALLY LEF T BL ANK...
- Page 36 D E S I G N E D I N M E L B O U R N E F O R A L L A U S T R A L I A N H O M E S W W W .
Need help?
Do you have a question about the IIFF341 and is the answer not in the manual?
Questions and answers