Endress+Hauser Liquicap M FTI52 Operating Instructions Manual
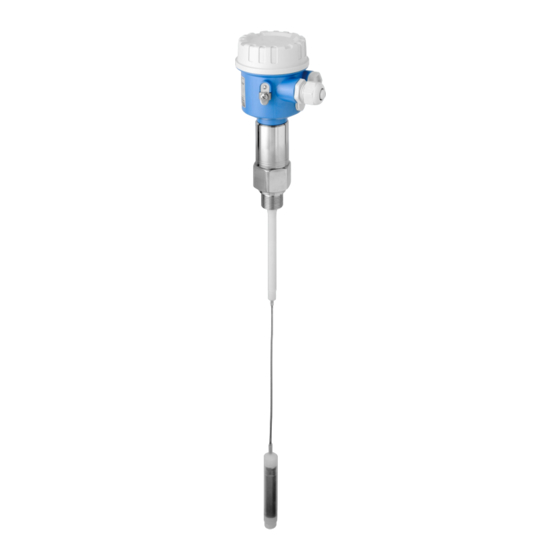
Capacitance point level switch for liquids
Hide thumbs
Also See for Liquicap M FTI52:
- Operating instructions manual (96 pages) ,
- Safety instructions (28 pages) ,
- Operating instructions manual (73 pages)

Related Manuals for Endress+Hauser Liquicap M FTI52


Summary of Contents for Endress+Hauser Liquicap M FTI52
- Page 1 Products Solutions Services BA02032F/00/EN/01.20 71514889 2023-09-25 Valid as of version V 01.00.zz Operating Instructions Liquicap M FTI52 Capacitance Point level switch for liquids...
- Page 2 Related documents Liquicap M FTI52 Related documents Order code: XXXXX-XXXXXX Ser. no.: XXXXXXXXXXXX Ext. ord. cd.: XXX.XXXX.XX Serial number www.endress.com/deviceviewer Endress+Hauser Operations App A0023555 Endress+Hauser...
-
Page 3: Table Of Contents
Liquicap M FTI52 Table of contents Table of contents 5.1.2 Cable specification ....23 About this document ....5 5.1.3... - Page 4 Seals ....... 72 Endress+Hauser services ....72 Repair .
-
Page 5: About This Document
Liquicap M FTI52 About this document About this document Document function These Operating Instructions contain all the information required in the various life cycle phases of the device: from product identification, incoming acceptance and storage, to installation, connection, operation and commissioning, through to troubleshooting, maintenance and disposal. -
Page 6: Symbols For Certain Types Of Information And Graphics
About this document Liquicap M FTI52 Flat blade screwdriver Torx screwdriver Allen key Open-ended wrench 1.2.4 Symbols for certain types of information and graphics Permitted Procedures, processes or actions that are permitted Preferred Procedures, processes or actions that are preferred Forbidden... -
Page 7: Documentation
Liquicap M FTI52 About this document Temperature resistance of the connection cables Specifies the minimum value of the temperature resistance of the connection cables LED not lit LED lit LED flashes Documentation All available documents can be downloaded using: • the serial number of the device (see cover page for description) or •... -
Page 8: Registered Trademarks
About this document Liquicap M FTI52 Registered trademarks HART ® Registered trademark of the FieldComm Group, Austin, USA TRI CLAMP ® Registered trademark of Alfa Laval Inc., Kenosha, USA KALREZ ® , VITON ® , TEFLON ® Registered trademarks of E.I. Du Pont de Nemours & Co., Wilmington, USA... -
Page 9: Basic Safety Instructions
Have read and understood the instructions in the manual and supplementary documentation. ‣ They follow instructions and comply with conditions. Intended use The Liquicap M FTI52 is a compact point level switches for the capacitance point level detection of liquids. Workplace safety For work on and with the device: ‣... -
Page 10: Incoming Acceptance And Product
Incoming acceptance and product identification Liquicap M FTI52 Incoming acceptance and product identification Incoming acceptance Check whether the packaging or content is damaged. Check that the goods delivered are complete and compare the scope of delivery with the information in your order. -
Page 11: Mounting
Mounting requirements 4.1.1 Mounting the sensor The Liquicap M FTI52 can be installed from the top only. Make sure that: • the probe is not installed in the area of the filling curtain • the probe is not in contact with the container wall •... -
Page 12: Installation Examples
Mounting Liquicap M FTI52 ≥ 500 (19.7) ∆s A0042380 2 Measuring conditions. Unit of measurement mm (in) Active length Inactive length ∆s Two-point control MIN Minimum measuring level The 0 % and 100 % calibration can be inverted. Installation examples 4.3.1... -
Page 13: Rope Shortening
Liquicap M FTI52 Mounting A0040452 4 A probe with inactive length for the insulated tanks A0040453 5 A probe with fully insulated inactive length 4.3.2 Rope shortening Both versions of the rope probes can be shortened. The weigth must be removed from the rope first. -
Page 14: Tensioning Weight With Tension
Mounting Liquicap M FTI52 4.3.3 Tensioning weight with tension The end of the probe needs to be secured if the probe would otherwise touch the silo wall or another part in the tank. This is what the internal thread in the probe weight is intended for. -
Page 15: Extension Heights: Separate Housing
Liquicap M FTI52 Mounting The maximum cable length L4 and rope length L1 cannot exceed 10 m (33 ft). The maximum cable length between the probe and separate housing is 6 m (20 ft). The required cable length must be indicated in the ordering process of a Liquicap M with separate housing. -
Page 16: Wall Bracket
Mounting Liquicap M FTI52 D and H5 parameter • rope probe without fully insulated inactive length and threads G¾", G1", NPT¾", NPT1", Clamp 1", Clamp 1½", Universal ⌀44 mm (1.73 in), flange < DN50, ANSI 2", 10K50: • D: 38 mm (1.5 in) •... -
Page 17: Pipe Mounting
Liquicap M FTI52 Mounting 4.4.4 Pipe mounting The maximum pipe diameter is 50.8 mm (2 in). 1 → A0042318 A0042321 ‣ ‣ Screw together the wall Screw the separate housing on bracket on the tube. a pipe. 4.4.5 Shortening the connecting cable NOTICE Risk of damage to connections and cable. - Page 18 Mounting Liquicap M FTI52 Probe without active buildup compensation Disconnecting the connection cable 1 → 2 → 3 → A0042111 A0042112 A0042113 ‣ ‣ ‣ Loosen the pressing screw with Pull the insert seal out of the Block the adapter disk with the an open-end wrench AF22.
- Page 19 Liquicap M FTI52 Mounting gn/ye A0042544 10 Cable connections External screening (not required) Strand black (bk) (not required) Coaxial cable with central core and screen Solder the red (rd) strand with the central core of the coaxial cable (probe)
-
Page 20: Installation Instructions
Mounting Liquicap M FTI52 7 → 8 → A0042549 A0042546 A0042119 ‣ ‣ ‣ Remove the blade plug from Loosen the screw to disconnect Loosen the nut (M4) of the the socket. the yellow-green cable. blade plug. gn/ye A0042547 11... -
Page 21: Probe Installation
Liquicap M FTI52 Mounting 4.5.1 Probe installation Probe with thread Cylindrical threads G½, G¾, G1, G1½ To be used with the elastomer fiber seal supplied or another chemically resistant seal. Make sure that the temperature resistance of a seal is correct. -
Page 22: Aligning The Housing
Mounting Liquicap M FTI52 4.5.2 Aligning the housing The housing can be rotated 270 ° to align the cable entry. To prevent moisture penetration, route the connecting cable downwards in front of the cable gland and secure it with a cable tie. -
Page 23: Electrical Connection
Liquicap M FTI52 Electrical connection Electrical connection Before connecting the power supply, note the following: • the supply voltage must match the data specified on the nameplate • switch off the supply voltage before connecting the device • connect the potential equalization to the ground terminal on the sensor When using the probe in hazardous areas, the relevant national standards and the information in the safety instructions (XA) must be observed. -
Page 24: Cable Entry
Electrical connection Liquicap M FTI52 PIN assignment for M12 connector A0011175 14 M12 connector with 2-wire-electronic insert FEI55, FEI57, FEI58, FEI57C Positive potential Not used Negative potential Ground A0011175 15 M12 connector with 3-wire-electronic insert FEI52, FEI53 Positive potential... -
Page 25: Connecting The Measuring Device
Liquicap M FTI52 Electrical connection Connecting the electronic insert to the power supply: 1 → A0047667 A0047668 ‣ ‣ Unscrew and remove the Release the cable gland. ‣ housing cover. Insert the cable. Connecting the electronic insert to the power supply mounted in the housing T13: 1 →... -
Page 26: Dc Pnp Electronic Insert Fei52
Electrical connection Liquicap M FTI52 Signal on alarm The output signal on power failure or in the event of damage to the sensor: < 3.8 mA Connectable load • For relays with a minimum holding power or rated power: • > 2.5 VA at 253 V (10 mA) •... -
Page 27: 3-Wire Electronic Insert Fei53
4. Switch on the supply voltage. 5.3.3 3-wire electronic insert FEI53 The 3-wire DC connection is used in conjunction with the Nivotester switching device FTC325 3–WIRE from Endress+Hauser. The switching device' s communication signal operates at 3 to 12 V Endress+Hauser... -
Page 28: Ac And Dc With Relay Output Electronic Insert Fei54
Electrical connection Liquicap M FTI52 The failsafe mode (MIN) / (MAX) and the point level adjustment are configured on the Nivotester. Power supply • Supply voltage: 14.5 V • Current consumption: < 15 mA • Power consumption: maximum 230 mW •... - Page 29 Liquicap M FTI52 Electrical connection Power supply • Supply voltage: • 19 to 253 V , 50 to 60 Hz • 19 to 55 V • Power consumption: 1.6 W • Reverse polarity protection: yes • Separation voltage: 3.7 kV •...
-
Page 30: Sil2 / Sil3 Electronic Insert Fei55
Electrical connection Liquicap M FTI52 4. Switch on the supply voltage. 5.3.5 SIL2 / SIL3 electronic insert FEI55 The two-wire DC connection should, if possible, be connected as follows: • to programmable logic controllers (PLC) • to AI modules 4 to 20 mA in accordance with EN 61131-2 The point level signal is sent via an output signal jump from 8 to 16 mA. -
Page 31: Pfm Electronic Insert Fei57S
Liquicap M FTI52 Electrical connection Functional safety (SIL) The electronic insert FEI55 meets the requirements of SIL2 or SIL3 in accordance with IEC 61508, IEC 61511-1 and can be used in the safety systems with the corresponding requirements. An exact description of the requirements in terms of functional safety can be found in document FY01073F. -
Page 32: Namur Electronic Insert Fei58
NAMUR electronic insert FEI58 The two-wire connection for a separate switching unit in accordance with NAMUR specifications (IEC 60947-5-6), e.g. Nivotester FTL325N from Endress+Hauser. Change in the output signal from high to low current in event of point level detection. -
Page 33: Post-Connection Check
Liquicap M FTI52 Electrical connection Ex ia — A0042393 17 Terminals must be connected to the isolating amplifier (NAMUR) IEC 60947-5-6 1. Connect the FEI51 according to the schema. 2. Tighten the cable gland. 3. Switch on the supply voltage. -
Page 34: Operation Options
Operation options Liquicap M FTI52 Operation options Human interface and display elements for FEI51, FEI52, FEI54, FEI55 3 4 5 6 FEI5x A0042394 18 FEI51, FEI52, FEI54, FEI55 human interface Green LED - operational status Green LED Red LED - fault... -
Page 35: Human Interface And Display Elements For Fei53, Fei57S
Liquicap M FTI52 Operation options 9. Upload sensor DAT (EEPROM) press for download press for upload Human interface and display elements for FEI53, FEI57S The electronic inserts FEI53 and FEI57S are used in conjunction with Nivotester switching devices. -
Page 36: Human Interface And Display Elements For Fei58
Operation options Liquicap M FTI52 0... A0042403 23 Measuring range: the measuring range is between 5 to 1 600 pF. Span: the span is between 5 to 1 600 pF Human interface and display elements for FEI58 FEI5x NAMUR... - Page 37 Liquicap M FTI52 Operation options A0042406 27 10 pF A0042407 28 2 pF Switching delay: A0042408 29 A0042409 30 Fail-safe mode: A0042410 31 The output switches safety-oriented when the probe is uncovered. It can be used in cases such as dry run protection and pump protection.
-
Page 38: Commissioning
Commissioning Liquicap M FTI52 Commissioning Installation and function check Make sure that the post-installation check and final check have been completed before you start your measuring point: • see the chapter "Post-installation check" → 22 • see the chapter "Post-connection check" → 33... -
Page 39: Carrying Out Empty Calibration
Liquicap M FTI52 Commissioning To set the range to 0 to 1 600 pF: 1 → 2 → 3 → A0042452 A0042453 A0043663 ‣ Set the function switch to position 4. 4 → 5 → 6 → > 2 s... -
Page 40: Carrying Out Full Calibration
Commissioning Liquicap M FTI52 To carry out an empty calibration, set the measuring range first → 38. 1 → 2 → 3 → > 2 s A0042458 A0042821 A0042459 ‣ ‣ Press the key > 2 s. Release the key when the green LED 1 starts to flash. -
Page 41: Carrying Out Empty And Full Calibration
Liquicap M FTI52 Commissioning 4 → 5 → 6 → > 2 s A0042462 A0042463 A0042464 ‣ ‣ ‣ The process of saving the full Press the key > 2 s. Release the key when the calibration is complete when green LED 5 starts to flash. - Page 42 Commissioning Liquicap M FTI52 4 → 5 → > 2 s A0042822 A0042459 A0043260 ‣ ‣ ‣ The process of saving the Press the key > 2 s. Release the key when the empty calibration is finished green LED 1 starts to flash.
-
Page 43: Reset: Calibration And Switch-Point Adjustment
Liquicap M FTI52 Commissioning 7.2.5 Reset: Calibration and switch-point adjustment Resetting the calibration or switch-point shift (all the other settings remain unchanged) The switch-point adjustment is reset to the factory setting of 2 pF. 1 → 2 → 3 →... -
Page 44: Setting The Switch Point Adjustment
Commissioning Liquicap M FTI52 7.2.6 Setting the switch point adjustment If only one calibration (empty or full) was carried out, and if buildup forms on the rope probe while the probe is in operation, the device may no longer respond to changes in level. -
Page 45: Configuring Two-Point Control And Buildup Mode
Liquicap M FTI52 Commissioning 7 → 8 → 9 → ∆c ∆c = 8 pF = 4 pF > 2 s A0042472 A0042473 A0043643 ‣ Press the key > 2 s to decrease the value. 10 → A0042474 A0043652 ‣... - Page 46 Commissioning Liquicap M FTI52 Configuring two-point control 1 → 2 → 3 → A0042483 A0043269 A0043654 ‣ Set the function switch to position 4. 4 → > 2 s A0042475 A0042476 ‣ ‣ The buildup two-point control Press the key > 2 s.
-
Page 47: Setting The Switching Delay
Liquicap M FTI52 Commissioning 7.2.8 Setting the switching delay NOTICE The tank can overflow if the switching delay is set for too long. ‣ The switching delay causes the device to signal the point level after a delay. This is highly useful in tanks with turbulent medium surfaces caused, for example, by the filling process or by collapsing mounds. -
Page 48: Activating The Self-Test
Commissioning Liquicap M FTI52 A0042748 0.3 s 1.5 s 10 s A0042749 34 The LED sequence regarding the switching delay value. 7.2.9 Activating the self-test NOTICE Accidental process run! This could result, for example, in overflowing the tank. ‣... - Page 49 Liquicap M FTI52 Commissioning 16 mA ± . 0 8 mA 8 mA ± . 0 5 mA A0042398 36 Start point uncovered MIN safety MAX safety Proof test START point Proof test END point Activating the self-test 1 →...
-
Page 50: Setting The Min, Max And Sil Fail
Commissioning Liquicap M FTI52 7.2.10 Setting the MIN, MAX and SIL fail-safe mode The SIL mode function is only available in conjunction with electronic insert FEI55. By selecting the fail-safe mode correctly, you ensure that the output always operates safely with the quiescent current. - Page 51 Liquicap M FTI52 Commissioning To set the MAX fail-safe mode: 1 → 2 → 3 → A0042483 A0042492 A0042494 ‣ Set the function switch to position 7. 4 → 5 → 6 → > 2 s A0042495 A0042496 A0042465 ‣...
- Page 52 Commissioning Liquicap M FTI52 Setting the MAX fail-safe mode and lock the SIL mode: The factory setting is set to MIN-SIL mode. 1 → 2 → 3 → A0042483 A0042492 A0042496 ‣ Set the function switch to position 7. 4 →...
- Page 53 Liquicap M FTI52 Commissioning 4 → 5 → 6 → > 2 s > 4 s A0042493 A0043657 A0042497 ‣ ‣ ‣ The MIN fail-save mode is set. Press the key > 2 s to set Press the and keys > 4 s.
-
Page 54: Restoring Factory Settings
Commissioning Liquicap M FTI52 To unlock the SIL mode and set the MIN fail-save mode: 1 → 2 → 3 → > 4 s A0042483 A0042484 A0042485 ‣ ‣ Set the function switch to Press the and keys > 4 s. -
Page 55: Upload And Download Sensor Dat
Liquicap M FTI52 Commissioning 4 → A0043661 A0042513 ‣ The factory settings have been successfully restored. 7.2.12 Upload and download sensor DAT (EEPROM) The customer-specific settings of the electronic insert (e.g. empty and full calibration, switch-point adjustment) are stored automatically in the sensor DAT (EEPROM) and the electronic insert. - Page 56 Commissioning Liquicap M FTI52 4 → 5 → A0042509 A0042503 A0042483 ‣ Set the function switch to position 1. Uploading the data 1 → 2 → 3 → > 2 s A0042483 A0042507 A0042510 ‣ ‣ Set the function switch to Press the ...
-
Page 57: Output Signals
Liquicap M FTI52 Commissioning 7.2.13 Output signals Output signal FEI51 <3.8 mA <3.8 mA I /<3,8 mA <3.8 mA A0042586 Output signal FEI52 I / I A0042587 Endress+Hauser... -
Page 58: Commissioning With Electronic Inserts Fei53
Commissioning Liquicap M FTI52 Output signal FEI54 A0042528 Output signal FEI55 ~16 mA ~8 mA ~16 mA ~8 mA ~8/16 mA < 3.6 mA A0042529 Commissioning with electronic inserts FEI53 or FEI57S This chapter describes the process for commissioning the device with electronic insert versions FEI53 and FEI57S. -
Page 59: Setting The Alarm Response If The Measuring Range Is Exceeded
Liquicap M FTI52 Commissioning 0...1600pF Standard 0..500pF FEI5x A0042395 37 FEI53 and FEI57S human interface Green LED - operational status Standard or alarm DIP switch Measuring range DIP switch Red LED - fault 7.3.1 Setting the alarm response if the measuring range is exceeded... -
Page 60: Output Signals
Commissioning Liquicap M FTI52 0... A0042403 41 Measuring range: the measuring range is between 5 to 1 600 pF. Span: the span is between 5 to 1 600 pF The choice of measuring range (0 to 500 pF and 0 to 1 600 pF) depends on the function of the probe. -
Page 61: Function Keys A, B, C
Liquicap M FTI52 Commissioning FEI5x NAMUR IEC 60947-5-6 8 9 10 A0042396 42 FEI58 human interface Function key A Green LED - operational status Red LED - fault Yellow LED - switching state Function key B Test key Calibration DIP switch... - Page 62 Commissioning Liquicap M FTI52 A0042404 44 The probe is covered during calibration Make sure that the probe is not covered with product. Carrying out empty calibration 1 → 2 → 3 → > 2 s A0042514 A0042515 A0042516 ‣...
-
Page 63: Setting The Switch Point Adjustment
Liquicap M FTI52 Commissioning Carrying out full calibration 1 → 2 → 3 → > 2 s A0042514 A0042519 A0042520 ‣ ‣ Make sure that the calibration Press the A and B keys > 2 s. DIP switch is in position "Covered". -
Page 64: Setting The Switching Delay
Commissioning Liquicap M FTI52 7.4.4 Setting the switching delay NOTICE The tank can overflow if the switching delay is set for too long. ‣ The switching delay causes the device to signal the point level after a delay. This is useful in tanks with turbulent medium surfaces caused by the filling process or by collapsing mounds. -
Page 65: Display Calibration Situation
Liquicap M FTI52 Commissioning 7.4.6 Display calibration situation Use this function to see what calibrations have been performed on the device. The calibration situation is indicated by the three LEDs. Displaying calibration situation > 2 s A0042550 ‣ Press the key > 2 s A0042551 ... -
Page 66: Output Signals
Commissioning Liquicap M FTI52 To perform the function test: 1 → 2 → A0042523 A0042524 A0042525 ‣ ‣ Press the C key for the entire The safety functions duration of the test. configured for the supply unit are activated. ‣... -
Page 67: Diagnostics And Troubleshooting
Liquicap M FTI52 Diagnostics and troubleshooting Diagnostics and troubleshooting In the event of faults during commissioning or operation of the device, you can carry out fault diagnostics on the electronic insert. This function is supported by the electronic inserts FEI51, FEI52, FEI54, FEI55. - Page 68 Diagnostics and troubleshooting Liquicap M FTI52 A0042558 Recalibrate The calibration point is too close to the measuring range limit - priority 4 A0042559 Reduce the switch-point or select a new installation location No calibration has yet been carried out - priority 5...
-
Page 69: Fault Diagnostics Fei53 And Fei57S
Liquicap M FTI52 Diagnostics and troubleshooting Operate the device in the specified temperature range only Fault diagnostics FEI53 and FEI57S The device does not switch Check the connection and the supply voltage Alarm LED flashes The ambient temperature of the electronics is outside the permitted range or the... -
Page 70: Firmware History
Diagnostics and troubleshooting Liquicap M FTI52 A0042572 Perform uncovered calibration with the probe uncovered, and covered calibration with the probe covered No calibration has yet been carried out - priority 4 A0042573 Carry out empty and full calibration The change in capacitance from uncovered probe to covered probe is too small -... - Page 71 Liquicap M FTI52 Diagnostics and troubleshooting FEI54 • Release date: 07/2006 • Software version: V 01.00.zz • Software change: original software FEI55 • Release date: 11/2008 • Software version: V 02.00.zz • Software change: extended to include SIL functionality FEI57S •...
-
Page 72: Maintenance
The intervals between seal replacement depend on the frequency of the cleaning cycles and on the fluid and cleaning temperature. Endress+Hauser services Endress+Hauser offers a wide range of services. Your Endress+Hauser Sales Center can provide detailed information on the services. Endress+Hauser... -
Page 73: Repair
• The measuring devices have a modular design • Spare parts are grouped into logical kits with the associated Installation Instructions • Repairs are carried out by Endress+Hauser Service or by appropriately trained customers • Certified devices can only be converted to other certified devices by Endress+Hauser Service or at the factory 10.2... -
Page 74: Replacement
Repair Liquicap M FTI52 • carry out the individual test for the device • change the device only with a device certificated by Endress+Hauser • report every change and repair of the device 10.4 Replacement After replacing a probe or the electronic insert, the calibration values must be transferred to the replacement device. -
Page 75: Accessories
• For signal lines in field housing: BA00304K. • For signal or supply lines in field housing: BA00305K. 11.4 Weld-in adapter All available weld-in adapters are described in the document TI00426F. The documentation is available in the Download section on Endress+Hauser web site: www.endress.com Endress+Hauser... -
Page 76: Technical Data
Technical data Liquicap M FTI52 Technical data 12.1 Capacitance values of the probe Basic capacitance: approximately 18 pF. 12.1.1 Additional capacitance Mount the probe at a minimum distance of 50 mm (1.97 in) from a conductive container wall: approximately 1.0 pF/100 mm (3.94 in) in the air for a rope probe. -
Page 77: Output
Liquicap M FTI52 Technical data 12.3 Output 12.3.1 Switch behavior Binary or ∆s operation. The pump control is not possible with FEI58. 12.3.2 Switch-on behaviour When the power supply is switched on, the switching status of the outputs corresponds to the signal on the alarm. -
Page 78: Operating Conditions: Environment
Technical data Liquicap M FTI52 12.5 Operating conditions: Environment 12.5.1 Ambient temperature range • F16 housing: –40 to +70 °C (–40 to +158 °F) • remaining housing: –50 to +70 °C (–58 to +158 °F) • observe derating • use a protective cover, when operating outdoors 12.5.2... -
Page 79: Electromagnetic Compatibility
Liquicap M FTI52 Technical data Aluminum housing F13 with gas-tight process seal Protection degree: • IP66 • IP68 • Type4X Stainless steel housing F27 with gas-tight process seal Protection degree: • IP66 • IP67 • IP68 • Type4X Aluminum housing T13 with gas-tight process seal and separate connection... - Page 80 Technical data Liquicap M FTI52 Probe with compact housing [°F] °C +158 +100 –13 –25 –40 – 0 –58 –50 °C –80 – 0 +200 [°F] –112 –40 +176 +392 A0043638 58 Process pressure range diagram: probe with compact housing...
-
Page 81: Process Pressure Limits
Liquicap M FTI52 Technical data Probe with separate housing [°F] °C +248 +120 +212 +100 –58 –50 °C –80 +170 +200 [°F] –112 +338 +392 A0043639 59 Process pressure range diagram: probe with separate housing Ambient temperature Process temperature The permitted ambient temperature at the separate housing is the same as indicated for the compact housing. -
Page 82: Pressure And Temperature Derating
Technical data Liquicap M FTI52 Rope probe with fully insulated inactive length E+H Configurator settings: • Feature: 20 • Options: 3, 6 –1 to 50 bar (–14.5 to 725 psi) Refer to the following standards for the pressure values permitted at higher temperatures: •... - Page 83 Liquicap M FTI52 Technical data For rope probes without inactive length or with inactive length in 316L, process connections 1½", flanges ≥DN50, ≥ANSI 2", ≥JIS 50A Rope insulation: FEP, PFA E+H Configurator settings: • Feature: 20 • Options: 1, 2, 5...
-
Page 84: Index
Index Liquicap M FTI52 Index About this document ......5 Incoming acceptance ......10 Accessories . - Page 85 Liquicap M FTI52 Index Sealing the probe housing ..... 22 Setting the measuring range ....38 Shock resistance .
- Page 88 *71514889* 71514889 www.addresses.endress.com...
Need help?
Do you have a question about the Liquicap M FTI52 and is the answer not in the manual?
Questions and answers