Table of Contents
Advertisement
Quick Links
Advertisement
Table of Contents

Related Manuals for UNITRA ZGB-401

Summary of Contents for UNITRA ZGB-401
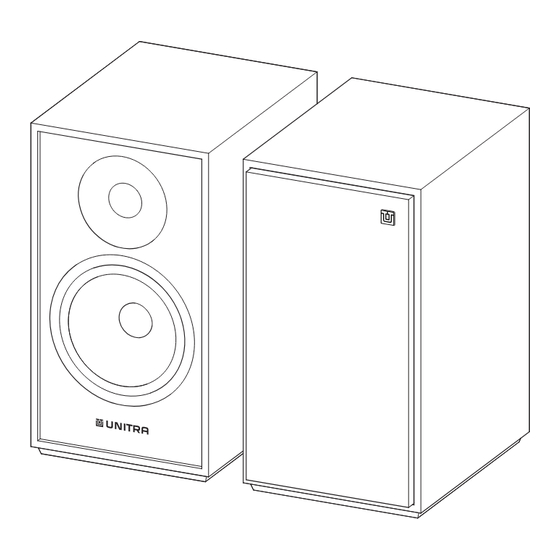
- Page 1 ZGB-401 BASS REFLEX LOUDSPEAKER User Manual...
-
Page 3: Table Of Contents
Contents Manufacturer Manufacturer Unitra sp. z o.o. Przejazdowa 2b, About this document 02-496 Warsaw, Poland Symbols used in this manual ......4 website: www.unitra.com... -
Page 4: About This Document
About this document Thank you for purchasing this Unitra product. To ensure proper operation, read this manual carefully and operate the device in accordance with the instructions contained in it. Please keep this manual for future reference after reading it. -
Page 5: Content Of The Package
Content of the package Make sure that the following elements are included in the package: • Device (ZGB-401 Bass Reflex Loudspeaker) • Connector bridge • Bass reflex port plug • User Manual (this book) • Safety Brochure • Warranty Card Connections The Device has an option for bi-wiring and bi-amping connections. - Page 6 Connection with speaker cables 10 mm NOTICE Do not let the bare speaker wires touch each other, nor any metal part Otherwise, the Device and/or the amplifier may be damaged Step Remove approximately 10 mm of the insulation from the end of the speaker cable and twist the exposed wires tightly together to prevent short circuits.
- Page 7 Connection with banana plug cables Step Tighten the knob at the speaker terminal. Step Insert the banana plug into the head of the knob.
- Page 8 Connection with Y-shaped lug cables Step Loosen the knob at the terminal. Step Insert the Y-shaped lug between the knob and the base of the terminal. Step Tighten the knob.
- Page 9 Deinstallation of the connector bridge Step Loosen all the knobs at the terminals. Step Slide the connector bridge upwards from the terminals. Step Tighten the knobs.
-
Page 10: Standard Connection
Standard connection Standard connection allows you to connect your Device to a single source (e.g. preamplifier, amplifier etc.). Use the connector bridge for the standard connection. Amplifier... -
Page 11: Bi-Wired Connection
Bi-wired connection A bi-wired connection allows you to connect the loudspeakers with separate wiring for the low ranges and the mid and high ranges. Remove the connector bridge for this connection. p. 9. You can connect the separate ranges to different terminal pairs on your amplifier. Make sure you selected both speaker output pairs (A+B) on your amplifier. -
Page 12: Bi-Amp Connection
Bi-amp connection A bi-amp connection allows you to connect the loudspeakers to two different amplifiers. In this setting the signal is separated: one of the amplifiers is responsible for the low ranges and the second amplifier for the mid and high ranges. Remove the connector bridge for this connection. -
Page 13: Break-In Period
Break-in period The speaker drivers consist of many mechanical components so they may need adaptation time to adjust and acclimatize to the humidity and temperature of the room. It is recommended to play the loudspeakers for at least 12 break-in hours after installation to enjoy the performance fully. - Page 14 > 30 cm > 30 cm > 50 cm > 50 cm It is recommended to place the loudspeakers at least 30 centimeters from the back wall and 50 centimeters from the side wall. Keep in mind that the room acoustics also have a great influence on the sound performance.
-
Page 15: Bass Reflex Port Plug
Bass reflex port plug The port plugs included with the loudspeakers are designed to help control bass response by limiting the airflow through the reflex port. To reduce the bass response insert port plugs into ports on the back wall of the loudspeakers. In case of small rooms or the need to place speakers in acoustically suboptimal locations (such as room corners, in a cabinet, or with the speaker port close to a wall), excessive bass boost may occur. -
Page 16: Maintenance
Maintenance • The speaker case is finished with natural wood veneer. For occasional cleaning use a soft, slightly dampened cloth. • Do not use any cleaner or wax. • Do not place any objects on top of the Device. • Avoid touching the drivers membranes. This may permanently damage the Device. •... -
Page 17: Troubleshooting
Troubleshooting Most difficulties in audio systems are the result of incorrect connections, or improper control settings. If you encounter problems, isolate the area of the difficulty, check the settings, determine the cause of the fault and make the necessary changes. If the Device does not operate correctly, refer to the suggestions for the following conditions: Problem... -
Page 18: Disposal
Disposal This Device is labeled in accordance with the European Directive 2002/96/EC concerning waste electrical and electronic equipment (WEEE). The Device or used and fully discharged batteries should not be disposed of with household waste. Since the transposition of Directive 2002/96/EC into the national law electric and electronic equipment must not be disposed of together with household waste and the user is obliged to dispose of a broken or redundant electrical or electronic device at a dedicated collection point, put it in a special... - Page 20 Copyright: Unitra sp. z o.o. Revision 1 (2024-02-16) For more information go to: https://www.unitra.com/ or scan QR code below.
Need help?
Do you have a question about the ZGB-401 and is the answer not in the manual?
Questions and answers