Table of Contents
Advertisement
Quick Links
Advertisement
Table of Contents

Related Manuals for SUNOVA SOLAR Sunova-eFox-WP Series

Summary of Contents for SUNOVA SOLAR Sunova-eFox-WP Series
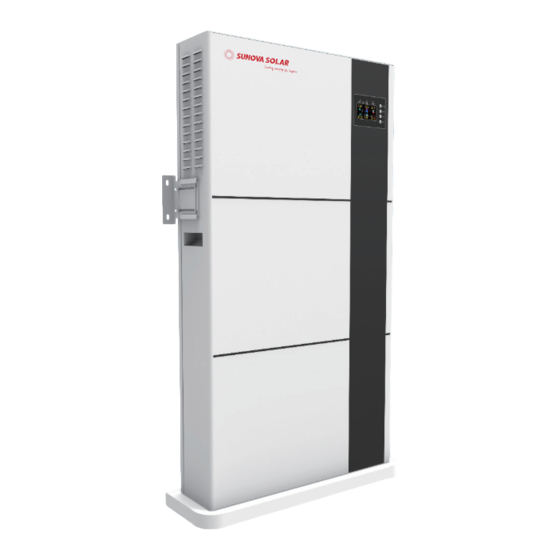
- Page 1 Sunova-eFox-WP Series Off-Grid Energy Storage System User Manual Version:EN V2.0...
- Page 2 Copyright This user manual’s copyright belongs to original manufacturer. Any unit or individual shall not reproduce or partially reproduce the contents of this manual without permission, and shall not convert or distribute in any form or means. Manufacturer reserves the copyright, and owns the power of interpretation.
- Page 3 Preface Sunova-eFox-WP Series Energy Storage System is a multi-functional power supply device designed to comprehensively use for residential and commercial projects. With built-in lithium battery, this system can provide uninterrupted and stable power supply, and ensure the normal use of the utility when the grid is out.
-
Page 4: Table Of Contents
Contents 1. Introduction ···························································································································04 1.1 Application·························································································································04 1.2 Components······················································································································08 1.3 Sunova-eFox-WP Dimension······················································································09 1.4 Quality Inspection ··········································································································10 1.5 Label ·····································································································································10 1.6 Safety ···································································································································10 2. Installation ······························································································································12 2.1 Device Overview··············································································································12 2.1.1 Device Carrying ·····································································································12 2.1.2 Unboxing Guide·····································································································13 2.1.3 Installation ···············································································································18 2.2 Electric Installation··········································································································19 2.2.1 Making cables·········································································································19 2.2.2 Battery Wiring Procedure···················································································19 3. -
Page 5: Introduction
1 Introduction 1.1 Application Sunova-eFox-WP series can connect with solar panels, grid (or generator), load, it built-in lithium battery, hybrid inverter and energy management system. Sunova-eFox-WP has four working modes: SOL (Solar first), UEI (Utility first), SBU(Solar-Battery-Utility), SUB (Solar-Utility -Battery). These working modes are described refer to the setting part. - Page 6 When PV power is greater than the consumption, and the battery capacity is low, the PV will supply power to the load and charge the battery at the same time. SOL (Solar first): Solar energy provides power to the loads as first priority.
- Page 7 When PV power is greater than the consumption, and the battery capacity is low, the PV will supply power to the load and charge the battery at the same time. When PV power is less than the consumption, (Solar-Battery-Utility) : and the battery capacity is high,PV and battery Solar energy provides suplay power to the load at the same time.
- Page 8 When PV power is greater than the consumption, and the battery capacity is low,PV supplies the load and charge the battery at the same time. (Solar-Utility -Battery) : Solar energy provides power to the loads as first priority. When PV power is less than the consumption, and the battery capacity is low, grid supplies power to the load, PV charges the battery, if there is rest PV power, supplies to the load.
-
Page 9: Components
1.2 Components After unpacking the package, please inspect the components based on the below table. Table 1 Component list Pictures Description Quantity Sunova-eFox-WP 1 pcs Residential energy storage system Base 1pcs Waterproof aviation 1pcs male pin plug Waterproof aviation 1pcs female pin plug D4B Connector(Male) 1pcs... - Page 10 Pictures Description Quantity Bracket 2pcs Sunk screw,M4-8 6pcs Phillips external hexagon 4pcs combination screws,M6-14 Hexagonal wrench, 1pcs D-3mm: L type Expansion screw 4 pcs User manual 1 pcs APP Operation Guide 1 pcs Qualified Certificate 1 pcs Packing List 1 pcs www.sunova-solar.com...
-
Page 11: Sunova-Efox-Wp Dimension
1.3 Sunova-eFox-WP Dimension The size is slightly different according to the type, below for reference. Figure 2 Sunova-eFox-WP Dimension 1.4 Quality Inspection Before installation, please confirm that the packaging is unbroken, and after unpacking, check that all parts are consistent with the packaging list and are in good condition. -
Page 12: Label
1.5 Label Danger: Possibility of fatal voltage · Warning: Possibility of device damage or personal injury · Warning: Heat injure · 1.6 Safety This user manual includes safety introduction. Please read this manual carefully before installing, maintaining and operating the equipment. If you do not operate in accordance with this manual, if there is equipment damage or personal injury or death, manufacturer will not be responsible for it. -
Page 13: Installation
2 Installation 2.1 Device Overview ① ② ⑨ ③ ④ ⑩ ⑤ ⑥ ⑦ ⑧ ① AC Input ② AC Output ③ PV Input ④ Inverter Switch ⑤ WiFi Antenna ⑥ Inverter communication port ⑦ Battery communication port ⑧ Battery Breaker ⑨... -
Page 14: Unboxing Guide
2.1.2 Unboxing Guide The iron buckle is sharp, please pay attention to personal safety when unbox- ing! (1) Place the wooden box on a flat ground. Figure 4 (2) Pry open the buckle of the wooden box, remove the top plate of the wooden box, and take out the accessory box and the base. - Page 15 (3) Remove the side boards one by one. Figure 6 (4) Move the bottom of device out of the bottom of the wooden box by 10-15mm. www.sunova-solar.com...
- Page 16 (5) Install the base. Take out the screws from the accessory box, and tighten them with a Phillips screwdriver. Note that the arc of the bottom plate faces the direction of the screen. (6) Tighten the screws with a wrench. www.sunova-solar.com...
- Page 17 (7) One person pushes up from point "A", and two persons push up from point "B". (8) Take out the machine, the machine is heavy, please pay attention. Warning: Ensure the installed place be well ventilate and conform to device using condition. No flammable and combustible objects are allowed to put within 4m.
- Page 18 Adequate ventilation of the room or location in which the device containing vented or valve-regulated batteries is located, to prevent the accumulation of hazardous gases. -Servicing of batteries should be performed or supervised by personnel knowledgeable about batteries and the required precautions. -When replacing batteries, replace with the same type and number of batteries or battery packs.
-
Page 19: Installation
All electrical connections must be in accordance with local and national standards. Only with the permission of the utility grid, the storage can be connected to the utility grid. Disconnect the storage from all the external power sources before service! Do not open the enclosure when the storage is working. - Page 20 Figure 7 Install suspension loop Figure 8 Install against the wall www.sunova-solar.com...
-
Page 21: Electric Installation
2.2 Electric Installation The Sunova-eFox-WP is ground mounted, shall put on the ground vertically. 2.2.1 Making cables PV cable assembling: (1) Stripping the red and black 6AWG PV cables, insert them into the jacks and pins of the PV connector in the accessories, and press them with crimping pliers. - Page 22 Figure 10 Table 3 Cable Size Function Typical Power Cable size Torque 1.4~1.6Nm 10AWG Load 3kVA/5kVA Sunova- 1.4~1.6Nm 3kVA/5kVA 10AWG Grid eFox-WP 1.4~1.6Nm 3kVA/5kVA 10AWG www.sunova-solar.com...
-
Page 23: Operation
3 Operation 3.1 LCD Display The operation and display panel, shown in below chart, is on the front panel of Sunova-eFox-WP. It includes three indicators, four function buttons and a LCD display, indicating the operating status and input/output power information. ①... -
Page 24: Lcd Display Icons
Table 5 Function Button Description Function Button To exit setting mode To go to previous selection DOWN To go to next selection ENTER To confirm the selection in setting mode or enter setting mode 3.2 LCD Display Icons Figure 15 Display Icons Table 6 Icon Information Description Icon... - Page 25 Icon Description PV Input Information PV input icon Indicate PV input power, voltage, current, etc. Output Information Inverter Icon Indicate output voltage, current, frequency, Inverter tempera- ture. Load Information Load Icon Indicates power of load, power percentage of load. Indicates overload happened. Indicates short circuit happened.
- Page 26 Icon Description Other Information Indicates output source priority: Solar first, Utility first, SBU mode or SUB mode. Indicates warning code or fault code. Indicates a warning or a fault is happening. Indicates it is during setting values. Indicates the alarm is disabled. Table 7 Battery information In AC mode, battery icon will present battery capacity SOC<25%...
-
Page 27: Lcd Setting
3.3 LCD Setting After pressing and holding ENTER button for 3 seconds, unit enter setting mode. Press “UP” or “DOWN” button to select setting programs. Then, press “ENTER” button to confirm the selection or ESC button to exit. Communication Settings protocol Choose Li Mode Maximum... - Page 28 Table 8 Setting Program Program Description Setting option Solar First Solar energy provides power to the loads as first priority. If solar energy is not sufficient to power all connected loads, battery energy will supply power to the loads at the same time. Utility grid provides power to the loads only when any below one condition happens: -Solar energy is not available...
- Page 29 Program Description Setting option SUB Priority Solar energy provides power to the loads as first priority. If solar energy is not sufficient to power all connected loads, solar and utility gird will supply power to the loads at the same time. Battery provides power to the loads only when solar energy is not sufficient and there is no utility.
- Page 30 Program Description Setting option Flooded Lithium (Default) Only suitable when communicated with BMS User-defined If “User-Defined” is selected, battery charge voltage and low DC cut-off voltage can be set up in program 19, 20 and 21. Battery type User-defined 2 Suitable when lithium battery without BMS communication If “User-defined 2”...
- Page 31 Program Description Setting option NOTE 1: When set the battery type as “LI” in program 05, the setting option 12,13,21 will change to display percent. At the “LI” type battery, the maximum charge current can’t be modify by the user. When the communication fail, the inverter will cut off output. If it lost the communication with the battery, you can set the battery type to “USER”...
- Page 32 Program Description Setting option 220V 230V(Default) 240V 208V Output voltage *This setting is only available when the inverter is in standby mode (Switch off). 50Hz(Default) 60Hz Output frequency *This setting is only available when the inverter is in standby mode (Switch off). Maximum utility 3.5K :Default 30A, 0A~60A Settable charging current.
- Page 33 Program Description Setting option If this off grid solar inverter is working in Battery mode or Power saving mode, only solar energy can charge battery. Solar energy will charge battery if it’s available and sufficient. Alarm off Alarm on (default) Alarm Control Backlight off Backlight on(default)
- Page 34 Program Description Setting option Battery equalization Battery equalization enable disable (default) Battery equalization If “flooded” or “user-Defined” is selected in program 05, this program cannot be set up. Default 58.4V, Battery equalization voltage 48.0V-58.4V Settable Default 60Min, Battery equalized 5min-90min Settable time Default 120Min, Battery equalized...
- Page 35 Program Description Setting option The time allows utility grid to charge the battery. Use 4 digits to represent the time period, the upper two digits represent the time 0000 (Default) when utility grid start to charge the battery, setting range is from 00 to 23, and the lower end to charge Utility grid the battery, setting range...
-
Page 36: Display Information
3.4 Display Information The LCD display information will be switched in turns by pressing “UP” or “DOWN” key. The selection information is switched as below order: voltage, frequency, current, power, firmware version. Figure 16 Display Information ① AC input voltage ① AC input Frequency ② Output Voltage ② Output Frequency Time... - Page 37 Table 9 Display Information Setting Information LCD display ① AC input voltage ② Output Voltage ③ Load Percentage ④ PV input voltage ⑤ Battery voltage ⑥ Warning or Fault code (Default display on screen) ① AC input Frequency ② Output Frequency ③ Load power in VA ④ PV energy sum in KWH ⑤ Battery percentage ⑥ Warning or Fault code ① AC input current...
-
Page 38: Operating Mode
Setting Information LCD display Time ( 15:20:10, December 15, 2018 ) 3.5 Operating Mode Table 10 Operating mode description Description Operation mode LCD display Standby Mode / Charging by utility Charge by utility and Power Saving PV energy Mode Note: *Standby mode: The inverter is not turned on yet but... - Page 39 Description Operation mode LCD display Charge by utility Charging by utility and PV energy grid Fault Mode Note: * Fault mode: Errors are caused PV energy and by inside circuit utility can or external charge batteries reasons such as Charging by PV No charging energy over tempera-...
-
Page 40: Monitoring
Description Operation mode LCD display Power from battery and PV power The unit will provide output Battery Mode power from battery and PV power Battery from battery power only 3.6 Monitoring For data monitoring, please refer to the "APP Operation Guide" manual. www.sunova-solar.com... -
Page 41: Maintenance
4 Maintenance 4.1 Fault Code Fault Code Fault Event Icon on Fan is locked Over temperature Battery voltage is too high Battery voltage is too low Output short circuited Output voltage is too high Overload time out Bus voltage is too high Bus soft start failed Main relay failed Over current or surge... -
Page 42: Warning Indicator
4.2 Warning Indicator Warning Icon Warning Event Audible Alarm Code flashing Fan locked when inverter Beep 3 times every second is on Over temperature Beep once every second Battery over charged Beep once every second Beep once every second Low battery Overload Beep once every 0.5 second Output power derating... - Page 43 Warning Icon Warning Event Audible Alarm Code flashing Cell under voltage Beep once every second Total over voltage Beep once every second Total under voltage Beep once every second Beep once every second Discharge over voltage Charge over voltage Beep once every second Beep once every second Discharge over temperature Charge over temperature...
-
Page 44: Specification
4.3 Specification Model Sunova-eFox-WP–35E Sunova-eFox-WP–50E Battery 51.2V Rated voltage 44.8~57.6V Voltage range 10.24kWh Capacity 0.7C Max. discharge rate 0.5C Max. charge rate Battery type Li-ion (LFP) AC Output(Backup) 5000W Rated power 3500W 10000W,5s Surge power 7000W,5s 220/230/240Vac 220/230/240Vac Output voltage 22.7A Output current 50/60Hz... -
Page 45: Trouble Shooting
4.4 Trouble Shooting Problem LCD/LED/Buzzer Explanation / Possible cause What to do LCD/LEDs and Unit shuts down The battery voltage is too 1. Re-charge battery. buzzer will be active automatically low(<setting in program 5) 2. Replace battery. for 3 seconds and during start up then complete off. -
Page 46: Activation
Problem LCD/LED/Buzzer Explanation/Possible cause What to do Output abnormal (Inverter 1. Reduce the connected Fault code 06/58 voltage below than 190Vac load. or is higher than 260Vac) 2. Return to repair center Overload error. The inverter Reduce the connected Fault code 07 is overload 110% and time load by switching off Buzzer beeps... - Page 48 Sunova Solar Technology Co., Ltd Add: H building, Standard Plant Phase II, Runzhou Road, Huishan District, Wuxi City, Jiangsu Province,P.R.China,214000 E-mail: info@sunova-solar.com Tel: +86 510 8595 9369 Web: www.sunova-solar.com...
Need help?
Do you have a question about the Sunova-eFox-WP Series and is the answer not in the manual?
Questions and answers